Loading ...
Loading ...
Loading ...
8
NOTE: Fill amounts shown are for standard powdered detergent.
Follow instructions on the package when using gel dishwasher
detergents. Premeasured forms are suitable for all hardness and
soil levels. Always place premeasured detergents in the main
compartment and close the lid.
Soft Water
Hard Water
Soft Water
Hard Water
Main Wash Pre-Wash
STEP 3
Add Rinse Aid (dispenser varies by model)
■ Your dishwasher is designed to use rinse aid for good drying
performance. Without rinse aid, your dishes and dishwasher
interior will have excessive moisture. The Heat Dry option will
not perform as well without rinse aid.
■ Rinse aid keeps water from forming droplets that can dry as
spots or streaks. It also improves drying by allowing water to
drain off of the dishes after the final rinse.
■ Rinse aid helps to reduce excess moisture on the dish racks
and interior of your dishwasher.
■ Check the rinse aid indicator with the door down (varies by
model). Add rinse aid when indicator drops to “Add” level.
Full
Add
Full
Ad
d
■ Add rinse aid to hinged lid
style dispenser by twisting
the dispenser cap 1/4 turn
clockwise to open and lift
off. Pour rinse aid into the
opening until the indicator
level is at “Full.” Replace
the dispenser cap and turn
to “Lock.” Make sure cap
is fully locked.
Lock
6
5
4
3
2
-
-
-
max
fill
1
-
-
-
-
-
-
-
-
-
-
-
1/4 turn clockwise to lock
■ To add rinse aid to sliding
lid style dispenser, open the
rinse dispenser lid by gently
pushing in the center of
the lid with your thumb and
pulling up on the edge. Pour
rinse aid into the opening
until the dispenser is full.
Then, close the dispenser
by pushing down gently
on the lid.
Pre
Wash
OPEN
SLIDE
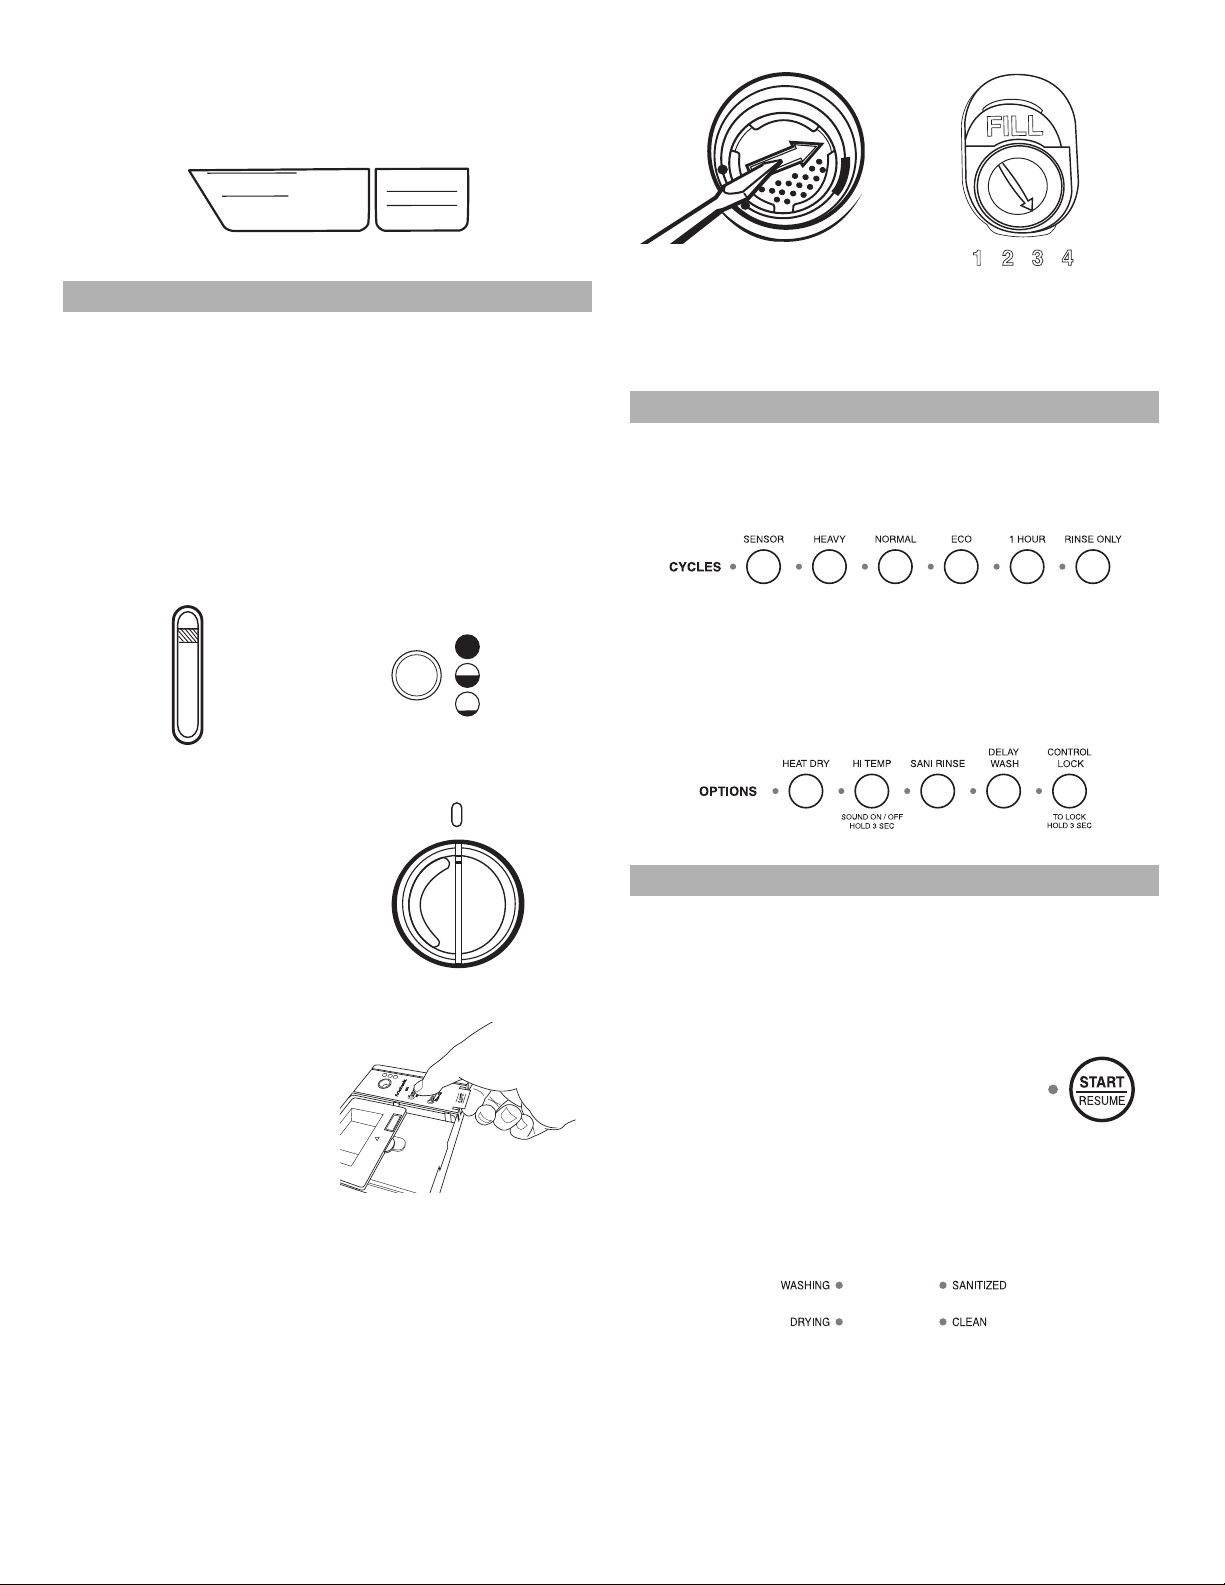
NOTE: For most water conditions, the factory setting will give
good results. If you have hard water or notice rings or spots, try
a higher setting. Turn the arrow adjuster inside the dispenser by
either using your fingers or inserting a flat-blade screwdriver into
the center of the arrow and turning.
6
5
4
3
2
-
-
-
max
fill
1
-
-
-
-
-
-
-
-
-
-
-
-
Higher numbers dispense more rinse aid. You should change
this setting only a little at a time and then run a few cycles before
changing it again because just enough rinse aid is more effective
than too much.
STEP 4
Select a Cycle (varies by model)
Press and hold the desired cycle button until the corresponding
light is on. See the “Cycle and Option Descriptions” charts in the
following section.
NOTE: Heavier cycles and options affect cycle length. Some
cycles and options will take up to 3
1
/
2
hours to complete.
Select Options (varies by model)
See the “Cycle and Option Descriptions” chart in the
following section.
You can customize your cycles by pressing the options desired.
STEP 5
Start or Resume a Cycle
■ If needed, run hot water at the sink nearest your dishwasher
until the water is hot. Turn off water.
■ For best dishwashing results, water should be 120ºF (49ºC)
as it enters the dishwasher.
■ Select the wash cycle and options desired.
Within 4 seconds of pressing Start/Resume
you must firmly push the door closed. If the
door is not closed within 4 seconds, the
Start/Resume LED will flash, an audible tone
will be heard, and the cycle will not start.
IMPORTANT: If the door has been opened after starting
a cycle (even during the Delay Hours option), Start/Resume
must be pressed again.
The Clean indicator glows when the cycle is finished.
Sanitized glows when Sani Rinse option is selected
and sanitization levels occur.
Loading ...
Loading ...
Loading ...