Loading ...
Loading ...
Loading ...
Installation
Wall mounting installation
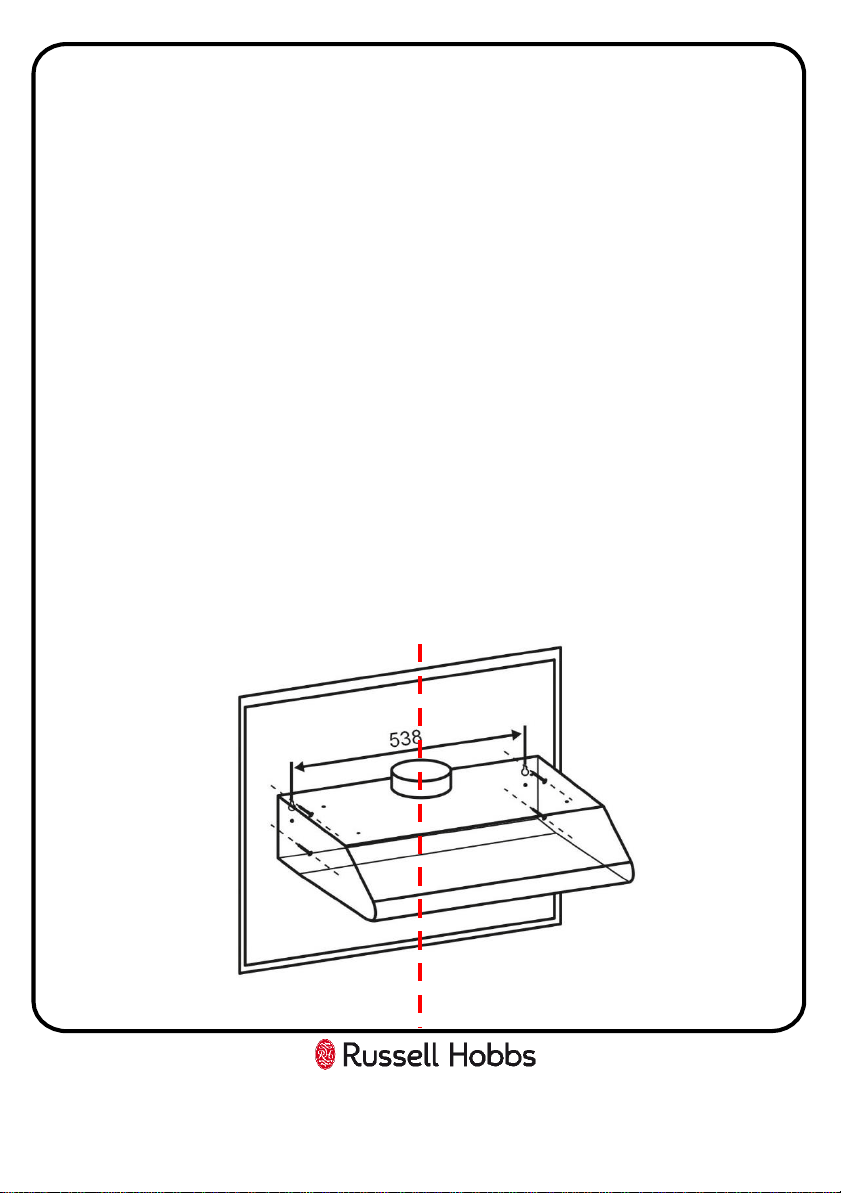
1. Mark a vertical centre line on the wall from the ceiling to the lower edge of the
extractor hood.
2. Mark the contour of the hood and the positions for the screws, ensuring the
cooker hood is at a minimum height of 65mm.
3. Drill 2 x 10mm Ø holes to a depth of 50mm, 538mm apart in the wall.
4. Insert 2 plastics wall plugs into the holes
5. Insert 2 screws into the 2 plastic wall plugs and tighten them leaving 3mm
protruding from the wall.
6. Mount the cooker hood onto the 2 screws and mark the bottom 2 screw
positions.
7. Remove the hood and drill 2 x 10mm Ø holes to a depth of 50mm for the
bottom 2 screw holes and insert 2 plastic wall plugs.
Use the 4 screws to fix the cooker hood to a kitchen cupboard .
8. Mount the hood on the top screws, Insert the bottom screws and fully tighten all
the screws.
All measurements in the below diagram are in millimetres (mm)
12
Loading ...
Loading ...
Loading ...