Loading ...
Loading ...
Loading ...
Installation
Preparation
• Ensure that there are no electric wires, gas or water pipes in the area where
holes are to be made.
• Ensure that that there is an electrical plug socket within adequate distance of
the hood after it has been installed.
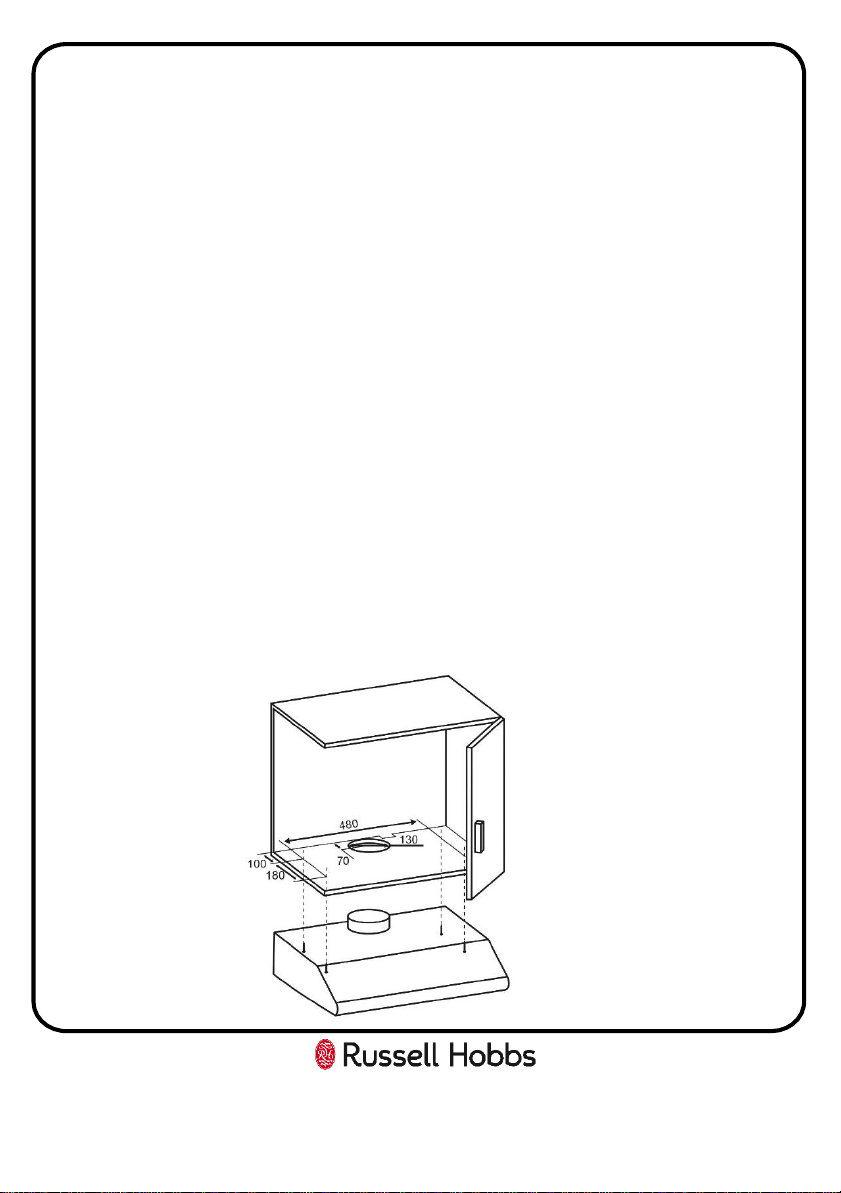
Cupboard mounting installation
1. Mark a vertical centre line on the bottom of the cupboard.
2. Mark the positions for the screws and the contour of the cooker.
3. If the cooker hood will be used in extraction mode then drill 1 x 130mm Ø hole
in the centre of the bottom of cupboard for the check valve. If it is going to be used
in recirculation mode then this is not required.
4. Drill 4 x 3.5mm Ø holes in the bottom of the cupboard, these are for the screws
that fix the hood into place.
5. Use the 4 screws to fix the cooker hood to a kitchen cupboard .
6. Check that your fixings are correctly located, by temporarily fitting the cooker
hood. If correct, fit the unit into position and tighten the screws if necessary
All measurements in the below diagram are in millimetres (mm)
11
Loading ...
Loading ...
Loading ...