Loading ...
Loading ...
3
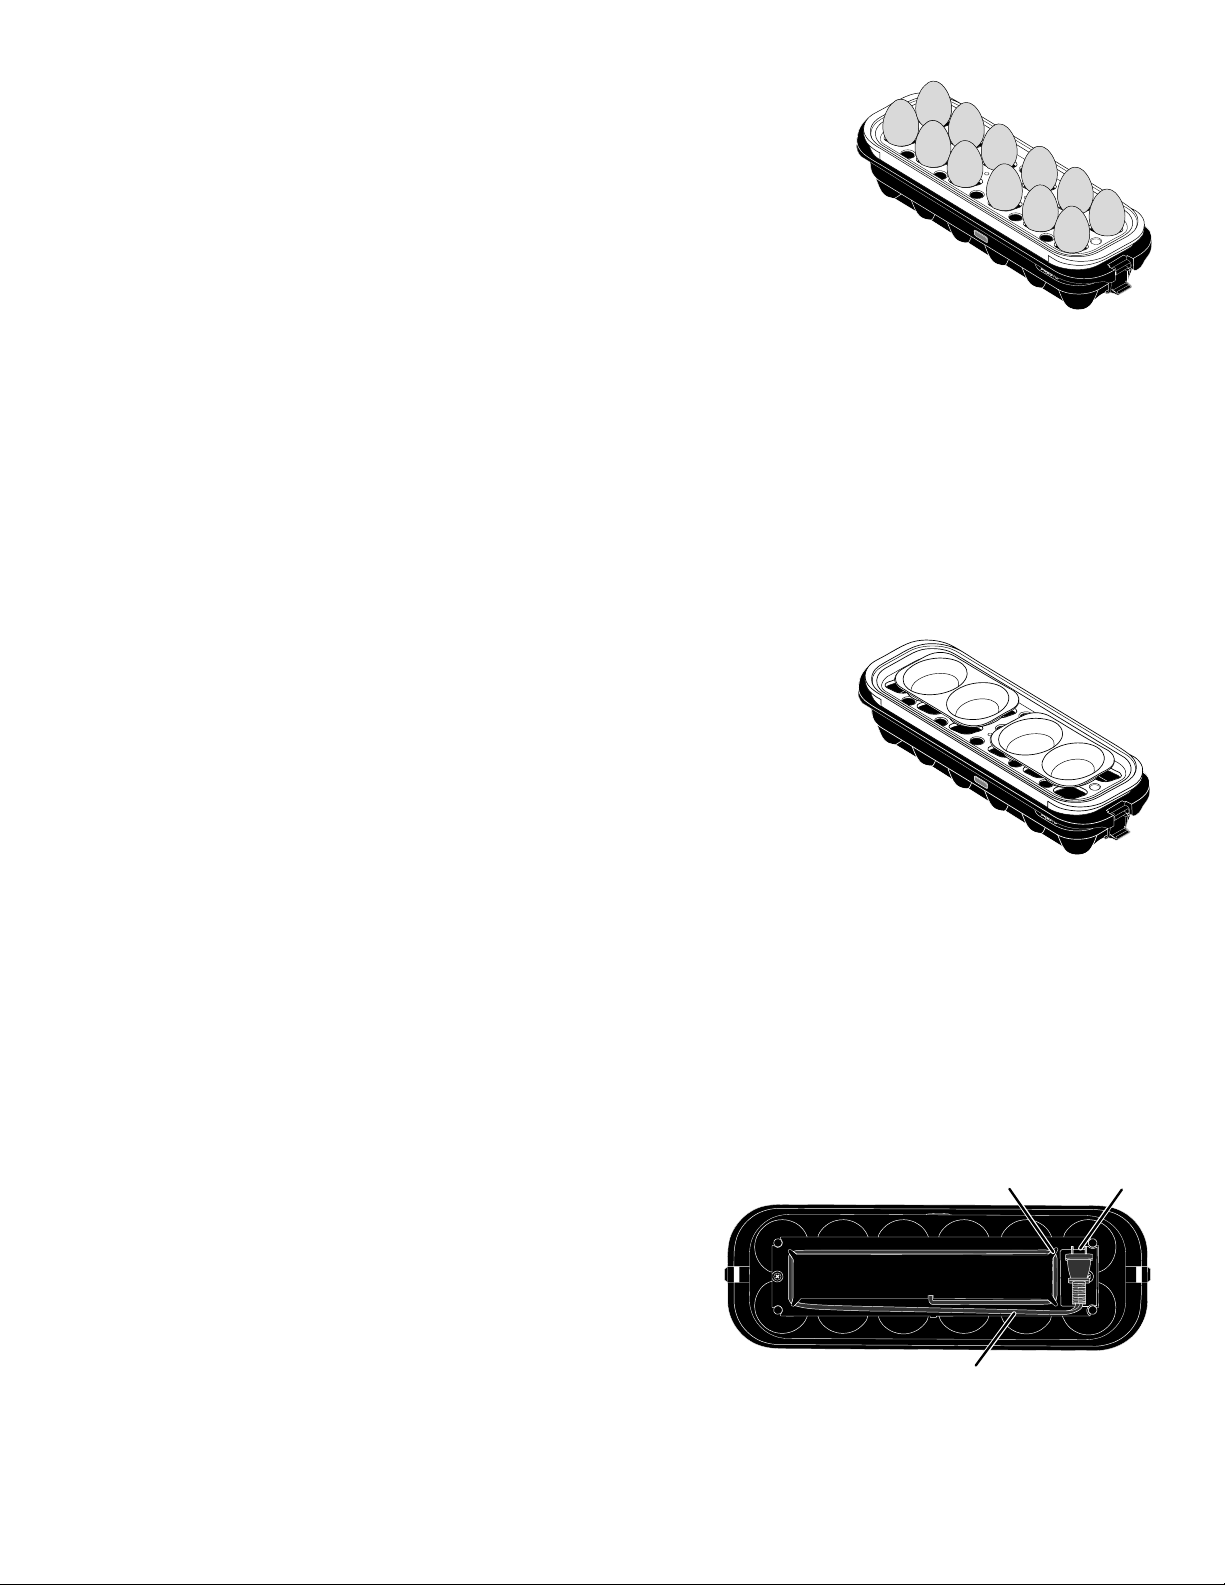
3. Position up to 12 cold medium or large eggs upright in the larger openings in the cooking
tray (Fig. B). If using extra-large or jumbo eggs, lay up to 12 eggs on their sides in these
openings. CAUTION! For food safety, do not use room temperature eggs. Always keep
eggs in the refrigerator until you are ready to cook them.
4. Place the cover over the eggs. Make sure the cover rests on the cooking tray. If it does not,
angle the eggs slightly in the openings so the tops of the eggs do not come in contact with
the cover. Lift the two base latches and snap them onto the cover edge.
5. Plug in the unit and the signal light will come on.
There is no need to set a timer as the egg cooker will shut off automatically when cooking
is complete. The cooking time is determined by the amount of water in the reservoir and
the number of eggs in the unit. See the cooking guide on page 4 for approximate cooking times.
6. When the cooking time is up, the signal light will go out and you will hear a buzzing sound. Unplug the unit.
7. Being careful to keep hands away from the vents, unlatch the cover from the base and remove the cover. Grasp the handles on the
short ends of the cooking tray (Fig. A) and carefully lift it off the egg cooker base.
8. Place the tray of eggs in a pan of cold water and cool eggs for 10 minutes. This will prevent the eggs from continuing to cook. If
consuming the eggs right away, cool the eggs just until they are comfortable to peel.
9. To store, leave cooked eggs in the tray, place cover on tray, and refrigerate.
How to Make Poached Eggs
1. Fill the measuring cup with the appropriate amount of water, as marked on the measuring cup, and pour into the water reservoir.
2. Place the cooking tray on the egg cooker base.
3. Apply a thin coating of vegetable oil or no-stick cooking spray to the poaching tray(s). Add
1 or 2 cracked, cold eggs to the poaching tray(s).
4. Set the poaching tray(s) on top of the cooking tray (Fig. C). Place the cover over the poaching
tray(s). Lift the two base latches and snap them onto the cover edge. Then plug in unit.
5. When cooking time is up, the signal light will go out and you will hear a buzzing sound.
Unplug the unit.
6. Being careful to keep hands away from the vents, unlatch the cover from the base and
remove the cover. Grasp the handles on the short ends of the cooking tray (Fig. A), carefully
lift it off the egg cooker base, and set it on the counter.
7. Lift the poaching tray(s) off of the cooking tray. Tilt the tray(s) slightly and pour off any condensation on top of the eggs. Flip the
egg(s) onto a plate for serving. If necessary, run a knife around the edge of the poached egg to loosen it from the tray.
Care, Cleaning, and Storage
1. Always unplug and allow egg cooker to cool before cleaning.
2. Wash the cooking tray, poaching trays, measuring cup, and cover in warm, soapy water. Rinse and dry thoroughly. The cooking tray
and poaching trays are dishwasher safe (top rack); however, the measuring cup and cover should NOT be washed in the dishwasher.
3. When exposed to steam, some egg shells leave a residue on the surface of the water reservoir. To remove, wash the surface of the
reservoir with a damp cloth. If necessary, gently scrub the surface with a nylon mesh pad, such as a Scotch-Brite* Multi-Purpose
Scrub sponge. Do not use steel wool or abrasive cleaners. When needed, wipe the egg cooker base with a damp cloth. Never
immerse the egg cooker base in water or any other liquid.
4. Mineral content in water varies from place to place. In some areas, this
may result in the formation of mineral deposits on the surface of the water
reservoir. To remove the deposits, pour 1 cup water and 1 cup vinegar into
the reservoir. Plug in the unit and heat for 10 minutes. Unplug and allow
solution to cool. Pour out solution. Wipe the surface with a damp cloth,
then dry.
5. For storage, turn the base over and wrap the cord counterclockwise under
the four tabs on the bottom of the base (Fig. D). Then insert the plug prongs
into the slots to secure the cord.
Turn the base right side up and stack the parts onto the base as follows: poaching trays, cooking tray, measuring cup, and cover.
Secure the cover to the base with the latches.
*Scotch-Brite is a trademark of 3M Company. Presto is not affiliated with this company.
Fig. B
Fig. C
Slots
Wrap cord counterclockwise
Tabs
Fig. D
Loading ...
Loading ...