Loading ...
Loading ...
Loading ...
en Cleaning function
22
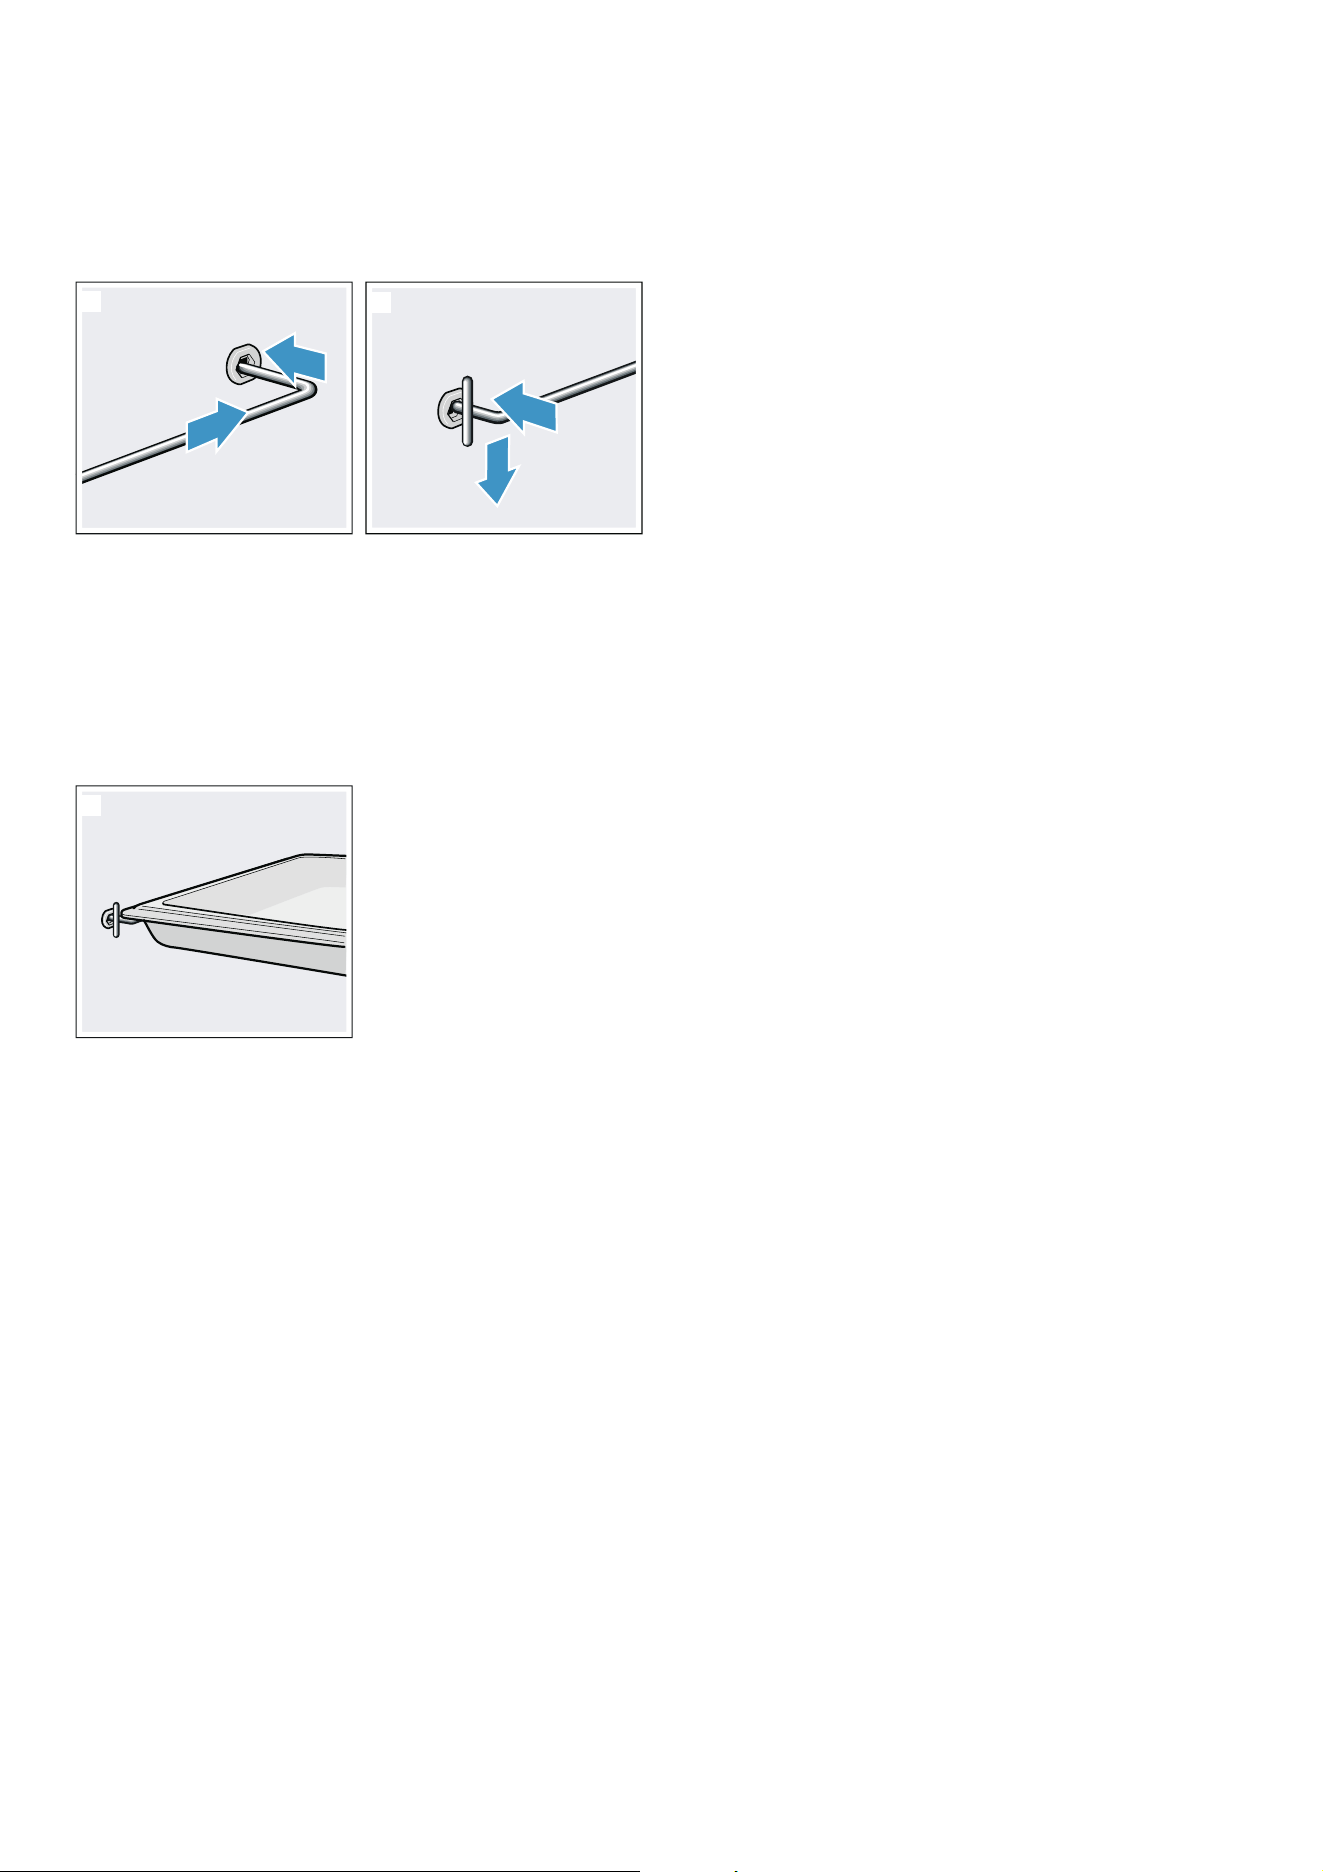
6. Insert the rear end of the accessory support as far
as it will go into the rear socket ƒ, and push the
accessory support back „ (figure ").
7. Then insert the front end of the accessory support as
far as it will go into the front socket …, and push the
accessory support down † (figure #).
8. Whenever you wish to use the cleaning function,
make sure that you never leave anything other than
an enamelled accessory without anti-stick coating
(e.g. the universal pan) on the accessory supports
(figure $).
Caution!
The wire rack tends to discolour if it is left in the
cooking compartment when it is cleaned. Do not
attempt to clean the rack using the cleaning function.
Note: Further accessories that can be cleaned using
the cleaning function are listed in the table for
special accessories. ~ "Accessories" on page 11
Starting
1. Touch the # touch button.
2. Touch the 0 touch button.
3. Use the ( or ) button to select "Self-cleaning ˜".
4. Use the & button to navigate to the next line.
5. Use the ( or ) button to select the cleaning setting.
Note: Once it has started, the cleaning setting can
no longer be changed.
6. Use the & button to navigate to the next line.
7. Touch the # touch button.
The appliance starts self-cleaning.
Ventilate the kitchen when the cleaning function is
running.
During self-cleaning, the appliance door is locked
automatically. The 5 symbol appears on the display.
Note: If you would like to start self-cleaning later, set an
end time.
Cancelling
Touch the # touch button to cancel. The appliance
door cannot be opened until the 5 symbol goes out.
Finishing
As soon as self-cleaning has run through, a signal
sounds. The appliance door cannot be opened until the
5 symbol goes out.
Once the cleaning function has ended
1. Allow the cooking compartment to cool down.
2. Wipe off any ash that has been left behind in the
cooking compartment and around the appliance
door with a damp cloth.
3. If you have left an accessory inside the cooking
compartment to be cleaned, remove it and wipe it
down with a damp cloth.
4. Lift the accessory support up at the front and remove
it. ~ "Rails" on page 23
5. Refit the shelf supports or pull-out rails. ~ "Rails"
on page 23
EasyClean
The EasyClean cleaning aid makes it easier to clean the
cooking compartment. Dirt is softened beforehand by
vaporizing soapy water. It can then be removed more
easily.
:Warning – Risk of scalding!
Water in a hot cooking compartment may create hot
steam. Never pour water into the cooking compartment
when the cooking compartment is hot.
Starting
Notes
■ The "EasyClean š" cleaning aid can only be started
once the cooking compartment is cold (room
temperature) and the appliance door is closed.
■ Do not open the appliance door during operation.
Doing this will interrupt the "EasyClean š" cleaning
aid.
1. Remove the accessories from the cooking
compartment.
2. Mix 0.4 litres of water (not distilled water) with a drop
of washing-up liquid and pour into the middle of the
cooking compartment floor.
3. Touch the # touch button.
4. Touch the 0 touch button.
5. Use the ( or ) button to select "EasyClean š".
6. Use the & button to navigate to the next line.
7. Touch the # touch button.
The appliance starts EasyClean. The remaining time
appears on the display.
End
As soon as the cleaning aid has run through, a signal
sounds and the appliance ends the operation
automatically.
As soon as you open the appliance door, the interior
lighting is switched on so that you can rinse the cooking
compartment more easily. The remaining water in the
cooking compartment must be removed promptly. Do
not leave the remaining water in the cooking
compartment for a long time (e.g. overnight). The
appliance must not be operated when the cooking
compartment is still wet or damp.
G
H
E
F
2
Loading ...
Loading ...
Loading ...