Loading ...
Loading ...
Loading ...
18
INSTALLATION
7
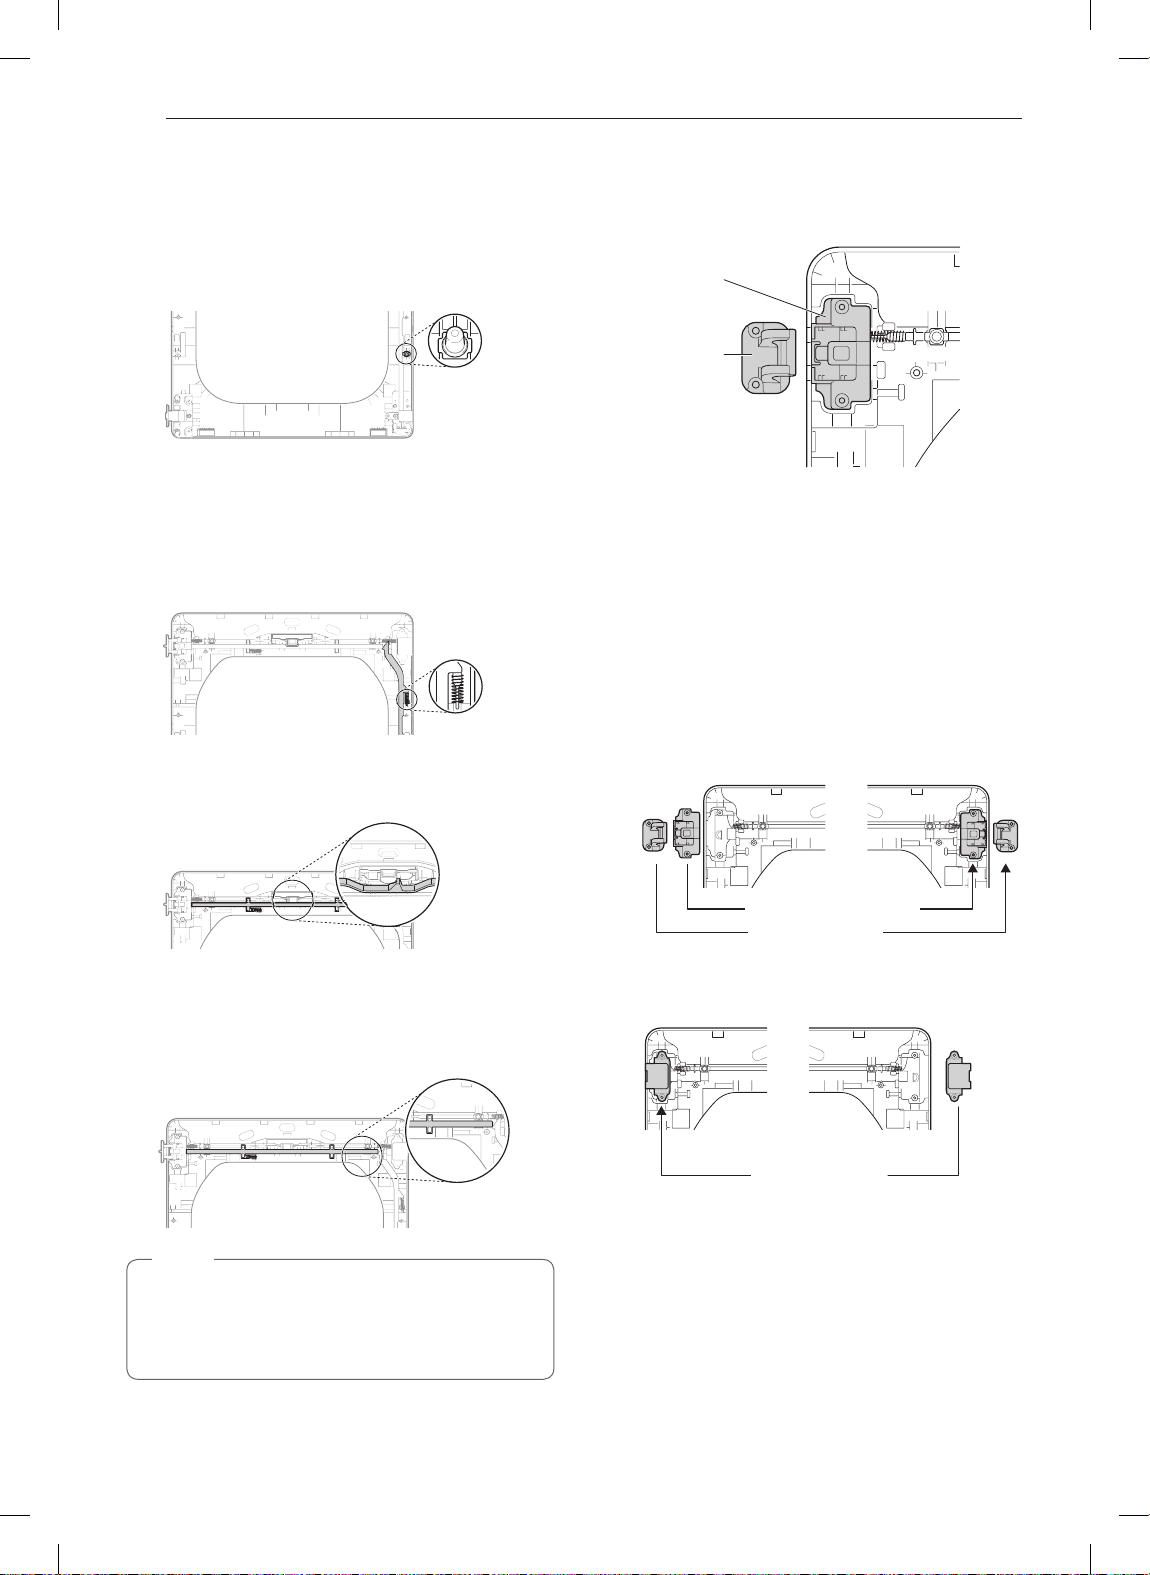
Lift out the gray interlock button in the side
of the door.
Make sure to remove the spring with the
interlock button and to keep the two together.
Set the interlock button aside. Do not confuse
these with the interlock buttons from the top of
the outer door.
8
Remove the side lock rod.
Remove the side lock rod from the lower hinge
bracket by lifting the top end of the rod and
sliding it toward the top of the door. The spring
should remain attached to the lock rod. Set the
lock rod aside.
Spring
9
Remove the top lock rod.
a. Slide the lock rod to the right to remove it from
the hinge assembly on the left side.
b. While sliding the lock rod right, lift the right end
up and out of the guides.
Do not remove the two inner lock rods and
two interlock buttons (see page 17) located
underneath the top lock rod. They do NOT need
to be reversed.
NOTE
10
Remove the upper hinge pivot.
Once the top lock rod has been removed, the
hinge pivot can easily be removed from the
hinge assembly on the upper left and set aside.
Upper hinge
assembly
Upper
hinge
pivot
11
Reverse the upper hinge assembly and
hinge filler.
Lift out the upper hinge filler (on the right) and
set it aside.
Carefully lift the upper hinge assembly (on the
left) out of the outer door frame, using a small
flat blade screwdriver if necessary. Rotate
the hinge assembly 180 degrees and install it
on the upper right side of the outer door. You
will need to press firmly to install the hinge
assembly.
The hinge pivot removed in step 11 will be
installed later.
Upper hinge assembly
Upper hinge pivot
Now rotate the hinge filler 180 degrees and
install it on the upper left side of the door.
Upperhingeller
MFL67731070_en_170711.indd 18 2017-07-11 오후 4:05:06
Loading ...
Loading ...
Loading ...