Loading ...
Loading ...
Loading ...
TE
CHNICAL
INSTRUCTION
technical instruction_20
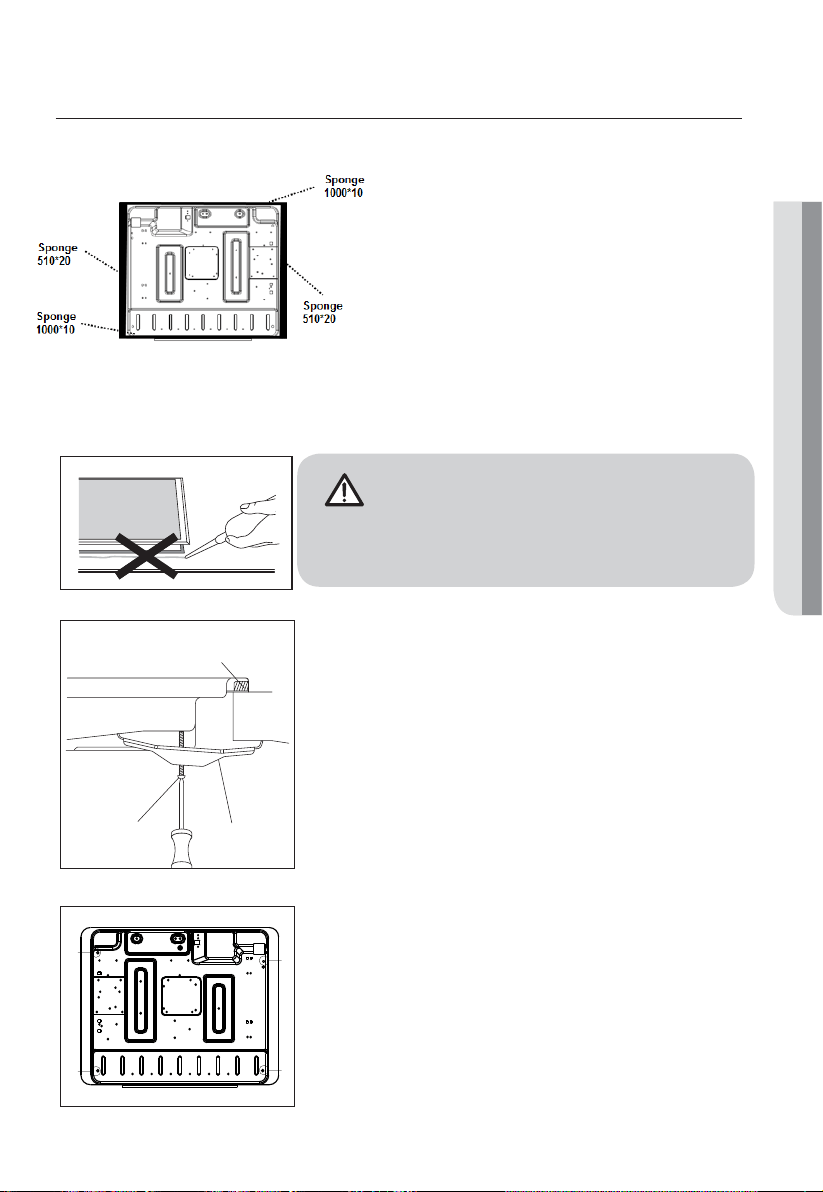
installing the appliance
'RQRWXVHDVLOLFRQVHDODQWWRVHDOWKH
DSSOLDQFHDJDLQVWWKHDSHUWXUH
7KLVZLOOPDNHLWGLI¿FXOWWRUHPRYHWKH
DSSOLDQFHIURPWKHDSHUWXUHLQIXWXUH
SDUWLFXODUO\LILWQHHGVWREHVHUYLFHG
3ODFHWKHEUDFNHW%RYHUWKHKROHVWKDWPDWFKWKHVL]H
of the screws.There are one set of screw holes in each
corner of the hob(H).
Slightly tighten a screw(C) through the bracket(B) so
that the bracket is attached to the hob, but so that you
can still adjust the position
.
2. Carefully turn the hob back over and then gently lower it
into the aperture hole that you have cut out.
3. On the underneath of the hob, adjust the brackets into a
position that is suitable for your worktop.
Then fully tighten the screws(C) to secure the hob into
position.
(A) SEALING STRIP
(C) SCREW (B) BRACKET
H
H
H
H
5HPRYHWKHSDQVXSSRUWVWKHEXUQHUOLGDQG
ÀDPHVSUHDGHUDQGFDUHIXOO\WXUQWKH
appliance upside down and place it on a
cushioned mat.
7DNHFDUHWKDWWKH,JQLWLRQGHYLFHVDQGÀDPH
supervision devices are not damaged in this
operation.
2. Apply the sponge provided around the
edge of the appliance.
3. Do not leave a gap in the sealing agent or
overlap the thickness.
Loading ...
Loading ...
Loading ...