Loading ...
Loading ...
Loading ...
10
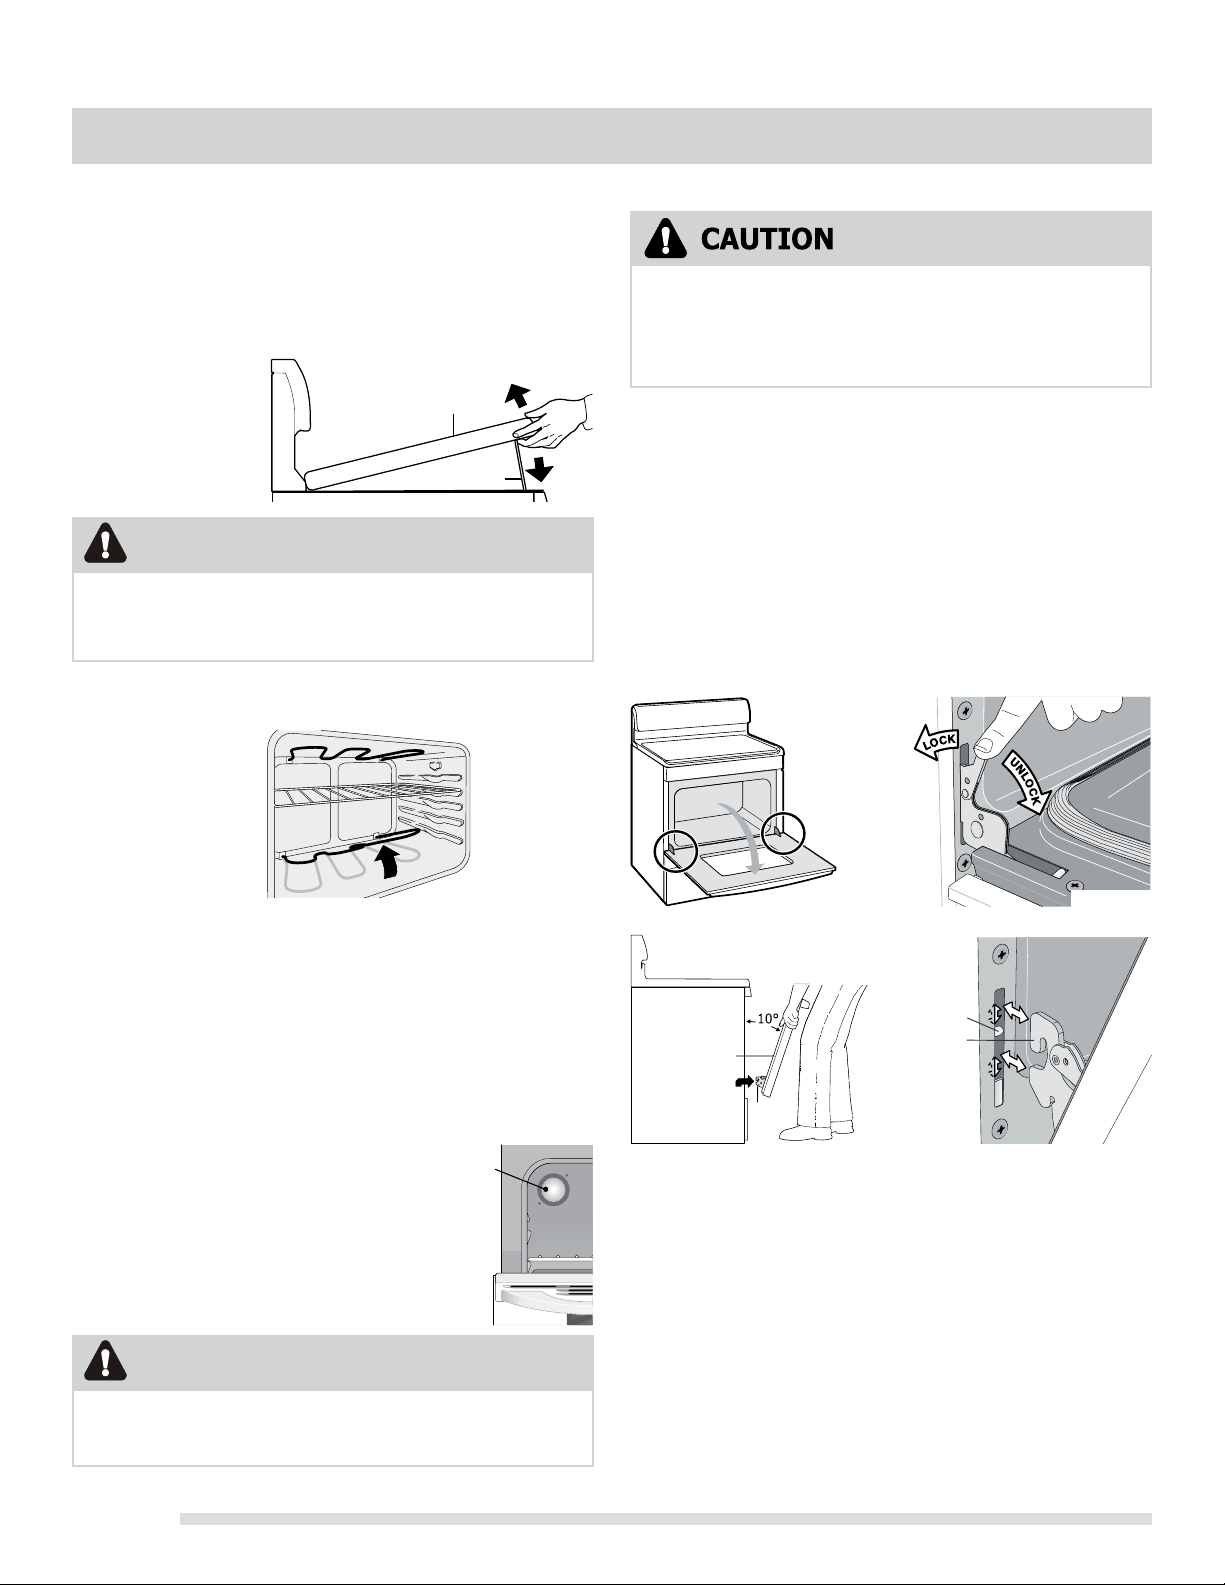
Raising the Top for Cleaning
1. Grasp the sides &lift from the front. Lift-up rods will support the
top in a raised position. Only lift the top far enough to allow the
support rods to snap into place.
2. Clean underneath using a clean cloth & hot soapy water.
3. To lower the top,
gently push back on
each rod to release
the notched support.
Hold the range top
and slide the lift rods
down into the range
frame.
(some models)
On some models, the oven light automatically turns on when the door
is opened. Some models have a switch located on the control panel
to turn on the light. The oven light is located at the rear of the oven.
Care & Cleaning of Stainless Steel
Some models are equipped with stainless steel exterior parts.
Special care and cleaning are required for maintaining the
appearance of stainless parts. Please refer to the Cleaning Chart
provided at the beginning of the General Care & Cleaning
section in this Use & Care Manual.
Cleaning the Oven Bottom
The bake element is designed to be gently tilted up using your
The baking
element may
be tilted
about 4 or
5 inches to
clean the
oven bottom.
Cleaning Recommendations for Coil Element
(continued)
When lowering the lift-up range top, grasp the sides with nger-
tips only. Be careful not to pinch ngers. DO NOT drop or bend
the range top when raising or lowering. This could damage the
surface.
CAUTION
Be sure the range is unplugged and all parts are COOL before
replacing oven light. Wear a leather-faced glove for protection
against possible broken glass.
CAUTION
hand from the front
of the bake element.
This will allow easier
access to the oven
bottom for cleaning.
Be careful not to raise
the element more than
4 or 5 inches from the
resting position.
To replace the oven light:
1. Turn electrical power off at the main source
or unplug the range.
2. Replace bulb with a new 40 watt appliance bulb.
3. Turn power back on again at the main source
(or plug the range back in).
4. The clock will then need to be reset. To reset,
see Setting Oven Controls in this Use &
Care Manual.
• To avoid possible injury when removing or replacing the oven
door, follow the instructions below carefully and always hold the
door with both hands positioned away from the door hinge area.
• The door is heavy. For safe, temporary storage, lay the door
at with the inside of the door facing down.
To remove oven door:
1. Open oven door completely (horizontal with oor - See Fig. 1).
2. Pull the door hinge locks on both left and right door hinges
down from the oven frame completely towards the oven
door to unlock (See Fig. 2). A tool such as a small at-blade
screwdriver may be required.
3. Firmly grasp both sides of oven door along the door sides (Do
not use the oven door handle).
4. Close the door to the broil stop position. The oven door will
stop into this position just before fully closing.
5. With the oven door in the broil stop position lift the oven door
hinge arms over the roller pins located on each side of the
oven frame (see g. 4)
Removing and replacing the lift-off oven door
Oven door
hinge
locations
Fig. 1
Fig. 4
roller
pin
hinge
arm
Fig. 2
To replace oven door:
1. Firmly grasp both sides of oven door along the door sides (Do not
use the oven door handle - see g 3).
2. Holding the oven door at the same angle as the removal position,
sit the hook of the hinge arm over the roller pins located on each
side of the oven door frame (See Fig. 4). The hook of the hinge
arms must be fully seated onto the roller pins.
3. Fully open the oven door (horizontal with oor - See Fig. 1).
4. Push the door hinge locks up towards and into the oven frame for
both left and right oven door hinges to the locked position (See Fig.
2).
5. Close the oven door.
Oven
door
Hinge
About
Fig. 3
Oven
light
Loading ...
Loading ...