Loading ...
Loading ...
3
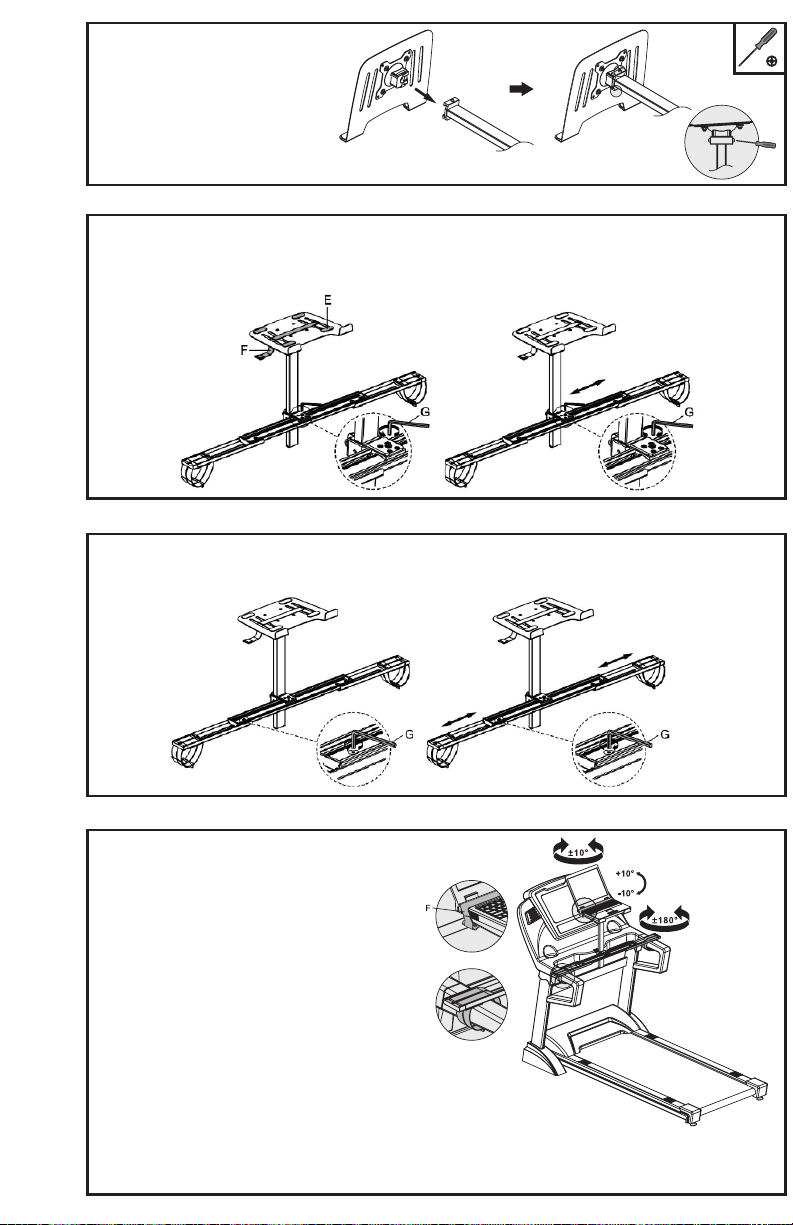
STEP 3
Slide the VESA plate with tray into the
opening on the top of the pole. Tighten
the screws with a Phillips screwdriver
to lock the parts in place.
STEP 4
STEP 5
To extend the telescopic crossbar, loosen the two bolts at each end using the 4mm Allen wrench (G).
Adjust the crossbar length to fit the treadmill’s handlebars, and then retighten the bolts.
STEP 6
Tightly fasten the mount to the treadmill’s
handlebars using the straps on each side. For
smaller diameter handlebars, the ends of the
straps may need to be fed through the slots to
be pulled for a tighter fit.
Use the security strap (F) to secure the laptop
to the tray. Adjust the mount so the laptop is in
an optimal position for use while walking.
NOTE: The laptop may swing back and forth somewhat while the treadmill is in use.
If the swinging motion seems excessive, check the straps to make sure the crossbar
is firmly mounted to the handlebars.
Stick pads (E) to the top of the tray, making sure the pads will align with the laptop computer. To slide
the tray to the side of the crossbar, loosen the center bolt on the support bracket as shown using the
4mm Allen wrench (G). Retighten the bolt when the tray is in the desired position. Insert the security
strap (F) into the slots in the tray as shown.
Loading ...