Owner's Guide Gas Cooktop
OPERATIONS
Having carried out the above adjustments, reassemble the appliance following, backwards, the instructions in paragraph “5.1 Removing the separable control panel / 5.2 Removing the hob”.
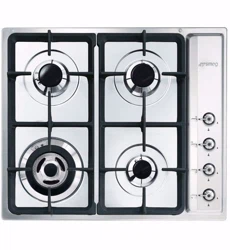
Arrangement of the burners on the hob (Hob with separable control panel)
60 cm. hob
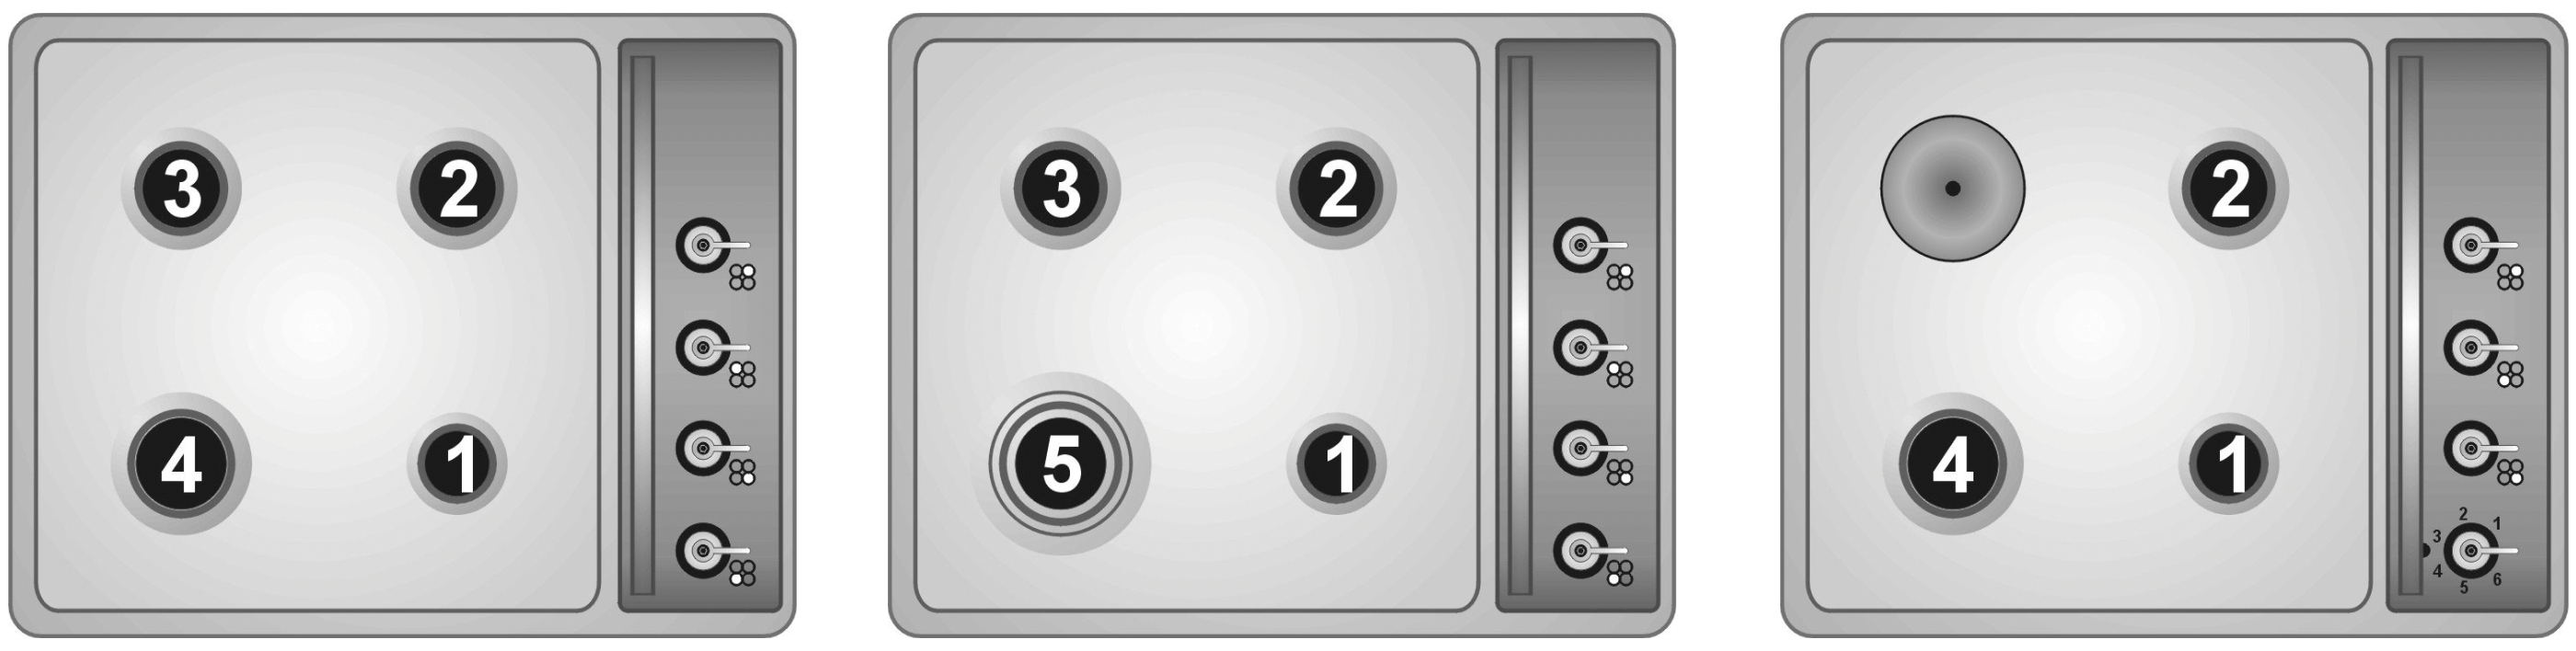
BURNERS
- Auxiliary
- Semirapid r
- Semirapid l
- Rapid large
- Wok
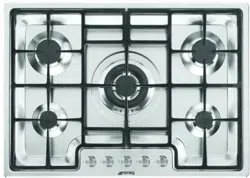
90 cm. hob
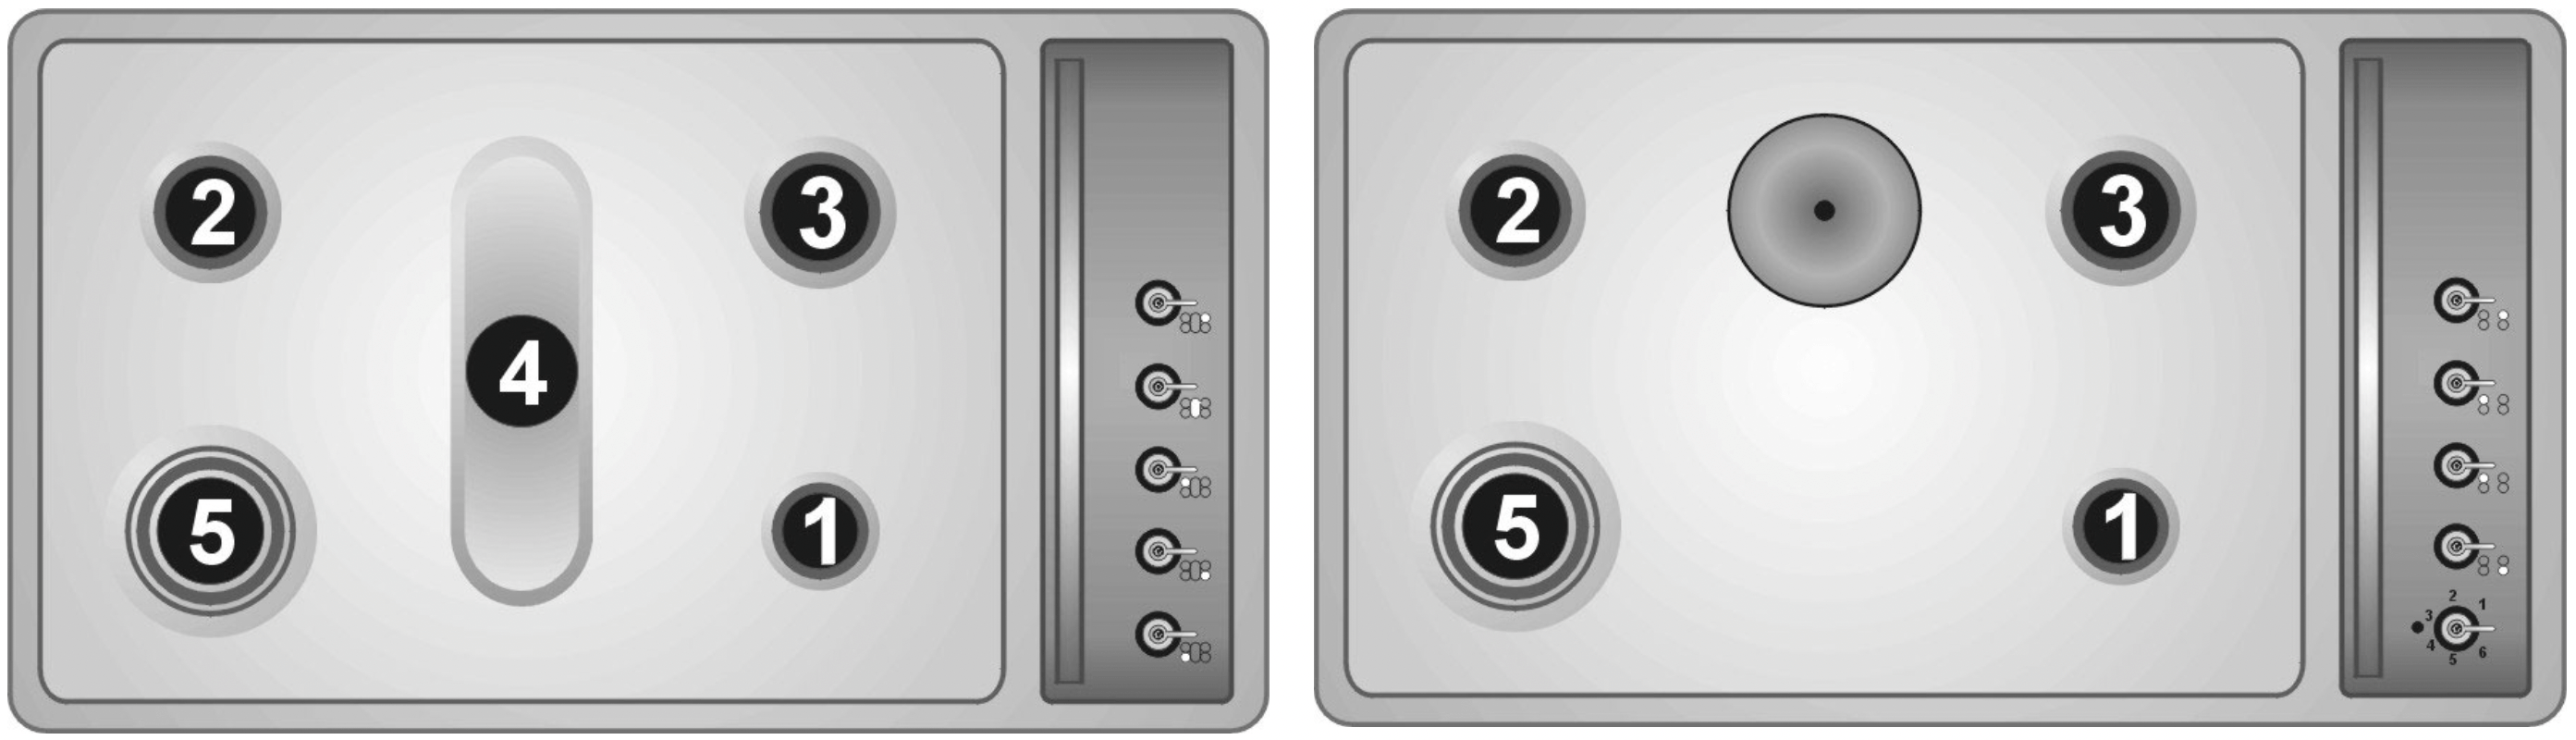
BURNERS
- Auxiliary
- Semirapid
- Rapid
- Fish burner
- Wok
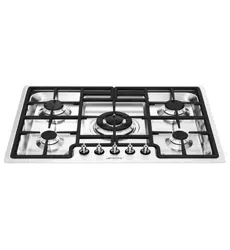
Arrangement of the burners on the hob (Hob with built-in control panel).
60 cm. hob
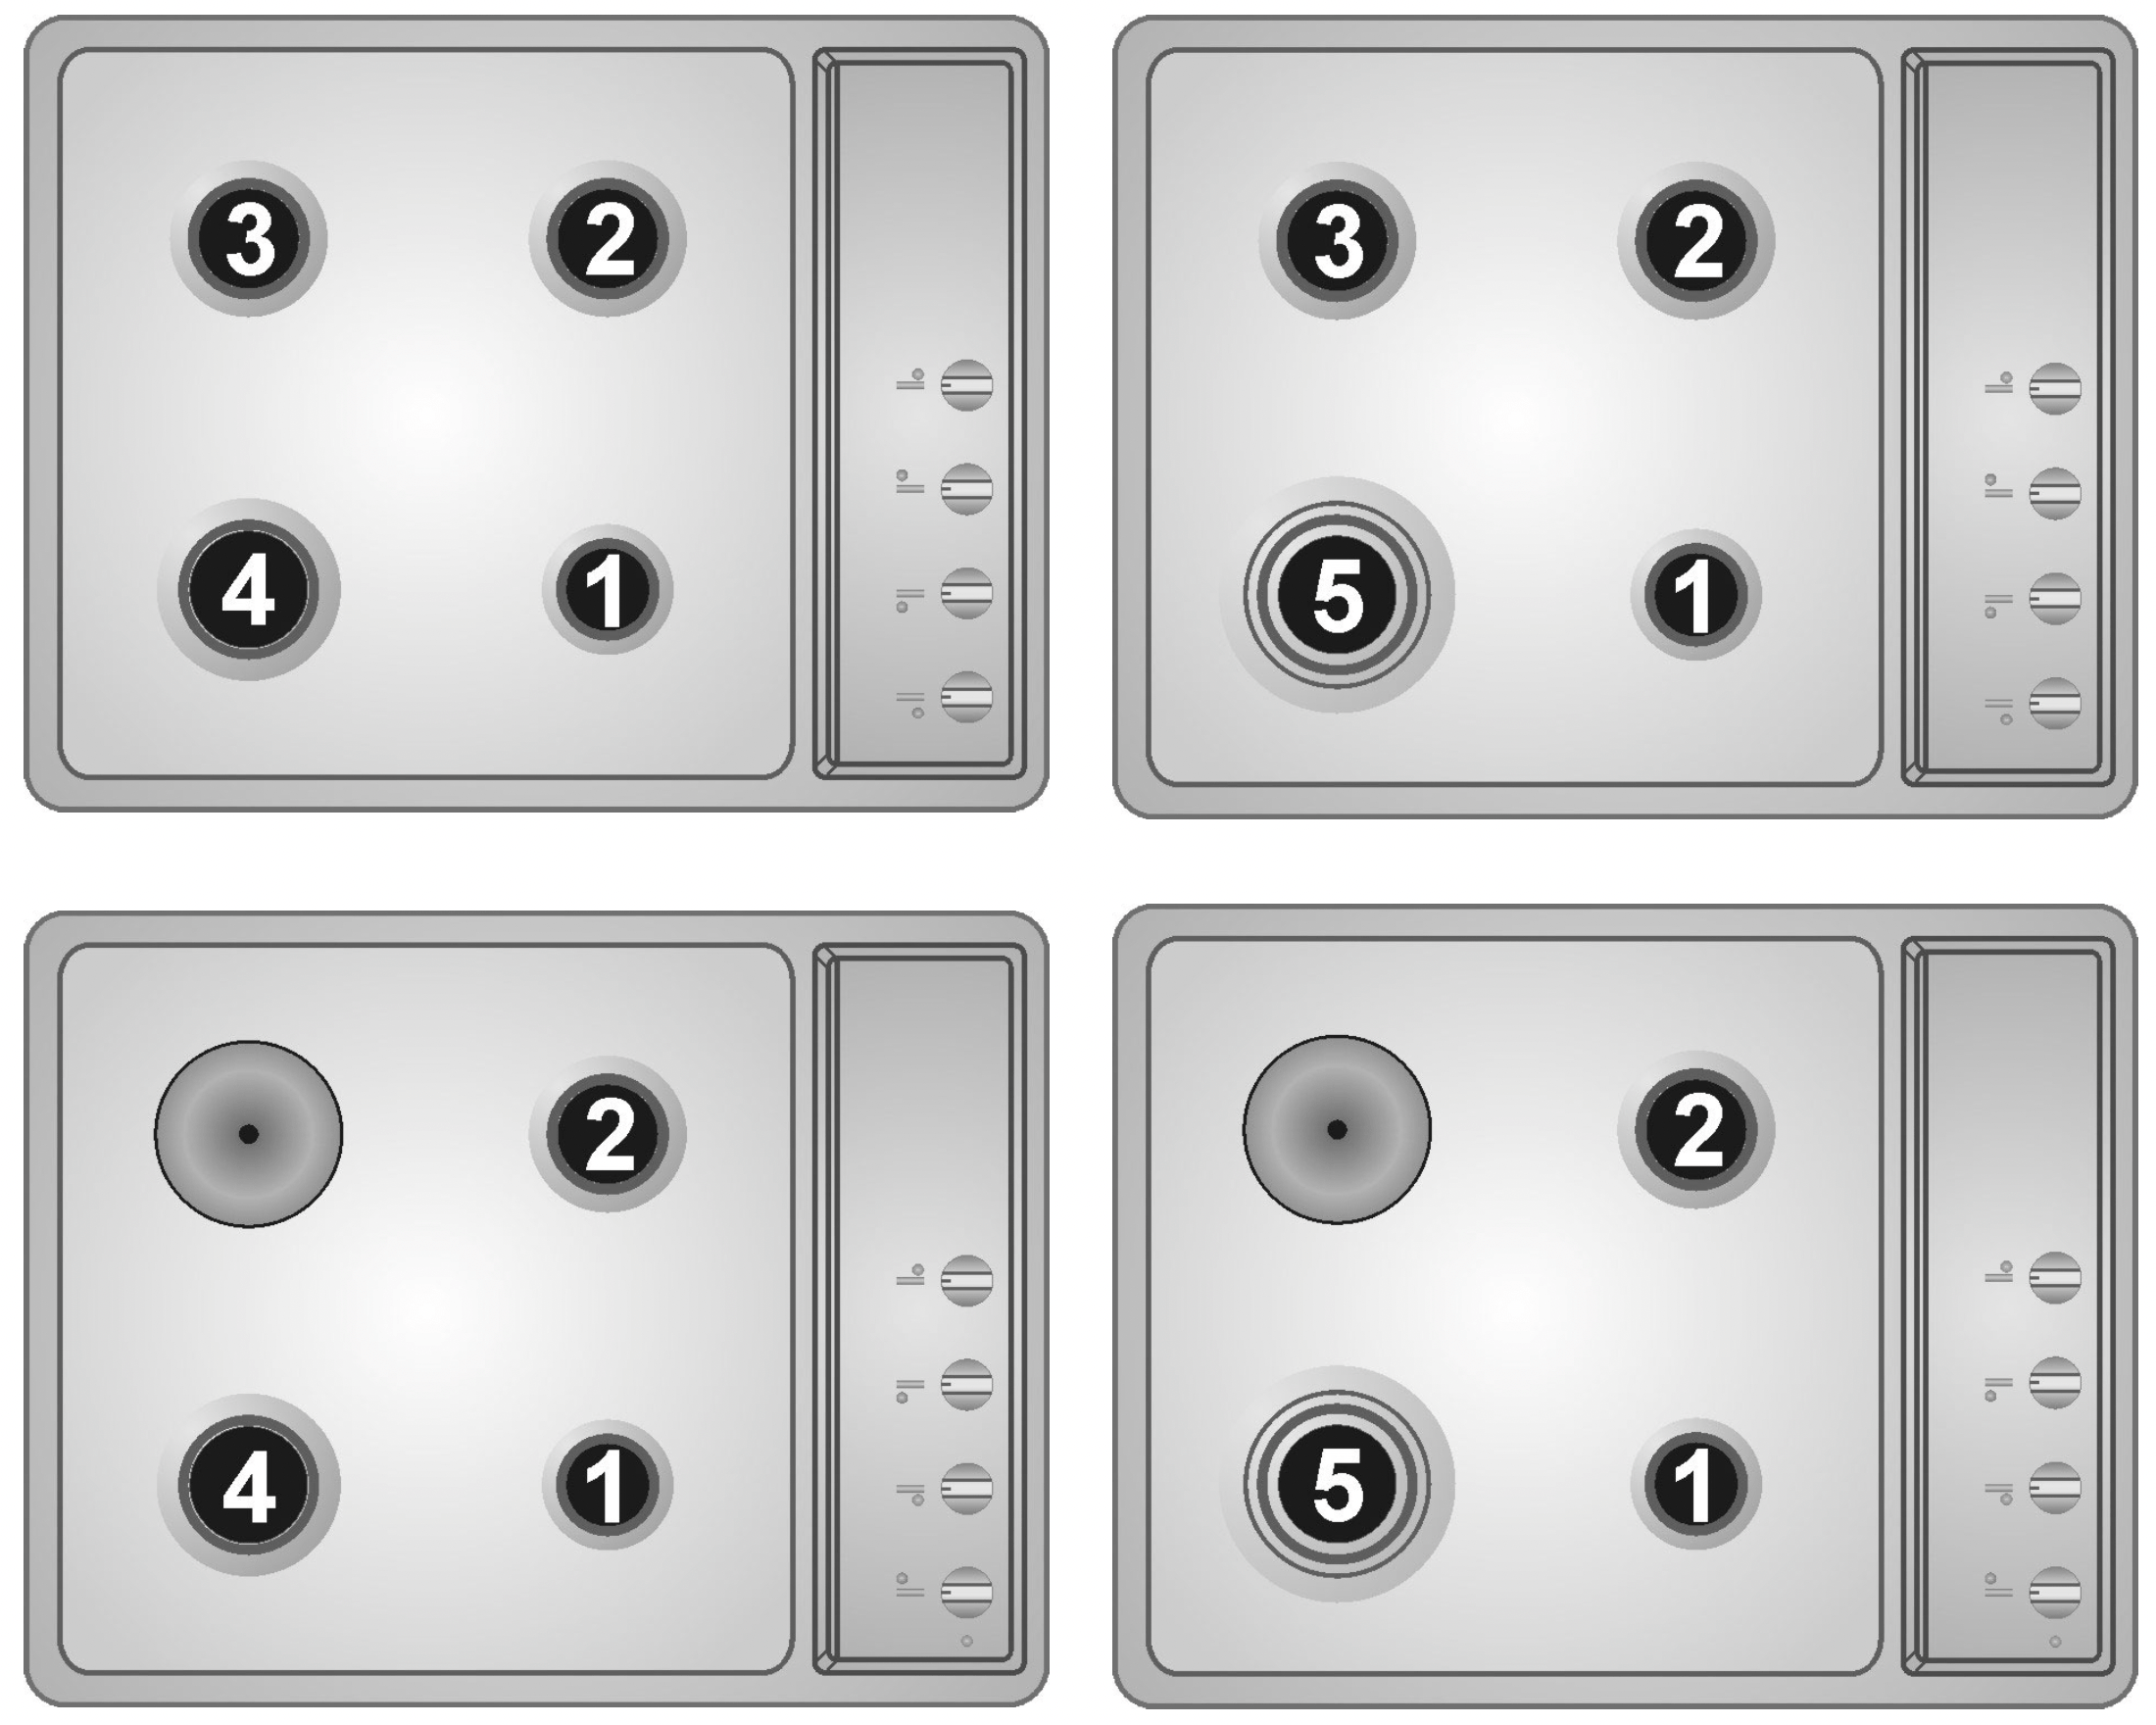
BURNERS
- Auxiliary
- Semirapid r
- Semirapid l
- Rapid
- Wok
Lubrication of gas taps
With time it may happen that the gas taps get blocked and hard to turn. Clean them inside and re-grease them. This operation must be done by an authorised person.
USING THE HOB
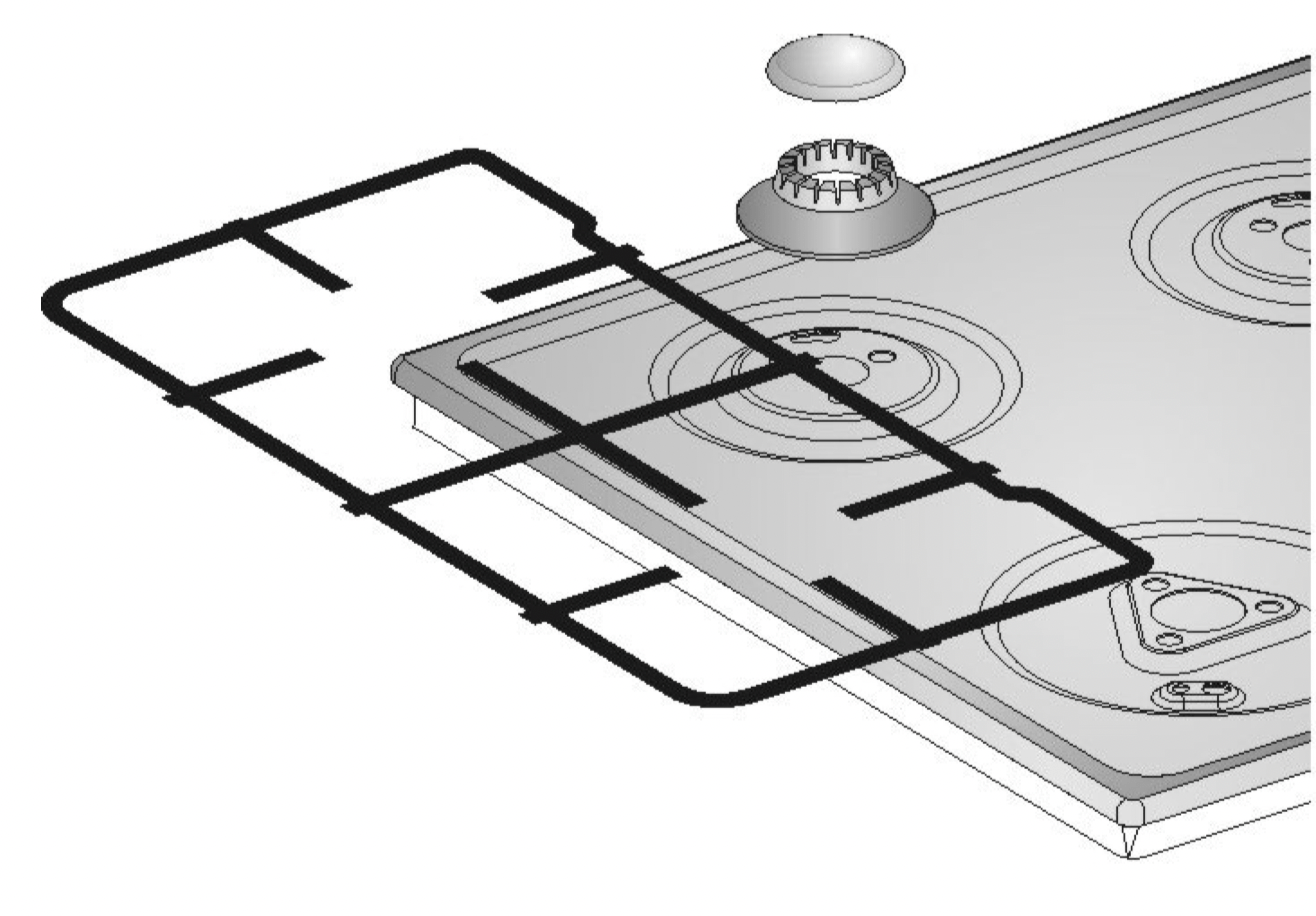
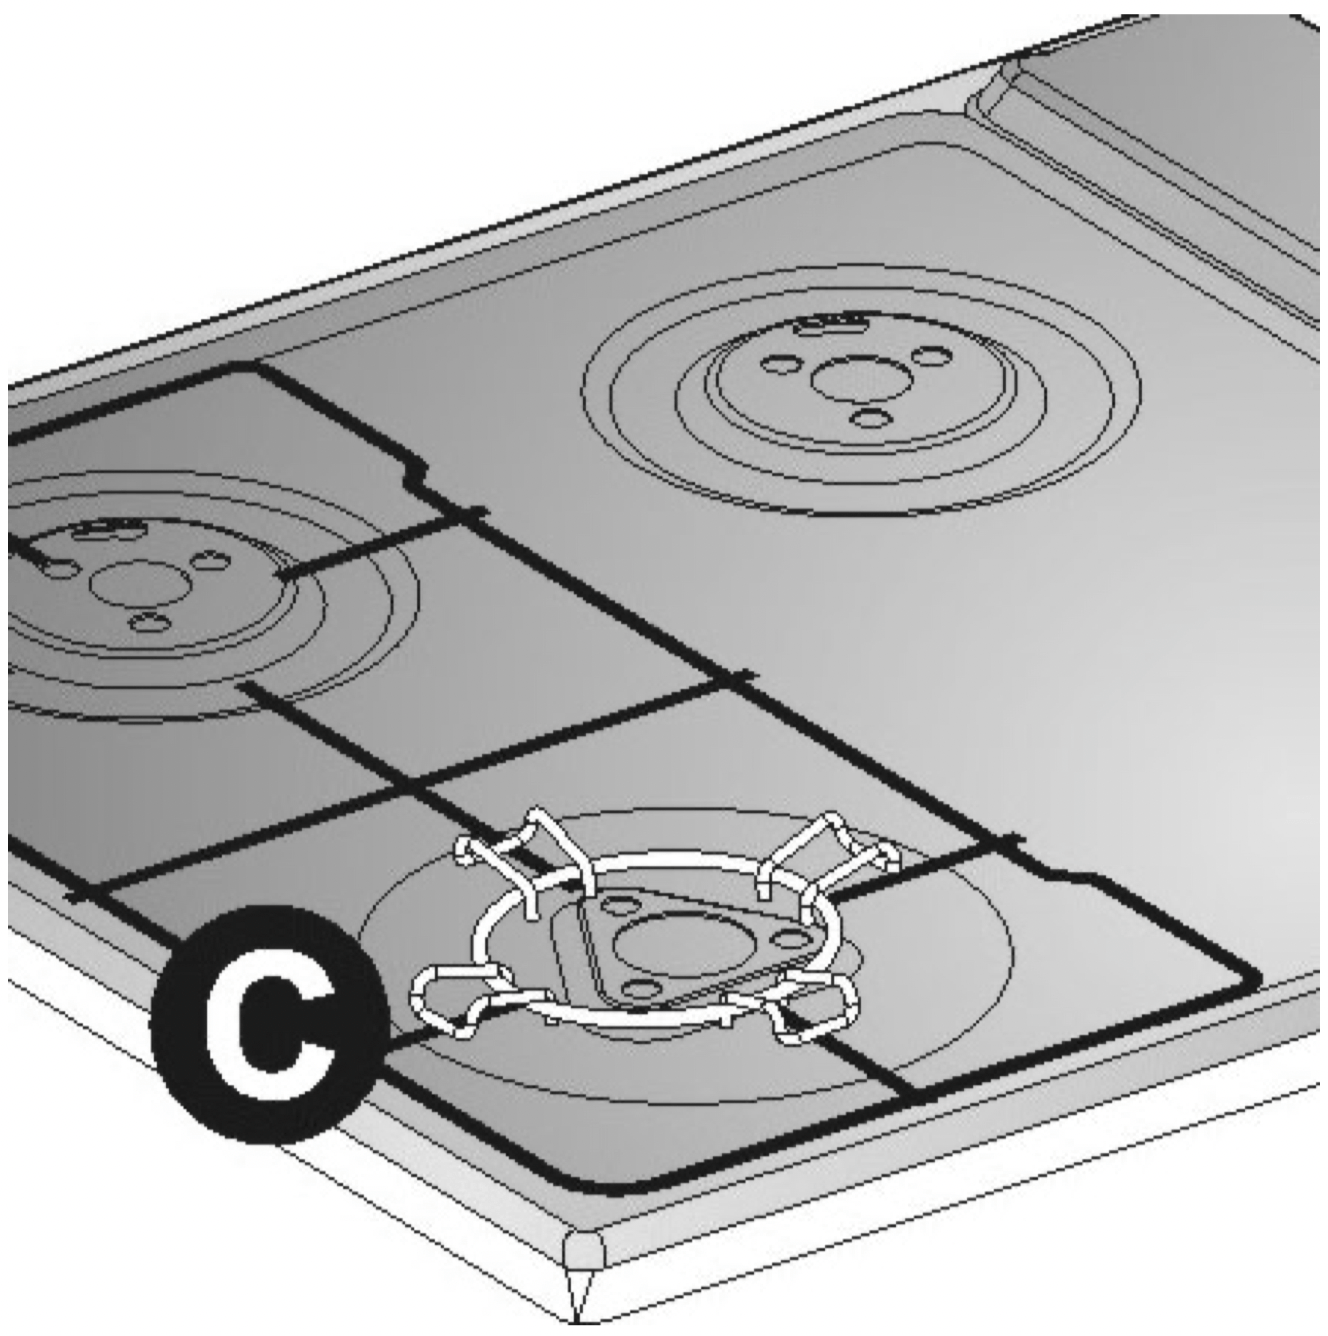
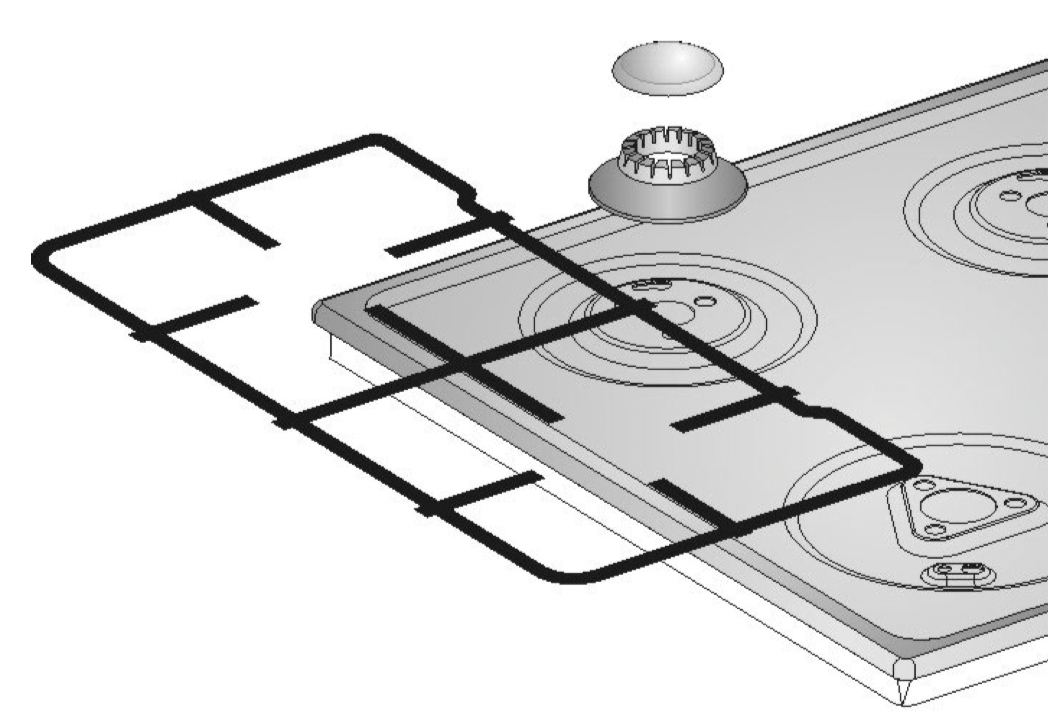
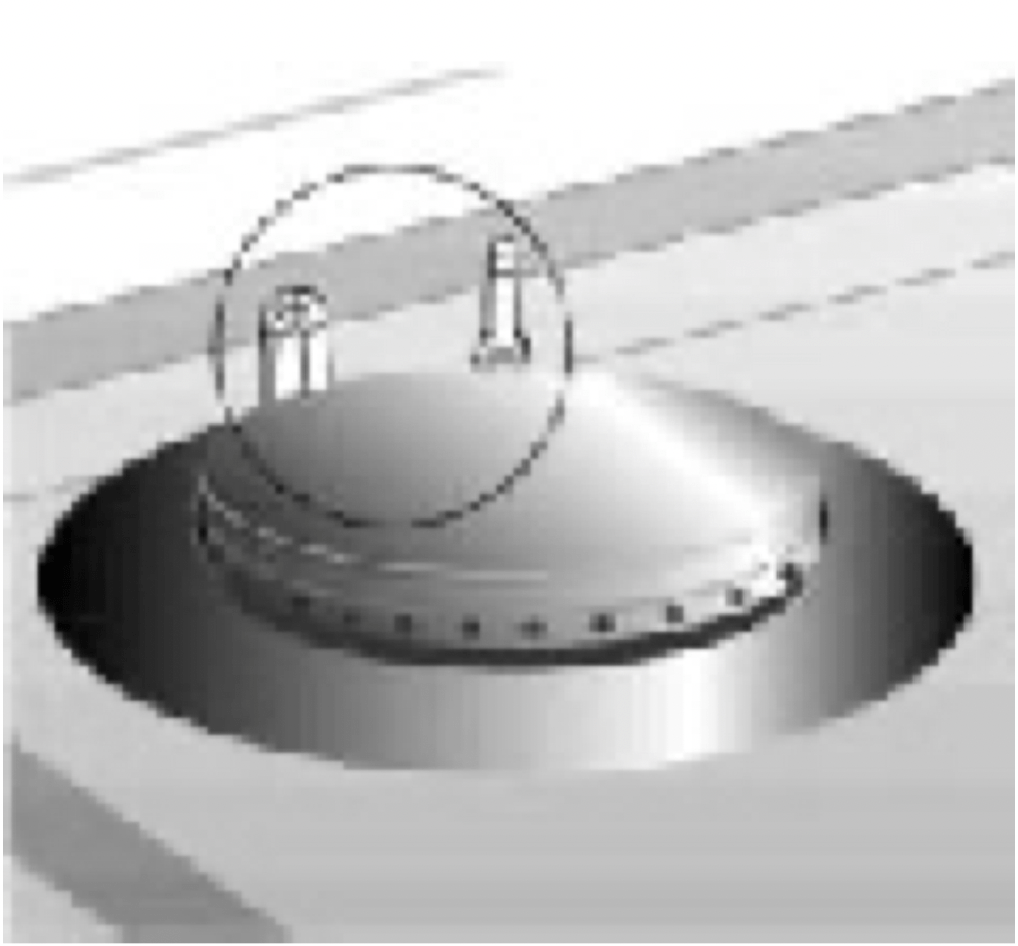
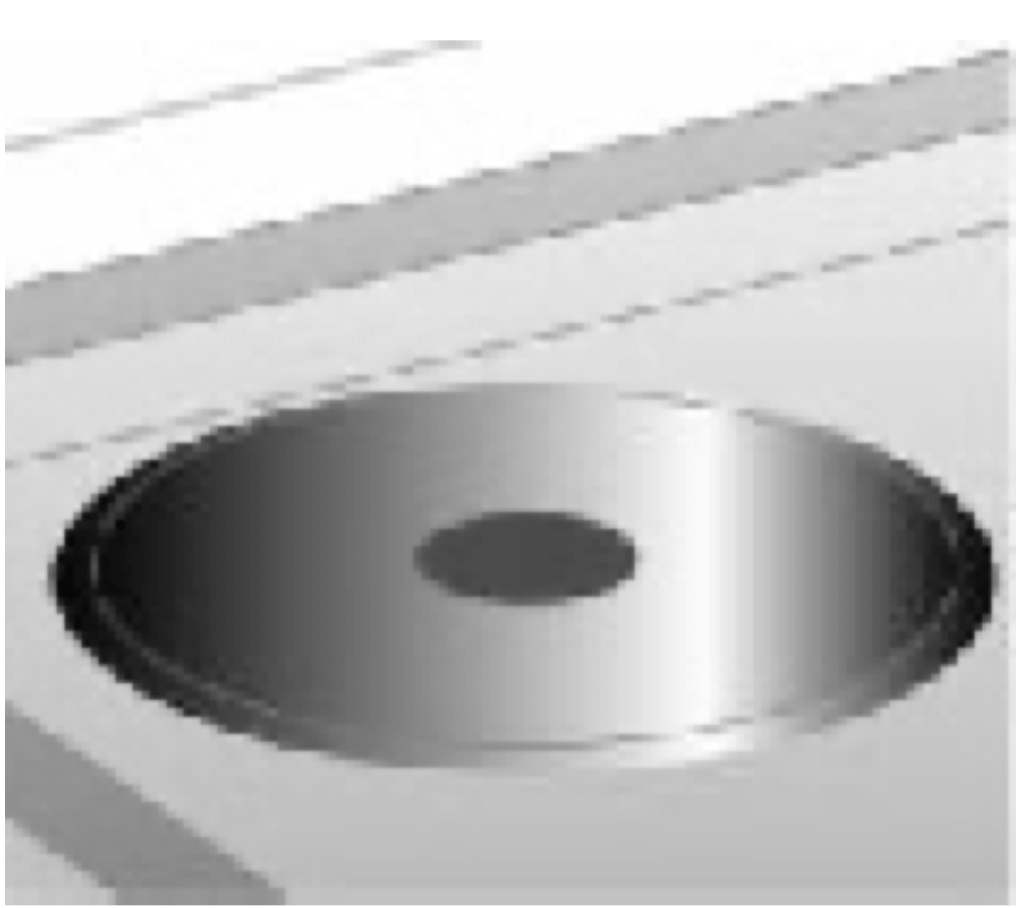
Before turning on the burners, make sure that the burner rings, caps and grids have been fitted correctly.
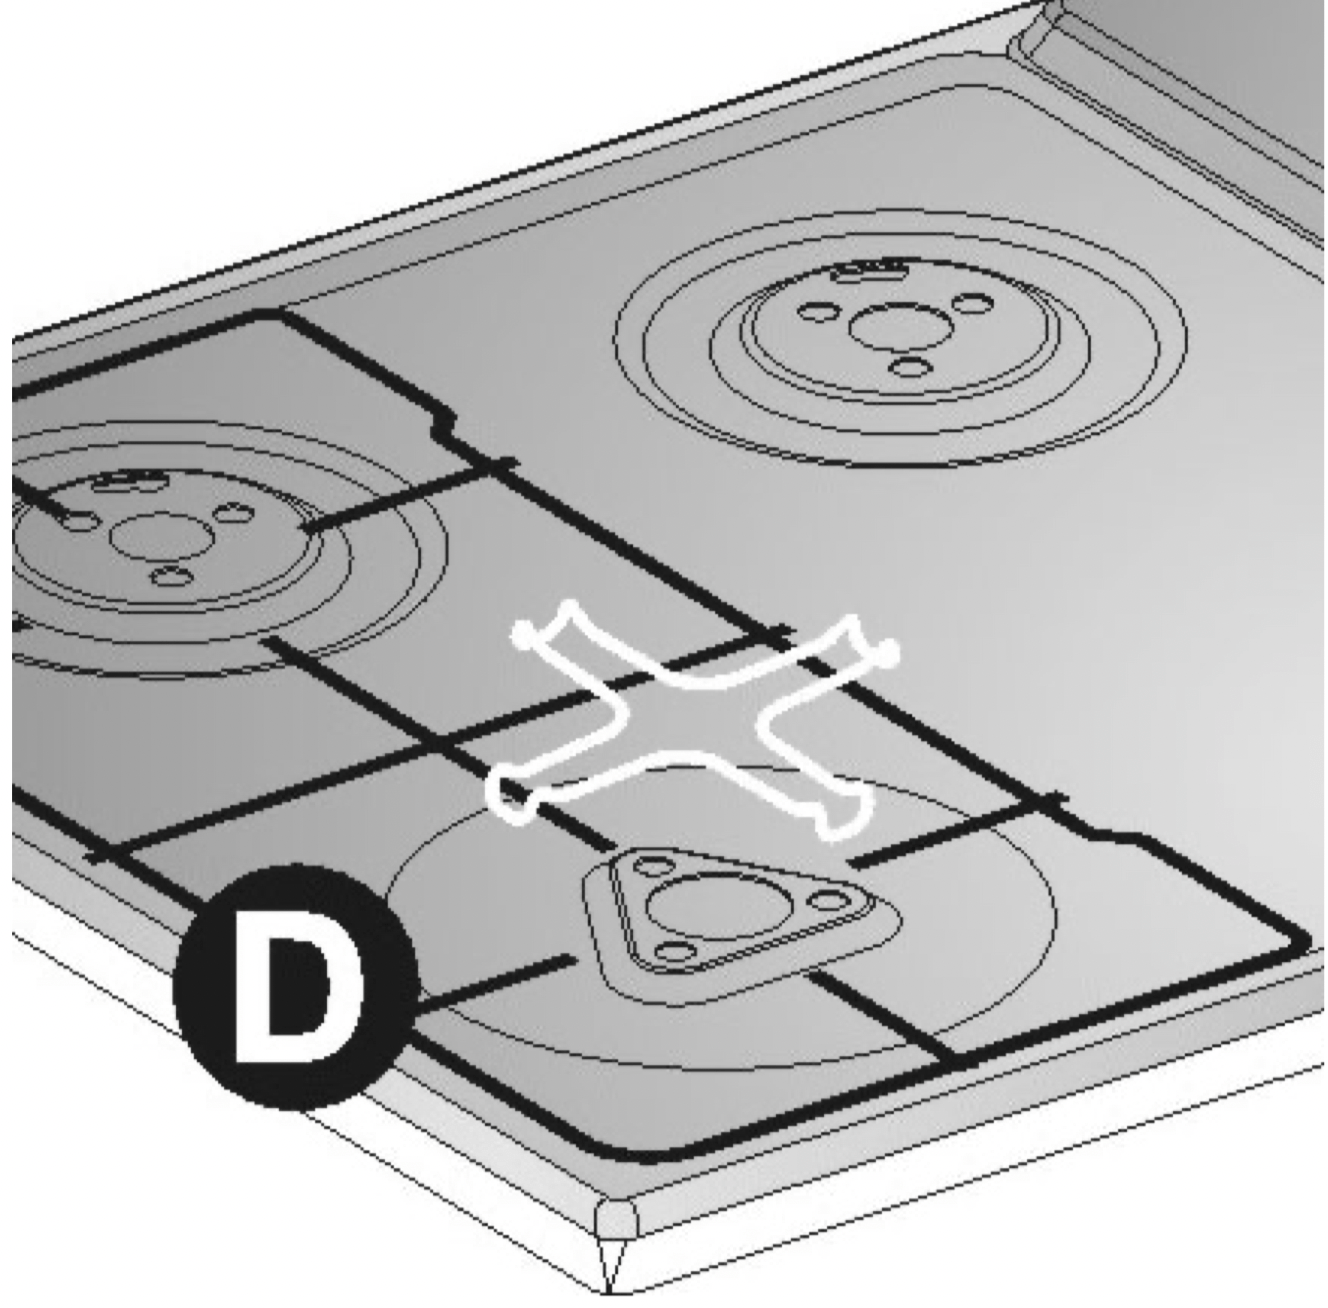
In the ultrarapid burner, notch A must be aligned with pin B. Grid C provided is intended for use with woks (Chinese pans).
Adapter D comes only with open grids models and is intended for use with small sized vessels.\

Ignition of the burners
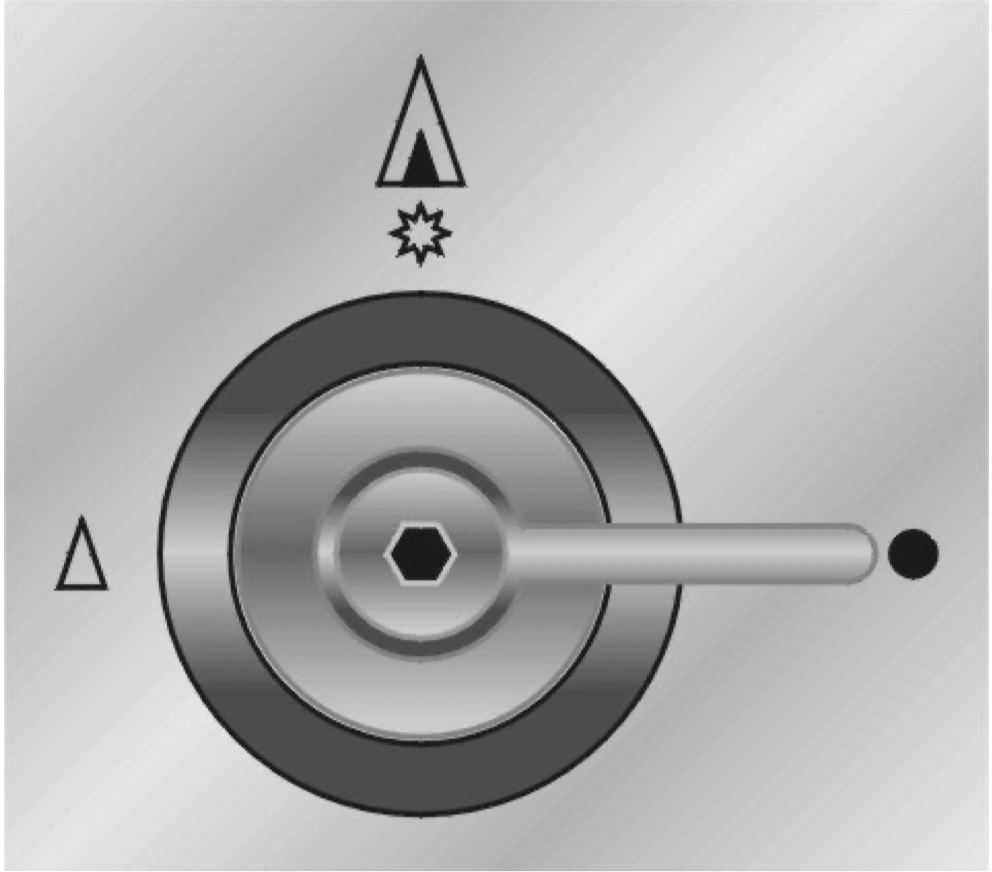
The device is fit with electronic ignition. Simply press and simultaneously turn the knob counter-clockwise on the low point flame symbol, until the burner is ignited. In models with safety valve, the knob has to be turned to the ignition symbol  before it is pressed, and after ignition the knob has to be kept pressed for about 2 seconds to keep the flame lit and to activate the safety device.
The burner might go off when the knob is released. In this case repeat the aforesaid operation keeping the knob pressed for more than 2 seconds.
NOTE: Should the burners go off accidentally in the models with valves, a safety device will trip after approximately 20 seconds to block the gas outlet even if the cock is open.
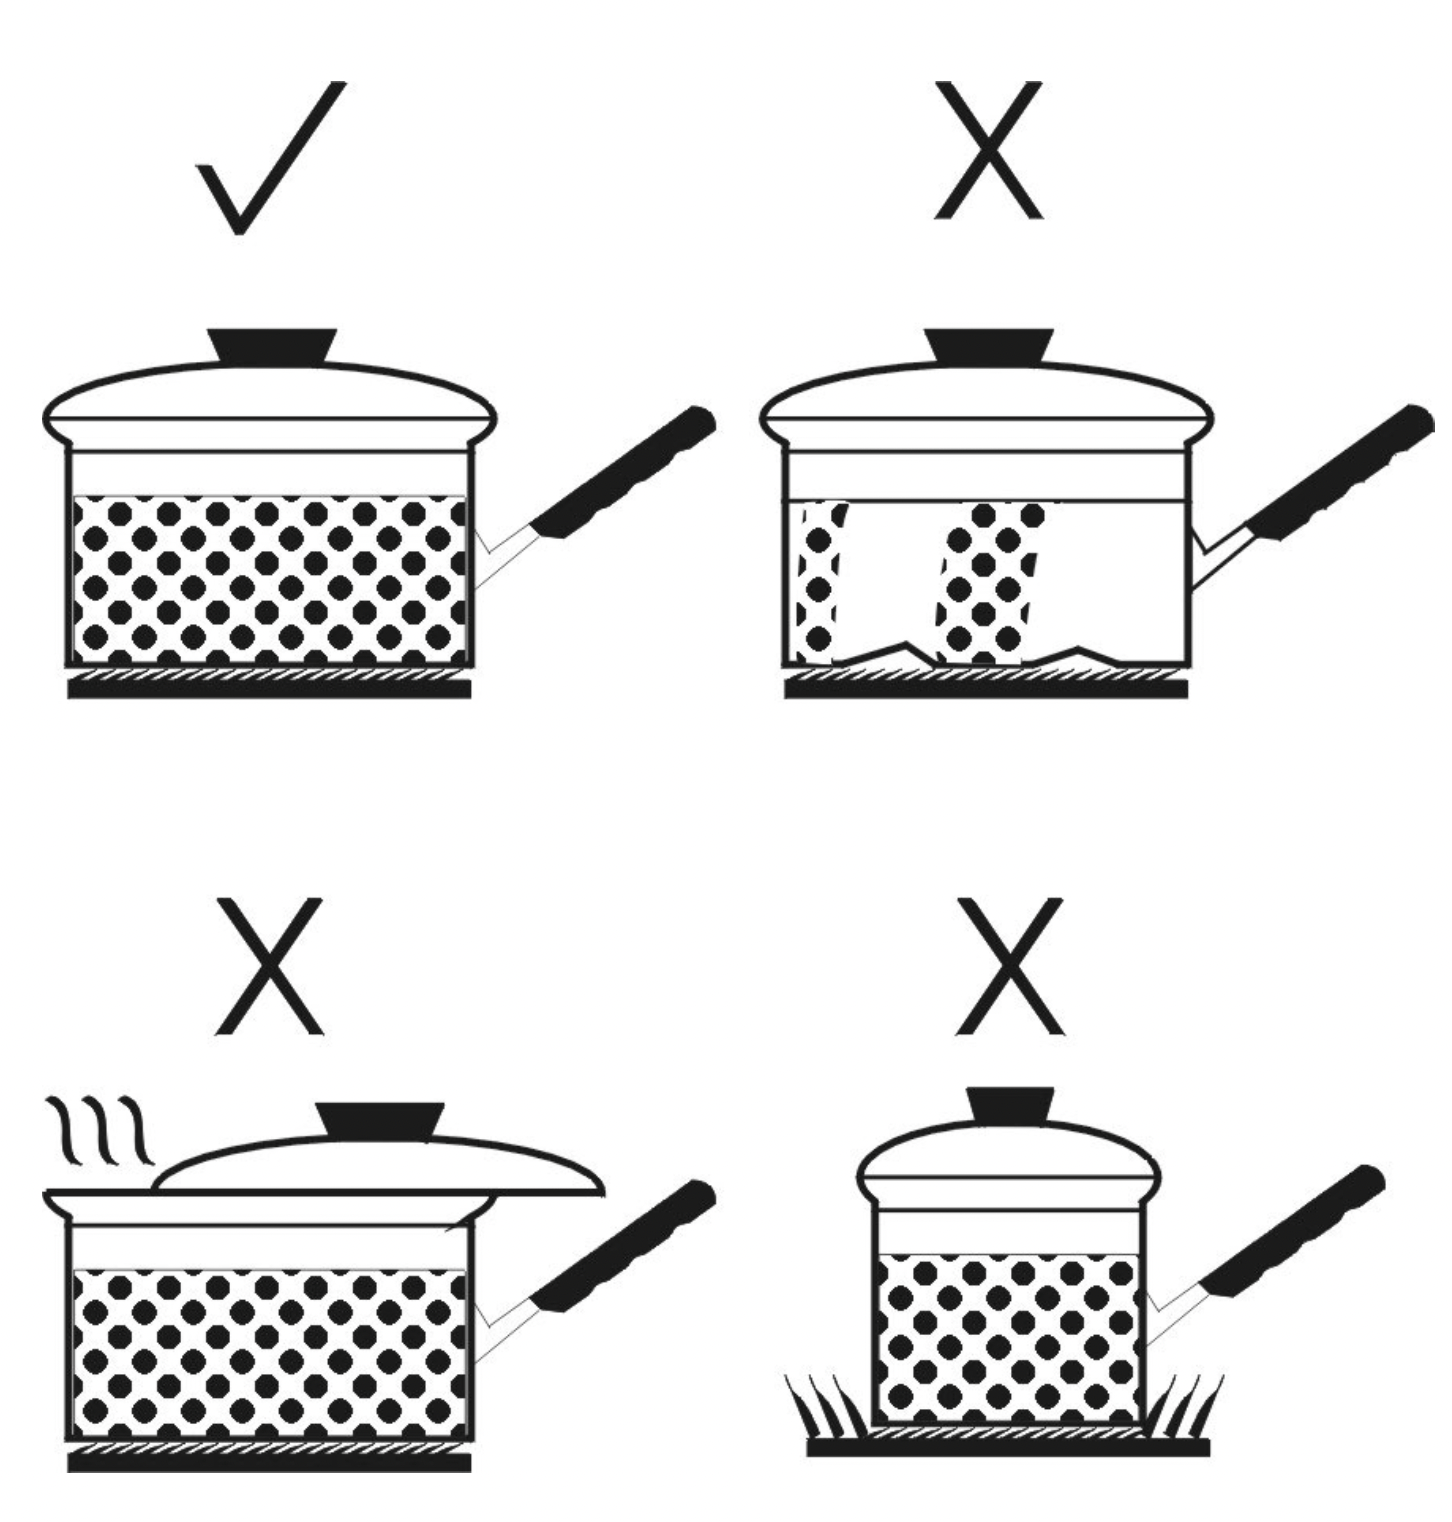
Practical advice for using the burners
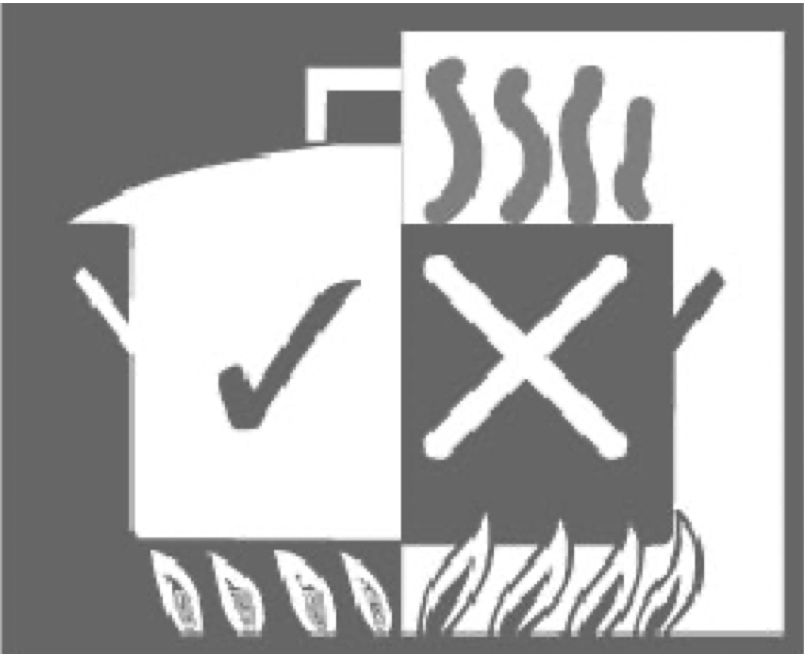
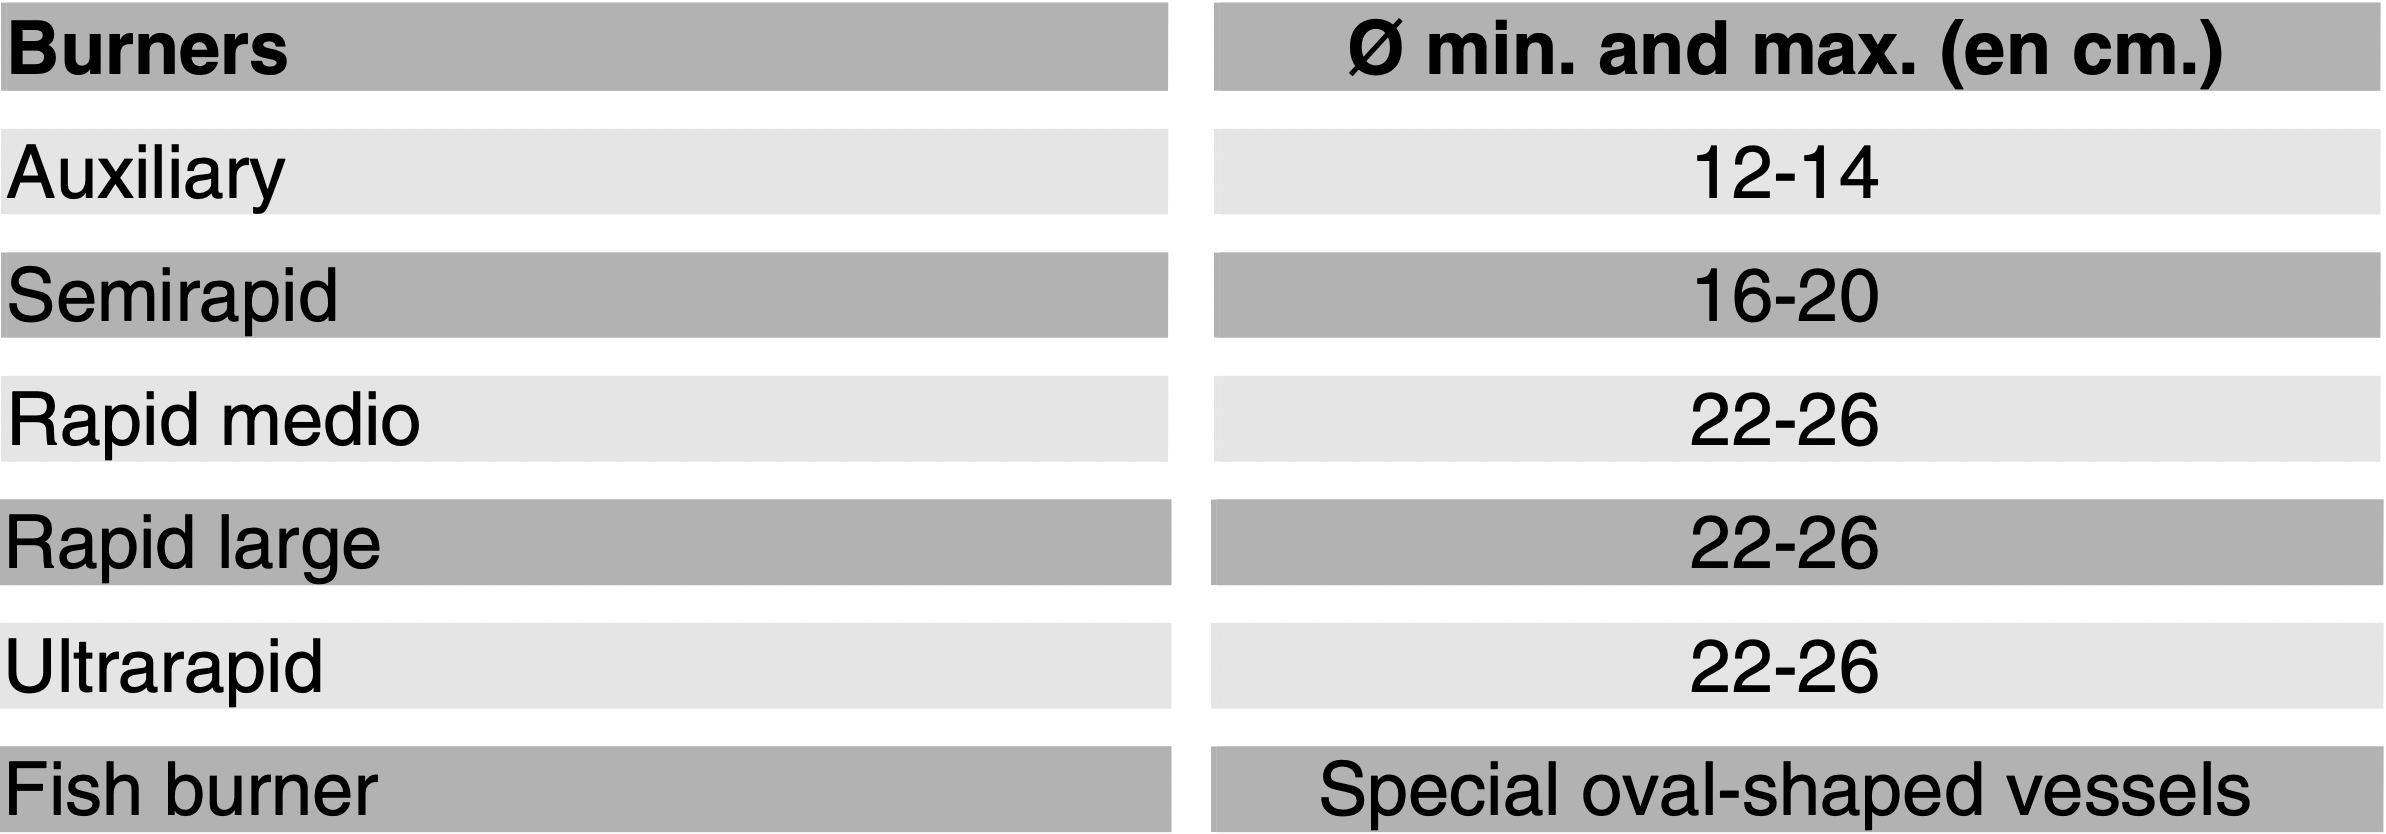
For better burner performance and minimum gas consumption, flat bottomed, even pans must be used, with covers and proportional in size to the burners (see paragraph “7.3 Diameter of the pans”).
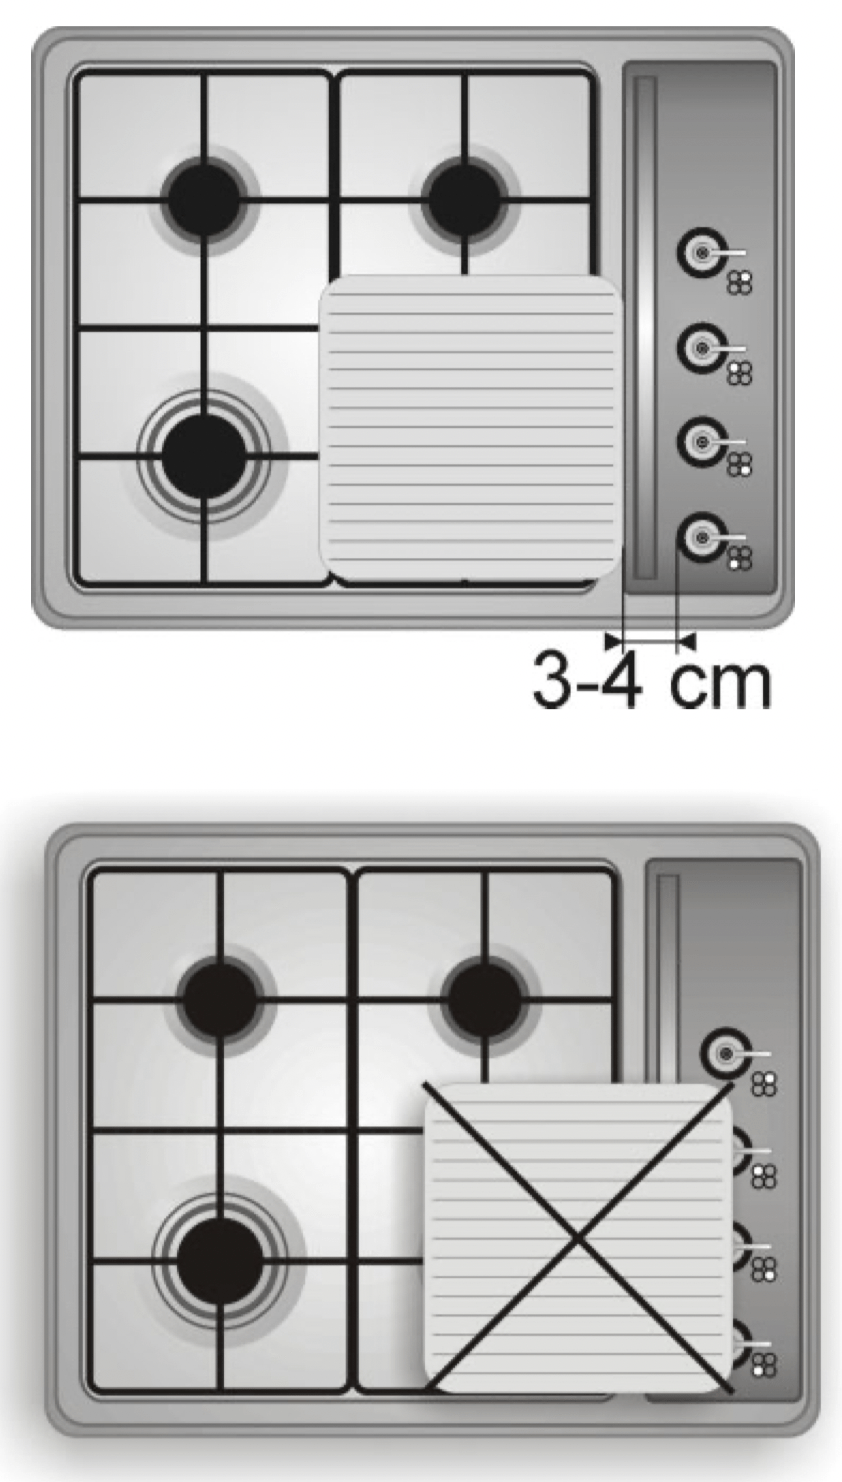
To avoid overcooking or damage to the surface top while cooking, all pans or griddles must be positioned within the cooking hob perimeter and must be a minimum distance of 3-4 cm from the knobs.
Diameter of the pans
Electric elements
Turning on electric elements
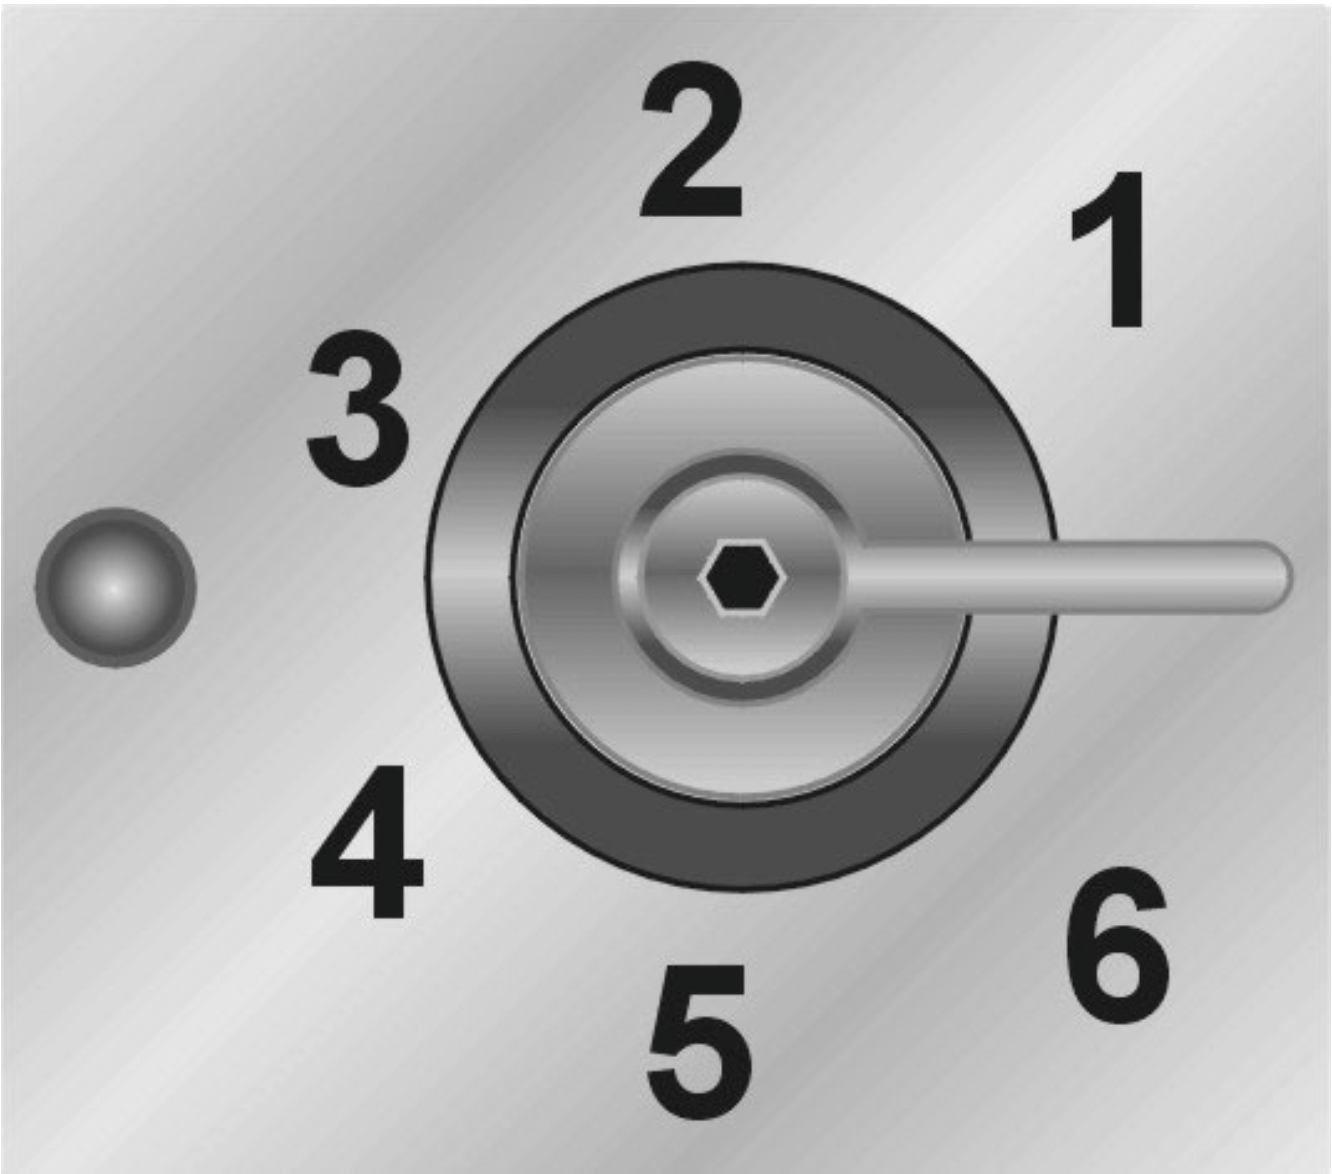
Hobs may be fitted with an electric element of varying diameter. The electric element is controlled by a switch and is turned on by rotating the appropriate knob to the desired position.
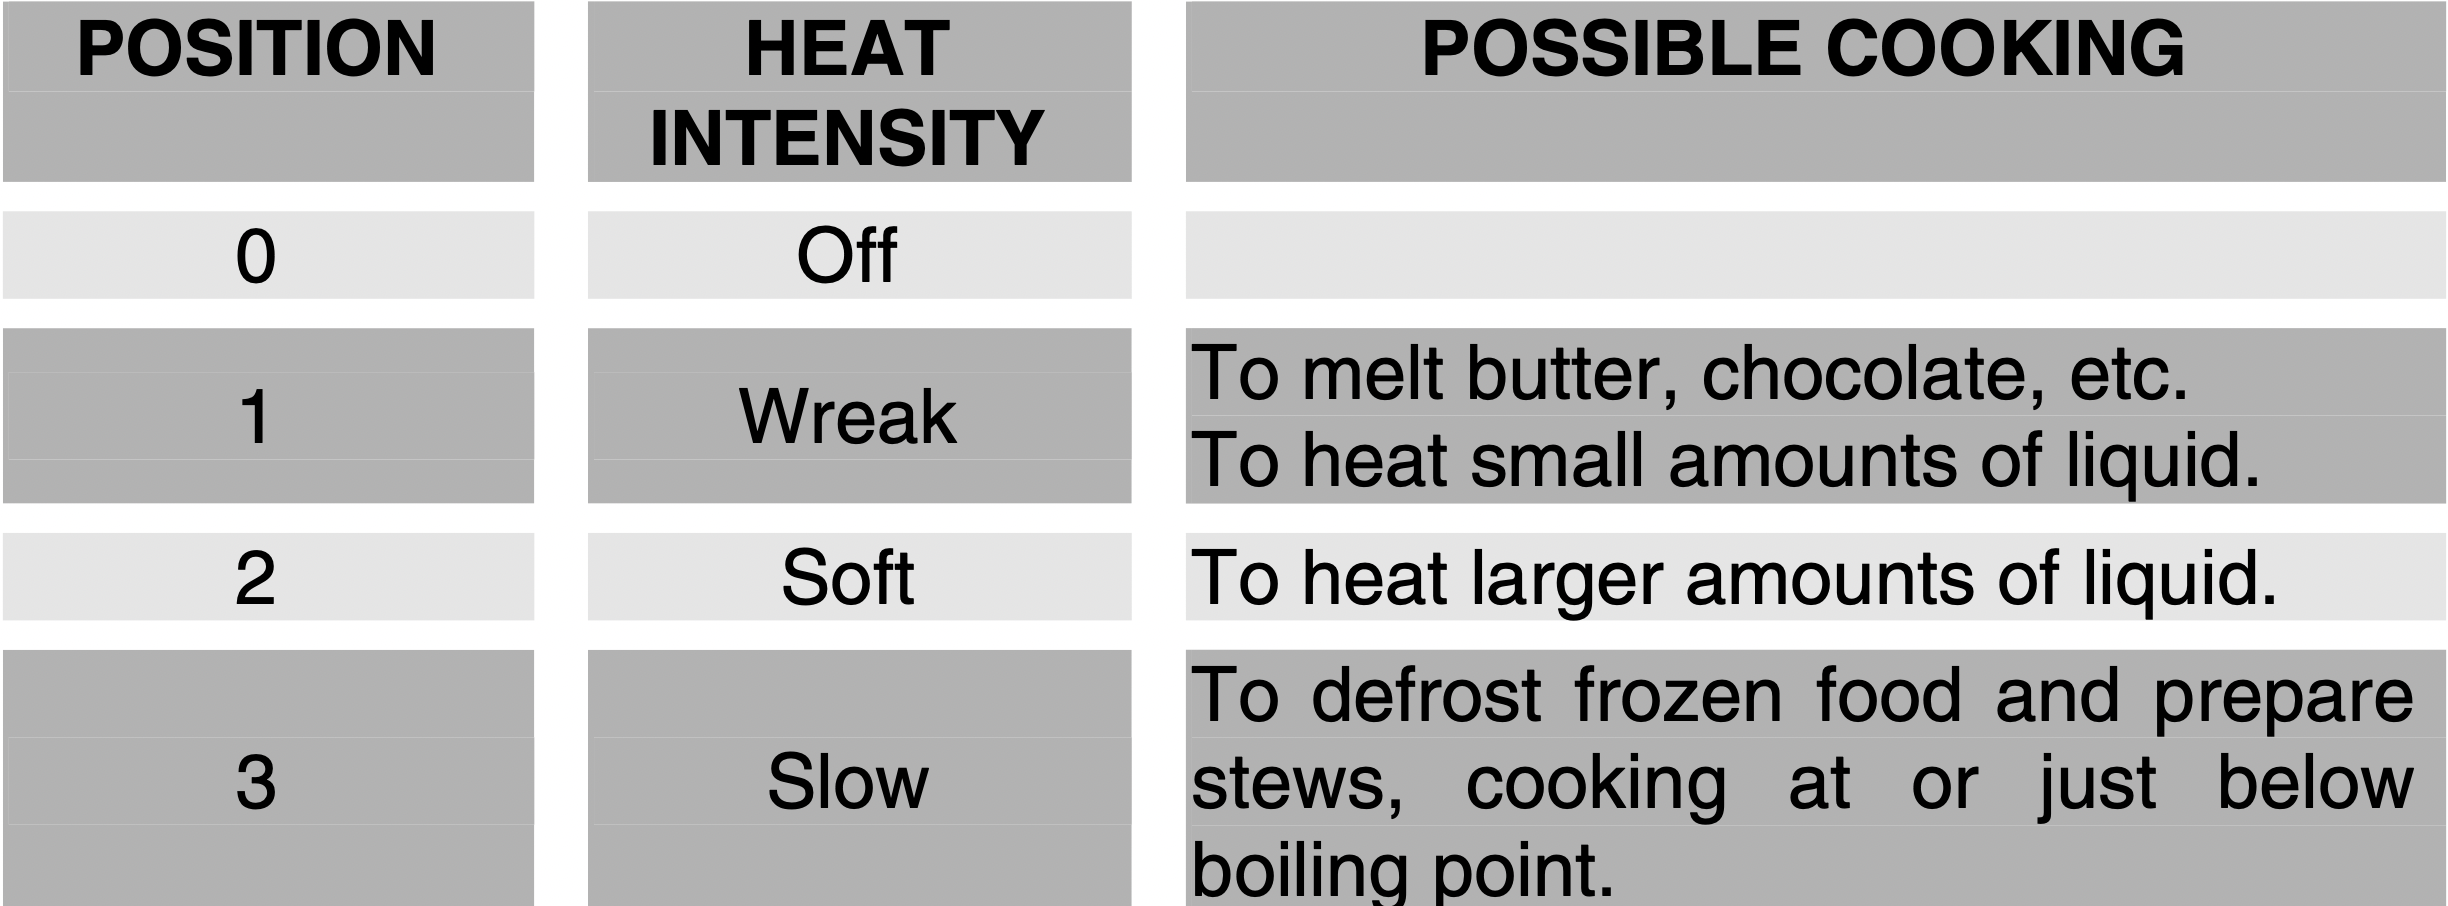
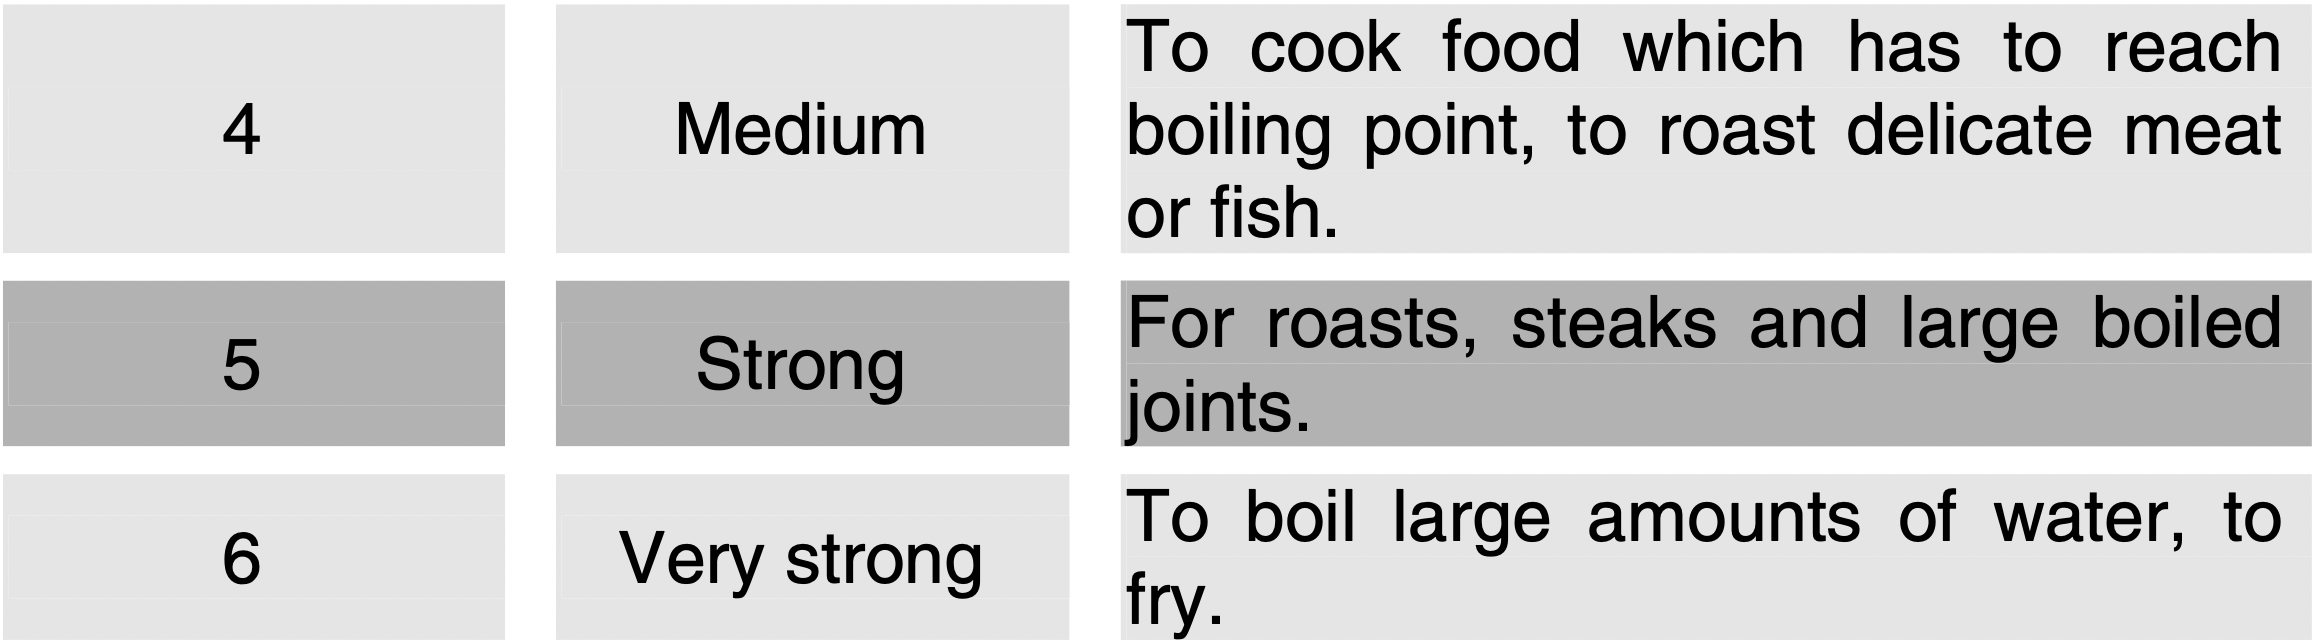
Using the electric elements
The settings shown in the table are merely indicative.
WARNING: When switching on the electric element for the first time, or if the electric element has not been used for a long time, to remove any humidity from the insulating material it should be dried out by placing the electric element on position 1 for 30 minutes.
To use correctly remember to:
- Switch the electric element only after having placed the pan on it.
- Use flat and thick bottomed pans.
- Never use pans which are smaller than the electric element.
- Dry the bottom of the pan before placing it on the electric element.
- When cooking with flammable oils and fats, never leave the appliance.
- The electric elements will stay hot for a long time after use: do not touch them or place any objects on them.
- If any dents appear in the electric element surface, switch it off immediately and contact the nearest authorised servicing centre.
- Never place sheets of aluminium foil directly on the surface of the hotplate.
CLEANING AND MAINTENANCE
WARNING: Never use a steam jet to clean the appliance.
Before any intervention, disconnect the power supply of the device.
Cleaning
Clean the cooking top regularly every time you use it, obviously after it has cooled.
Regular daily cleaning of the hob
In order to clean and preserve the surface, always use specific products only, which do not contain abrasive substances or chlorinebased acid substances.
How to use: pour the product on a damp cloth and wipe the surface, rinse thoroughly and dry with a soft cloth or deerskin.
Food stains or residues
Do not use metallic sponges or sharp scrapers: they will damage the surface.
Use normal non-abrasive products and remove spots or residuals with non-scratch sponges or, if need be, with wood or plastic utensils.
Rinse thoroughly and dry with a soft cloth or deerskin.

Cleaning of cooking hob components
CAUTION: do not wash these components in a dishwasher. In normal use of the hob, the stainless steel burner caps and pan-stands tend to be burnished by the high temperature. Clean these parts using very fine abrasive sponges or similar commercial products. Then use a specific paste polish to restore the steel’s shine. Your local authorised after-sales technician is able to supply professional products for appliance cleaning and care.
Grids, caps, flame cap crowns and burners can be removed for ease of cleaning. Wash them in warm water using a non-abrasive detergent, taking care to remove all tough spots. Before remounting, allow the components to fully dry out. In fact, humidity residues inside the burner holes might impair burner operation.
Ignition plugs and safety devices
For good functioning of the lighting ignition plugs and the safety devices, keep them very clean.
Check frequently and clean with a damp cloth when necessary.
The electric element
After use, to make sure that the surfaces are clean and long lasting, the electric element must be treated with specific cleaning products which are available on the market. This necessary operation prevents oxidisation (rust formation).
The cover
Clean the glass or steel cover, where mounted, with warm water. Never use abrasive sponges or detergents.
Never lower the cover when burners or electric elements are on or still hot.
Attention: the glass lid may break if overheated. Make sure that all the burners are switched off and let them cool down before lovering the lid.
Preventive maintenance
This appliance does not need any special maintenance. However, a few simple operations have to be carried out periodically to prevent malfunctioning:
Burners: the burners must be cleaned periodically to ensure correct combustion; make sure that all the openings and flame ports are clean and free of obstacles, and that the burners rest firmly on their supports.
Gas connection: the gas connection must be checked periodically.
Flexible pipes: if a flexible pipe is used, it must be inspected periodically (once a year) for leakages: if the surface of the pipe appears rigid and cracked, disconnect immediately the cooker from the gas supply and replace the pipe with a new one.
Valves: if the gas valves get stuck or hard to turn, they need to be cleaned and re-greased; this operation must be carried out by an authorised person.
PROBLEMS AND CAUSES
Each of the following cases is caused by an abnormal operation of the appliance and should be dealt with by a authorised persons: please contact your local dealer or Service Center in case you detect any of these malfunctioning.
| PROBLEM |
CAUSE |
WHAT TO DO |
|
The flame is very long with bright yellow tips.
Black deposits on the bottom of the pans.
|
Defect of comburent air or incorrect injectors.
Burner dirty or flame ports obstructed.
|
Clean the burner.
Call Service Center if the problem remains.
|
|
The flame is very short and noisy. The flame moves away from the burner ports.
|
Excess of comburent air. |
Call Service Center. |
|
The flame extinguishes when the burner knob is set to the low flame position.
|
Incorrect adjustment of the minimum heat input or excess of comburent air.
|
Call Service Center. |
|
The valve knob is hard to rotate.
|
Gas valve worn out or needs lubrification.
|
Call Service Center. |