Loading ...
Loading ...
04/21/17 www.elitescreens.com
3
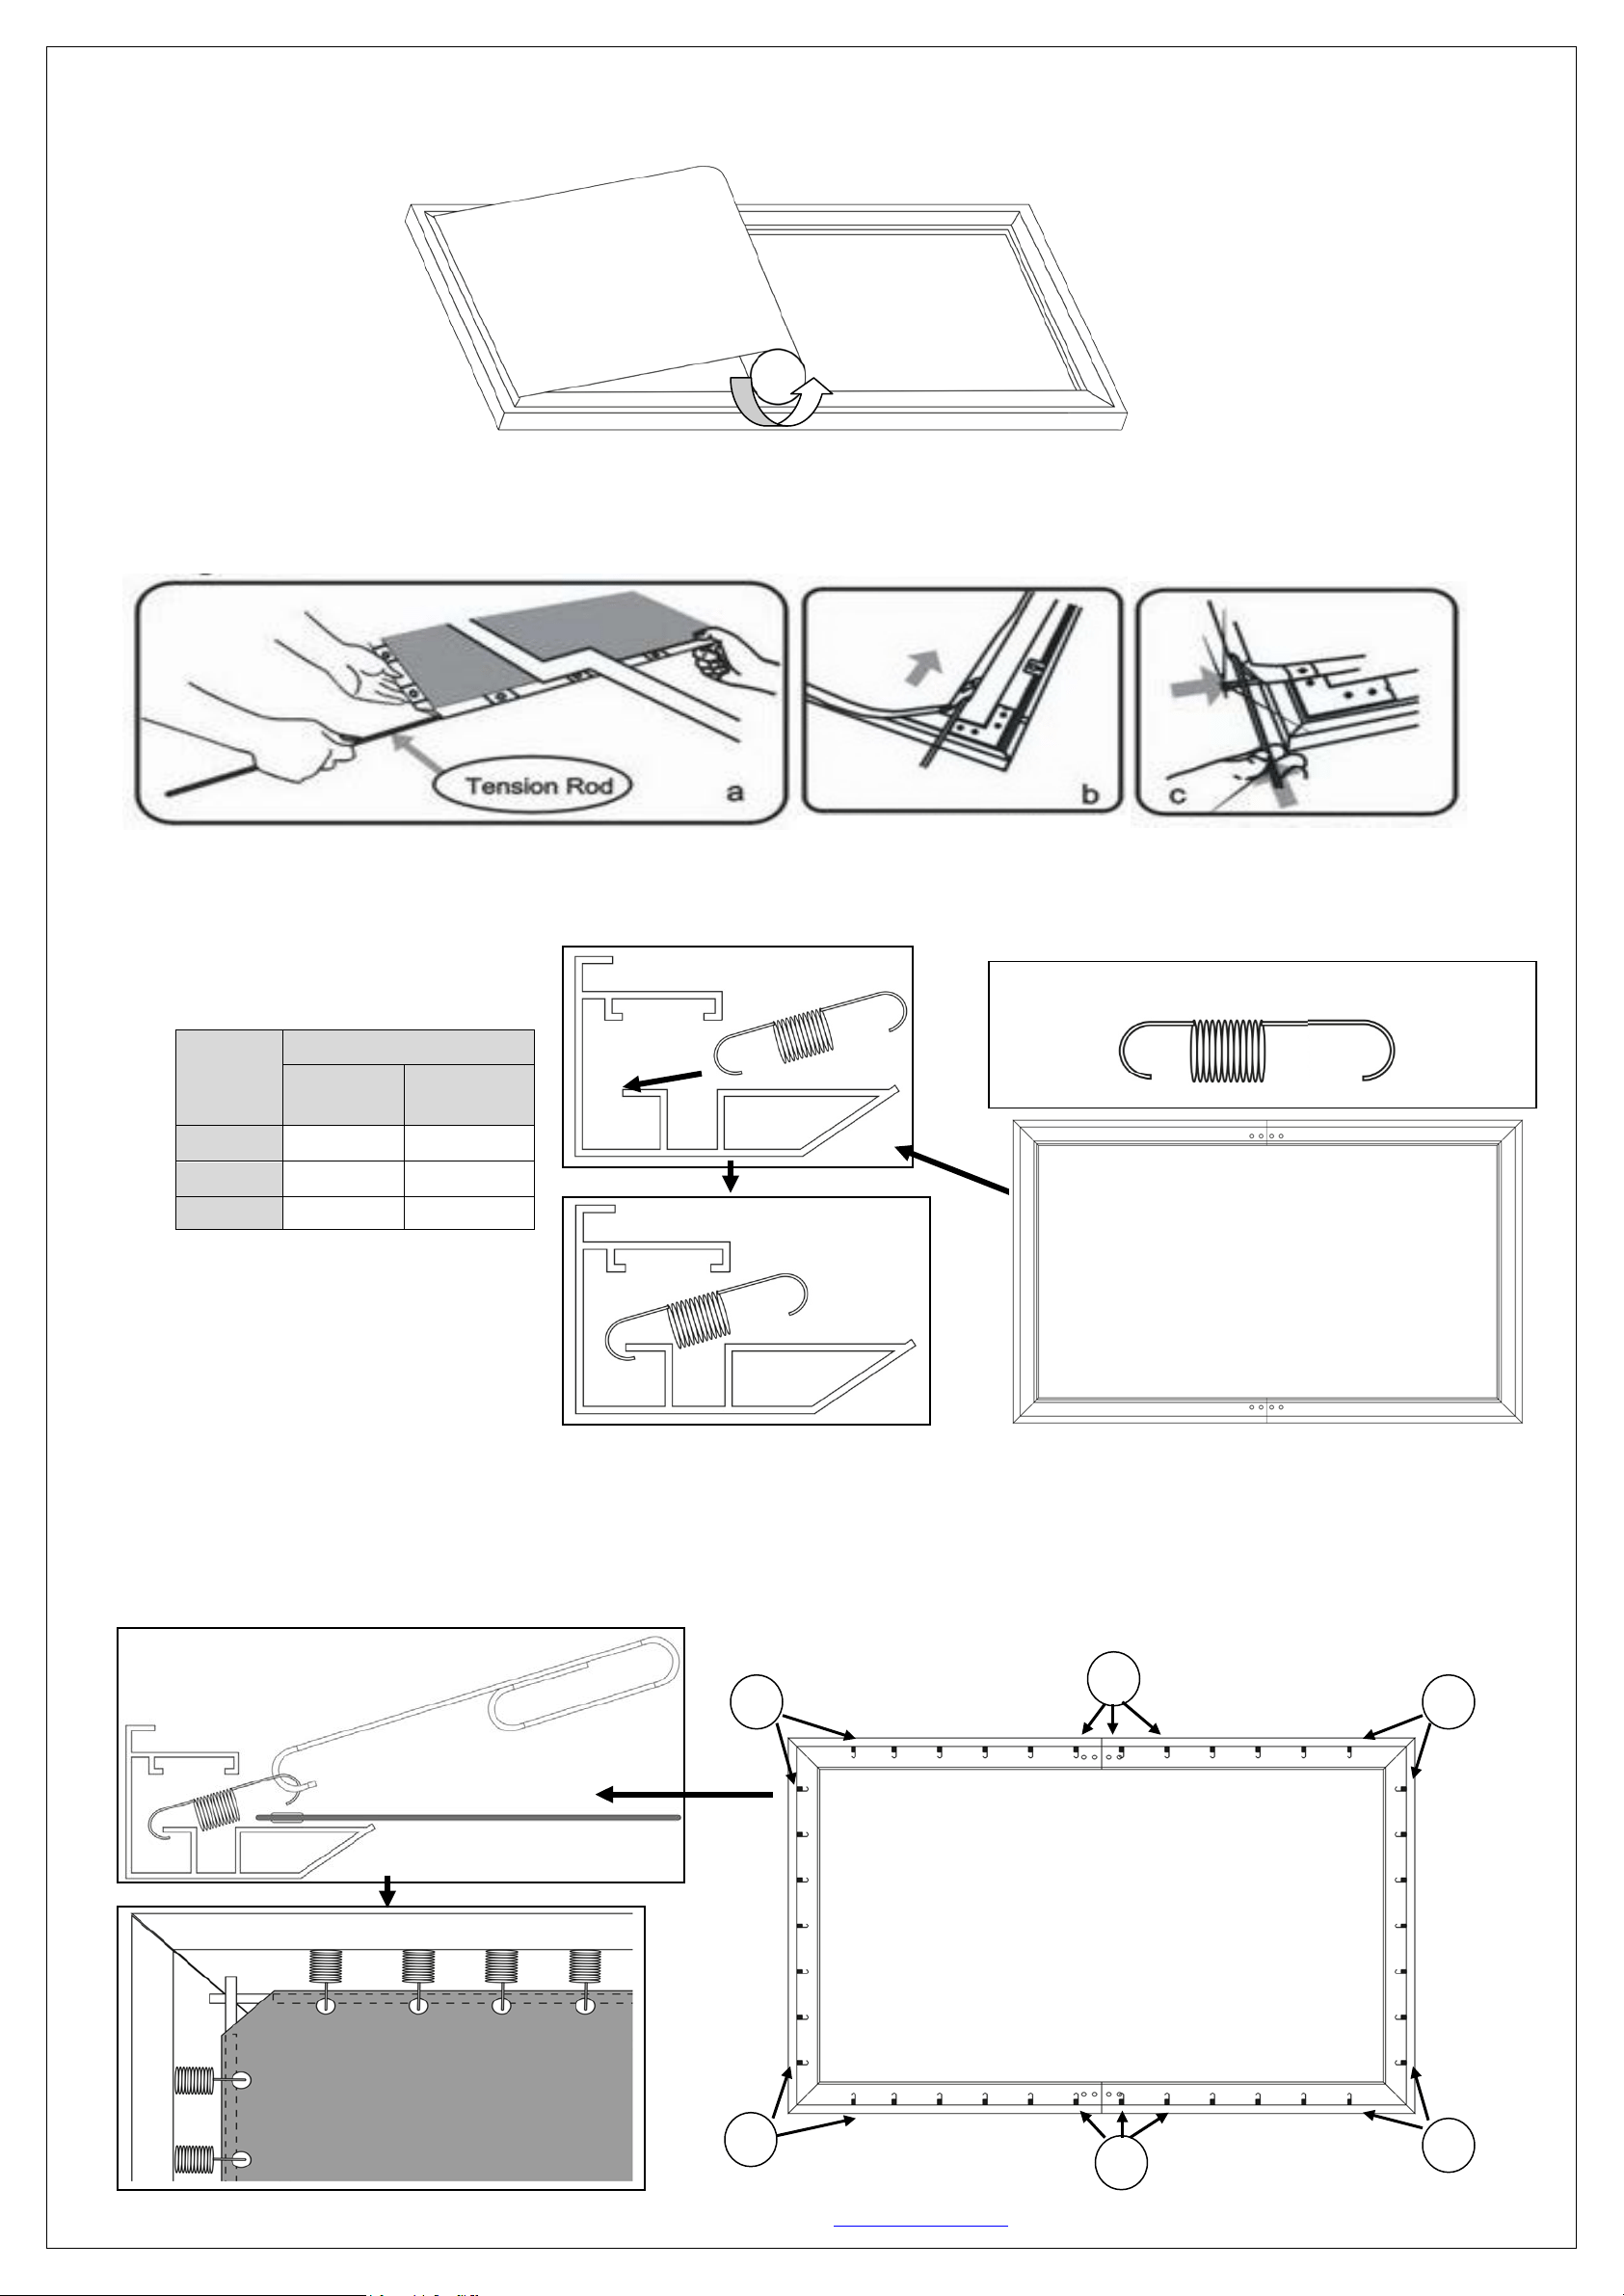
To prevent permanent damage to the screen material, be sure your hands are clean for the next step.
Step 5. Carefully unroll the screen material face-down on, top of the assembled frame, from one side of the frame to the
other side as shown below.
Step 6. Insert the four horizontal and two vertical Tension Rods (I) into the corresponding sides of the screen material, while
keeping the material laying flat. Careful not to snag on the holes at the edge of the material during this process; forcing
the rods may damage the screen material.
Step 7. Insert the Springs (B) into the grooves of the frame. Line them up with the corresponding holes in the materials
edge. Be sure the shorter hook on each spring is placed in the frame's groove, while the longer hook attaches to the
material. For the correct amount of springs to place into the frame, please refer to the table listed below.
Step 8. With one end of the spring placed inside the groove of the frame, hook the Spring (B) through the hole located
on the screen material’s outer edge. Be sure to hook the Springs (B) onto the Tension Rod (I) to avoid damage to the
screen material. Use the Pull Hook (E) when necessary. Attach the four corners and center horizontal sections of the
material (1).
Screen
Size
Qty
Horizontal
Spring
Vertical
Spring
100”
24 14
120”
28
16
135”
32
18
1
1
1
1
Short side
hooks to
frame.
Long side
hooks to
material.
1
1
Back Side
Loading ...
Loading ...