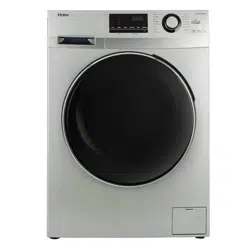
Haier HW70-B12636 Washer

User Manual

For HW70-B12636. Additionally, the document applies to other Haier models: HW80-B12636, HW80-B14636, HW100-B14636

PDF File Manual, 23 pages, Read Online | Download pdf file

HW70-B12636 photo
background
Loading page 2...
Loading page 3...
Loading page 4...
Loading page 5...
Loading page 6...
Loading page 7...
Loading page 8...
Loading page 9...
Loading page 10...
Loading page 11...
Loading page 12...
Loading page 13...
Loading page 14...
Loading page 15...
Loading page 16...
Loading page 17...
Loading page 18...
Loading page 19...
Loading page 20...
Loading page 21...
Loading page 22...
Loading page 23...

Other documents for Haier HW70-B12636

The following documents are available:
User Manual Photos

Specifications

User Manual - Transcript

  • Page 2 - English - : Thanks for purchasing a Haier Product Please read these instructions carefully before using this appliance. The instructions contain important information which will help you get the best out of the appliance and ensure safe and proper installation. use and maintenance. Keep this manual in a convenient place so you can always refer to it for the safe and proper use of the appliance. If you sell the appliance. give it away. or leave it behind when you move house. make sure you also pass on this manual so that the new owner can become familiar with the appliance and safety Accessories Check the accessories and literature in accordance with this list: 1x Drain hose bracket 1x User Manual 1x Inlet hose assembly (7 ~ 5x Blanking Plugs Pag a ~©8£ | })} eo ;
  • Page 3 - English - : UD ea gic en gira yy dsr eiet cin allantenie ar arg seal ean nies citebatecacetci Mich Sid aS SUCH eta aa Sar cease 3 Bigot bige eeee e ee a tee FOS aie artical IN SIT NEE a ei eg ed sd pu aR a eA g FROGS OER iis sisi isis uaa eaeSb van adesaeed dawsindnns rae daas ibecbadaaeeaiaaaiaas SR wie (@) Optional A Warning!|mportant safety information! General information and tips The presence of this symbol on the product. accessories or materials that goes with this information indicates that at the end of its useful life the product should not be disposed with other household waste.To prevent possible damage to the environment or human health from uncontrolled waste disposal. please separate these items from other types of waste and recycle them. This will promote the sustainable reuse of material resources. Household users should contact either the retailer where they purchased the product or the relevant local authorities to find out how they can take this item for environmentally safe recycling and safety. Business users should contact their supplier and check the conditions of the purchase. This product and its electronic accessories should not be mixed with | other commercial waste.
  • Page 4 - English - : Before switching the appliance on for the first time This appliance can be used by children aged from 8 years and above and persons with reduced physical. sensory or mental capabilities or lack of experience and knowledge if they have been given supervision or instruction concerning use of the appliance in a safe way and understand the hazards involved. Children shall not play with the appliance. Cleaning and user maintenance shall not be made by children without supervision. Children of less than 3 years should be kept away unless continuously supervised. Make sure that the transport bolts are removed. Use a Separate earthed socket for the power supply. Make sure that the plug is always accessible. Hold the plug and not the electric cable when unplugging the power supply. Make sure that the fuses in the power circuit are rated for 13A. Keep it away from heat sources and direct sunlight to prevent plastic and rubber components from aging. Make sure that the power cable is not caught under or in the appliance and avoid damage to the power cable. Check that hose joints and connections are firm and with no water leaking. If joints are not firm there will be leakage. turn off the water supply and refix it. Do not use the washing machine until the hoses are totally fixed. Touch or use the appliance when barefoot or with wet or damp hands or feet. Use flammable detergent or dry cleaning agent. Use any flammable sprays in close vicinity to the appliance. Remove or insert the plug in presence of flammable gas. Allow children or infirm persons to play with the appliance or packing materials. “ *® KX K K Install the appliance outdoors in a damp place. or in an area which may be prone to water leaks such as under or near a sink unit. In the event of a water leak allow the machine to dry naturally. * Place the washing machine directly on a carpet. or close to a wall or furniture. During daily use of the appliance Y pull up zips and fix loose threads to prevent the items from being entangled. If necessary. put small items into a small bag or net.
  • Page 5 - English - : v Turn off the machine after each wash program and switch it off at the mains to save electricity. and for safety. Wipe clean the lower part of the porthole. v Keep the door slightly open when the washing machine is not in use to prevent formation of v let the power cord be replaced by the manufacturer. his service agent or other accordingly qualified people. in case it is damaged. Touch the washer door during the washing process. it gets hot. Place heavy objects or sources of heat or damp on top of the appliance. * Hot wash foam rubber or sponge-like materials * Open the detergent distribution drawer during the wash cycle. Force the washer door to open. the door is fitted with a self-lock device and will open shortly after the washing procedure is ended. Open the washer door if the water level is visibly over the porthole. Cover the washing machine with a plastic cover so that the washing machine cannot dry out when not in use Saving Tips © Achieve the best use of energy. water. detergent and time by using the recommended maximum load size © Do not exceed the detergent dosages indicated in the manufacturer's instructions. @) Save energy and time by selecting a high spin speed to reduce the water content in laundry before using a tumble dryer. () Choose the correct washing temperature. Modern detergents can wash with very good result already in lower temperature than 60°C. Only use higher temperature than 60°C for very dirty
  • Page 6 - English - : Before Use Description This diagram may be slightly different from the layout of the washing machine you have just purchased. Detergent/Softener drawer Z 1 Transportation bolts (T1-T4) 2 Panel 2 Back cover 3 Start/Pause 3 Back cover screws (51-54) 4 Worktop 4 Power cord 5 Power 5 Water inlet valve 6 Washer door 6 Drain hose 7 Filer cover 8 Adjustable feet Preparing the machine Remove all the packing materials to prevent unsteadiness. including the polystyrene base. Upon opening the package. water drops may be seen on the plastic bag and the porthole. This is normal phenomenon resulting from water tests in the factory.
  • Page 7 - English - : Installation Warning.The washing machine is very heavy.Use safe lifting techniques Dismantle the transportation bolts The transportation bolts are designed for clamping antivibration components inside of the washing machine during the transportation process. v Remove the back cover. v¥ Remove the four bolts on the rear side and take out the plastic spacers from within the machine. / Replace the back cover. Y¥ Fill the holes left by the bolts with blanking plugs. ZXwhen you replace the back cover. the convex must face to outside. and you have to insert the back cover from the two gaps as shown in fig.5. A Keep the transportation bolts and plastic spacers ina safe place for later use. Adjusting the feet and locking nut There are adjustable feet under the bottom of the washing machine. Before use. they should be adjusted so that the machine is level. This will minimize vibrations and thus noise during use. It will also reduce wear and tear. We recommend using a spirit level to level the appliance. The floor should be as stable and flat as possible. 1. Loose the lock nut (1) by using a wrench. 2. Adjust the height by turning the foot (2) 3. Tighten the lock nut (1) against the bottom of the cabinet.
  • Page 8 - English - : Inlet Hose ¥ Connect the nut on the inlet hose to the connector on the water valve. v¥ Connect inlet hose to.a water tap with cold. fresh water. ¥ Tighten inlet hose connections and turn on water supply.Check for any leaks.Stop all water leaks before continuing with installation. LNuse the hose-set supplied with the appliance. Old hose-sets should not be reused. Drain Hose v¥ Use the drain hose bracket to keep the end of the drain hose retained and prevents the overflow of vw The height of the drainage outlet must be 80cm-100 cm. Fix the drain hose to the clip at the back of the washing machine to prevent it from dropping off. L\the drain hose should not be submerged in water and should be securely fixed and leak-free. lf the drain hose is placed on the ground or if the pipe is at a height of less than 80cm. the washing machine will continuously drain while being filled (self-siphoning). Drain hose is not to be extended.If necessary. please consult a serviceman or plumber. Connecting to Power Supply Before connecting to the power supply. check: v The socket is adequate for the maximum power of the washing machine (For safety. fuses in the power circuit should be rated for no less than 13A). v The voltage should meet the requirement on the rating plate. v The power outlet should be capable of accepting the washing machine plug. ¥ Connect the machine to an earthed socket outlet.
  • Page 9 - English - : Control Panel Haier Hotrium 1. Detergent/Softener Drawer 6. Intense button 2. Power Button 7. Extra Rinse 3. Program Selector 8. Delay 4. Wash Temp 9. Start/Pause Button 5. Spin Speed 10. LED Display Operational Functions Ne Function Explication Detergent Open the drawer. three compartments can be seen: /Softener Compartment 1: Prewash detergent(for prewash mode). drawer Compartment 2: Detergent for programs 1 to 15. Compartment :Softener. conditioning agent. The recommendation on the type of detergents is suitable for the various washing temperatures. please refer to the manual of detergent. Power Button Press this button to switch on the washing machine. Press it again to switch it off.Press this button gently for 2 seconds to switch off the machine as buttons are soft touch sensitive. Selector be selected. There are 16 programs available. After a program is selected. the corresponding light will illuminate. Wash Temp Touch this button lightly. the washing temperature will be displayed on the indicator. Select a temperature according to the type of laundry.Note: If there is no indicator light displayed. this means cold wash. Spin Speed Touch this button lightly to select the desired speed. When a speed is set. it will be displayed on the indicator.Note: If there is no indicator light displayed. this means no spinning. © Different water temperatures and spinning speeds can be set for different clothing. Wash using the default settings if there is no special requirement. Intense button If the laundry isvery dirty. press this button before starting the program. When the button is pressed. the washing time increases.
  • Page 10 - English - : Extra Rinse Press this button. the washing machine will perform additional rinses.Press the button once to select one additional rinse. The display will show"P-1". Press the button repeatedly and the screen will display "P-2"'or "P-3". indicating two or three additional selected rinses. The "extra rinse light" is activated and flashes during the performance. "P-1/2/3" is displayed alternating with the remaining time. The light turns off and the display disappears when the extra rinse ends. () You can select if you require this function when programs 1-15 are used. Touch this button lightly. the washing machine will start operation after a period of time and the corresponding indicator will go on. The range is 0.5-24 hours; each touch of this button increases a half hour. After the button is set. press the Start/Pause button to start countdown of the set time (the time is displayed on the screen until the program ends). The delay time must be longer than the program time otherwise the washing machine will start the wash program directly. Start/Pause When the washing machine is connected to the power socket and a Button program is selected. lightly touch this button to start operation. During a wash cycle. touch it lightly. peration will stop and the digits on the screen start blinking. Touch it again to resume operation. To cancel a wash program during a wash cycle. touch this button. when the digits on the screen start blinking. press the Power switch. the program will be cancelled. LED Display Information as remaining wash time and error messages will be shown here. After a wash program Is started the display will go on and the remaining wash time decreases. As the water pressure and temperature may differ. the remaining time may be adjusted accordingly. When the laundry is not balanced during spinning. the time may be automatically prolonged. To cancel audible alarm Alarm sound can be cancelled if it is required (not recommended) Switch on the washing machine and turn the program selector to spin cycle. then press the "Delay" and “Extra rinse" button. hold on for 3 seconds. The message "BEEP OFF” will be displayed on the screen. indicating that the alarm sound has been cancelled. To reinstate audible alarm Switch on the washing machine and turn the program selector to spin cycle. then press the "Delay" and "Extra rinse" button. hold on for 3 seconds.The "BEEP ON" message will be displayed on the screen. indicating that the alarm sound has been reinstated. Speed Up Function press “Extra rinse"and"Delay”at the same time for 3 seconds. hen the display shows “SPEED uP" (displayed sequentially) to confirm this function is activated.To cancel press the 2 buttons again to cancel the “SPEED uP’function.
  • Page 11 - English - : Program Modes 1 Detergent compartment for prewash mode 2 Detergent compartment 3 Compartment for softener Programme Temp. Preset Fibre Type Preset Spin Speed up 1 Cotton 9c 630 2 ¥ «© & Cotton /Synth 1400/1200 y 2 Synthetic 60°C 30°C yY © Sane. i260tam 2g 3 Mix 60°C 30°C ¥Y @® «x _~ Cotton /Synth 1000 rpm v 4 Wool & 40°C --- Y © Woolen 800 rpm x 5 Under wear 60°C 40°C ¥v @ «x«* Underwear 1000 rpm v 6 Sport 40°C 20°C ¥Y © Sports Wear 800 rpm x 7 Jeans 60°C 30°C ¥Y © Jeans 1000 rpm v 8 Hygienic 90°C 90°C Y © Cotton 1000 rpm v 9 Fast 40°C 40°C ¥Y © Cotton 1000 rpm x 10 Express 15 min 40°C ao Y Cotton /Synth 1000 rpm x 11 Daily Wash 60°C 30°C ¥ © Cotton fabrics 1000 rpm vw 12 Baby Care 90°C 40°C ¥Y © Cotton /Synth 1000 rpm v 13 Delicate/Silk 30°C 30°C vy © Silk 800 rpm x 14 Hand Wash 30°C 30°C ¥ © Cotton fabrics sea (e00 x 15 Duvet 40°C 40°C ¥Y @© x ~ Cotton 800 rpm v 16 Spin --- --- x x & --- 1000 rpm x Yes vv Optional ©) x
  • Page 12 - English - : Consumption Table Max.Load wee! [Wash Time Spin Performance | Program Temp. HW70-812636 HW70-B12636 HW70-812636 | HWw70-812636 | HW70-812636 HW20-612636 HW0-B12636 HW80-B12636 |HW80-812636 | HWs0-812636 HW 80 -B 1463.6 HW80-B 14636 HW80-B 14636 HW80-B 14636 HW#80-8 14636 HW 100-8 14636 HW100-B 14636 HW100-B14636 HW100-B14636 7 HW100-814636 [seals I | Hee eae aot ete |} face |e | [oo ee TC” | rare | OUT | casnnona $2335 [ 2 _] © The standard 60 °C and 40 °C cotton programs are suitable to clean normally dirty cotton laundry and they are the most efficient programs in terms of combined energy and water consumptions for washing that type of cotton laundry; The actual water temperature may differ from the declared cycle temperature. * Energy Label Program Settings: 1."Cotton +40°C+Intense+Max speed” 2." Cotton +60°C+Iintense+Max speed" Choose the best Detergent | Wool ft |Underwearf[ L/P Tseans |_| | Hygienic JP Baly Wash] uP [BabyCare ft /P Delicate/Silk | ow oy] Hand Wash | « J PO Optional Pp -TCU CN If using liquid detergent. it is not recommended to activate the delayed start. The amount of detergent required please refer to the detergent packaging. Info:Modern washing detergents work at low temperatures.
  • Page 13 - English - : Washing Methods As this washing machine is for domestic use only. lf the machine is used for commercial purpose the guarantee will not be valid anymore. Do not use it for purposes other than that for which it was designed. Follow the instructions given on the label of each garment and wash only machine-washable garments. Power Supply Connect the washing machine to the power supply (220V to 240V~/50Hz). Water Connection Turn on the tap. The water must be clean and clear. — Ss © Before use. check for leaks in the joints between the tap and the inlet SS hose by turning on the tap. fe th Preparing the Laundry i] Sort out clothes according to fabric (cotton. synthetics. wool or silk) and to how dirty they are. PT Je Separate white clothes from colored ones. Wash them first by hand to check 4 5 if they fade or run. Garments without hems. underwear. and finely woven textile such as fine curtains are to be put into wash bag {it is better not to wash them ina washing machine). Close zippers and hooks. make sure the buttons are sewn on tightly and place small items such as socks. belts. bras. etc. in the wash bag. Unfold large pieces of fabric such as bed sheets. bedspreads. etc. Turn shirts inside out. © Attention: Small parts (like buttons. etc) may lead to repair work which user has to pay and can cause damage in the machine. Empty pockets (keys. coins. etc.) and remove the harder decorative objects {e.2. brooches).
  • Page 14 - English - : Loading the appliance Open the washer door put in the laundry piece by piece. Close the door tightly. When using the washing machine. for the first time let it run unloaded for one program to prevent the laundry from being tainted by oil or dirty water from the washing machine. Before washing you should run the machine. but with detergent. with 60°C program. Do not overload the washing machine.Note the different maximum load according to programmes.Rule of thumb for maximum load: Keep six inches between load and drum top.Close the door carefully. Make sure that no pieces of laundry are pinched. Selecting Detergent The washing efficiency and the performance is determined by the quality of detergent used. Special non-foaming detergent produces good washing results. Use specific detergents for synthetic and woollen goods. Do not use dry cleaning agents such as trichloroethylene and similar products. Lddo not add more detergent than needed; otherwise. it may cause the situations as following and washing machine malfunction impacting washing machine's life. &\ Due to the increasing foam. the rinse time will be longer than normal: £. The foam may overflow from the detergent drawer because of the increasing pressure of A. \t may remain foam without cleaning out after the final spinning cycle. © Recommendation: © Clean the detergent drawer once a week. © Please follow the dosage recommendation on the powder or liquid detergent package. Adding Detergent Slide out the detergent drawer and put the required detergent and softening agent into the corresponding compartments. Push back the drawer gently. (Refer to the instructions on the drawer) Aduse liquid detergent according to the instructions on its package. PDA x not use liquid detergent if "Delay" is selected. NY © Do not overuse softener; otherwise. it will damage the artificial Re hi
  • Page 15 - English - : Selecting program To get the best washing results. an appropriate washing program should be selected according to the laundry type. Please turn the program knob to select the right program. Selecting function Select the required options. (Refer to the "Control panel" pages 8. and 10) Setting washing temperature Press and hold down the temperature button until the desired temperature is selected. Setting spin speed Press and hold down the speed button until the desired speed is selected. See "Operational functions" on the “Control panel” pages (8. and 10) for selecting temperature and spin speed. It is advisable to select the recommended value. Press the Start/Pause button. The washing machine will operate according to the preset programs.The washing machine will stop operation automatically when a washing cycle ends. The "End" sign will appear on the display. Open the washer door and take out the laundry.To cancel a program. Press the "Start/Pause" button. then switch off the power and the program is automatically cancelled. Turn the program selector again to choose another program. Child lock Control panel lock function: Press the " Temp."and the"Intense’ buttons simultaneously for 3 seconds after starting a program. When the function be activated. it will display "clok”. It can no longer be changed by operating buttons. —= i ——! To unlock press the" Temp.and the" Intense buttons again for 3 seconds. —<——————
  • Page 16 - English - : Care Chart Machine Wash. 4 Hand Wash Tumble Dry. ) HEAT Do Not ra iron. Steam or Dry. with COLD a Turia Dry HEAT Machine Wash. Do Not Wash Pas) Tumble Bry LOW HEAT Ling Dry iron. Steam: or Din. with {ed wane Pt Ke) A CA Mebum Hear Machine Wash. AN Bleach as needed a] Tumble br. MEDIUM 7] Grip Dry Iron. Steam or Dry. with ey HOT 4 Any bleach. like Clorox®. HIGH HEAT Machine Wash. COLD may be safely used Tumble Dry. HIGH [=] Dv eet Do Not tron Permanent Press ce with Steam EJ Machine Wash. WARM Non-chlorine Bleach a5 needed Tumble Dry. ermanent & Don't dry clean * Do Nat Iron Permanent Press Use only a color-safe bleach. = Press. NO HEAT “t Machine Wash. OT Ihe Clorox 2° G Tumble Dry. Permanent I Dry on clothes hanger Dryclean May appear with additional leet. Permanent Press past Press. OW HEAT letters and/or lanes Take this item to Machine Wash. OLD Do Not Bleach Za] Tumble Ory. Permanent Tumble dry. Medium heat a professional drycleaner Gentle Cycle No beach product should be Press. MEDIUM cE. Do Not Oryclean Machine Wash. WARM used including detergents with 7 7 j Lardnne git Sao : bleach - or follow bleach packape L ) oe ee CG aeeetanes (A) ene eae | Machine Wash. HOT safety. If) Tumble Ory. Gentle Cycle. Don't tumble dry Dry cleaning with pericoride Gentle Cycle Da} LOW HEAT Ei ® Wool Mark fas) Tumble Dry. entle Cycle. & =| MEDIUM Load Reference Material Made of Load in grams Bed Sheet Approximately 800 Blanket Wool Approximately 3000 Blended fabric clothes / Approximately 800 Jackets Cotton Approximately 800 Jeans / Approximately 800 Overalls Cotton Approximately 950 Ladies Pyjamas / Approximately 200 Shirts / Approximately 300 Socks Blended fabrics Approximately 50 T-Shirts Cotton Approximately 300 Underwear Blended fabrics Approximately 70
  • Page 17 - English - : Maintenance Cleaning and Care After washing Turn off the water supply and remove the electrical plug after each wash. Open the washer door to prevent formation of moisture and odors. If the washing machine is left idle for a long period. drain the water in the machine and replace the drain hose. Cleaning the detergent drawer Take always care there are no detergent residues. Clean the drawer regularly : 1. Pull out the drawer until it stops. 2. Press the release button and remove the drawer. 3. Flush the drawer with water until it is clean and insert the drawer back in the appliance. Cleaning the machine Unplug the machine during cleaning and maintenance. Use a soft cloth dampened with soap liquid to clean the machine case and rubber components. Do not use organic chemicals or corrosive solvents. Cleaning the filter Clean the filter once a month: 1.Turn off and unplug the machine.(Fig.1). 2.Open service flap. You can either use a coin ora screwdriver.(Fig.2). 3.Provide a flat container to catch water.There could be big amounts! (Fig.3). 4.Pull the drainhose out and hold its end above the container ({Fig.3). 5.Take the sealing plug out of the drainhose.(Fig.3). 6.After complete drainage close drainhose. and push it back into the machine(Fig.4). 7.Unscrew and remove counter clockwise the pump(Fig.5). 8. Remove contaminants and dirt (Fig.6). 9. Clean carefully pump filter. e.g. using running water (Fig.7} 10.Refix the filter and tighten it clockwise to prevent leaks(Fig. 7). 11.Close service flap. L\the filter must be in place. or it may lead to leakage. PN Place a container under the drain pump filter. to collect any excess water that may come out of the drain pump ———______——__{ 1 }#——
  • Page 18 - English - : Maintenance Water inlet valve and inlet valve filter To prevent blockage of the water supply by foreign substances. clean the inlet valve filter regularly. Moving the machine If the machine is to be moved to a distant location. replace the transportation bolts removed before installation to prevent damage as shown below. ; Remove the back cover. Remove the blanking plugs. Insert the plastic spacers and the transportation bolts. Tighten the bolts with a spanner. Replace the back cover. Long periods of disuse If the washing machine is left idle for a long period. pull out the electrical plug(Ijand turn off the water supply(2). Open the washer door to prevent formation of moisture and odors. Leave the door open while not used. Before next usage check carefully power cord. water inlet and drain hose. Make sure | everything is properly installed and without leackage. In case of power failure The current programme and its setting will be saved. When power supply is restored operation will be resumed. lf a power failure cuts an operating wash programme door opening is mechanically blocked. To get out any laundry water level should not be seen in the glass porthole of the door. - Danger of burns! Water level has to be lowered as described in “Pump filter” .Not till then pull lever beneath service flap until door is unlocked by a gentle click. Afterwards refix all parts. Power-off memory function: In case of abrupt power failure or the need to cut off the power during a program cycle. the present settings will be saved and the preset operation will resume when the power is on again.
  • Page 19 - English - : WET aelaeas Display Codes Display Codes and Special functions Codes Causes Solutions El Drainage error. water not emptied within 6 minutes. for blockage. If error still exists. please contact the maintenance personnel. E? Door is not properly shut. Shut the door properly. and then press the Start/Pause button. F3 Temperature sensor not properly Contact the maintenance personnel. connected or damaged. FA Heater error (Appears at the end of a Contact the maintenance personnel. E4 Water level not met in 7(HW70-B12636) Make sure that tap is turned on. and water /10(HW100-B14636) minutes. If problem still exists. please contact the The height of the drain hose is below 80 maintenance personnel. cm. Install drain hose within 80-100 cm of The drain hose is in water. height. Make sure the drain hose is not in water. F? Motor Error Contact the maintenance personnel. E8 Water exceeds protective level. Contact the maintenance personnel. FA Water level sensor error. Contact the maintenance personnel. FCI Abnormal communication error display Contact the maintenance personnel. board and motor FC2 Abnormal communication error display Contact the maintenance personnel. board and power board End End of wash cycle. 19:30 Status information: Preset time for delayed operation. 1:25 The remaining time is 1 hour 25 minutes. UNb Washing machine has an unbalancedload check and balance the laundry load in the protection function.When unbalanced weight is greater than allowable maximum. Restart with a spin program drum .Also reduce the load if too heavy. the washing machine will not spin and will run at a speed to avoid abnormal vibration AN During the spin process. if too much foam is generated. in order to protect the motor. the washing machine will eliminate the foam automatically; the motor will stop and the drain pump will drain the water continuously for 90 seconds. If it happens more than 3 times. the motor will stop until the end of cycle without spinning.
  • Page 20 - English - : Trouble-Shooting Trouble-Shooting Washing machine fails to operate. Washing machine cannot be filled with water. Machine is draining while being Drainage failure. Strong vibration while spinning. Operation stops before completing wash cycle. Operation stops for a period of time. Excessive foam in the drum. which is spilled to the distribution drawer. Automatic adjustment of the washing time. Spinning fails Poor connection to the power supply. Power failure. The washer door is not properly closed. Machine has not been switched on. The "Start/Pause" button is not pressed. Water tap is not turned on. Water pressure is less than 0. 3 MPa. The inlet hose is kinked. Water supply failure. The program selector is not properly set. The washer door is not properly closed. The inlet hose filter is blacked. K Rw EK OR EK OX The height of the drain hose is below The drain hose is in water. Drain hose is blocked. Drain hose end is higher than 100 em abovethe floor level. The filter is blocked. Not all transportation bolts have been Washing machine is located on an uneven surfaceor is not level. Machine toad is not comect. Water or electricity failure. Washing machine gives an error message. Washing machine Is in soaking cycle? The detergent is not a low-foaming type or for manual wash. Excessive use of detergent. The washing program duration will be Unbalance of the laundry Check connection to the power supply. Check the power supply Close the washer door properly. Make sure the machine is switched on. Press the "Start/Pause" button. Turn on the water tap. Check water pressure. Check the inlet hase. Ensure the water supply. Set the program selector properly. Close the washer door properly. Unblock the inlet hose filter. Install drain hose within 80-100 cm of height. w Make sure the drain hose is natin Unblock the drain hose. * Make sure the drain hose end is lower than 100 cm above floor level. Unblock the filter. Remove all transportation bolts. Make sure the washing machine is on an.even surface and levelled. Reduce amount of laundry in the Check the power supply or water ¥ Check display codes. Press the rinse hold button or the Start/pause button again to cancel it. ” Check if your detergent is appropriate. Reduce amount of detergent in the distribution drawer. This is normal and doesn't affect the functionality. Add clothes or run a spinning Program again.
  • Page 21 - English - : Technical data Product Fiche (according EU 1061/2010) Haier Haier W70-B12636 |HW80-B12636 HW80-B14636 y efficiency class nergy consumption per year (kWh) ” Energy consumption of cotton 60°C. full load (kWhicycle) nergy consumption of cotton 60°C. partial load (kWh/cycle nergy consumption of cotton 40°C. partial load (kWh/cycle Weighted power consumption of the off-mode (1) Weighted power consumption of the left-on mode(W). Water consumption per year (L) *! pin-drying efficiency class * Max.spin speed (rpm) Remaining moisture content (%) *! standard 60°C cotton program” Program time of cotton 60°C. full load (min) 206 Program time of cotton 60°C. partial load(min) — 206 Program time of cotton 40°C. partial load (min) 203 Duration of the left-on mode (min) ee Lem Airborne acoustical noise (washing/spinning | 53/67 freestanding i) Based on 220 standard washing cycles for cotton programmes at 60°C and 40°C at full and partial load. and the consumption of the low-power modes. Actual energy consumption will depend on how the appliance is used. 2) Based on 220 standard washing cycles for cotton programmes at 60°C and 40°C at full and partial load. Actual water consumption will depend on how the appliance is used. 3) Class G is the least efficient and Class A is the most efficient. 4) Based on the standard 60°C cotton program at full load and the standard 40°C cotton program at partial load s) "standard 60°C cotton program" and "standard 40°C cotton program" are the standard washing programms to which the information in the label and fiche relates.These programms are suitable to clean normally soiled cotton laundry and they are the most efficient programmes in terms of combined energy and water consumplion. a) In case there is a power management system 7) Based on the standard 60°C cotton program at full load Basic technical information regarding the appliance. HW/70-B12636 HW80-B12636 HW80-B14636 HW100-B14636 Power source 220V-240V~/SOHz |220V-240V~/50 Hz | 220V-240V~/50 Hz |220V-240V~/50 Hz Max. working current (A) 10 10 10 LO Water pressure (MPa) 0.03sP <1 0.03

  • Page 22 - English - : Do not use a multiple socket extension cord. A separate earthed socket is required which shall be accessible at all times. lf the mains cord becomes damaged. it must be replaced by the manufacturer. its service agent or similarly qualified person with a lead of the sarne type and rating to avoid a hazard. Never remove the plug from the socket by pulling on the cord. always grasp the plug. The door may get hot during use. do not touch it and keep children away whilst the machine is operating. Never open the detergent drawer while the machine is running.Hot water and detergent might be ejected. When installing the product. make sure the mains cord is not trapped or twisted. This appliance is intended for domestic use only. commercial or any other use may invalidate the warranty and might be dangerous . Never touch or operate the machine with wet hands or when bare footed. Do not put the machine on a carpet that can block the ventilation slots on the bottom of the unit. De not install this machine outdoors or ina damp place or expose it to rain. Do not install this product near a heat source or in direct sunlight. Do not place any object on the machine when it is operating. This appliance must be earthed. lf you are disposing of an old appliance. isable the door lock to avoid entrapment of children when playing and cut off the mains cord close to the machine. The appliance must be connected to a 220-240 volts 50 cycle AC supply by means of a three pin socket. suitably earthed and should be protected by a 13 amp fuse in the plug. The appliance is supplied with a standard 13 amp 3-pin plug fitted with a 13-amp fuse. Should the fuse require replacement. it must be replaced with a fuse rated at 13 amps and approved to BS1362. lf the mains plug is unsuitable for the socket outlet in your home or is removed for any other reason. then the cut off plug should be disposed of safely. do not insert the cut off plug into a mains outlet to prevent the hazard of electric shock. Remove the fuse before disposal. There is a danger of electric shock if the cut off plug is inserted into any 13-amp socket outlet. How to wire a 13 amp plug. (UK Only) The wires in the mains lead on this appliance are coloured in accordance with the following code: Green and Yellow - Earth Blue — Neutral Brown — Live As the colours may not correspond with the markings identifying the terminals in your plug proceed as follows. The green and yellow wire must be connected to the terminal in the plug which is marked with the letter E or with the earth symbol or coloured green and yellow. pee) The blue wire must be connected to the terminal marked N. | The brown wire must be connected to the terminal marked L. a. a “i You must make sure the lead is firmly secured under the cord clamp. ke yk l [ia aes | WATER CONNECTION NS The product should be connected to the water main using new hose sets. old hose sets should not be reused. The water pressure must not be less than 0.03MPa. 0.3 bar. .3 psi. Connect to the water main using a standard 3/4 inch threaded tap outlet. —_______________f 1 }
  • Page 23 - English - : After-Sale Service In case of trouble. lease check the trouble-shooting section of this manual.If required please check your warranty card for after sales service information or refer to www.haier.com service and support area.You can find FAQs and can activate service claim. Useful Information Haier Italy AS Phone number; 199-10091? Haier Germany AS Phone number (DE/ AT) ; 01805 39 39 99 / 0820001205 AS Phone number; 0333 003 8172 Haier Republic of lrelang;(IE) 01431 1342 Haier France AS Phone number: 0980 406 409 Haier Spain AS Phone number (ES and PT); 902 509 123 and 707 500 311 Haier BelgiumFR +32 2 808 41 31 BelgiumNL+32 2 808 41 32 Netherlands+31 70 89 12 567 Luxembourg+352 20 880 325 For other countries please refer to www.haier.com