m
TopLoad
ClothesWasher
User ManuQJ- Mod_l#

IMPORTANTSAFETYINSTRUCTIONS
Warning - To reduce the risk of fire, electric shock, or injury
to persons when using your appliance, follow basic
precautions, including the following:
1, Read all instructions before using the appliance.
2, Use this appliance only for itsintended purpose as described in this use and
care guide,
3, Use only detergents or softeners recommended for use in a clothes washer
and keep them out of the reach of children,
4, Thiswasher must be properly installed in accordance with the installation
instructions before it isused,
5, Never unplug your washer by pulling on the power cord, Always grasp the
plug firmly and pull straight out from the outlet,
6, If the supply cord is damaged, it must be replaced by the manufacturer or
an authorised service agent in order to avoid a hazard,
7, Unplug your washer before cleaning or before making any repairs,
8, If your old washer is not being used, we recommend that you remove the
door, Thiswill reduce the possibility of danger to children,
9, Do not operate your washer in the presence of explosive fumes,
] 0, Do not use the washer to wash clothes soaked, spotted or washed in
gasoline, dB/cleaning solvents or any other explosive or flammable
substances that could ignite and explode,
] ], Clothes or rags used to clean flammable or explosive materials should not
be washed in the washer until all traces of this material have been removed,
to avoid an accident,
] 2, Do not add or mix any flammable or explosive substances with the wash,
] 3, Do not try to remove clothes while the tub or the agitator is moving, Let it
come to a complete stop first,
4, Washer loading door must be closed when agitator and tub isspinning
5, Do not operate your washer when parts are missing or parts are broken,
6, Do not use the washer for commercial clothes washing
] 7, Do not operate washer unless all enclosure panels are properly in place,
] 8, Do not tamper with controls,
] 9, To reduce riskof injury do not allow children to play in or on the washer
20, The washer must be connected to a proper electrical outlet with the correct
electrical supply

21Propergroundingmustbeensuredto reducetheriskofshockandfire
DONOTCUTORREMOVETHEGROUNDINGPLUG,tfyoudonot
haveathree-prongelectricreceptacleoutletinthewall,haveacertified
electricianinstalltheproperreceptacleThewallreceptacleMUSTbe
properlygrounded,
22,Hydrogengasmaybeproducedifthewaterheaterhasnotbeenusedin
morethan2weeks,Thiscouldbeexplosiveand can explode under
certain circumstances, If this isthe case, before using the washer turn on
all the hot faucets and let the hot water run for a few minutes, Thiswill let
the trapped hydrogen escape, During this process do not turn on an
electric appliance, smoke, light a match/lighter or use a flame to avoid
an accident, as hydrogen gas isflammable and can explode,
SAVETHESEIN$1'RUCTIONS
ForDtureUse
Risk of child entrapment. Before you throw away your old
washer, take off the door so that children may
not easily get trapped inside.
Thank you for using our Haler
product, This easy-to-use manual will Model number
guide you in getting the best use of
your washer, Serial number
Remember to record the model and
serial number, Theyare ona label in
Date of purchase
back of the washer,
Stable your receipt to your manual. You will need it to obtain
warranty service.
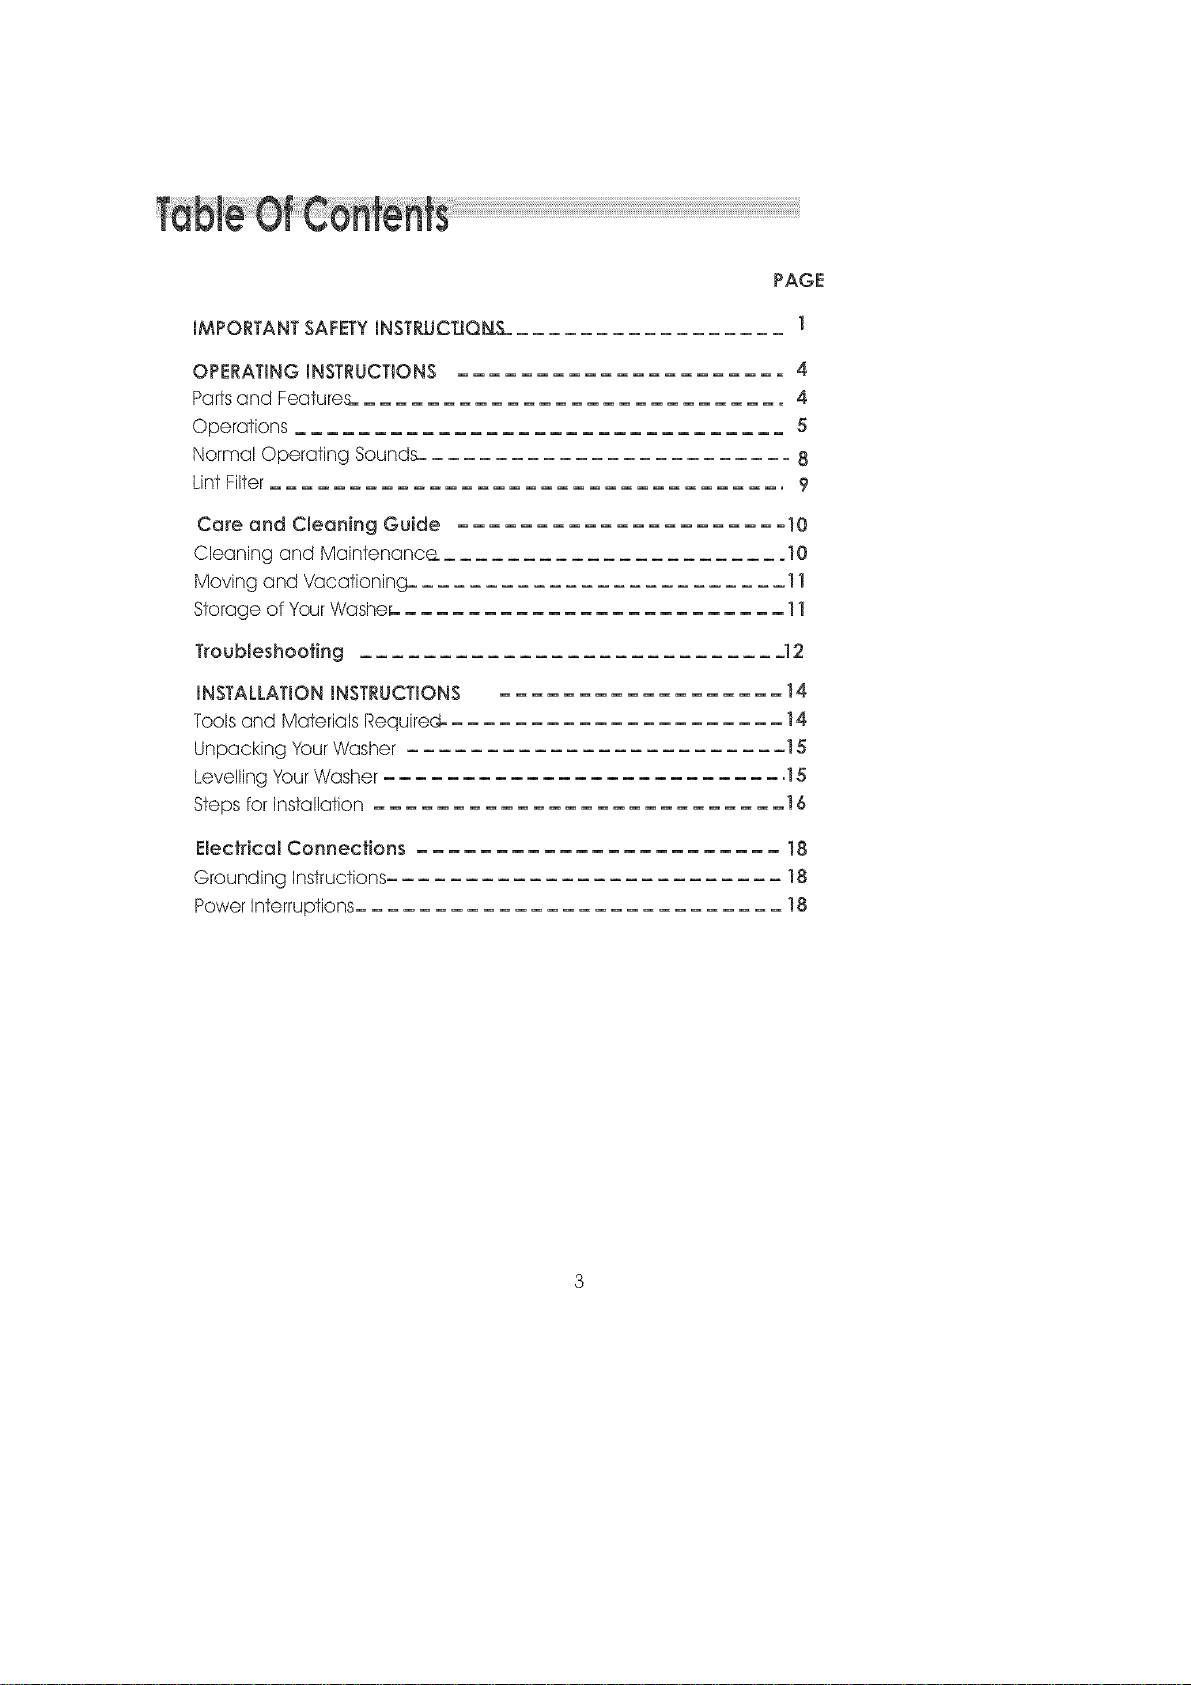
IMPORTANTSAFETYINSTRUCTJQ_
OPERATINGINSTRUCTmONS
PartsandFeatures
Operations
NormalOperatingSounds__
LintFilter
CareandCleaningGuide
CleaningandMaintenancQ
Movingand Vacationin_ _
Storage of Your 'vVashe_
TroubJeshoofing
iNSTALLATiON iNSTRUCTiONS
Tools and Materials Require@
Unpacking YourWasher
Levelling YourWasher
Steps for installation
ElectdcaJ Connections
Grounding Instructions,
Power Interruptions
PAGE
1
4
4
5
8
9
10
.10
11
11
_12
14
14
-15
,15
--16
18
18
18

Parts and Features
ConfroJ Panel
c0,_
@
1, Top lid
2, Control panel 9, Front door
3, Control panel sea}0, Filter, Filtercover
4, Cabinet ] I, Outer tub cover
5, Leveling legs ] 2, Balance ring
6, Inner cover ] 3, Inner tub
7, Door switch 14, Stick
8, Bleach injection inlet15, Pulsator
16, Drain hose joint
] 7, Power cord
18, Cold water inlet valve
19, Hot water inlet valve
20, Back cover
Operations
_el_ TJ,_ _ _Es_J,_I_ TJ,_
. LJ_ _ Coo_/Col_ "_@_,,i__¸¸
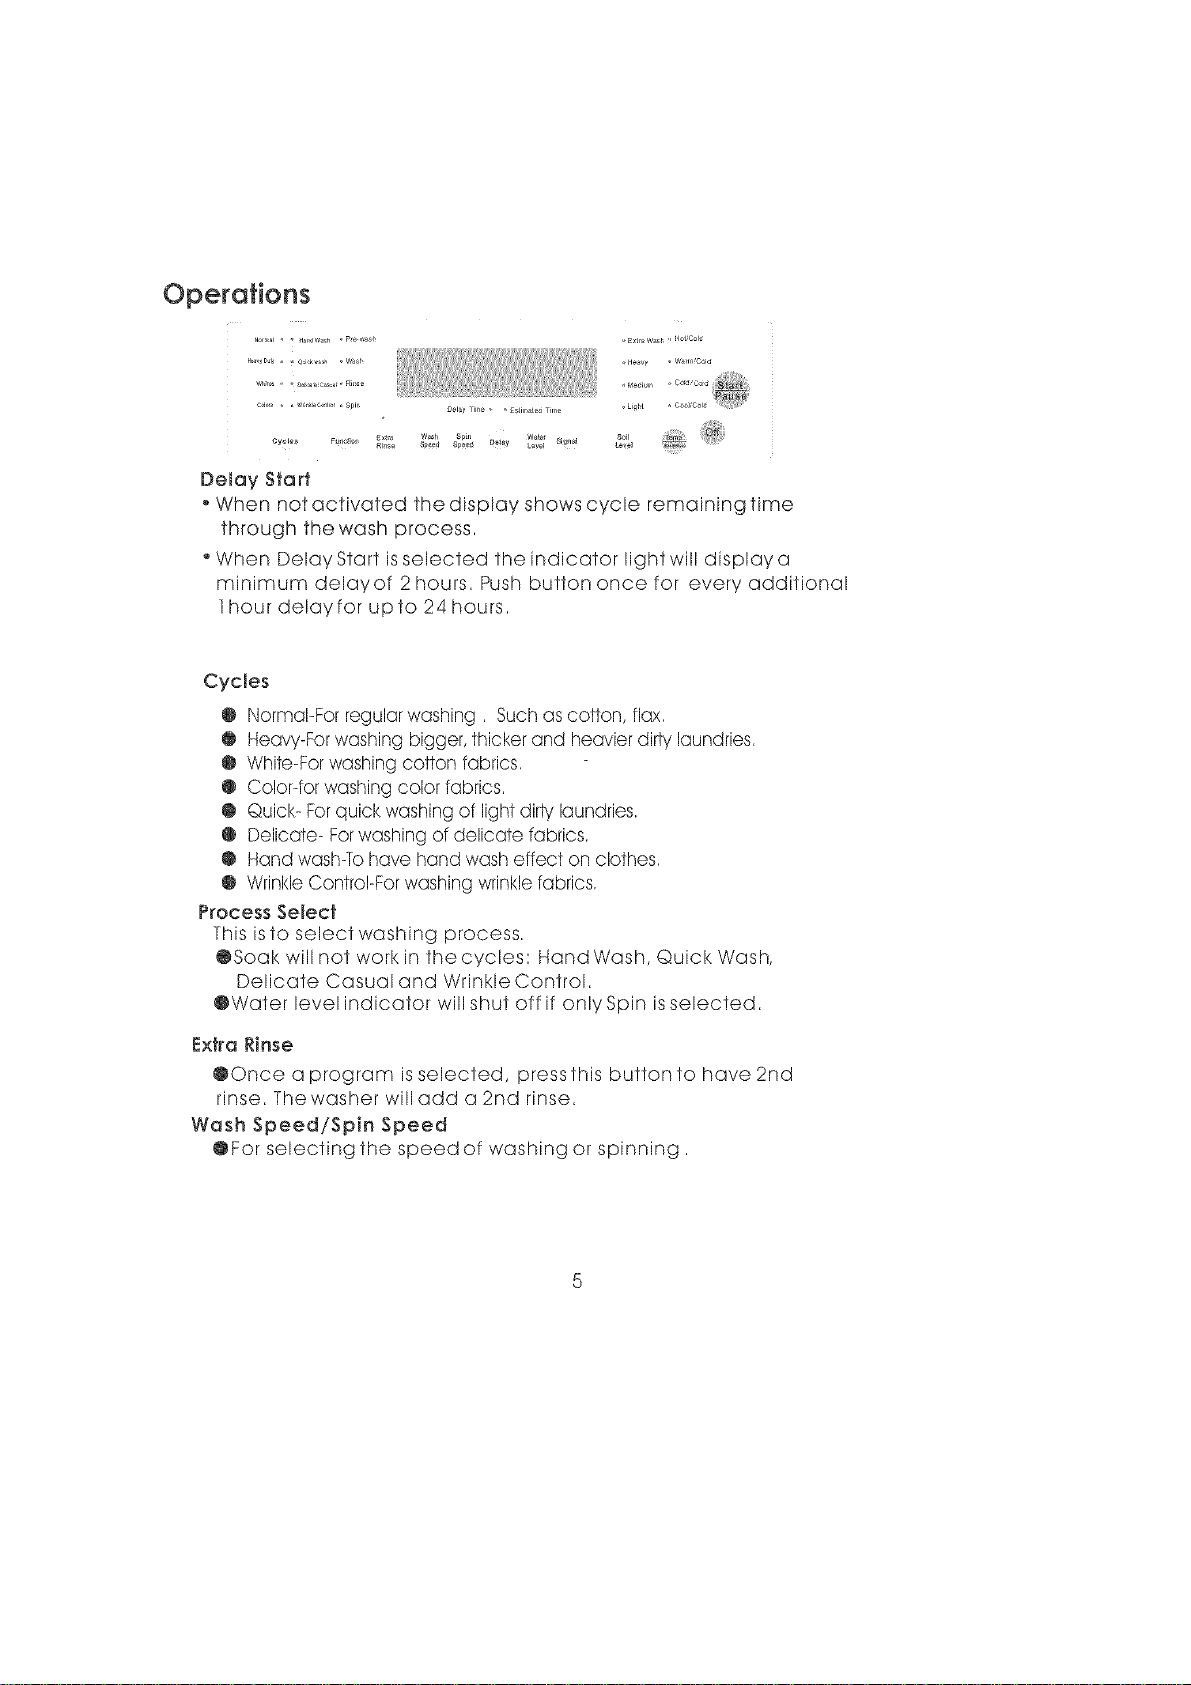
Delay Start
When not activated the display shows cycle remaining time
through the wash process,
"When Delay Start isselected the indicator light will display a
minimum delayof 2 hours, Push button once for every additional
1hour delayfor upte 24 hours,
Cycles
@ Normal-For regular washing, Such as cotton, flax,
@ Heavy-Forwashing bigger, thicker and heavier dirt,/laundries,
@ White-Forwashing cotton fabrics,
@ Color-for washing color fabrics,
@ Quick- Forquick washing of light dirty laundries,
@ Delicate- Forwashing of delicate fabrics,
@ Hand washqo have hand wash effect on clothes,
@ WrinkleControl-For washing wrinklefabrics,
Process Select
This isto select washing process,
@Soak will not work in the cycles: Hand Wash, Quick Wash,
Delicate Casual and Wrinkle Control,
@Water level indicator will shut off if only Spin isselected,
Extra Rinse
@Once a program is selected, pressthis buttonto have 2nd
rinse, Thewasher will add a 2nd rinse,
Wash Speed/Spin Speed
@For selecting the speed of washing or spinning,
Waterlevel
WQterlevelsmQybesetat thebeginningofthewashorQt
pQuse,
DuringSoQk,WQshorRinsepressthisbuttonto mQnuQIly
replenishwQter,ReleQsetostop,FunctionQutomaticallyis
inQctivewhenwQterreQchestheoverflowprotectionlevel,
Cycle Signal
SignQI volume con be Qdjusted softer, louder or off,
Soil Level
Select clothes soil level,
WQsh CyCle increQses 2 minutes for every soil level increQsed
Temperature Wash/Rinse
To selectinlet wQter temperQture forwQsh Qnd rinse,
Power On/Off
Push the "Power On/Off" button to switch the mQchine on or
off,
Start/Pause
Once wQsher is powered Qnd selections ore chosen, push this
button once to stQrtthe wQsh,
While unitis working, push this button onceto pQuse it,
If unitis in PQuse mode, pushthis button once toresume
operQtion,
Delay Start and Estimated Time Indicator
IndicQtes remQining minutes when cycle is in progress,
IndicQtes remQining hours during delQy process,
IndicQtes fQult codes or conditions thQt ore not normQI,
LoadingtheWasher:
Loadeachitemloosely,
Separatethewhiteandcolouredclothes,Separateheawclothesfrom
lightclothes,
Carefullycheckallpocketsandcuffsforsmallitems,
Theycaneasilyslideintothetubandmaydamagethetub,
, Re-treatallstainsandheavilysoiledareasforbestresults,
Do not o:verloadyour washer
. When loading wet items, keep water level high enough so items
can float easily in the wafer,
• Closethe door properly after loading the clothes, Ifyou keep the lid
up, the agitation will not start,
Proper Use of Detergent:
* Itisgood washing practice b add the detergent b the wafer
before you add the clothes sothat the detergent can work
effectively on your clothes,
Note: Youcan use lessor more detergent depending on the sizeof the load,
water lype inyour livingarea, whether the wafer issalt or hard and
whether the clothes are heavily soiledor lightlysoiled,
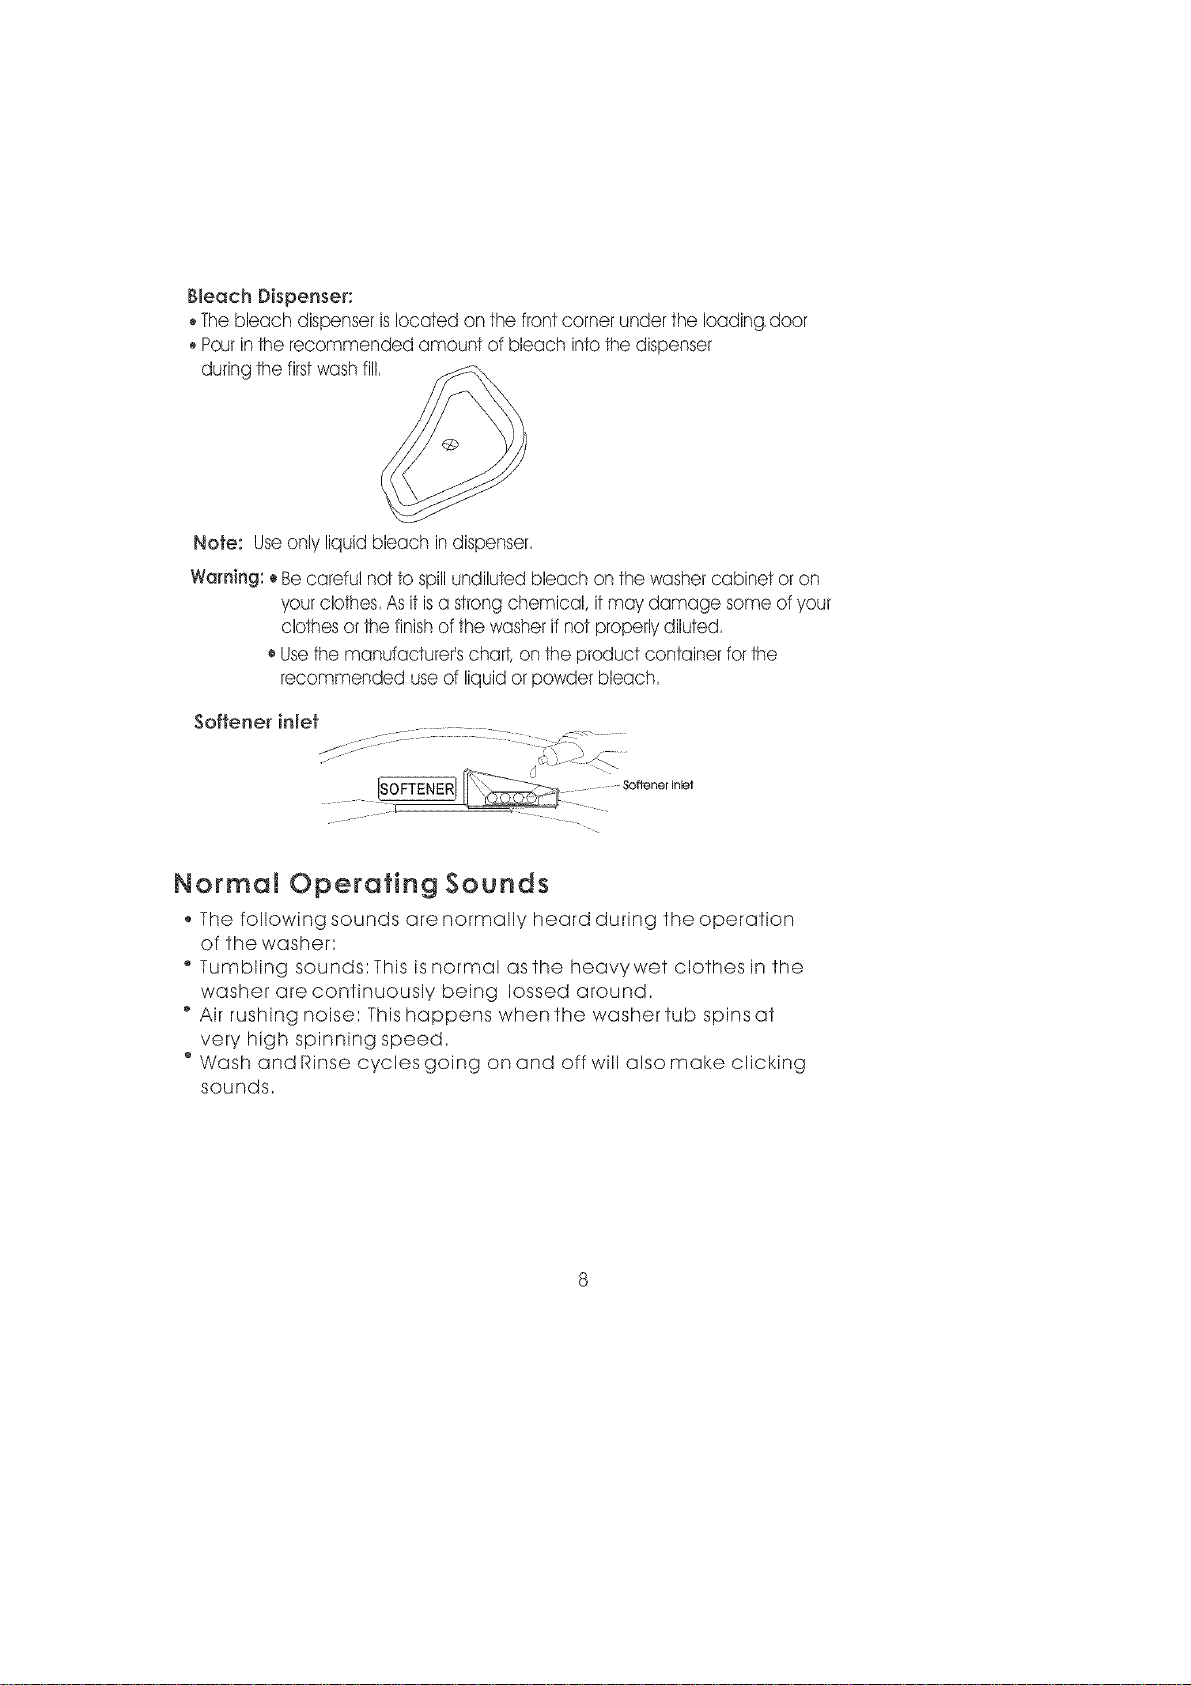
BleachDispenser:
•Thebleachdispenserislocatedonthefrontcornerundertheloading,door
Pourintherecommendedamountofbleachintothedispenser
duringthefirstwashfill,
Note:Useonlyliquidbleachindispenser,
Warning:• Becarefulnottospillundilutedbleachonthewashercabinetoron
yourclothes,Asitisa strong chemical, itmay damage some of your
clothes or the finishof the washer if not properly diluted,
®Usethe manufacturer's chart, on the product container forthe
recommended useof liquid or powder bleach,
Softener inlet
Softener inlet
. LI:I
Normal Operating Sounds
The following sounds are normally heard during the operation
of the washer:
Tumbling sounds: This isnormal as the heavywet clothes in the
washer are continuously being Iossed around,
° Air rushing noise: This happens when the washer tub spins at
very high spinning speed,
° Wash and Rinse cycles going on and off will also make clicking
sounds,
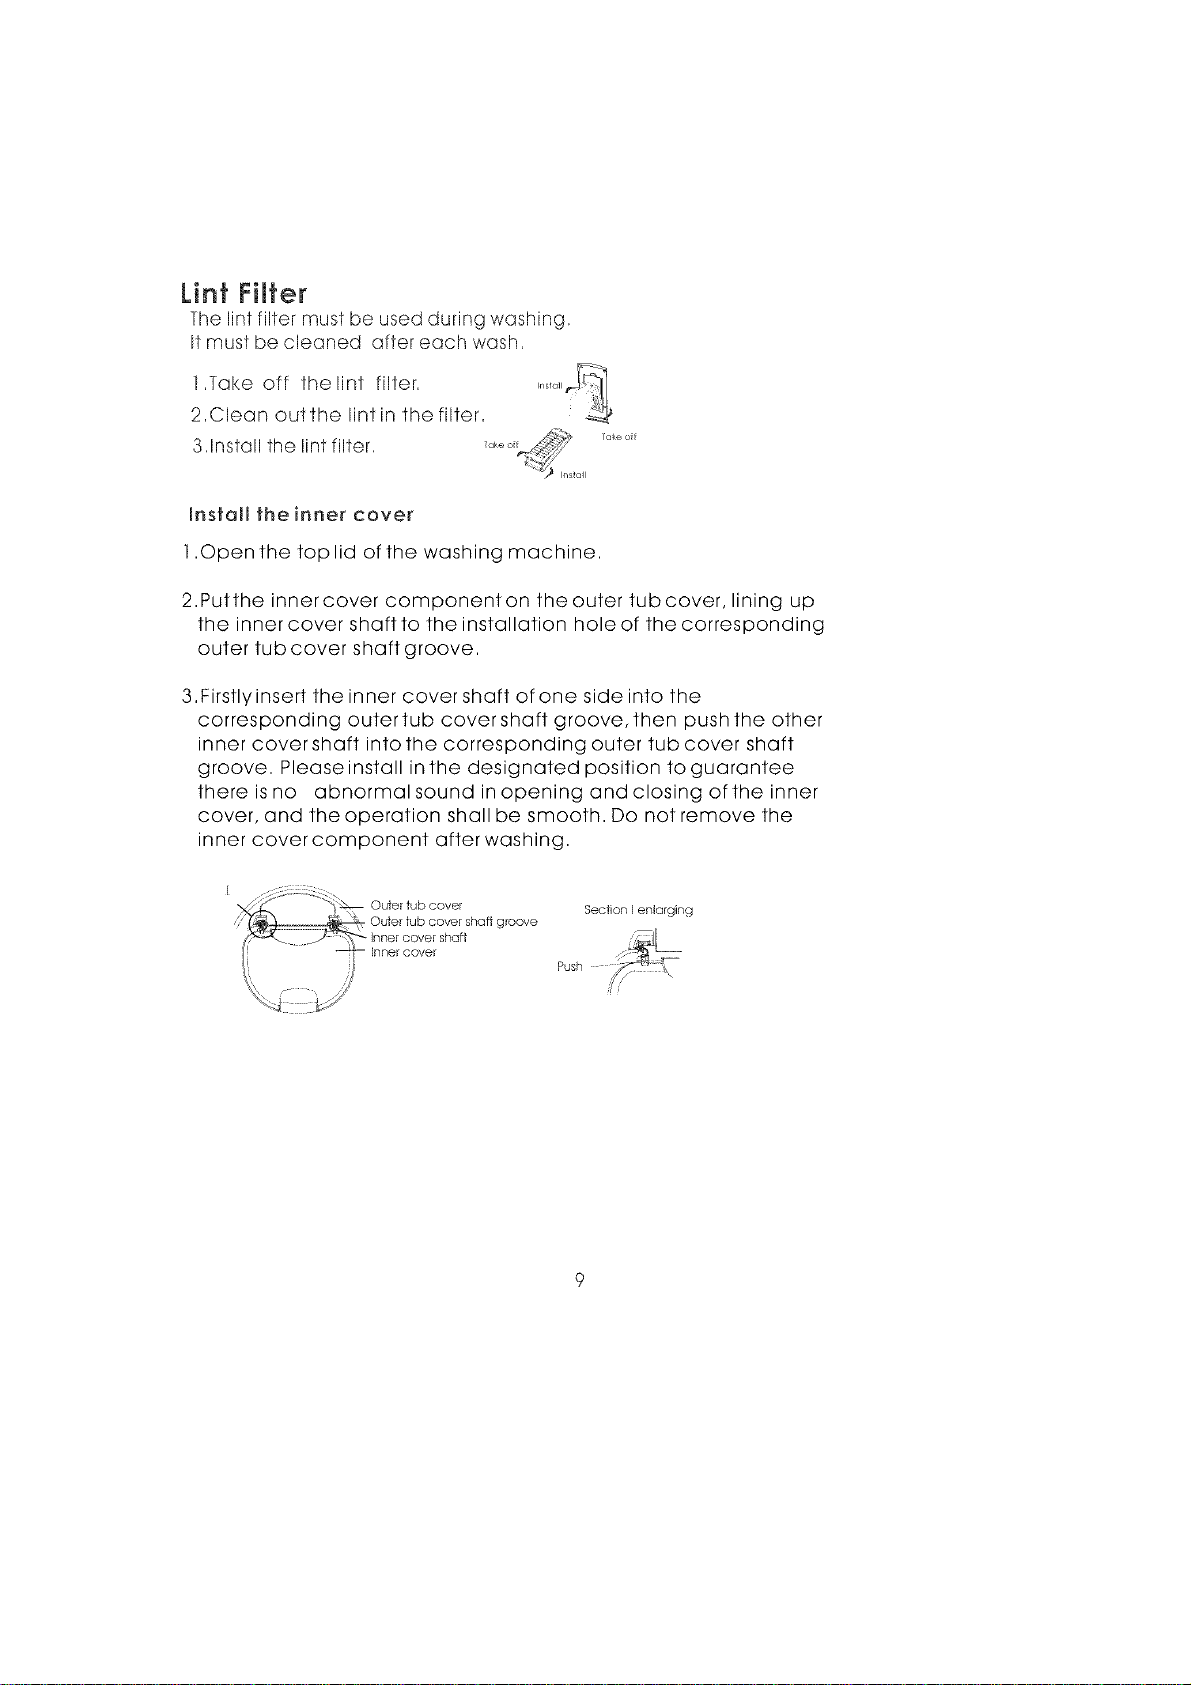
LintFilter
The lintfilter must be used during washing,
It mus_ be cleaned after each wash,
],Take off the lint filter,
2,Clean out the Iintin the filter,
3,Install the lint filter,
TaRe ®f
Install the inner cover
1,Open the toplid of the washing machine,
2,Putthe innercover componenton the outer tubcover, lining up
the inner cover shaft to the installation hole of the corresponding
outer tub cover shaft groove,
3,FirstlyJnsert the inner cover shaft of one side into the
corresponding outer tub cover shaft groove, then push the other
inner cover shaft into the corresponding outer tub cover shaft
groove, Please install in the designated position to guarantee
there is no abnormal sound in opening and closing ofthe inner
cover, and the operation shall be smooth, Do not remove the
inner cover component after washing,
Section I enlarging
Push _ _
Warning: Always unplug yourwasher to avoid electric shock
before cleaning, Ignoring this warning may result in
injury, Before using cleaning products, always read
and follow manufacturer warnings to avoid personal
Injury or product damage,
Cteaning and Maintenance
Use onlydamp orsudsy cloth for cleaning control panel,
To avoidany kind of damageto cabinet finish, wipewasher
cabinet as needed, If you spill liquid/powdered softener bleach
or detergent on the cabinet, wipe cabinet immediately because
it can damage the finish,
Do not use any abrasive, harshchemicals, ammonia, chlorine
bleach, concentrated detergent, solvents or metal scouring
pads, Someof these chemicals maydissolve, damageor
discolor your washer,
Remove pins or other sharp objects from clothes to prevent
scratching of interior parts,
Leave lid open afteryou are done washing to allow inside of
washer to dry and prevent bad odors,
10
Moving & Vacationing
, Turnoff the water supply faucets and disconnect the hoses, Drainwater from all
ofthe hoses,Thiswillprevent damage due to waterleakage ifthe hoses
accidentally get ruptured or they become loose,
o Disconnect the electrical plug
Drythe inner washtub, Ifyou are moving the washer,disconnect the drain hose,
Turnthe levelling legsclockwise all the way in,
* Move and store yourwasher in an upright position only,
. Toprevent mould or mildew, leave the lid open somoisture insidethe
machine can evaporate,
Storage of Your Washer
. Thewasher mustbe stored at room temperature,
Ifyou have received a washerwhen the outside temperature isbelow freezing
do not operate untilthe washer haswarmed to room temperature,
• Do not installoroperate yourwasherwherethe room temperature isbelow freezing,
11
Thewasherdoesnotoperate:
,,Checkiftheunitispluggedin,Theplugmayhavecomeloose,
Checkiftheelectricalwallreceptacleisofpropervoltage,
Checkifthecircuitbreakerneedstoberesetorifthefuse
needstobereplaced,
Checkifthewasherisoverloaded:theloadmayneedtobe
re%alancedandclothesmayneedtoberedistributed,
Checkifthelidisopen,Youmayhavetoclosethelidproperly
Thewasherpausesinsomecycles,Thisisnormalinsome
cycles,whichhasashortsoakperiod,Youwillnothearthe
washerinoperationforashortperiodoftime,When
thesoaktimeisever,itwillstartautomatically,
Problemswith wafer:
Not enough water coming out: Waterfaucet may need to be turned
on fully,Waterhosesmay be tangled or wrinkledup, Straightenup
the hoses,Check the water level selection, it may need to be readjusted,
• Watertemperature isincorrect: Check your water heater temperature,
Hotwater needsto be at a temperature of at least 120F-140F
(49 ha60 0}, Check to make surethe inlethoses are properly
connected,(e,g,hotto hot& coldto cold}
• Waterleaks:Thisisdue to not properly installingthe drain hose or the fill
hoses,Yourhome drain may be clogged or may not have constant
waterpressure,'Youmayneedto tighten hoses,check the
plumbing or call a plumber,
Thewater willnot drain: Thisisdue to not installingyourdrain hose
properly,Youmay need to connect the drain hose properly, Check the
position of the drain hose, Inorder to drain the water properly,;make sure
that the top of the drain outlet islessthan 4ft,(1,2m}above the floor,
12
Washerismaking noise:
Washermayneed tobe reinstalled,(Checkwasherinstallation
section)
Washerloadmayneedto bere-balanced,asthe loadmaybeuneven,
Coins,loosechange, buttonsorotherheavyobjectscould make
noise(readOperatingGuide-NormalOperatingSounds),
Squealingsound:Duetooverloadedwashtub,
VibrationNoise:Duetonotlevelingwasherproperlyonthefloorand
unevendistributionof clothesinthetub,
Problemswithclothes:
Clothesaretoo wrinkled:thisisduetoimpropersorting,overloading
andwashingintoohotwaterrepeatedly,Avoidoverloadingand resort
yourload,Donotmixheavyclothessuchasworkclotheswithlight
clothessuchasblouses,lightshirtsand delicateitems,YOumayneed
to washinwarmorcoldwater,
Havesoapresidue:detergentmaynotbe dissolvinginwater,
Checkwatertemperatureoryouneedto adddetergentaswash
tubisbeingfilledwithwater,
Spotsorstainsonyourclothes:thisisduetoincorrectuseof fabric
softener,Youmayneed to read proper instructions on the container
and follow proper directions when using the softener,
Clothes are grayed or yellowed: this is due to not pouring enough
detergent for large loads, You may have to add more detergent to the
load,
Clothes are ripped & have holes/excessive wear & tear: this is due to
sharp objects such as pins and belt buckles left in pockets, You will
need to remove small loose sharp objects, Fasten belts, zippers,
metal snaps etc, Checkif you are using undiluted bleach, Never add
undiluted bleach to wash,
Note:
Trouble Codes
E0
E1
E2
E4
E7
F2
Reason
Top lid not dosed during delay start sequence
Blockage of drain hose
Top lid not closed during wash operation
The water inlet time exceeds the preset time
(30rnlnutes)
The communication isbad
The protection ofwater overflow
13
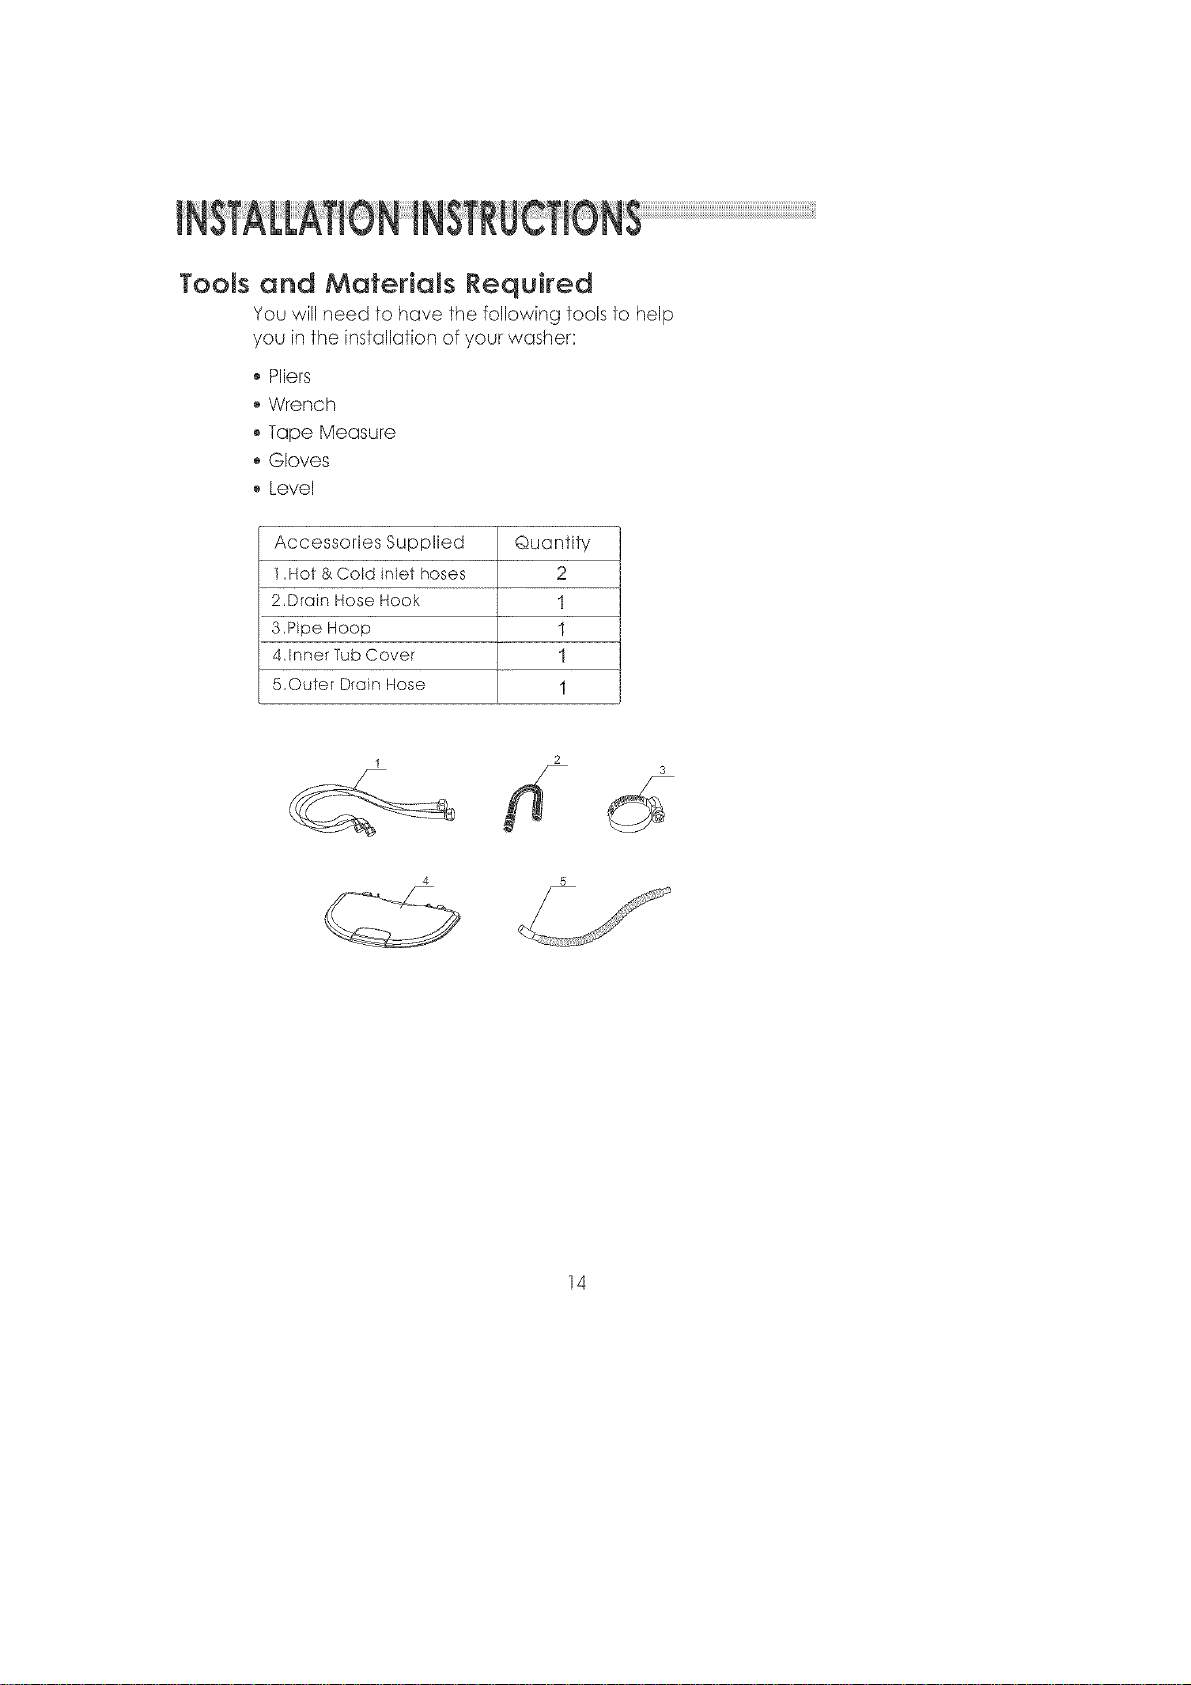
TooJs and Materials Required
You will need to have the following fools to help
you in the installation of your washer:
o Pliers
° Wrench
° Tape Measure
Gloves
• Level
Accessories Supplied
1,Hot8<Cold inlet hoses
2,Drain Hose Hook
3,Pipe Hoop
4,Inner TubCover
5,Outer DrainHose
Quantify
2
1
I
1
I
4 5
14
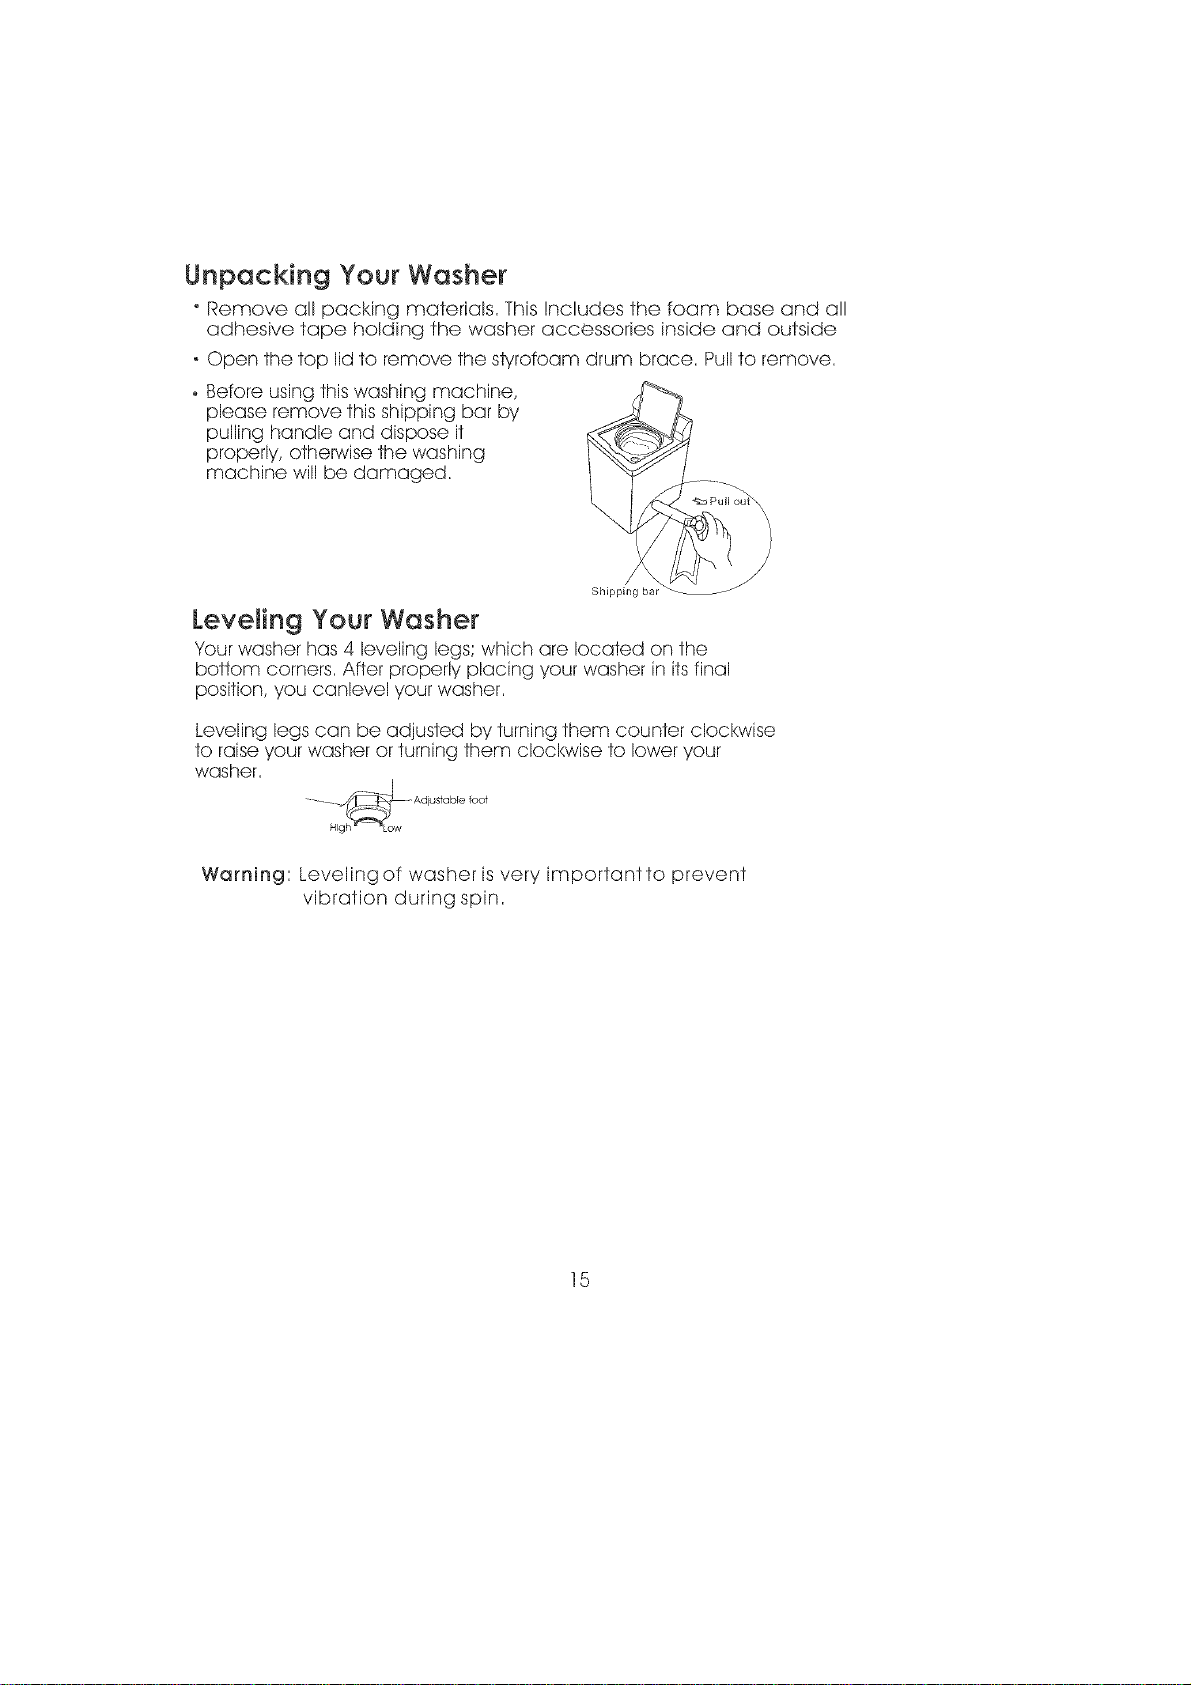
Unpacking Your Washer
" Remove all packing materials, This Incrudes the foam base and art
adhesive tape harding the washer accessories inside and outside
- Open the top lid to remove the styrofoam drum brace, Pullto remove,
• Before using this washing machine,
please remove this shipping bar by
pulling handle and dispose it
properly, otherwise the washing
machine will be damaged,
Shipping bar
Leveling Your Washer
Your washer has 4 leveling legs; which are located on the
bottom corners, After properly placing your washer in its final
position, you canlevel your washer,
Leveling legs can be adjusted by turning them counter clockwise
to raise your washer or turning them clockwise to lower your
washer,
Warning: Leveling of washer isvery important to prevent
vibration during spin,
]5
Steps for hstaHation
o Select a away suitable location for the washer on a hard even surface
from direct sunlight or heat source e,g, radiators, base board heaters,
cooking appliances etc,Any floor unevenness should be corrected with
the leveling legs located on the bottom corners of the washer,The
washer must be placed at room temperature,You must not place washer
where the temperature isat below freezing,
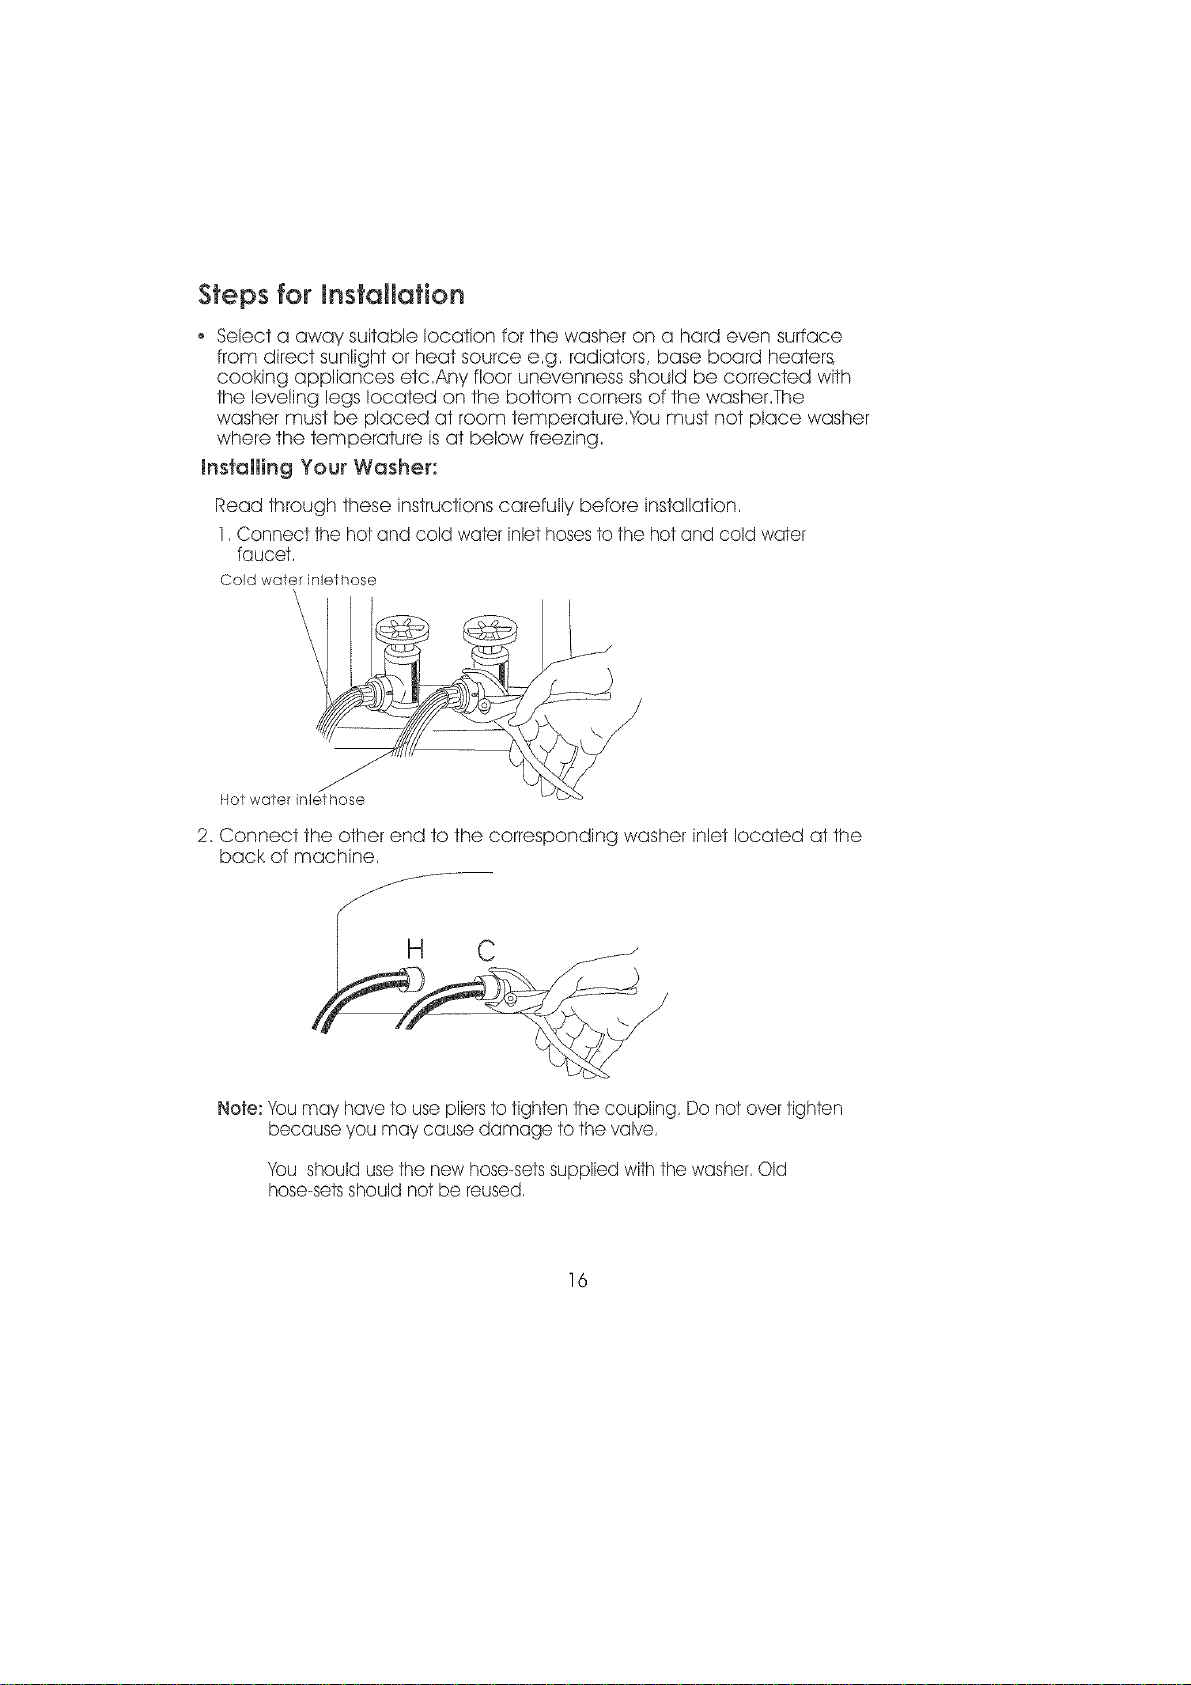
installing Your Washer:
Read through these instructions carefully before installation,
1,Connect the hot and cold water inlet hosesto the hot and cold water
faucet,
Cold water inlethose
'\
\\\\ i
Hot water inlet hose
2, Connect the other end to the corresponding washer inlet located at the
back of machine,
H
Note: You may have to usepliersto tighten the coupling, Do not over tighten
because you may cause damage to the valve,
You should usethe new hose-setssupplied with the washer, Old
hose-setsshould not be reused,
16
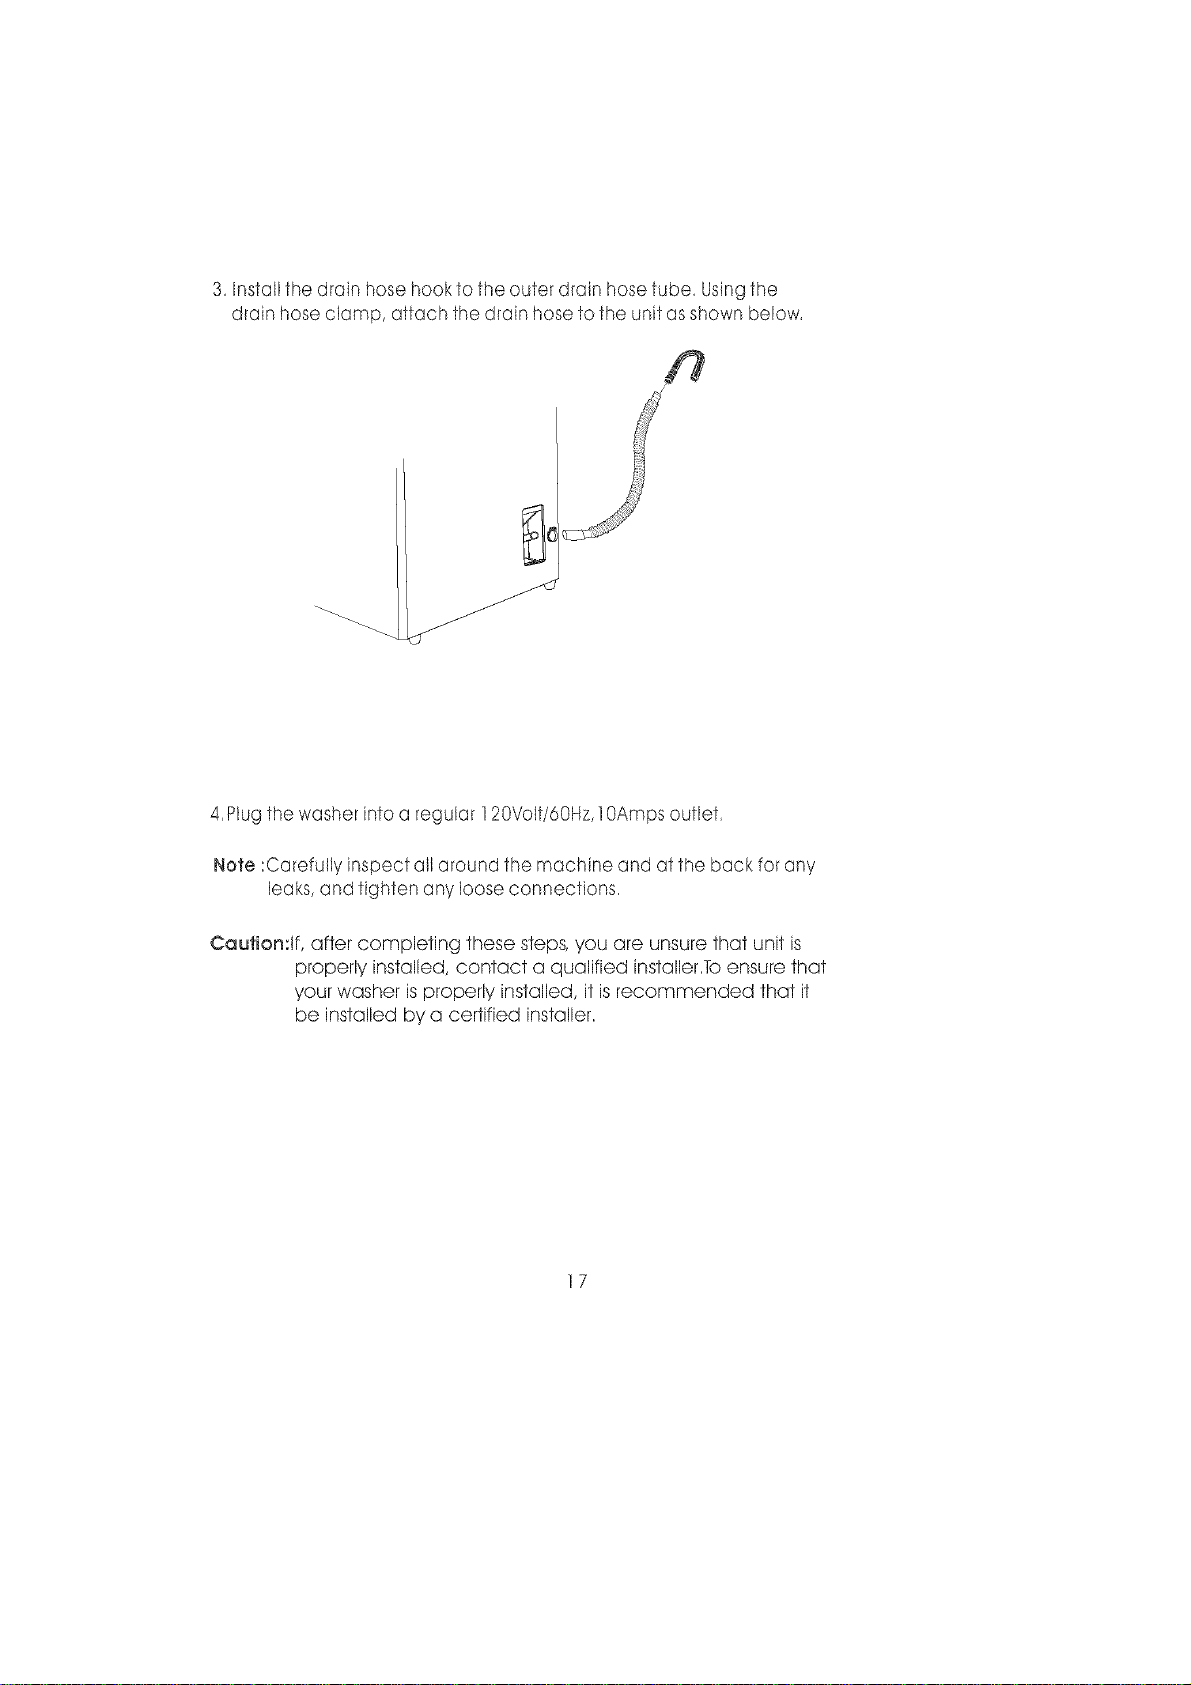
3.Installthedrainhosehooktotheouterdrainhosetube.Usingthe
drainhoseclamp,attach the drain hose to the unit as shown below.
P
4,Plug the washer into a regular 120Volt/6OHz,10Amps outlet,
Note :Carefully inspect all around the machine and at the back for any
leaks, and tighten any loose connections.
Caution:If, after completing these steps, you are unsure that unit is
properly installed, contact a qualified installer.To ensure that
your washer isproperly installed, it is recommended that it
be installed by a certified installer.
]7
Grounding nstructions
Thisappliance must be grounded, In the event of an electrical short
circuit, grounding reduces the riskof electric shock by providing an
escape wire for the electric current, Thisappliance isequipped with a
cord having a grounding wire with a grounded plug, The plug must be
inserted into an outlet that isproperly installed and grounded,
Improper use of the plug can result in a riskof electric shock,
Consult a qualified electrician or service person if the grounding
instructions are not completely understood or if doubt exists as
to whether the appliance isproperly grounded,
Wiring Requirements:
The washer must be plugged into at least ]0AMP ] 20VOLT
60 HZGROUNDED OUTLET,
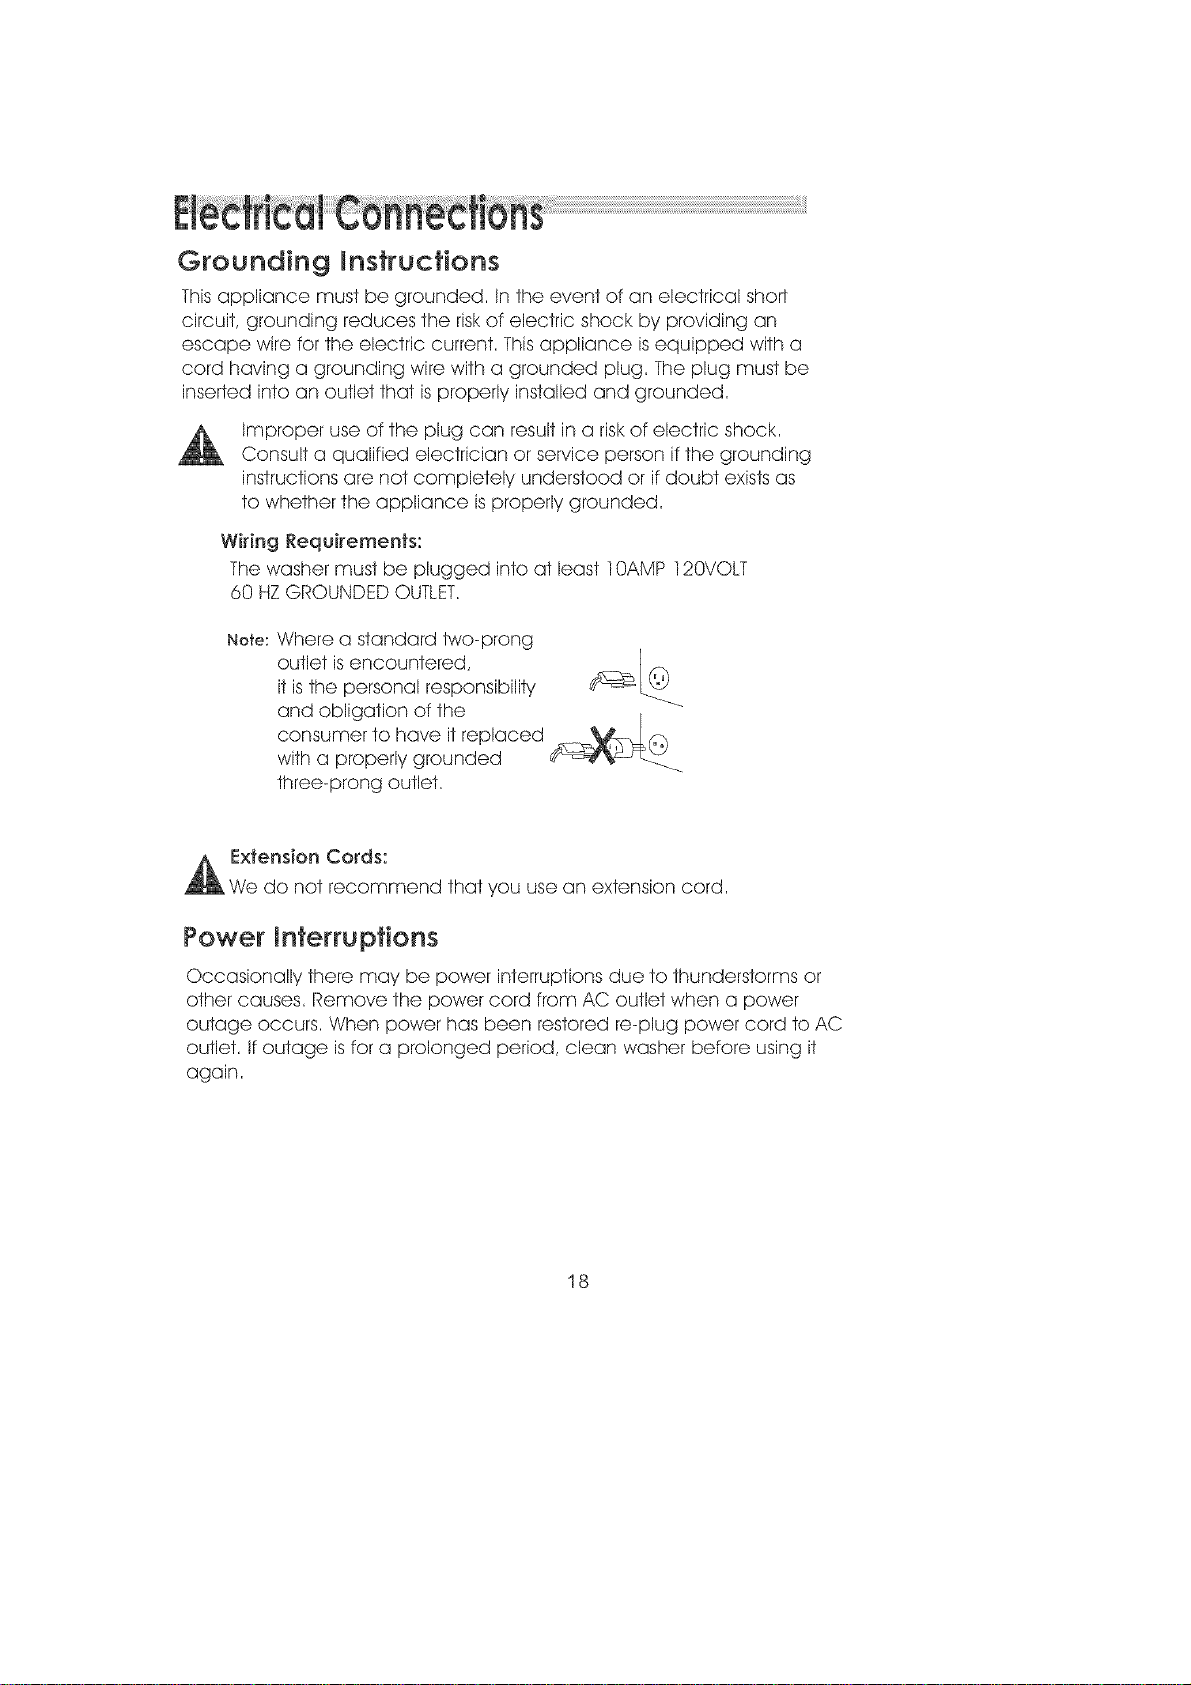
Note: Where a standard k_/o-prong
outlet isencountered, I_
it isthe personal responsibility
and obligation of the
consumer to have it replaced ___V,___
with a properly grounded
three-prong outlet,
Extension Cords:
We do not recommend that you use an extension cord,
Power mnterruptions
Occasionally there may be power interruptions due to thunderstorms or
other causes, Remove the power cord from AC outlet when a power
outage occurs, When power has been restored re-plug power cord to AC
outlet, If outage isfor a prolonged period, clean washer before using it
again,
18