Loading ...
Loading ...
Loading ...
English 7
Installation
Install the Range Hood
WARNING
USE TWO OR MORE PEOPLE TO MOVE AND INSTALL THE RANGE
HOOD. FAILURE TO DO SO CAN RESULT IN BACK OR OTHER
INJURY.
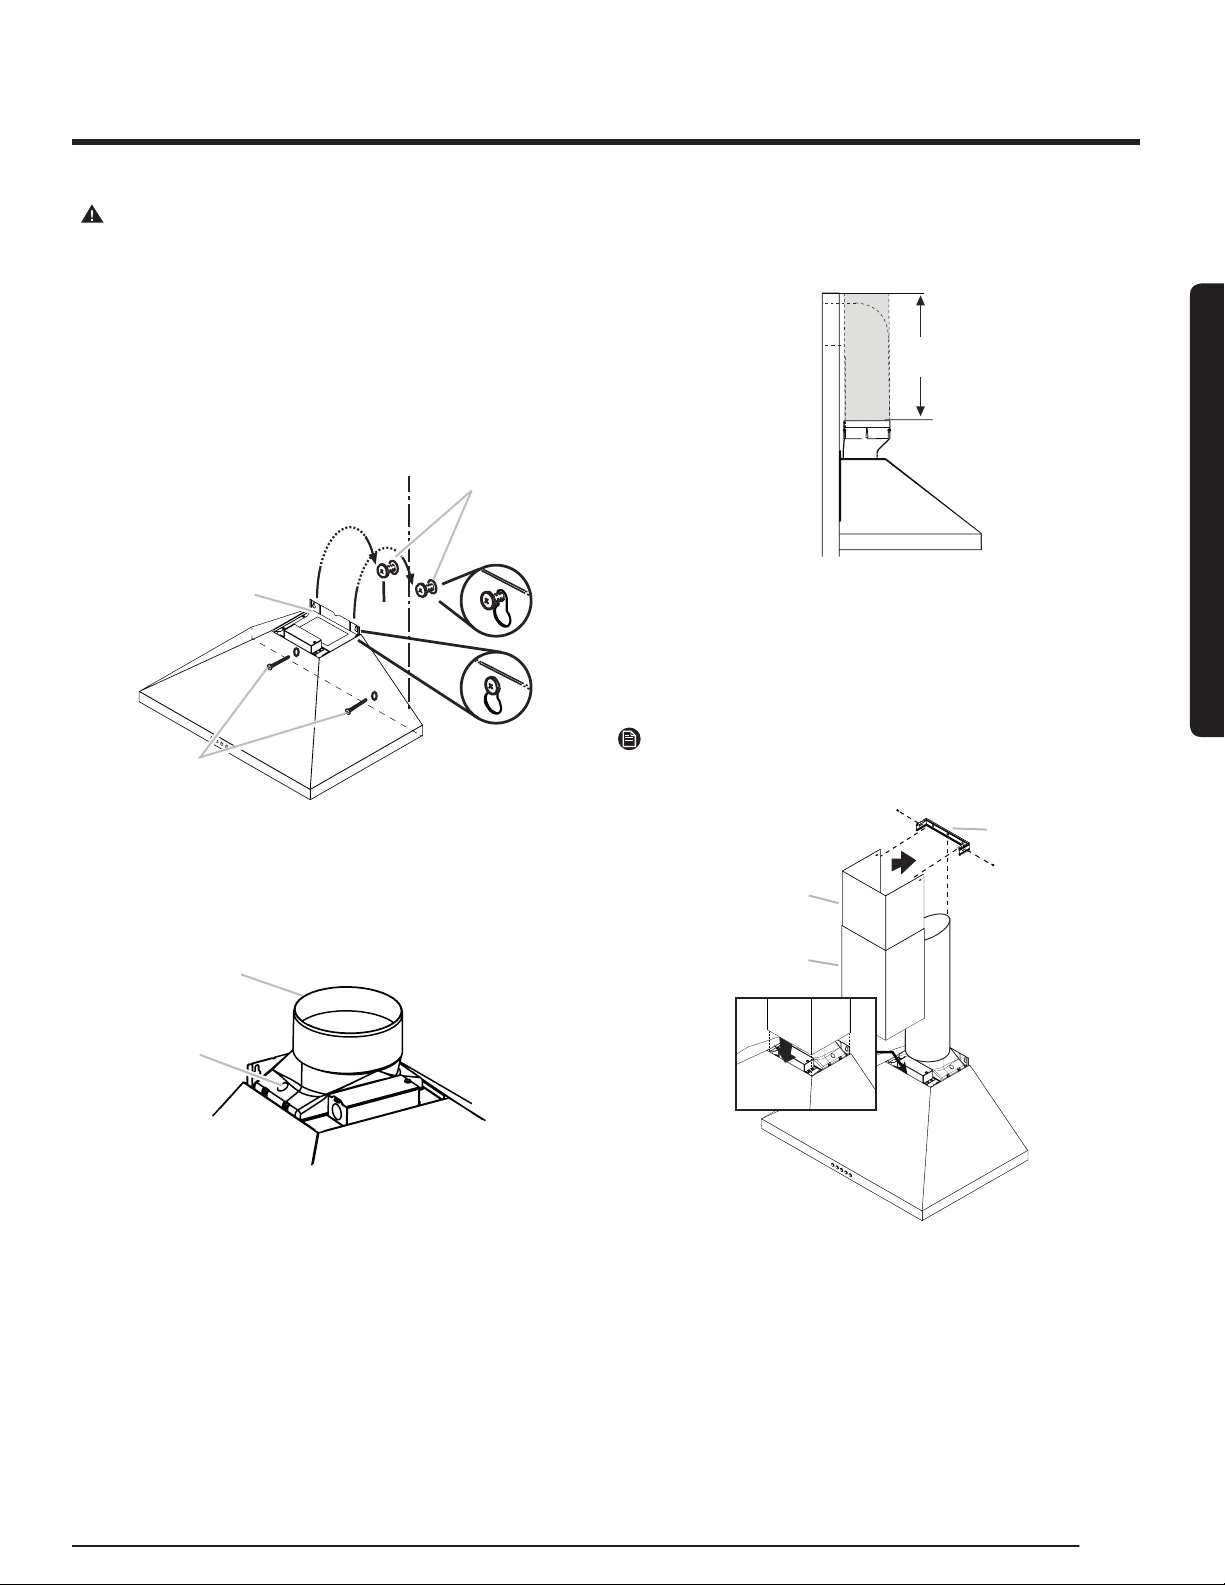
1. Mark the lower mounting hole locations with a pencil .
2. Uninstall the hood assembly, and drill
3
⁄16”” (4.8 mm) pilot holes at
the marked locations.
3. Hang the range hood again on 2 the upper mounting screws.
4. Level the range hood and tighten the upper mounting screws.
5. Install 2 - 5 x 45 mm lower mounting screws and tighten. Use the
optional wall anchors if needed.
A
B
C
A. Mounting screws
B. Mounting slots
C. Lower mounting screws
Connect the vent system
1. Install the transition on top of the hood (if removed for shipping) with
2-3.5x9.5 mm sheet metal screws.
A
B
A. Vent transition
B. 3.5 x 9.5 mm screw
For vented installations only
1. Fit the vent system over the exhaust outlet.
2. Measure from the bottom of the air deector to the bottom of the
hood outlet. Cut the ductwork at the measured dimension.
Roof Outlet
Dimension to
measure
Wall
outlet
3. Seal the connection with clamps.
4. Conrm that the back draft dampers work properly
Install the Duct Covers
When using both upper and lower vent covers, push the lower cover
down onto the hood and lift the upper cover to the ceiling, and then install
with two mounting screws.
NOTE
For vented installations, the upper vent cover may be reversed to hide
slots.
A
C
E
C
D
A.. Upper vent cover
B. Lower vent cover
C. 2.9 x 6.5 mm screws
D. Bracket
Installation
Loading ...
Loading ...
Loading ...