Loading ...
Loading ...
Loading ...
2a.If installing before the
cooktop is placed into cutout:
• Place the cooktop upside down on a
protective surface (blanket, pad).
• Remove the attachment screws for the
bracket locations selected from the
bottom of the burner box.
• Use bracket mounting holes that will
allow the clamp screws (see Step 3)
to contact the countertop bottom.
Attach brackets as shown then rotate
brackets so that they do not extend
beyond edge of burner box.
• Tighten screws just enough to hold
brackets in place when cooktop is put
into cutout.
• Turn the cooktop right side up.
Carefully place into the cutout.
Important: Check that the front edge
of the cooktop is parallel to the front
edge of the countertop.
If repostioning is needed, lift entire
cooktop up from cutout to prevent
scratching the countertop.
• Loosen the screws, rotate the
brackets so that they extend beyond
edge of the burner box.Tighten
screws securely.
2b.If installing after the cooktop
is placed into cutout:
• Carefully place cooktop into cutout.
• Important: Check that the front edge
of the cooktop is parallel to the front
edge of the countertop.
If repostioning is needed, lift entire
cooktop up from cutout to prevent
scratching the countertop.
•
Remove the attachment screws from
selected bracket locations on the
bottom of the burner box.
• Attach brackets as shown so that they
are beyond edge of burner box and
the clamp screws (see Step 3) will
contact the countertop bottom.
Tighten screws securely.
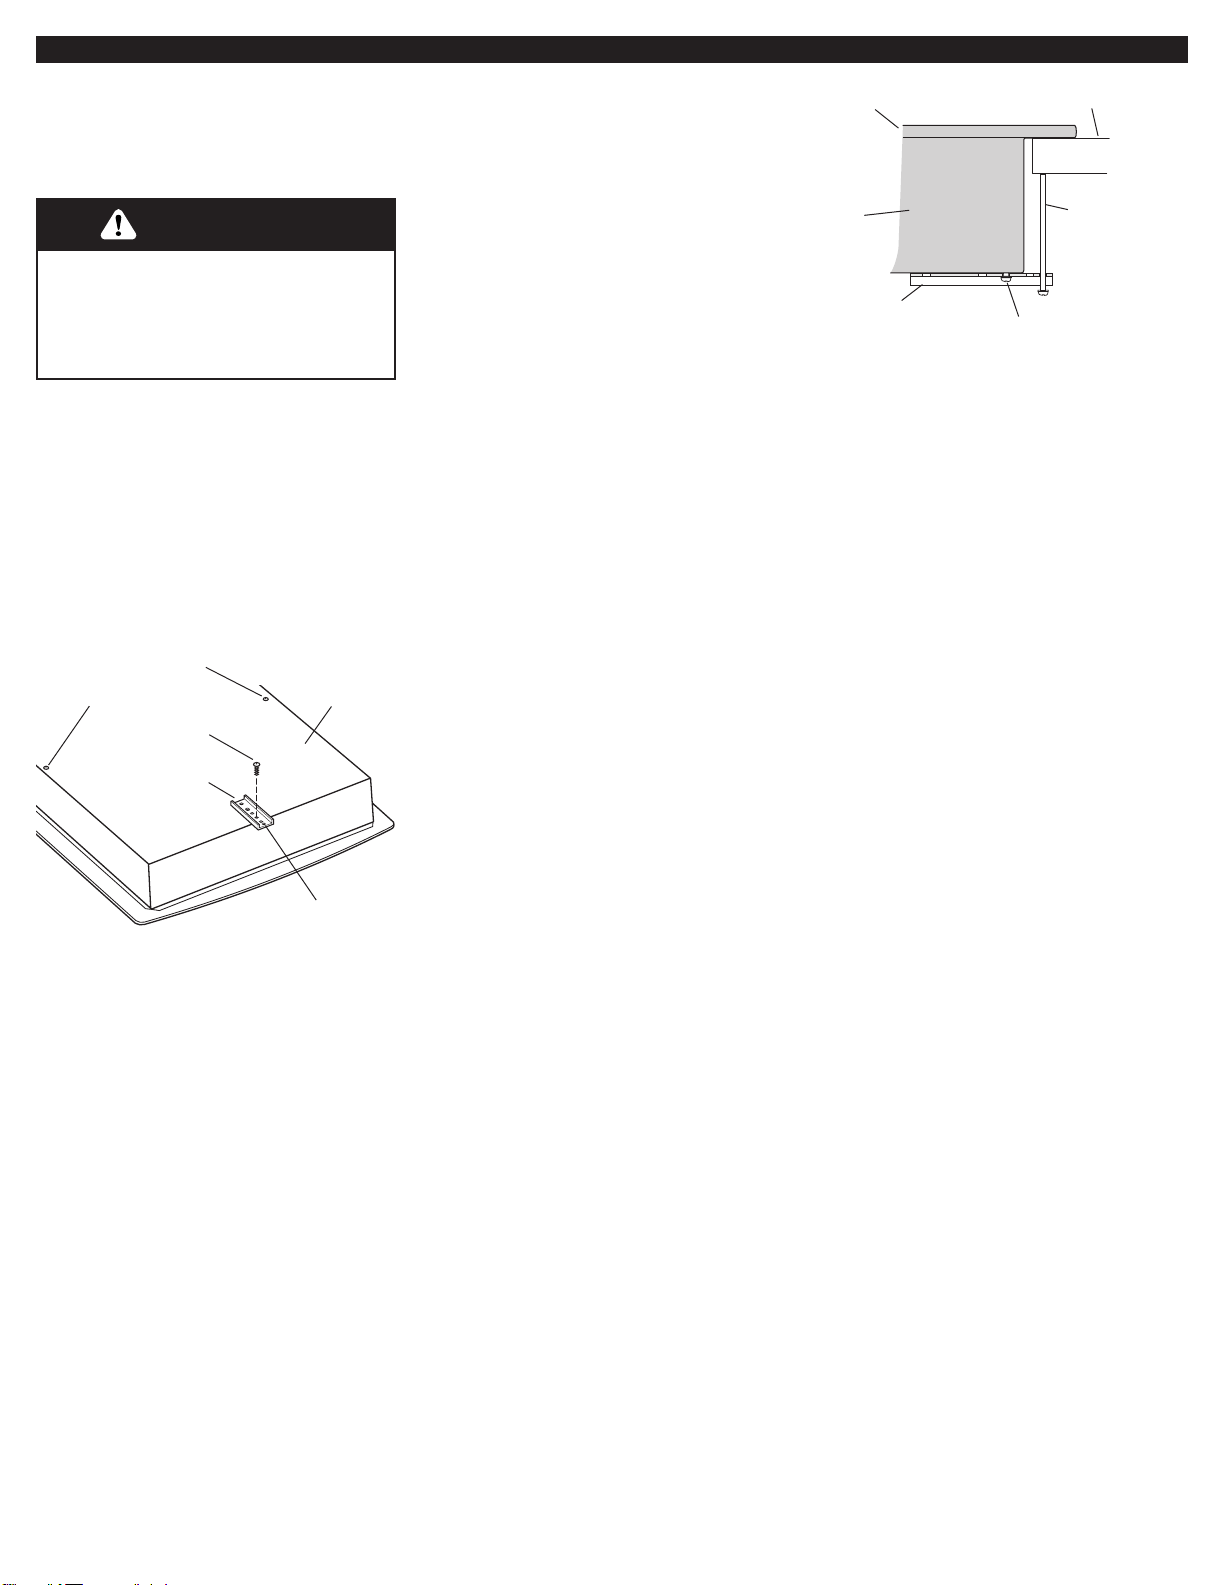
cooktop
countertop
2-1/2" (6.4 cm)
clamping
screw
bracket
burner
box
3.Place the 2-1/2" (6.4 cm)
clamping screws into the brackets. Use
a screwdriver to tighten the screws
against the countertop. DO NOT
OVERTIGHTEN.
4.Make electrical connection. (See
“Electrical requirements” and “Electrical
connection” sections, Pages 4 and 5.)
If your house has aluminum wiring,
see “Electrical requirements”, Page 4.
5.Turn on power supply.
6.Depending on your model, push
in and turn each control knob to the “HI”
position or touch “ON” and turn each
control knob to the “HI” position. Check
the operation of the cooktop elements
and indicator lights.
attachment screw
Now start…
With cooktop in kitchen.
1.Remove the shipping materials
and tape from the cooktop. Remove the
hardware package from inside the
literature bag.
Excessive Weight Hazard
Use two or more people to move
and install cooktop.
Failure to do so can result in back
or other injury.
WARNING
attachment
screw
burner box
bottom
bracket (end
locations
recommended)
attachment screws for
optional front and back
location
“U” shaped spring
clip or small
diameter hole
2.Two clamp brackets are provided
to clamp the cooktop to the countertop.
Install the clamp brackets on each end
of the burner box bottom. Optional: If
cabinet construction does not provide
clearance for installing brackets at
burner box ends, install the brackets on
the front and back of the burner box
bottom.
The brackets may be installed before
(see Step 2a) or after (see Step 2b) the
cooktop is placed into the cutout.
6
YK20658/8285316 ENG 8/23/02 12:07 PM Page 6
Loading ...
Loading ...
Loading ...