Loading ...
Loading ...
Loading ...
9
Insignia NS-DSC10A and NS-DSC10B 10 Megapixel Digital Cameras
www.insigniaproducts.com
To activate the flash:
• Press the Flash/right ( ) button on your camera
repeatedly until the desired flash mode is
displayed on the LCD monitor.
Your camera is equipped with five flash modes:
Auto flash–Flash fires automatically when
shooting conditions require extra lighting.
Red-eye reduction–Flash fires twice--once
to let the subject’s eyes adjust to the flash,
then again to take the actual image.
Force on–Flash fires every time you take a
photo, regardless of lighting conditions.
Slow sync (fill flash)–Flash fires with a
slow shutter speed. Ideal for situations
where additional lighting is needed for
subjects in the foreground.
Flash off–The flash never fires, regardless of
lighting conditions.
Using the self-timer
Self-timer lets you take photos after a pre-defined
delay. This function is available only when
capturing still images. When the self-timer is
enabled, the icon is displayed on the LCD monitor.
The self-timer setting is automatically set to Off
when you turn your camera on or off.
To enable the self-timer:
1 Set your camera to Record mode. If you are in
video capture mode, press the Record mode
button to switch to photo capture mode.
2Press the self-timer
button once to enable
the self-timer. Press it
again to disable the
self-timer.
When the self-timer is
enabled, the shutter
release is delayed for 10 seconds.
3 Press the shutter button to take the photo.
Using the macro feature
Your camera is equipped with a macro feature that
lets you focus on very close subjects.
To use the macro feature:
1 Set your camera to Record mode. If you are in
video capture mode, press the Record mode
button to switch to photo capture mode.
2 Press the macro button
to enter macro mode.
The macro icon
appears on the LCD
monitor.
3 Press the shutter button to take the photo.
4 Press the macro button again to exit macro
mode.
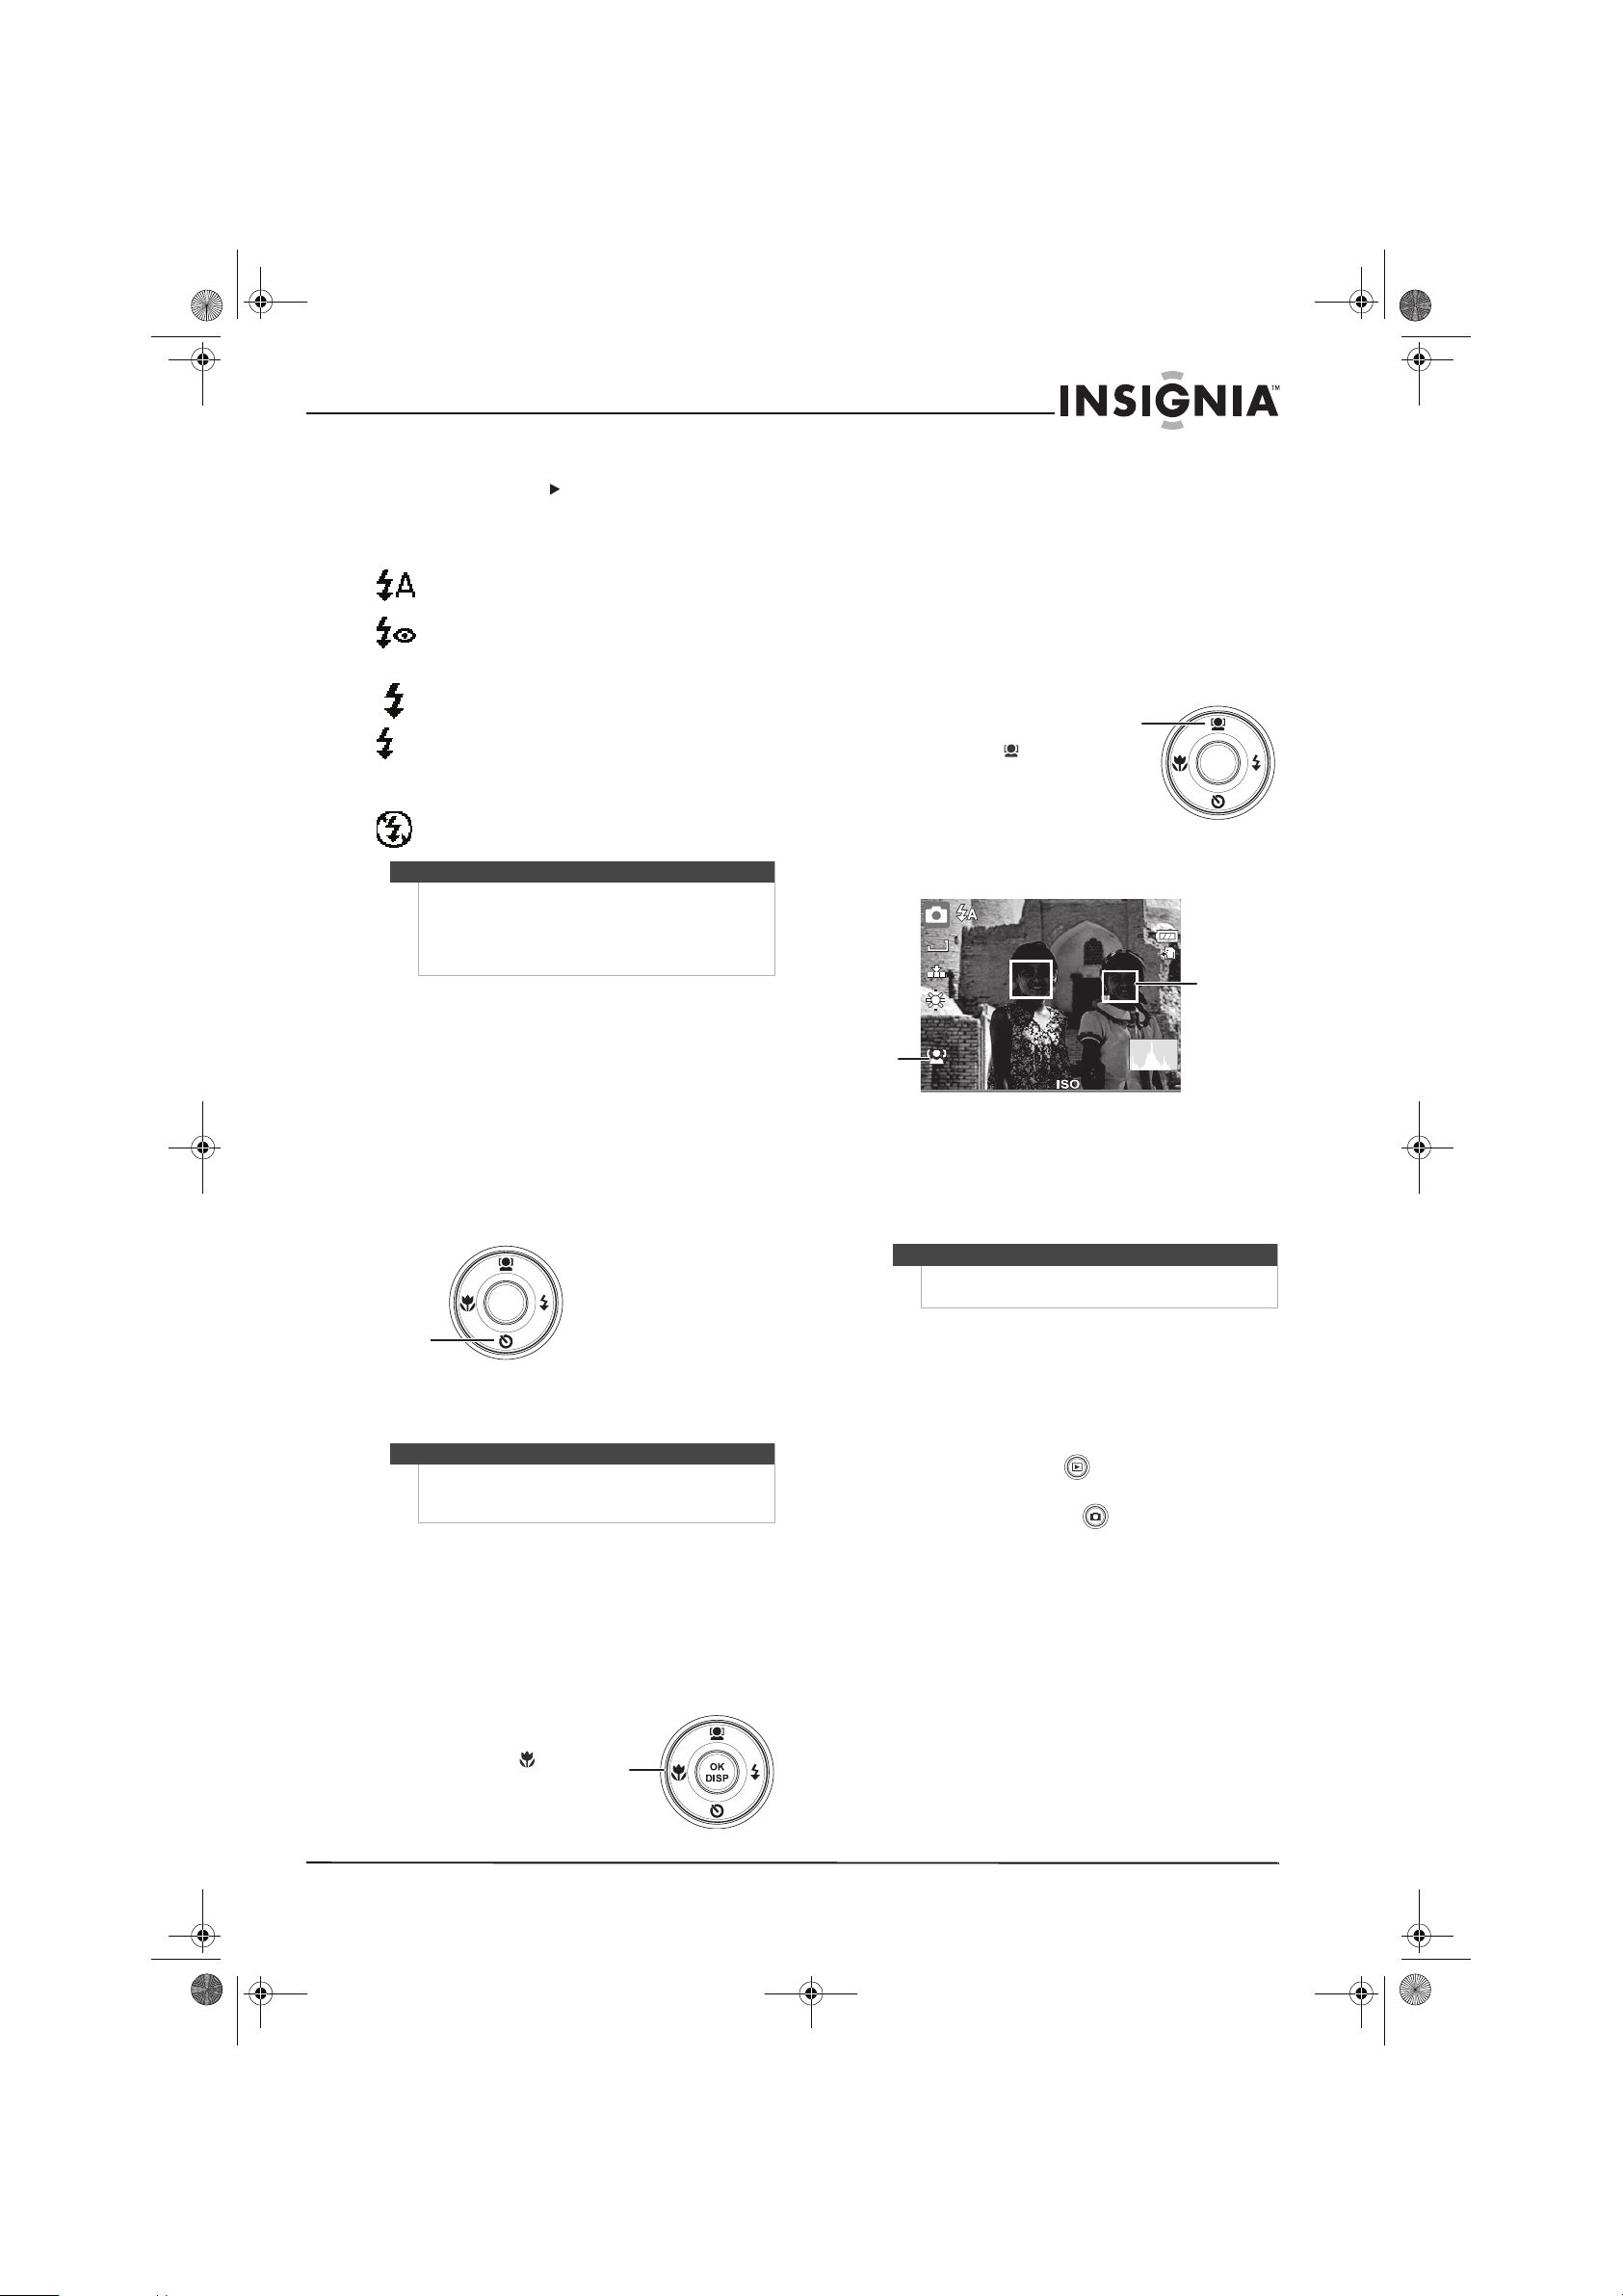
Using face tracking
The face tracking mode detects faces and sets the
camera to focus on the detected face. This function
can detect several faces at the same time, however
the camera sets the focus on the closest person to
the center of the screen.
To activate face tracking:
1 Press the face tracking
button. The face
tracking icon is
displayed on the LCD
monitor.
2 Aim the camera at the
subject. Notice that the
white focus frame appears when faces are
detected.
3 Half-press the shutter button to focus. Notice
that the white frame closest to the center of the
screen turns green.
4 Fully press the shutter button to capture the
image.
Changing the mode
You can record images and video in Record mode
and you can use the Playback mode to replay,
delete, or edit images on the LCD monitor.
To switch between modes:
•In Record mode, press (playback) to switch to
Playback mode.
•In Playback mode, press (record) to switch to
Record mode.
Recording video
You can record video with your camera. The
available recording time depends on the available
capacity of the internal memory or the memory
card in use. Videos can be recorded until the
maximum memory capacity has been reached.
About 15 minutes of video can be recorded for
every gigabyte of available memory space.
To record a video:
1 Press POWER to turn your camera on.
Notes
• Flash charging time may increase when the
battery is low.
• Hold the camera steady, or mount it on a tripod,
to reduce blurring when using the slow sync
flash mode.
Note
When using the self-timer, make sure that you use a
tripod or place the digital camera on a level, stable
surface.
S
L
OK
DISP
Self-timer
button
Macro
button
Tips
When capturing an image with several faces, the
camera may take more time to detect faces.
OK
DISP
Face
tracking
button
307
10M
AUTO
White frame
around the
detected face.
Face
tracking
icon.
NS-DSC10A-10B_09-0323_MAN_V2.book Page 9 Monday, April 27, 2009 8:42 AM
Loading ...
Loading ...
Loading ...