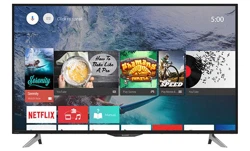
Sharp LC-50UA6800X 50" 4K UHD Android TV

User Manual

For LC-50UA6800X.

PDF File Manual, 121 pages, Read Online | Download pdf file

LC-50UA6800X photo
background
LED BACKLIGHT TV
OPERATION MANUAL
Please choose your favourite page from the content.
If you want to close the operation manual, press the EXIT
button.
Also, if you want to return to the previously displayed page,
press the
(Back) button.
ENGLISH | FRANÇAIS | PORTUGUÊS | РУССКИЙ | 中文 | INDONESIA | ภาษาไทย | TIẾNG VIỆT | ﻲﺑرﻋ | АҒЫЛШЫН | O'ZBEK TILIDA
>>
Loading page 2...
Loading page 3...
Loading page 4...
Loading page 5...
Loading page 6...
Loading page 7...
Loading page 8...
Loading page 9...
Loading page 10...
Loading page 11...
Loading page 12...
Loading page 13...
Loading page 14...
Loading page 15...
Loading page 16...
Loading page 17...
Loading page 18...
Loading page 19...
Loading page 20...
Loading page 21...
Loading page 22...
Loading page 23...
Loading page 24...
Loading page 25...
Loading page 26...
Loading page 27...
Loading page 28...
Loading page 29...
Loading page 30...
Loading page 31...
Loading page 32...
Loading page 33...
Loading page 34...
Loading page 35...
Loading page 36...
Loading page 37...
Loading page 38...
Loading page 39...
Loading page 40...
Loading page 41...
Loading page 42...
Loading page 43...
Loading page 44...
Loading page 45...
Loading page 46...
Loading page 47...
Loading page 48...
Loading page 49...
Loading page 50...
Loading page 51...
Loading page 52...
Loading page 53...
Loading page 54...
Loading page 55...
Loading page 56...
Loading page 57...
Loading page 58...
Loading page 59...
Loading page 60...
Loading page 61...
Loading page 62...
Loading page 63...
Loading page 64...
Loading page 65...
Loading page 66...
Loading page 67...
Loading page 68...
Loading page 69...
Loading page 70...
Loading page 71...
Loading page 72...
Loading page 73...
Loading page 74...
Loading page 75...
Loading page 76...
Loading page 77...
Loading page 78...
Loading page 79...
Loading page 80...
Loading page 81...
Loading page 82...
Loading page 83...
Loading page 84...
Loading page 85...
Loading page 86...
Loading page 87...
Loading page 88...
Loading page 89...
Loading page 90...
Loading page 91...
Loading page 92...
Loading page 93...
Loading page 94...
Loading page 95...
Loading page 96...
Loading page 97...
Loading page 98...
Loading page 99...
Loading page 100...
Loading page 101...
Loading page 102...
Loading page 103...
Loading page 104...
Loading page 105...
Loading page 106...
Loading page 107...
Loading page 108...
Loading page 109...
Loading page 110...
Loading page 111...
Loading page 112...
Loading page 113...
Loading page 114...
Loading page 115...
Loading page 116...
Loading page 117...
Loading page 118...
Loading page 119...
Loading page 120...
Loading page 121...

Other documents for Sharp LC-50UA6800X

The following documents are available:
User Manual Photos

Specifications

User Manual - Transcript

  • Page 1 - English - : LED BACKLIGHT TV OPERATION MANUAL e Please choose your favourite page from the content. If you want to close the operation manual. press the EXIT e)Ujaco)ap Also. if you want to return to the previously displayed page. press the et EFT button. [1] DOLBY AUDIO" HOME. wif (ED HIGH-DEFINITION MULTIMEDIA INTERFACE €} Bluetooth eilex ENGLISH | FRANCAIS | PORTUGUES | PYCCKUM | 3c | INDONESIA | aiq'lue | TIENG VIET | oe | AFbINILUBIH | O'ZBEK TILIDA
  • Page 2 - English - : 1. Part Names 1-3. Remote Control Unit 2. How to select the TV Mode 2-1. Using the Remote Control Unit 2-2. HOME screen 2-4. Settings 2-5. Chromecast built-in compatible 2-6. Tools 3. Tool Operation 3-1. Introduction 3-2. View Setting 3-3. Picture 3-22. Audio 4. Settings 4-22. Personal 4-28. Network & Peripherals 5. Direct Button Operation 5-1. Changing Channels 5-2. Changing Volume 5-4. FLASHBACK 5-5. AUDIO 5-6. Sleep Timer 5-7. VIEW MODE 5-10. NETFLIX 5-11. YouTube 6. Enjoying Photo/Music/Video Playback 6-1. Preparation 6-3. Selecting the Folders to Play Back 6-6. Playing Back Files on a USB Memory Device/Home Network Server 6-15. Playing Back Files from a Portable 7. Using LINK Operation 7-1. Controlling HDMI Equipment Using LINK Operation 8. Using a PC 8-1. Setting Audio Input 9. Using the Internet 9-1. Connecting to the Internet 9-3. Using Keyboard and Mouse 9-4. Notes EN Contents ENGLISH | FRANCAIS | PORTUGUES | PYCCKUM | 3c | INDONESIA | aiealua | TIENG VIET | Je | AFbIILUbIH | O'ZBEK TILIDA 10. Appendix 10-1. Troubleshooting 10-3. Troubleshooting - Error Message 10-4. Information on the Software License for This Product 11. Trademarks 12. Specifications 12-2. Wireless LAN 13. Dimensional Drawings 13-1. LC-45UA6800X 13-2. LC-50UA6800X 13-3. LC-60UA6800X
  • Page 3 - English - : IMPORTANT INFORMATION Precautions For Daily Use Observe the following items Maintenance of the cabinet e When cleaning the cabinet. use a soft cloth (made of cotton. floss. etc.) to clean e Do not use a dry or damp rag mixed with chemicals. as this could cause the ingredients of the cabinet body to deteriorate or crack. e Be careful not to use an abrasive cloth for cleaning or clean with excessive force. as this could scratch the surface of the cabinet. e If the cabinet is greatly soiled. clean with a soft cloth (made of cotton. floss. etc.) soaked with a small amount of diluted neutral detergent and wrung out. and then clean with a soft dry cloth. © Solvents such as benzene or thinner could cause the cabinet to deteriorate. or make its coating come off. Therefore do not use such solvents to clean the cabinet. e Because plasticizer is included in the plastics. deterioration or the coating peeling off could occur when the cabinet comes into contact with some substances. Therefore keep it away from volatile substances such as insecticide. In addition. do not let it come into contact with objects made of rubber. resin. etc. for a long time. Maintenance of the LCD panel e Before cleaning the LCD panel. be sure to turn off the TV set and unplug the power cord from the outlet. e When cleaning the LCD panel. use a dry and soft cloth (made of cotton. floss. etc.) to clean the surface of the LCD panel gently. For protecting the LCD panel. do not clean with a dirty cloth. detergent. or a dry or damp rag mixed with chemicals. as this could cause peeling of the panel surface. © Be careful not to clean with an abrasive cloth or with excessive force. as this could cause the panel surface to be scratched. e If the LCD panel is greatly soiled. clean it gently with a soft cloth (made of cotton. floss. etc.) soaked with a small amount of water (Do not clean with excessive force. so as to avoid the scratch of the panel surface). e If dust sticks on the surface of the LCD panel. clean the panel with a commercially available cleaning brush (anti-static brush). Important safety precautions Caring for the cabinet e Use a soft cloth (cotton. flannel. etc.) and gently wipe the surface of the e Using a chemical cloth (wet/dry sheet type cloth. etc.) may deform the components of the main unit cabinet or cause cracking. e Wiping with a hard cloth or using strong force may scratch the surface of the cabinet. e lf the cabinet is very dirty. wipe with a soft cloth (cotton. flannel. etc.) soaked in neutral detergent diluted with water and thoroughly wrung out. and then wipe with a soft dry cloth. e The cabinet is primarily made of plastic. Avoid using benzene. thinner. and other solvents. as these may deform the cabinet and cause the paint to peel off. e Do not apply insecticides or other volatile liquids. e Also. do not allow the cabinet to remain in contact with rubber or vinyl products for a long period of time. Plasticizers inside the plastic may cause the cabinet to deform and cause the paint to peel off. e When relocating the product placed on a cart. it must be moved with utmost care. Sudden stops. excessive force and uneven floor surface can cause the &) product to fall from the 2 EN Important1 ENGLISH | FRANCAIS | PORTUGUES | PYCCKUM | 3c | INDONESIA | aiealua | TIENG VIET | Je | AFbIILUbIH | O'ZBEK TILIDA Caring for the front panel e Turn off the main power and unplug the AC cord from the wall outlet before e Gently wipe the surface of the front panel with a soft cloth (cotton. flannel. e To protect the front panel. do not use a dirty cloth. liquid cleaners. or a chemical cloth (wet/dry sheet type cloth. etc.). This may damage the surface of the front panel. — e Wiping with a hard cloth or using strong force may scratch the surface of the front panel. e Use a soft damp cloth to gently wipe the front panel when it is really dirty (It may scratch the surface of the front panel when wiped strongly). e If the front panel is dusty. use an antistatic brush. which is commercially available. to clean it. e Water and moisture — Do not use the product near water. such as bathtub. washbasin. kitchen sink. laundry tub. swimming pool and in a wet
  • Page 4 - English - : IMPORTANT INFORMATION Introduction e Do not place vases or any other water-filled containers on this product. The water may spill onto Ne the product causing fire or electric shock. Stand — Do not place the product on an unstable cart. stand. tripod or table. Doing so can cause the product to fall. resulting in serious personal injuries as well as damage to the product. Use only a cart. stand. tripod. bracket or table recommended by the manufacturer or sold with = the product. When mounting the product on a wall. be sure to follow the manufacturer's instructions. Use only the mounting hardware recommended by the manufacturer. Ventilation — The vents and other openings in the cabinet are designed for ventilation. Do not cover or block these vents and openings since insufficient ventilation can cause overheating and/or shorten the life of the product. Do not place the product on a bed. sofa. rug or other similar surface. since they can block ventilation openings. This product is not designed for built-in installation; do not place 7 the product in an enclosed place such as a bookcase or rack. unless proper ventilation is provided or the manufacturer’s instructions are followed. e In case the product is dropped and the cabinet is damaged. be sure to turn off the power of the product. and unplug the power cord. If you continue to use the product. it may cause fire or electric shock. Contact your dealer. Do not open the rear cover of the cabinet to reconstruct the circuits. There exists high voltage pr within the cabinet and it may cause electric shock and injury. If maintenance is required. contact your dealer. The LCD panel used in this product is made of glass. Therefore. it can break when the product is struck forcefully or witha sharo —~./z object. If the LCD panel ia a is broken. be careful not ~ to be injured by broken glass. Heat sources — Keep the product away from heat sources such as radiators. heaters. stoves and other heat-generating products 2 (including amplifiers). Do not install the TV in a location in which it will be subject to water drops such as underneath an air conditioning unit or in the vicinity of a humidifier e Water drops falling onto the TV and water entering inside it may result in fire. electric shock. or malfunctions. We recommend that you install the TV at least 1 m away from the outlet of an air Conditioner. e To prevent fire. never place any type of candle or naked flames on the top or near the TV set. e To prevent fire or shock hazard. do not place the AC power cord under the TV set or other heavy items. e Do not place heavy objects on this product or stand on it. ~« Doing so could cause /v injury if the product overturns. Take special care near children and pets. e Unplug the power cord before you move the TV set. If not unplugged beforehand. the power cord may become damaged and cause electric shock. The LCD panel is a very high technology product with 8. 94. 00 pixels. giving you fine picture details. Due to the very large number of pixels. occasionally a few non-active pixels may appear on the screen as a fixed point of blue. green. red or yellow. This is within product specifications and does not constitute a fault. Precautions when transporting e When transporting the TV. never carry it by holding or otherwise putting pressure onto the display. Be sure to always carry a “ the TV by two or more SS people holding it with two “@ hands — one hand on each side of the TV. EN Important2 ENGLISH | FRANCAIS | PORTUGUES | PYCCKUM | 3c | INDONESIA | aiealua | TIENG VIET | Je | AFbIILUbIH | O'ZBEK TILIDA If a television is not positioned in a sufficiently stable location. it can be potentially hazardous due to falling. Many injuries. particularly to children. can be avoided by taking simple precautions such as: e Using cabinets or stands recommended by the manufacturer of the television. e Only using furniture that can safely support the television. e Ensuring the television is not overhanging the edge of the supporting furniture. e Not placing the television on tall furniture (for example. cupboards or bookcases) without anchoring both the furniture and the television to a suitable e Not standing the televisions on cloth or other materials placed between the television and supporting furniture. e Educating children about the dangers of climbing on furniture to reach the television or its controls. e Do not display a still picture for a long time. as this could cause an afterimage to remain. e Install the product on the place where the AC cord can be unplugged easily from the AC outlet. or from the AC INPUT terminal on the rear of the e The above are pictures for reference only; the actual item might be different.
  • Page 5 - English - : (Front) (Side) POWER button — EXIT button | INPUT button — Channel buttons (CH A/V) | Volume buttons (VOL +/-) | = VOL + < CH > INPUT EXIT POWER 7 Remote control sensor POWER Light Sensor *1 indicator e The illustrations and on-screen displays in this operation manual are for explanation purposes and may vary slightly from the actual operations. e The drawings used throughout this manual are based on the LC-60UA6800X model. ENGLISH | FRANCAIS | PORTUGUES | PYCCKU | “3c | INDONESIA | aiun'lue | TIENG VIET | oe | AFbITLUBIH | O'ZBEK TILIDA
  • Page 6 - English - : Part Names TV (Continue) e HDMI IN 1 and 2 terminals are all capable of receiving 4K60P 4:4:4 signals. To receive 4K60P 4:4:4 signals. on the Devices menu. set the HDMI type to *2 Use HDMI IN 2 to connect ARC USB 1 terminal compatible equipment. HDMI IN 1 terminal Select function. *4 Usually do not connect anything to this terminal as it reserved only for service personnel. HDMI IN 2 terminal2 USB 2 terminal — HDMI IN 3 terminal? AUDIO (L/R) terminal HDMI IN 4 terminal — SERVICE DIGITAL ONLY AUDIO SERVICE ONLY“ ETHERNET terminal terminal DIGITAL AUDIO INPUT 5/AV IN OUTPUT terminal terminal ENGLISH | FRANCAIS | PORTUGUES | PYCCKU | “3c | INDONESIA | aiun'lue | TIENG VIET | oe | AFbITLUBIH | O'ZBEK TILIDA
  • Page 7 - English - : Remote Control Unit 1 POWER: Switch the TV power on or enter standby. 2 Buttons for useful operations ieee (Reveal hidden teletext) 1 Display hidden characters. SaaS Celene 8 (Hola) Stop updating teletext pages automatically or release the hold mode. (Top/Bottom/Full) Set the area of magnification. 4 Display the teletext subpage directly. 5 (Teletext) 6 Select the teletext mode. (Subtitle) Switch subtitle languages on / off. IVE 6 VOL+/-: Set the volume. (See page 5-2.) 10 External equipment operational buttons: Operate the external equipment. NETFLIX | Youtiiit) ENGLISH | FRANCAIS | PORTUGUES | PYCCKUIM | 3c | INDONESIA | atwatue | TIENG VIET | oe | AFBITLUbIH | O'ZBEK TILIDA
  • Page 8 - English - : Remote Control Unit (Continue) 11 R. G. Y. B: The coloured buttons are correspondingly used to select the coloured items on the screen. ote 13 VIEW: Select the screen size. (See pages 5-7 to 5-9.) a aS 14 (Back): Return to the previous screen. 15 A/V /<4/> . @ (ENTER): Select a desired item on the screen. 16 EXIT: Turn off the menu screen and application. a. 17 Voice: Start a Voice Search. Speak the word that you want to search for into the microphone at the bottom a of the remote control. When you are using the microphone. do not cover this part with your hand. 18 NETFLIX: Display the NETFLIX screen. If you press the NETFLIX button when the TV is turned off. the TV turns on AVMODE VIEW ___ SURROUND ENGLISH | FRANCAIS | PORTUGUES | PYCCKUIM | 3c | INDONESIA | atwatue | TIENG VIET | oe | AFBITLUbIH | O'ZBEK TILIDA
  • Page 9 - English - : Remote Control Unit (Continue) POWER POWER SLEEP AUDIO INFO DISPLAY AV MODE aU S10] Ts eL0]\10) NETFLIX | You(iirs 19 POWER (DEVICES): Switch the devices power on or enter standby. 20 TV: Press to access analogue and digital TV mode. 21 INPUT: Select an input source. 23 EPG: DTV: Display the EPG screen. 24 DISPLAY: Display the channel information. DTV: Display the programme information. 26 SURROUND: Select surround setting. 29 e-manual: Display the operation manual. 30 YouTube: Display the YouTube screen. 31 Microphone: Used in Voice searches and apps. When you are using the Microphone. do not cover this part with your hand. ENGLISH | FRANCAIS | PORTUGUES | PYCCKUIM | 3c | INDONESIA | atwatue | TIENG VIET | oe | AFBITLUbIH | O'ZBEK TILIDA
  • Page 10 - English - : How to select the TV Mode Using the Remote Control Unit The main TV modes can be displayed by pressing the TOOL button on the remote control unit. Press [all (HOME) to display the HOME screen. Press TOOL to display the Tools screen. ee ee eee == AV MODE ATV SURROUND NETFLIX | Yougfiie) ENGLISH | FRANCAIS | PORTUGUES | PYCCKUM | 3c | INDONESIA | aiq'lue | TIENG VIET | oe | AFbINILUBIH | O'ZBEK TILIDA
  • Page 11 - English - : How to select the TV Mode To display the HOME screen. press the a (HOME) button on the remote control unit. @® & Ww & 16:06 > Play Next @ Start a Search. @ Among the applications installed on the TV. the icons for the favourite applications are shown inside here. (Favourite applications can be added / deleted / changed its order by users.) Apps : Click to jump to Apps screen where all the installed applications are listed. @® The contents of the programmes that user is watching or watched are displays here. Notification: Display the notifications. Inputs: Icon to select an input source. = E-Manual: Icon for the built-in operation manual. Eo} Settings: Various settings can be configured here. For details on the settings. see the next explanation. e When you are using the microphone. see page 1-5. ENGLISH | FRANCAIS | PORTUGUES | PYCCKUM | 3c | INDONESIA | aiq'lue | TIENG VIET | oe | AFbINILUBIH | O'ZBEK TILIDA
  • Page 12 - English - : How to select the TV Mode HOME screen (Continue) On the air : Digital On the Air : Analog © #= Customise channels © Channels served by install applications are displayed here. Channels can be changed the display order of channels by users. © Add or delete HOME screen channel. ENGLISH | FRANCAIS | PORTUGUES | PYCCKUM | 3c | INDONESIA | aiq'lue | TIENG VIET | oe | AFbINILUBIH | O'ZBEK TILIDA
  • Page 13 - English - : How to select the TV Mode Peripherals Wake on LAN: Enable the TV to be started by a signal over a Various settings can be configured from Settings on the HOME screen. The LAN. follow settings can be configured. Google Cast: Configure various Chromecast built-in settings. RC setting: Switch the Remote Control settings. Bluetooth: Add accessory. System/Function |Date & time: Set the date and time. Language: You can select a language. Select from among 12 languages. (English (UK). English (US). French. Portuguese. Simplified Chinese. Indonesian. Thai. Vietnamese. Arabic. Russian and Persian and Malay) Keyboard: Switch the keyboard setting. Home screen: Home screen customise settings. Google: Switch the Google function settings. Accessibility: Configure Caption. Talkback. and SwitchAccess settings. Some of the Caption settings may not be applied. Input/Output TV location: Select "Home" or "Store" for the location where you plan to install Location: Configure the location settings. Quick start Usage & Diagnostics: Help improve your Android TV by automatically sending diagnostic and usage data to Google. This information won't be used to identify you and helps teams working on things like apps performance and new Yet f-I-1 ests NV.e1 Broadcast related setting Channel setting [Accounts —s [Add account: Add an account. Storage & reset NOTE e The menu may be different depending on when you purchased the TV. Sound: System sound and Surround sound. Quick start: You can reduce the TV's start-up time after turning on the power with the remote control unit. Apps: View a list of applications. Screen saver: Set the Screen saver. Storage & reset: View the memory usage status or perform a reset. When you perform a reset. the TV will be returned to the factory preset values. and the Google Accounts will also be deleted. About: Check for system updates and view various information. ENGLISH | FRANCAIS | PORTUGUES | PYCCKU | “3c | INDONESIA | aiun'lue | TIENG VIET | oe | AFbITLUBIH | O'ZBEK TILIDA
  • Page 14 - English - : How to select the TV Mode Chromecast built-in compatible devices When you connect a device such as a Chromecast built-in compatible smartphone or tablet to this TV. you can enjoy video and audio from the device on the TV's large screen and speakers. 1 Configure the settings from "HOME" > "Settings" > "Network & Peripherals" > "Google Cast (Chromecast built-in)". 2 Enable the Chromecast built-in function on the Chromecast built-in compatible device and connect to the TV. (The TV screen changes according to the behavior of the device) e When the TV is turned off or the connection is ended on the device. you must connect the device again. e For details about the operation of the Chromecast built-in compatible device. check the manual for that device. ENGLISH | FRANCAIS | PORTUGUES | PYCCKUIM | 3c | INDONESIA | atwatue | TIENG VIET | oe | AFBITLUbIH | O'ZBEK TILIDA
  • Page 15 - English - : How to select the TV Mode The View Setting. Picture and Audio menus can be configured on the Tools screen. |. and 3-22 to 3-33 for details on the settings for each menu. x Basic setting Set general topics. ENGLISH | FRANCAIS | PORTUGUES | PYCCKU | “3c | INDONESIA | aiun'lue | TIENG VIET | oe | AFbITLUBIH | O'ZBEK TILIDA
  • Page 16 - English - : Tool Operation Introduction Si About Menu Items | e Some menu items may not be displayed 3 depending on the selected input source. 6 e The screens in the operation manual are for 9 explanation purposes (some are enlarged. others cropped) and may vary slightly from TV the actual screens. Ne e The order of explanations for each menu | item in the following pages is not necessarily in accordance with the alignment of the items on the screen. SLEEP AUDIO INFO DISPLAY AV MODE VIEW |SURROUND NETFLIX | You(iir) ENGLISH | FRANCAIS | PORTUGUES | PYCCKU | “3c | INDONESIA | aiun'lue | TIENG VIET | oe | AFbITLUBIH | O'ZBEK TILIDA
  • Page 17 - English - : Tool Operation View Setting NOTE e Some items do not appear depending on the type of received signal. You can select the screen size. Normal: Keeps the original aspect ratio in a View Setting full screen display. Full: For 16:9 squeeze pictures. View Mode Cinema 16:9: For 16:9 letterbox pictures. Bars may appear on the top and bottom with some programmes. Cinema 14:9: For 14:9 letterbox pictures. Bars may appear on the top and bottom with some programmes. Zoom 14:9: For 14:9 letterbox pictures. A thin side bar appears on each side. and you may also see bars on the top and bottom with some programmes. Underscan: Displays an image with the same number of pixels on the screen when receiving HD signals only. Dot by Dot: Detects the resolution of the signal and displays an image with the same number of pixels on the screen. ENGLISH | FRANCAIS | PORTUGUES | PYCCKU | “3c | INDONESIA | aiun'lue | TIENG VIET | oe | AFbITLUBIH | O'ZBEK TILIDA
  • Page 18 - English - : Tool Operation AV Mode STANDARD fey igciit B) ae Laytaetses AV Mode gives you several viewing options to choose from to best match the surrounding environment of the TV. which can vary due to factors like room brightness. type of programme watched or the type of device connected. These settings will be automatically saved on each input for convenience. STANDARD: For a highly defined image ina normal lighting. MOVIE: For a movie. GAME: Lowers image brightness for easier PC: For PC. PHOTO: For a photo. DYNAMIC:For a clear-cut image emphasizing high contrast. useful for sports viewing. DYNAMIC (FIXED): Changes the image and sound settings to the factory preset values. No adjustments are allowed. e When you play games. "GAME" is recommended for AV Mode. e You can select AV Mode by pressing AV MODE on the remote control unit. ENGLISH | FRANCAIS | PORTUGUES | PYCCKU | “3c | INDONESIA | aiun'lue | TIENG VIET | oe | AFbITLUBIH | O'ZBEK TILIDA
  • Page 19 - English - : Tool Operation AV Mode : STANDARD AV Mode STANDARD fey igciit B) ae Laytaetses ENGLISH | FRANCAIS | PORTUGUES | PYCCKU | “3c | INDONESIA | aiun'lue | TIENG VIET | oe | AFbITLUBIH | O'ZBEK TILIDA Picture (Continue) Automatically adjusts the brightness of the Select from the following available settings. e When set to "On". the Light Sensor senses the surrounding light and automatically adjusts the backlight brightness. Make sure nothing obstructs the Light Sensor. which could affect its ability to sense surrounding
  • Page 20 - English - : Tool Operation Picture (Continue) Adjusts the picture to your preference with the following picture settings. AV Mode : STANDARD AV Mode STANDARD Backlight | The screen | The screen dims brightens e "Backlight" is not available when you set Eee - "OPC" (Light Sensor) to "On". Brightness ENGLISH | FRANCAIS | PORTUGUES | PYCCKU | “3c | INDONESIA | aiun'lue | TIENG VIET | oe | AFbITLUBIH | O'ZBEK TILIDA
  • Page 21 - English - : Tool Operation Picture (Continue) Adjusts the picture to your preference with the following picture settings. ma Teiael a= AV Mode : STANDARD AV Mode STANDARD Contrast For less For more contrast contrast ie ¥elel dite] nit Brightness ENGLISH | FRANCAIS | PORTUGUES | PYCCKU | “3c | INDONESIA | aiun'lue | TIENG VIET | oe | AFbITLUBIH | O'ZBEK TILIDA
  • Page 22 - English - : Tool Operation Picture (Continue) Adjusts the picture to your preference with the following picture settings. AV Mode : STANDARD Brightness | For less For more brightness brightness ied aCe] ness ENGLISH | FRANCAIS | PORTUGUES | PYCCKU | “3c | INDONESIA | aiun'lue | TIENG VIET | oe | AFbITLUBIH | O'ZBEK TILIDA
  • Page 23 - English - : Tool Operation Picture (Continue) Adjusts the picture to your preference with the following picture settings. AV Mode : STANDARD Backlight a] +6 Colour | Forless colour | For more colour intensity intensity Brightness ENGLISH | FRANCAIS | PORTUGUES | PYCCKU | “3c | INDONESIA | aiun'lue | TIENG VIET | oe | AFbITLUBIH | O'ZBEK TILIDA
  • Page 24 - English - : Tool Setup Operation Brightness Reset Picture ENGLISH | FRANCAIS Picture (Continue) Adjusts the picture to your preference with the following picture settings. AV Mode : STANDARD . Tint Skin tones Skin tones become reddish | become | PORTUGUES | PYCCKUM | “3c | INDONESIA | anwd'lue | TIENG VIET | oe | AFbITLUBIH | O'ZBEK TILIDA
  • Page 25 - English - : Tool Operation =a Teiel a= Brightness Reset Picture Picture (Continue) Adjusts the picture to your preference with the following picture settings. AV Mode : STANDARD For less For more sharpness sharpness | PORTUGUES | PYCCKUM | “3c | INDONESIA | anwd'lue | TIENG VIET | oe | AFbITLUBIH | O'ZBEK TILIDA ENGLISH | FRANCAIS
  • Page 26 - English - : Tool Operation Picture (Continue) C.M.S. (Colour Management System) Advanced Colour tone is managed using the six-colour EVAR LGD) adjustment setting. C.M.S.-hue: This is a standard to adjust the colour either more reddish or more bluish in oa RSC A lower value makes the image darker. C.M.S.-value Colour temp. Resolution Active Contrast Gamma Adjustment ENGLISH | FRANCAIS | PORTUGUES | PYCCKU | “3c | INDONESIA | aiun'lue | TIENG VIET | oe | AFbITLUBIH | O'ZBEK TILIDA
  • Page 27 - English - : Tool Operation Picture (Continue) C.M.S. (Colour Management System) Advanced Colour tone is managed using the six-colour acca adjustment setting. C.M.S.-saturation: Increases or decreases the saturation of a selected colour. A lower value makes the image darker. OA Romecs- 10 ec1i(e)a) C.M.S.-value Colour temp. Resolution Active Contrast Gamma Adjustment ENGLISH | FRANCAIS | PORTUGUES | PYCCKU | “3c | INDONESIA | aiun'lue | TIENG VIET | oe | AFbITLUBIH | O'ZBEK TILIDA
  • Page 28 - English - : Tool Operation C.M.S.-saturation (On RoRa Vell) Colour temp. Resolution Active Contrast Gamma Adjustment ENGLISH | FRANCAIS | PORTUGUES | PYCCKU | “3c | INDONESIA | aiun'lue | TIENG VIET | oe | AFbITLUBIH | O'ZBEK TILIDA AV Mode : STANDARD Picture (Continue) C.M.S. (Colour Management System) Colour tone is managed using the six-colour adjustment setting. C.M.S.-value: A higher value makes the image brighter. A lower value makes the image darker.
  • Page 29 - English - : Tool Operation Picture (Continue) Colour temp. (Colour Temperature) Advanced For a better white balance. use colour AV Mode : STANDARD temperature correction. High: White with bluish tone avigectactine Low: White with reddish tone C.M.S.-value Colour temp. Resolution Poi {em Ore) al Ure k1s Gamma Adjustment ENGLISH | FRANCAIS | PORTUGUES | PYCCKU | “3c | INDONESIA | aiun'lue | TIENG VIET | oe | AFbITLUBIH | O'ZBEK TILIDA
  • Page 30 - English - : Tool Operation Picture (Continue) Resolution Advanced Please select 4K resolution mode based on IACI your watching preference. Select from the following available settings. C.M.S.-saturation Detail/Wide Edge C.M.S.-value Colour temp. Resolution Active Contrast Gamma Adjustment ENGLISH | FRANCAIS | PORTUGUES | PYCCKU | “3c | INDONESIA | aiun'lue | TIENG VIET | oe | AFbITLUBIH | O'ZBEK TILIDA
  • Page 31 - English - : Tool Operation Picture (Continue) Active Contrast Advanced Automatically adjusts the image contrast AV Mode : STANDARD according to the scene. On: Produces higher contrast image in any C.M.S.-value scene. Off: No adjustment. Colour temp. Resolution Active Contrast Gamma Adjustment ENGLISH | FRANCAIS | PORTUGUES | PYCCKU | “3c | INDONESIA | aiun'lue | TIENG VIET | oe | AFbITLUBIH | O'ZBEK TILIDA
  • Page 32 - English - : Tool Operation Picture (Continue) Gamma Adjustment Advanced Adjusts the differences of picture tones PNAC CSENDLGD between bright parts and dark parts. The adjustment range of the gamma can be set to a oreo la cll maximum of +3 and a minimum of -3 by pressing <4 or P. Resolution Active Contrast Gamma Adjustment Digital Noise Reduction ENGLISH | FRANCAIS | PORTUGUES | PYCCKU | “3c | INDONESIA | aiun'lue | TIENG VIET | oe | AFbITLUBIH | O'ZBEK TILIDA
  • Page 33 - English - : Tool Operation Picture (Continue) HDR Gamma Adjustment Advanced Emphasize the differences of picture tones LVAD) between bright parts and dark parts. The adjustment range of the gamma can be set to a orloltia Chiles maximum of +2 and a minimum of -2 by pressing <4 or P. Resolution NOTE e "HDR Gamma Adjustment" is available only when receiving HDR signal. Active Contrast HDR Gamma Adjust... Film Mode STANDARD Digital Noise Reduction ENGLISH | FRANCAIS | PORTUGUES | PYCCKU | “3c | INDONESIA | aiun'lue | TIENG VIET | oe | AFbITLUBIH | O'ZBEK TILIDA
  • Page 34 - English - : Tool Operation Picture (Continue) Film Mode (3:2 pull-down) Advanced This function provides high-quality playback of AV Mode : STANDARD images originally encoded at 24 frames/second. such as films. ole mC S Select from the following available settings. Resolution NOTE e "Film Mode" does not function depending Active Contrast on input signal type. Gamma Adjustment Digital Noise Reduction ENGLISH | FRANCAIS | PORTUGUES | PYCCKU | “3c | INDONESIA | aiun'lue | TIENG VIET | oe | AFbITLUBIH | O'ZBEK TILIDA
  • Page 35 - English - : Tool Operation Picture (Continue) Digital Noise Reduction Advanced Produces a clearer video image. initia heiaantiin Auto: Automatically adjusts the level of noise reduction. High/Middle/Low: You can select a desired level for viewing a clearer video image. Colour temp. Reel Ut todg Off: No adjustment. pe RTS e "Digital Noise Reduction" is not available when PC format is being input. Gamma Adjustment Digital Noise Reduction ENGLISH | FRANCAIS | PORTUGUES | PYCCKU | “3c | INDONESIA | aiun'lue | TIENG VIET | oe | AFbITLUBIH | O'ZBEK TILIDA
  • Page 36 - English - : Tool Operation AV Mode : STANDARD (fey iret. ay Brightness Reset Picture Picture (Continue) Returns Picture Settings to their factory preset values. To reset. select "Yes" and then press @ (ENTER). ENGLISH | FRANCAIS | PORTUGUES | PYCCKU | “3c | INDONESIA | aiun'lue | TIENG VIET | oe | AFbITLUBIH | O'ZBEK TILIDA
  • Page 37 - English - : Tool Operation This function allows you to convert the audio Audio Select from the following available settings. INT OM ete) STANDARD NOTE e "Audio Mode" is not available when you set "Audio Out" to "Variable". Auto Volume ENGLISH | FRANCAIS | PORTUGUES | PYCCKU | “3c | INDONESIA | aiun'lue | TIENG VIET | oe | AFbITLUBIH | O'ZBEK TILIDA
  • Page 38 - English - : Tool Operation Audio (Continue) Different sound sources sometimes do not have the same loudness level. such as a Audio programme and its commercial breaks. The aia eal aa Auto Volume reduces this problem by equalizing it. On: Reduces the loudness gaps among different sound source. The result is eA automatically adjusted according to the sound sources. Off: No adjustment. e "Audio Mode" is not available when you set "Audio Out" to "Variable". Audio Mode STANDARD 3-1 Fel alors) ENGLISH | FRANCAIS | PORTUGUES | PYCCKU | “3c | INDONESIA | aiun'lue | TIENG VIET | oe | AFbITLUBIH | O'ZBEK TILIDA
  • Page 39 - English - : Tool Operation Audio (Continue) You can adjust the sound quality to your preference with the following settings. AV Mode : STANDARD Audio Mode STANDARD Treble For weaker For stronger treble treble Auto Volume NOTE e "Audio Mode" is not available when you set "Audio Out" to "Variable". ENGLISH | FRANCAIS | PORTUGUES | PYCCKU | “3c | INDONESIA | aiun'lue | TIENG VIET | oe | AFbITLUBIH | O'ZBEK TILIDA
  • Page 40 - English - : Tool Operation Audio (Continue) You can adjust the sound quality to your preference with the following settings. Audio Selected AV Mode : STANDARD . Audio Mode STANDARD For weaker For stronger Auto Volume NOTE e "Audio Mode" is not available when you set sea - "Audio Out" to "Variable". ENGLISH | FRANCAIS | PORTUGUES | PYCCKU | “3c | INDONESIA | aiun'lue | TIENG VIET | oe | AFbITLUBIH | O'ZBEK TILIDA
  • Page 41 - English - : Tool Operation Audio (Continue) You can adjust the sound quality to your preference with the following settings. AV Mode : STANDARD Auto Volume Off Balance| Decrease audio | Decrease audio from the right from the left speaker speaker e "Audio Mode" is not available when you set "Audio Out" to "Variable". 13-1 Felner) Harmonics enhancer exte... ENGLISH | FRANCAIS | PORTUGUES | PYCCKU | “3c | INDONESIA | aiun'lue | TIENG VIET | oe | AFbITLUBIH | O'ZBEK TILIDA
  • Page 42 - English - : Tool Operation AV Mode : STANDARD Treble | ) Harmonics enhancer exte... Reset Audio Audio (Continue) The surround function produces Surround effect from the speakers. "Audio Mode" is not available when you set "Audio Out" to "Variable". For some discs. setup may be required on your BD/DVD player. In this case. please refer to the operation manual of your BD/DVD player. ENGLISH | FRANCAIS | PORTUGUES | PYCCKU | “3c | INDONESIA | aiun'lue | TIENG VIET | oe | AFbITLUBIH | O'ZBEK TILIDA
  • Page 43 - English - : Tool Operation Audio (Continue) This function allows you to select surround mode for surround on. Select from the following available settings. Living/Theater/Hall e "Audio Mode" is not available when you set Balance i "Audio Out" to "Variable". (See page 4-10.) AV Mode : STANDARD Surround Always set "Surround" to "Off". Surround mode Living Harmonics enhancer exte... Reset Audio Wall Mount Setup ENGLISH | FRANCAIS | PORTUGUES | PYCCKU | “3c | INDONESIA | aiun'lue | TIENG VIET | oe | AFbITLUBIH | O'ZBEK TILIDA
  • Page 44 - English - : Tool Operation Audio (Continue) This function improves the sound quality by extending the selected range. Audio Select from the following available settings. Seeeeeaneie All Range/Low Range/Off Balance. NOTE e "Audio Mode" is not available when you set "Audio Out" to "Variable". Surround Always Surround mode Living Harmonics enhancer exte... Reset Audio Wall Mount Setup Clear Voice ENGLISH | FRANCAIS | PORTUGUES | PYCCKU | “3c | INDONESIA | aiun'lue | TIENG VIET | oe | AFbITLUBIH | O'ZBEK TILIDA
  • Page 45 - English - : Tool Operation AV Mode : STANDARD Surround Always Surround mode Living Harmonics enhancer exte... Reset Audio Wall Mount Setup Clear Voice Audio Description Set... Audio (Continue) Returns Audio Settings to their factory preset values. To reset. select "Yes" and then press @ (ENTER). "Audio Mode" is not available when you set "Audio Out" to "Variable". ENGLISH | FRANCAIS | PORTUGUES | PYCCKU | “3c | INDONESIA | aiun'lue | TIENG VIET | oe | AFbITLUBIH | O'ZBEK TILIDA
  • Page 46 - English - : Tool Operation Surround Always Surround mode Living Harmonics enhancer exte... Reset Audio Wall Mount Setup Clear Voice Audio Description Set... —= Audio (Continue) This selects the optimal audio for the programme you are currently watching even when the TV is mounted to a wall. ENGLISH | FRANCAIS | PORTUGUES | PYCCKU | “3c | INDONESIA | aiun'lue | TIENG VIET | oe | AFbITLUBIH | O'ZBEK TILIDA
  • Page 47 - English - : Tool Operation Surround mode Harmonics enhancer exte... Reset Audio Wall Mount Setup Clear Voice Audio Description Set... a) ENGLISH | FRANCAIS | PORTUGUES | PYCCKU | “3c | INDONESIA | aiun'lue | TIENG VIET | oe | AFbITLUBIH | O'ZBEK TILIDA Audio (Continue) This function emphasises speech against background noise for greater clarity. Select from the following available settings. Normal/Low/High/Off "Audio Mode" is not available when you set "Audio Out" to "Variable".
  • Page 48 - English - : Tool Operation Audio (Continue) This function allows you to enable output of audio description if the TV receives a signal Audio including audio description. Soa Always e The audio description sound is superimposed on the main audio when you select a broadcast compatible with audio Surround mode Living ar description. e This function is available only for DTV Harmonics enhancer exte... broadcasts. e The audio description sound is superimposed on the main audio only when excl@ [fo the sound is output on the speaker sound output. headphone sound output and sound for audio out output. The sound is not output MEU Latte Soc» on the digital audio output and the HDMI sound output. e This function is not available for the AQUOS Audio speaker system. e This function does not work during USB Audio Description Set... | recording playback. Clear Voice ENGLISH | FRANCAIS | PORTUGUES | PYCCKU | “3c | INDONESIA | aiun'lue | TIENG VIET | oe | AFbITLUBIH | O'ZBEK TILIDA
  • Page 49 - English - : 11 Setting the country. Press A/ W to select your country or area. and then press Auto installation aE ee . e This setting screen only appears during the initial auto installation. When the TV is powered on for the first time after purchase. the initial auto e Auto installation will be executed. installation wizard appears. Follow the menus and make the necessary NOTE settings one after another. — e Digital (DVB-T/T2) broadcasting cannot be viewed in the area where digital broadcasting is not yet launched. e DTV concerned menu may not displayed in some country. 12 Press A/ YW to view Sharp Terms of Use and Sharp Privacy Policy. 13 Selecting the location of the TV. Confirm the following before turning on the power e Is the antenna cable connected? e ls the AC cord plugged in? 4 Press POWER on the TV. aren TERA to select where you will use this TV. and then press e The initial auto installation wizard appears. Home: . = e Settings are optimised for normal home viewing and energy efficiency. B re e “STANDARD?” will be the default value for the “AV Mode” setting. é Yv (Pa i au Store: é |. B e Settings are designed for maximum impact in retail store displays. J ME « “DYNAMIC (FIXED)” will be the default value for the “AV Mode” setting. If & = ced JIT Te the “AV Mode” is changed. the TV will automatically switch back to + — I | aaa al “DYNAMIC (FIXED)” when there is no operation using the TV or remote 1 j 7 f control unit for 30 minutes. —<— iy NOTE e Store: A demonstration image will be displayed after initial auto installation is completed. If you have chosen “Store” by mistake. go to “HOME” > “Settings” > “System/Function” > “TV location” > select “Home” 14 You have to follow the procedure shown below to pair the remote control 2 Setting the OSD language. Press A/ W to select the desired language. and then press @ (ENTER). 3 Press "Yes" or "No" to allow Android device (phone. tablet or other device) to setup TV. 4 Press A/ ¥ to select your Wi-Fi network. unit with the TV. 5 Press A/ ¥ to sign in Google account. 15 Initial setup has finished. 6 Press &/ ¥ to view Google Terms of Service and Google Privacy 16 After completing the initial setup. application introductions and tutorials will Policy. be displayed. 7 Press "Yes" or "No" to allow Google use your device location. 8 Press "Yes" or "No" to set permission for Google to use your TV diagnosis and usage data. 9 Press A/ W to select desired TV name or to customize it. ENGLISH | FRANCAIS | PORTUGUES | PYCCKUM | 3c | INDONESIA | aiq'lue | TIENG VIET | oe | AFbINILUBIH | O'ZBEK TILIDA
  • Page 50 - English - : TV (Continue) Channel Search CLRUNID Souls Auto-Searching digital (DVB-T/T2) and analogue broadcasting channels. OFT esy=rel Keun Channel Registration Channel Skip Programme Setup ENGLISH | FRANCAIS | PORTUGUES | PYCCKU | “3c | INDONESIA | aiun'lue | TIENG VIET | oe | AFbITLUBIH | O'ZBEK TILIDA