Loading ...
Loading ...
Loading ...
5
Installation of the
built-in oven
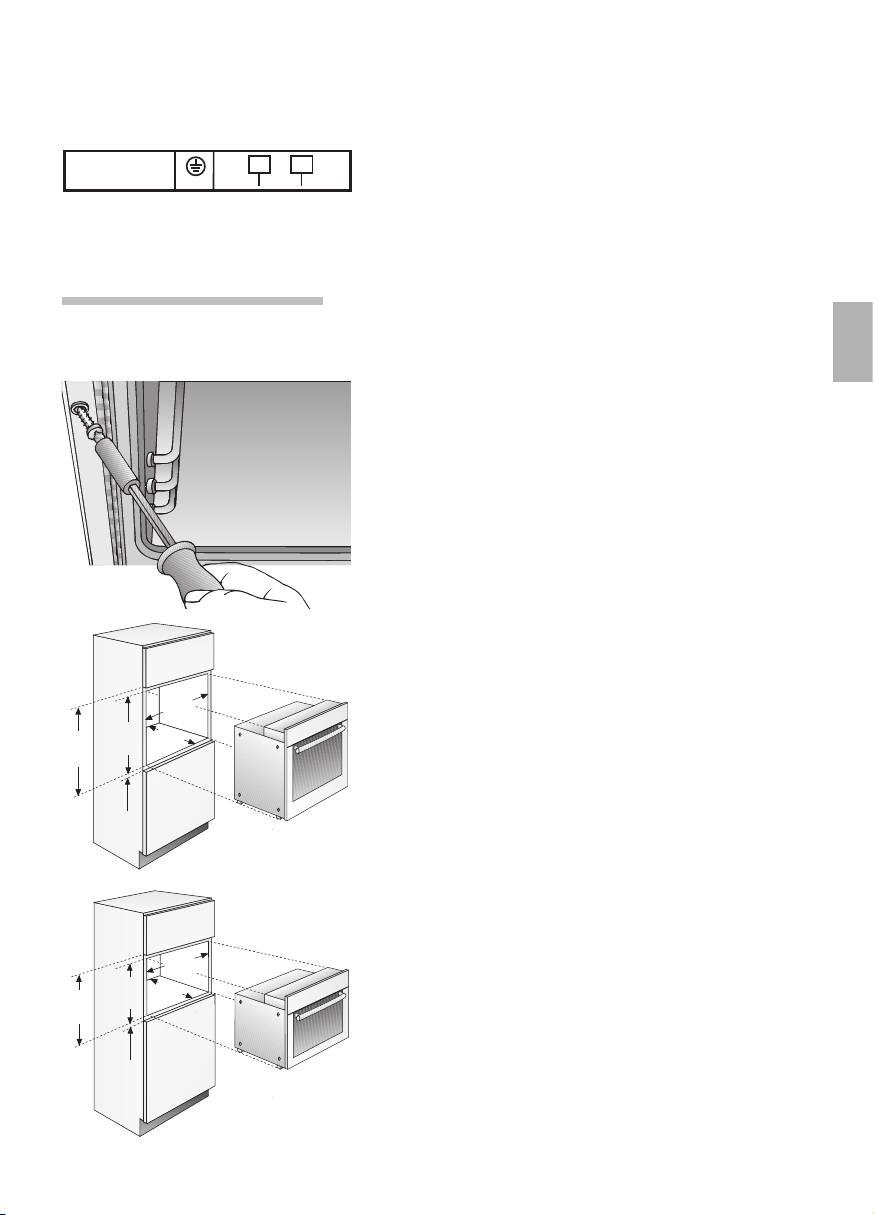
Push the built-in oven into the installation
roughing of the conversion cabinet and align the
unit until it is in a level position.
Open the oven door and, using one screw on
each side, fasten the built-in oven to the side
strips of the conversion cabinet.
When screwing in the two screws (enclosed in a
bag with the built-in oven), ensure that they are
pointing outwards at a slight angle. Please use
these screws only.
Verify that the built-in oven is positioned securely
and in a level position, and that the required
installation dimensions have been maintained.
In units featuring telescoping extensions,
these may not move by themselves.
In units featuring automatic oven cleaning,
after filling 0,4 l of cleaning solution into the
recess in the oven floor, the liquid must not
spill toward the front.
Furniture programmes
Cooker conversion cabinets from virtually all lines
of kitchen furniture are suitable for installing the
built-in oven. However, the veneers or plastic
laminates on the conversion cabinets must be
applied with heat-resistant cement (90 C).
If plastic laminates or cement are not sufficiently
heat-resistant, warping, bubbling or detachment
of the finish may result.
min.
590
3
min.
550
min.
560-
570
min.
598
min.
450
3
min.
550
min.
560-
570
min.
458
In the case of repairs interrupt all power
connections to the unit.
The properly installed appliance must be covered
on all sides in such a fashion that not even
components with rough insulation are exposed to
the touch.
The cover must be removable with tools only.
220-240V
~
L
N
The connection diagramm is
located on the rear panel of the
appliance.
Loading ...
Loading ...
Loading ...