Assemble the battery into the dust cup, make sure the battery bolt head is inserted into the dust cup slot rightly as below.
Attach the metal tube to the main part as below until hearing the click sound.
Attach the power brush to the tube as showed below.
Press the Switch to start the machine. Two suction speeds control.
a. Turn on the switch, the machine will work on the low speed mode(default). b. Press the +/- button on the top cover to change between high and low speed mode. c. Press the switch again to stip the machine.
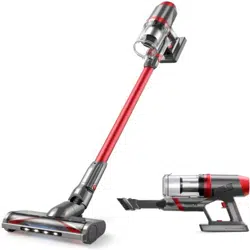
How to use as a hand vacuum:
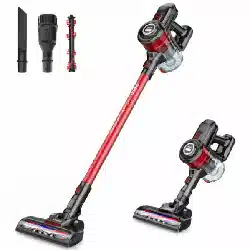
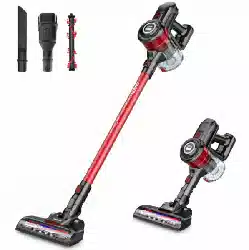
Insert the accessory(bristle brush or long crevice) to the main part as showed below until hearing the click sound
How to charge:
1. When only one indicator light is blinking, please turn off the appliance, put it back to the charging base, then make sure the plug of the charger has been inserted into the socket. When charging, the indicate lights will become flashing green.
Note: How to use the wall bracket
Hang it on the wall with screws
Use 3M stickers to make the bracket glued to the wall, for storing the vacuum cleaner (make sure the height is the same as the vacuum cleaner itself, totally hanging away from floor is not acceptable)
2. It will have 3 green lights on after fully charged.
How to Maintain the Filter:
Press the handle locker to remove the battery from dust cup.
Separate and remove the top cover as showed below.
Take out the filter case, then take out the filter.
Wash the filter case and the filter by water.
Please dry the filter and the filter case completely before assembling back.
After drying, assemble the filter to the case.
Put the filter case back to the dust cup.
Assemble the top cover to the dust cup
Troubleshooting
Suction gets weak
Empty the dust cup
Check if the dust cup is installed correctly
Check if the filter case and the filter are installed correctly
Clean the filter
Stop working
Charge the vacuum
Clean the roller brush and the bearing thoroughly
Battery doesn’t hold a charger
Check if the plug has been inserted already
Check if the socket is useful
Technical Specification
Battery
22.2V/2200mAh
Charging time
4-5 hours
Battery charge input
100-240V ~ 50/60Hz 0.3A
Battery charge output
26V - 0.45A
Working time
30 min(low speed); 15 min(high speed)
Power
250W
Large Suction
7KPa(Regular)/20KPa(Max)
Important Safety Instructions
IMPORTANT SAFE GUARDS
Read all safety warnings and instructions. Failure to follow the warnings and instructions may result in electric shock, fire and/or serious injury.
READ ALL INSTRUCTIONS BEFORE USING YOUR VACUUM CLEANER.
WARNING:
Prevent unintentional starting. Ensure the switch is in the off-position before connecting to battery pack, picking up or carrying the vacuum cleaner. Carrying the vacuum cleaner with your finger on the switch or energizing vacuum cleaner that have the switch on invites accidents.
Disconnect the battery pack from the vacuum cleaner before making any adjustments, changing accessories, or storing vacuum cleaner. Such preventive safety measures reduce the risk of starting the vacuum cleaner accidentally.
Recharge only with the charger specified by the manufacturer. A charger that is suitable for one type of battery pack may create a risk of fire when used with another battery pack.
Use vacuum cleaners only with specifically designated battery packs. Use of any other battery packs may create a risk of injury and fire.
When battery pack is not in use, keep it away from other metal objects, like paper clips, coins, keys, nails, screws or other small metal objects, that can make a connection from one terminal to another. Shorting the battery terminals together may cause burns or a fire.
Under abusive conditions, liquid may be ejected from the battery; avoid contact. If contact accidentally occurs, flush with water. If liquid contacts eyes, additionally seek medical help. Liquid ejected from the battery may cause irritation or burns.
Do not use a battery pack or vacuum cleaner that is damaged or modified. Damaged or modified batteries may exhibit unpredictable behavior resulting in fire, explosion or risk of injury.
Do not expose a battery pack or vacuum cleaner to fire or excessive temperature. Exposure to fire or temperature above 130°C may cause explosion.
Follow all charging instructions and do not charge the battery pack or vacuum cleaner outside of the temperature range specified in the instructions. Charging improperly or at temperatures outside of the specified range may damage the battery and increase the risk of fire.
Have servicing performed by a qualified repair person using only identical replacement parts. This will ensure that the safety of the product is maintained.
Do not modify or attempt to repair the vacuum cleaner or the battery pack (as applicable) except as indicated in the instructions for use and care.
Read all safety warnings and instructions. Failure to follow the warnings and instructions may result in electric shock, fire and/or serious injury.
WARNING: To reduce the risk of fire, electrical shock, or injury:
Do not use outdoors or on wet surfaces.
Do not allow to be used as a toy. Close attention is necessary when used by or near children.
Use only as described in this manual. Use only manufacturer’s recommended attachments.
Do not put any object into openings. Do not use with any opening blocked; keep free of dust, lint, hair and anything that may reduce air flow.
Keep hair, loose clothing, fingers, and all parts of body away from openings and moving parts.
Do not pick up anything that is burning or smoking, such as cigarettes, matches, or got ashes.
Use extra care when cleaning on stairs.
Do not use to pick up flammable or combustible liquids such as gasoline or use in areas where they may be present.
Do not pick up anything that is burning or smoking, such as cigarettes, matches, or hot ashes
Do not use without dust bag and/or filters in place
Always turn off this appliance before connecting or disconnecting motorized nozzle