Loading ...
Loading ...
Instructions for the Installer
21
2. Fitting the appliance in the top
If the hob has to be adapted for a type of gas different from the one for which it
is preset in the factory, make this adjusting before building it into the unit,
following the instructions in point “5. Adapting to different types of gas”.
The procedures required below must be carried out by a skilled builder and/or joiner.
The hob can be installed on various materials, including masonry, metal, solid wood
and wood finished with plastic laminates, provided the material is heat-resistant
(T 90° C).
2.1 Fixing to the supporting structure
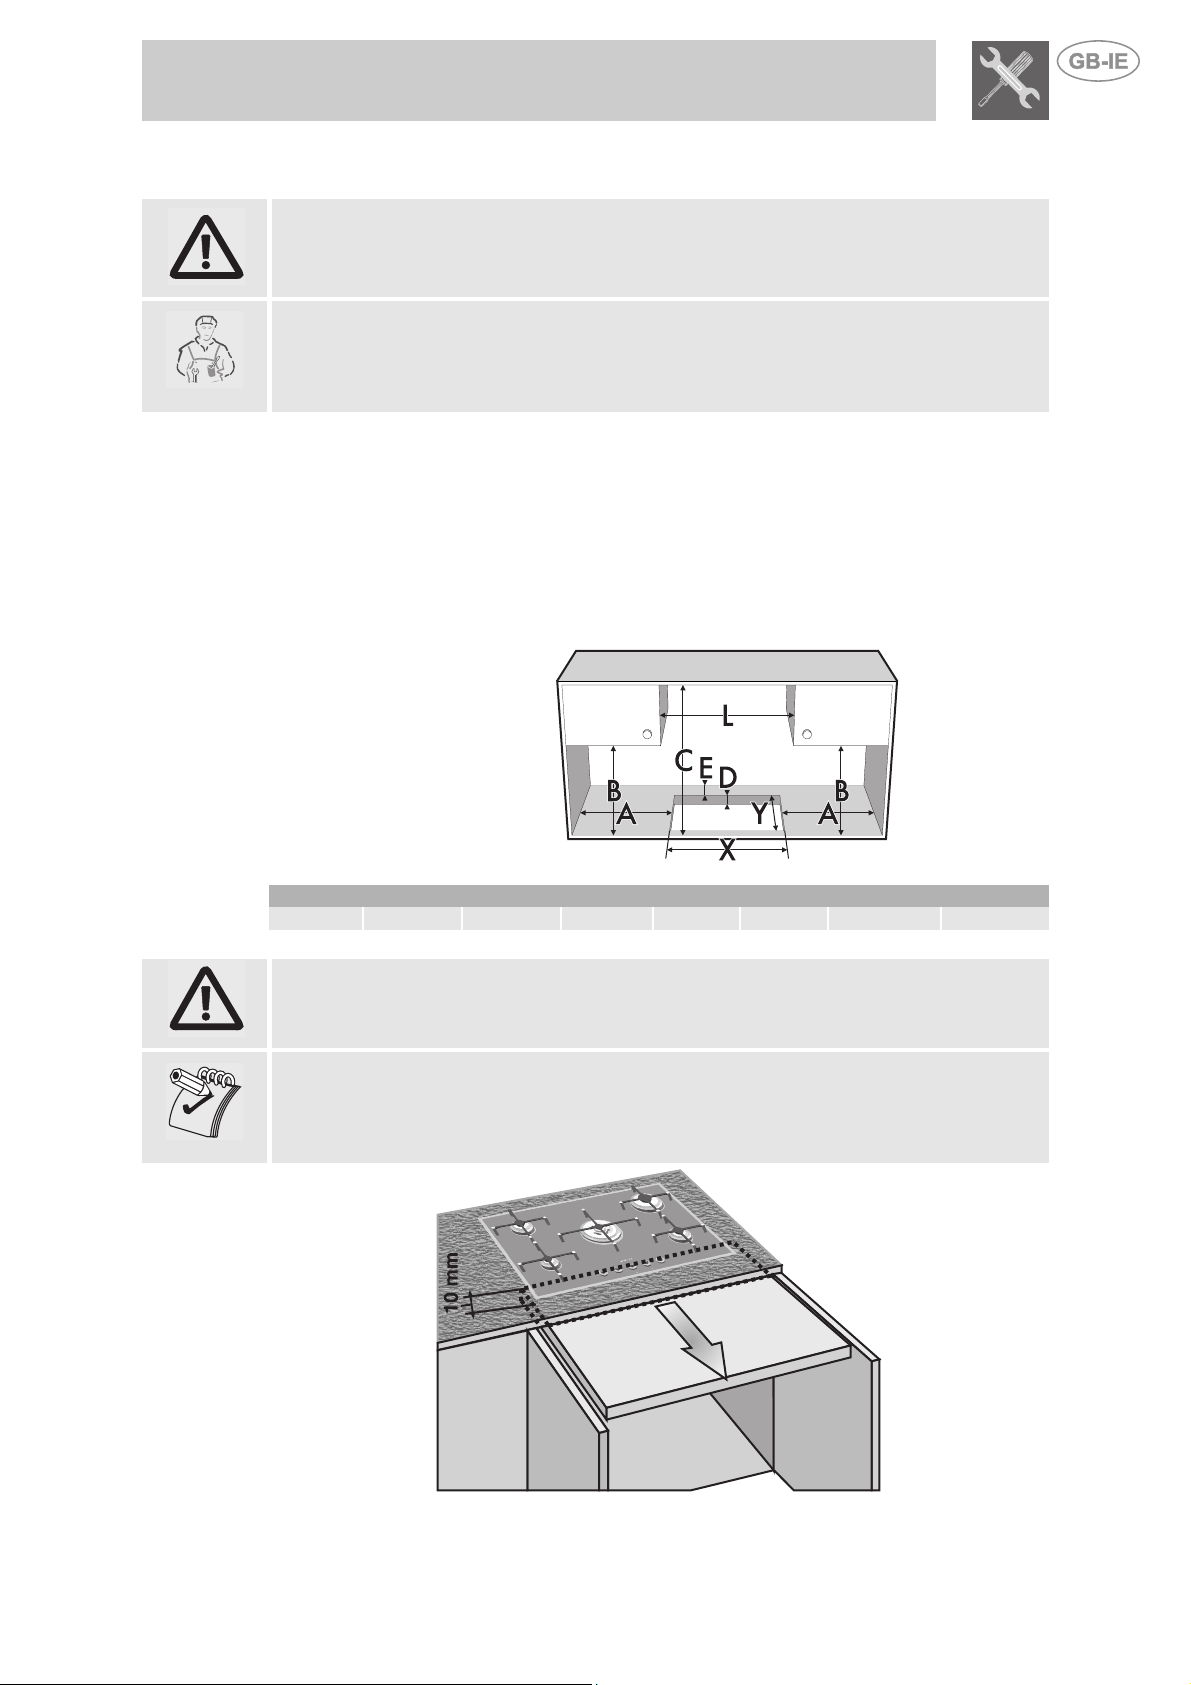
Make a hole in the cabinet top with the dimensions shown here, maintaining a
distance of at least 50 mm from the rear edge. This appliance may be installed
against walls higher than the worktop surface, provided the distance shown here is
maintained, in order to prevent damage due to overheating. Make sure that there is a
minimum distance of 750 mm between the stoves of the hob and any shelf that may
be installed directly above it. If a hood is installed above the hob, refer to the hood
instruction manual to ensure the correct clearance is left.
A (mm) B (mm) C (mm) D (mm) E (mm) L (mm) X (mm) Y (mm)
min 200 min 460 min 750 20÷60 min 50 740 730÷733 500÷503
If the hob is installed above an oven, the oven must be fitted with a cooling fan.
If the hob is installed above a cupboard with doors, a separator panel must be
installed underneath it. Leave a gap of at least 10 mm between the bottom of the hob
and the surface of the panel, which must be easily removable to allow sufficient
access for any servicing procedures.
Loading ...
Loading ...
Loading ...