Loading ...
Loading ...
Loading ...
4
Need Help? Visit our web site for replacement parts, product support, a list of authorized service centers in the US and customer service contact information
at www.razor.com. Please have the product I.D. code (located on the white label of your product) available for better assistance. Additional Customer Service
contact information is listed at the back of this manual.
ASSEMBLY AND SET-UP
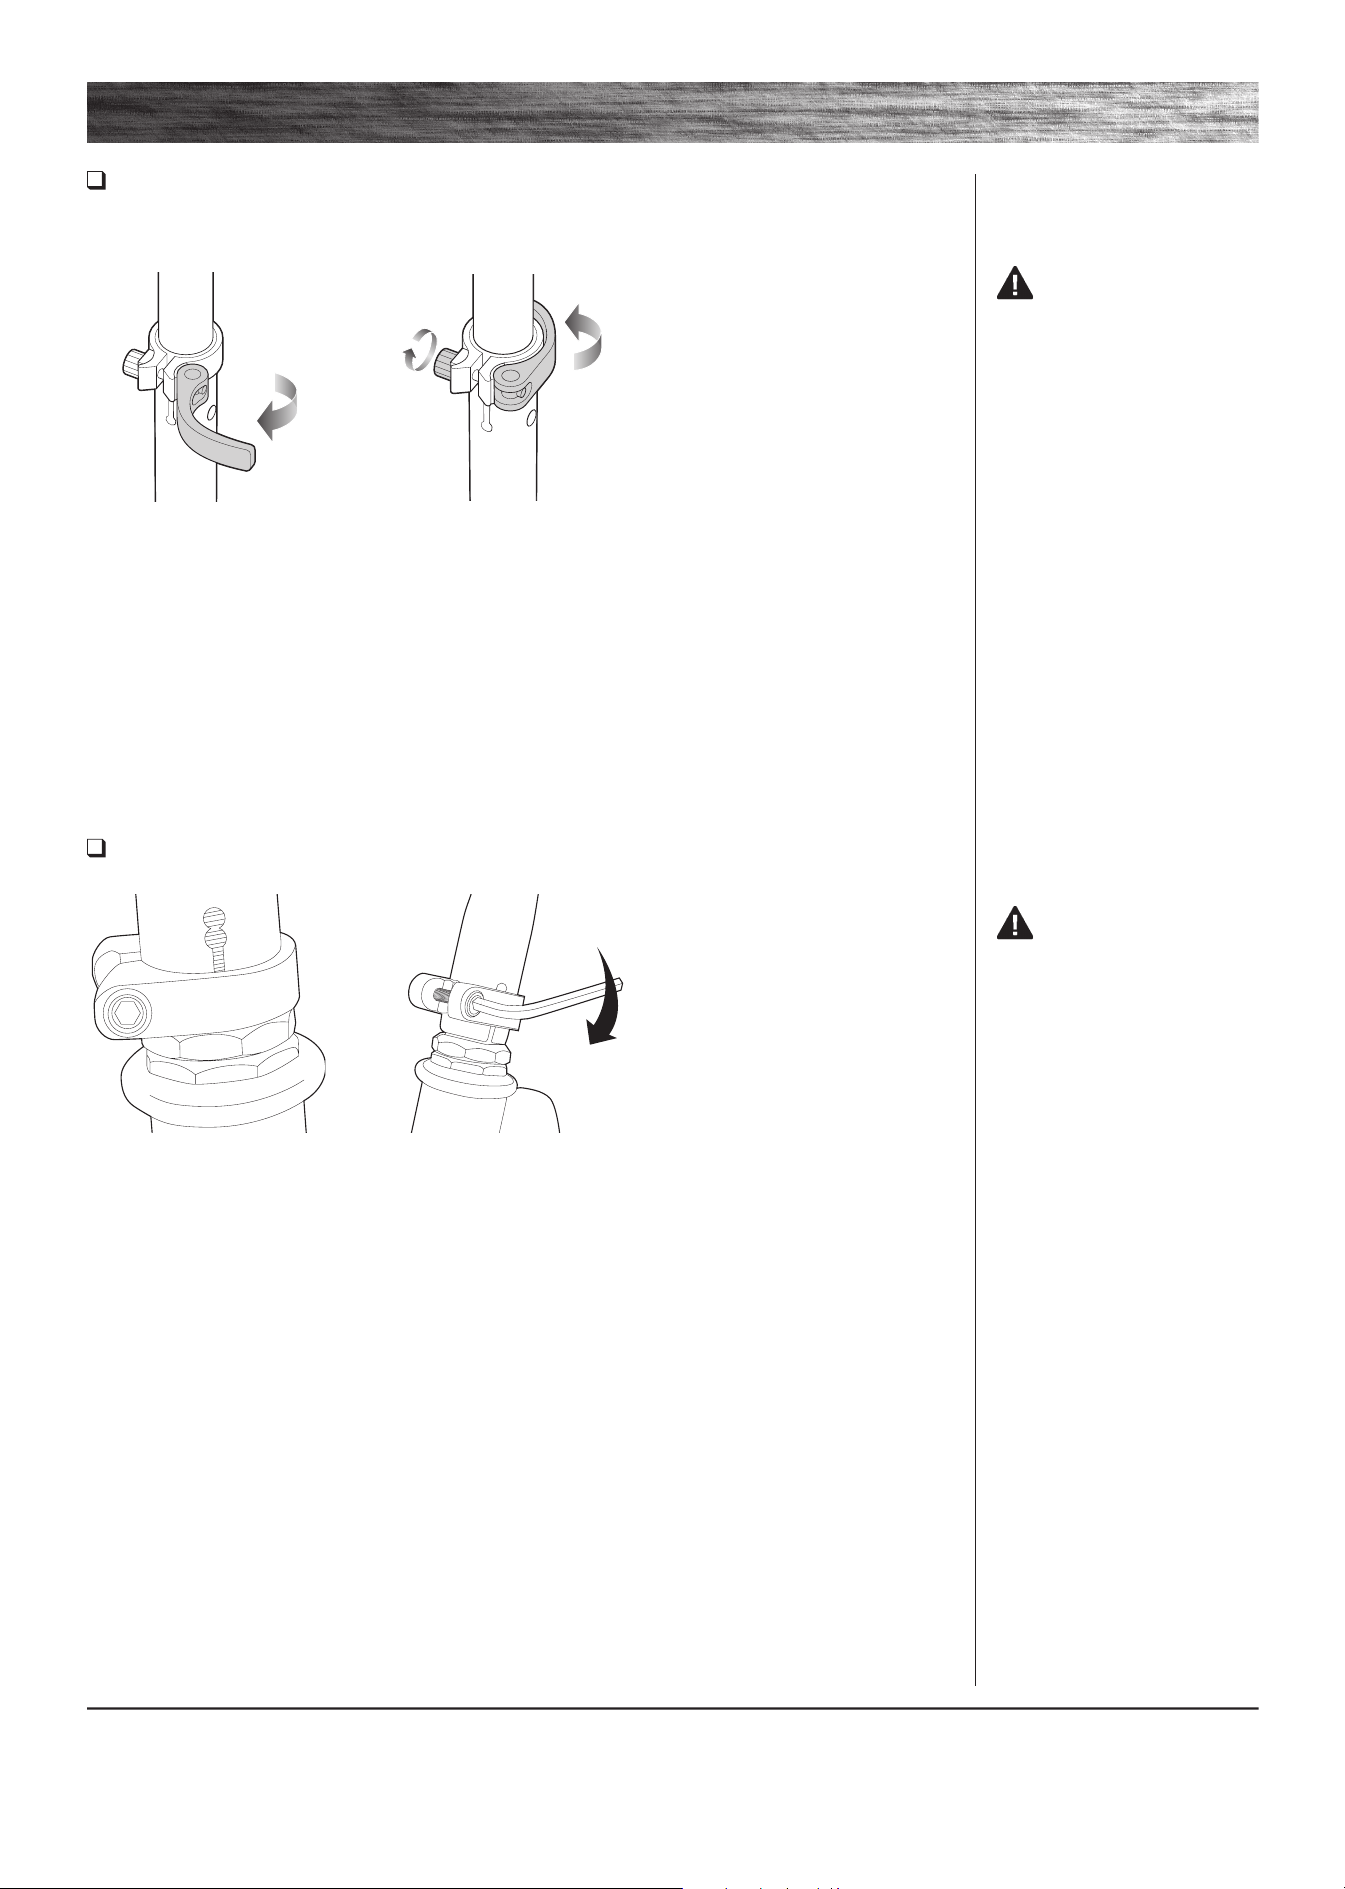
Collar Clamp
Using a 5 mm Allen wrench, check that the collar clamp bolt(s) are tightened securely. This item is tightened and
quality inspected at the factory, but there is a slight chance that the effects of shipping or handling may have caused
the bolt(s) to loosen.
WARNING:
Failure to properly install and/
or tighten the collar clamp
may cause the rider to lose
control and fall. If you are
having difficulty understanding
these instructions, please
contact Razor Customer
Service for assistance.
Note: The tension of the quick-
release lever can be adjusted by
manually tightening or loosening
the Allen bolt. Be careful not to
over-tighten. You should always
be able to open and close the
quick-release lever by hand and the
T-bar should slide freely when the
quick-release is open.
1 To adjust the height of the
handlebars, open the quick-release
lever and slide the T-bar to the
desired position and resecure the
quick release lever to lock into
place. When the T-bar is raised to
the maximum height, depress the
push button located directly below
the quick release lever to unlock
the T-bar.
Adjusting the Handlebar Height
(Select models)
WARNING: Failure to
properly secure the quick-release
lever may cause the T-bar to
telescope up or down while riding
and may cause you to lose control
and fall.
Loading ...
Loading ...
Loading ...