Loading ...
Loading ...
3
INSTALLATION REQUIREMENTS
Tools and Parts
IMPORTANT:
■ Observe all governing codes and ordinances.
■ Installer: Leave Installation Instructions with homeowner.
■ Homeowner: Keep Installation Instructions for future reference
and for the local electrical inspector’s use.
■ Keep cardboard shipping piece or plywood under refrigerator
until it is installed in the operating position.
■ Comply with installation specifications and dimensions.
■ Remove any moldings or decorative panels from kitchen
cabinets that would not allow access to the refrigerator for
service.
■ Contact a qualified electrical installer.
TOOLS NEEDED (on some models):
Gather the required tools and parts before starting installation.
Read and follow the instructions provided with any tools listed
here.
PARTS NEEDED (on some models):
■ Your refrigerator dealer has a kit available with a ¹⁄₄" (6.35 mm)
saddle-type shutoff valve, a union, and copper tubing.
■ Or you can purchase a ¹⁄₄" (6.35 mm) copper tubing with
shutoff valve and a ¹⁄₄" (6.35 mm) compression fitting
(coupling).
■ Depending on water line connections, you may also need a ¹⁄₄"
(6.35 mm) nut and ¹⁄₄" (6.35 mm) ferrule.
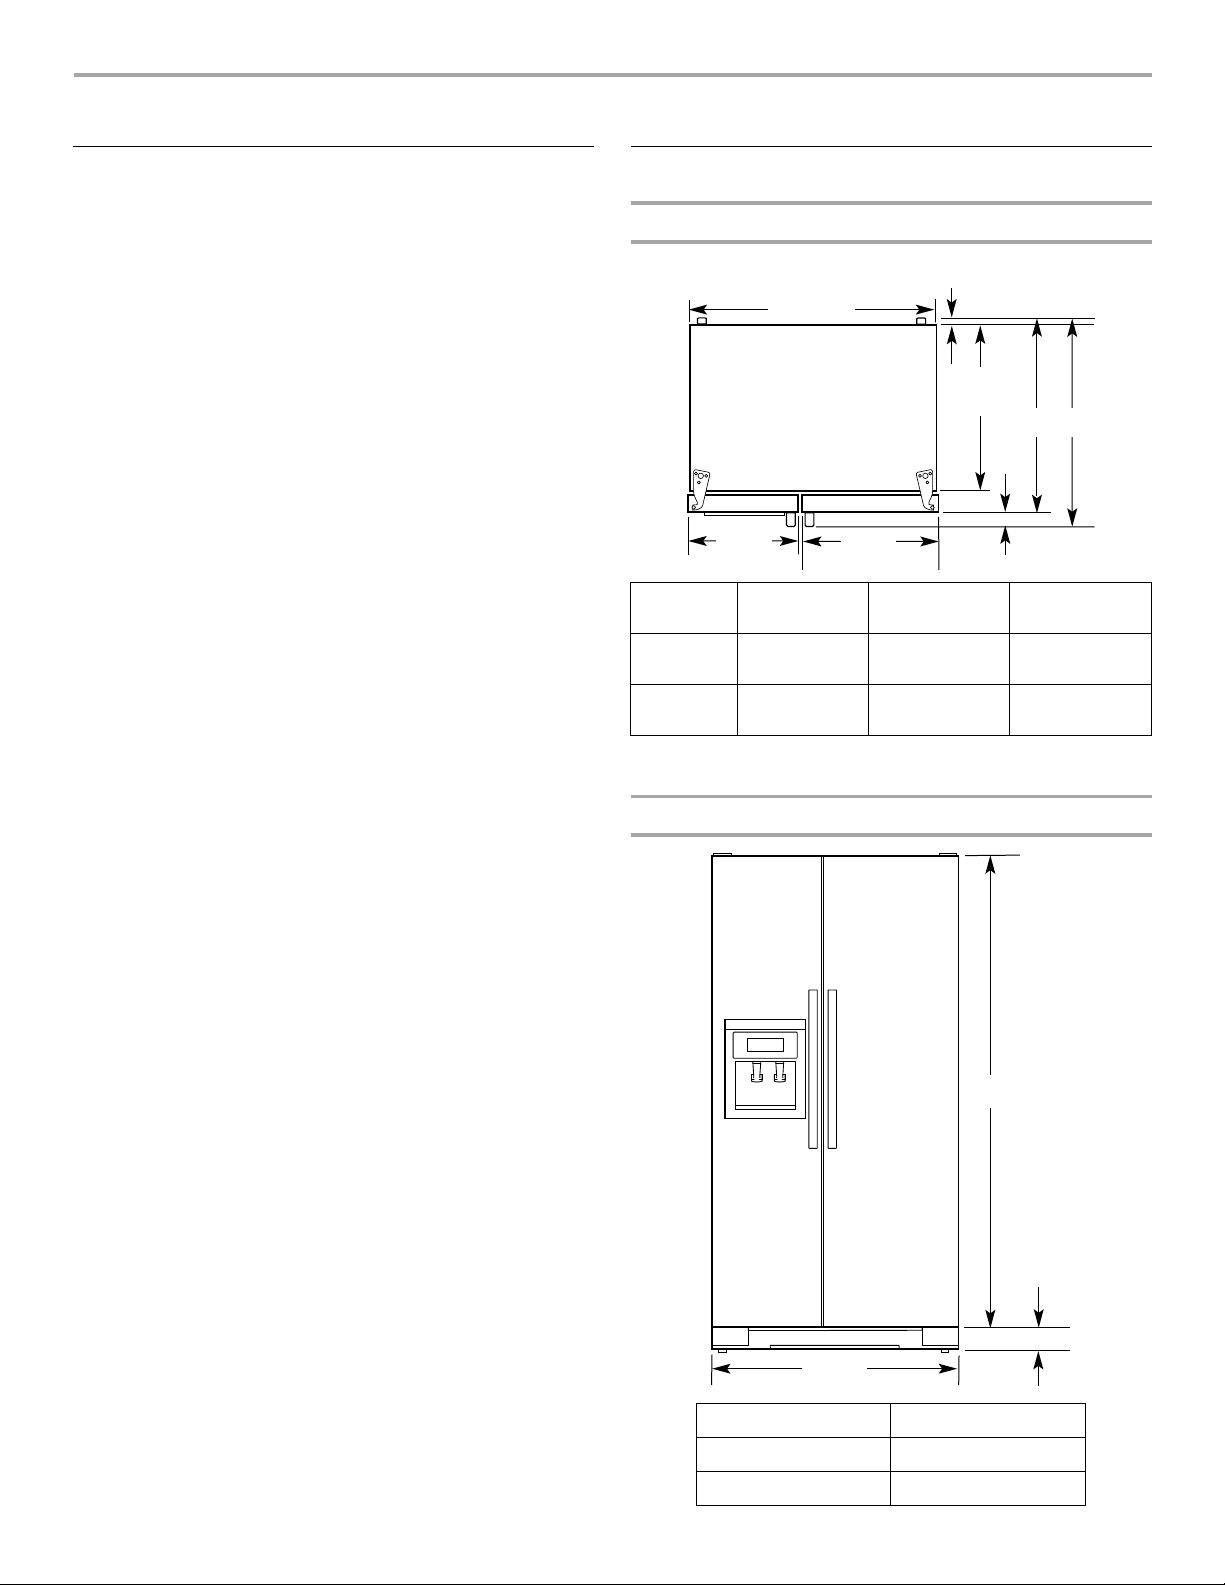
Product Dimensions
Top View
*Dimension may vary based on style of door handle.
The depth for the largest available handle is listed.
Front View
■ Cordless drill
■ ¹⁄₄" Nut driver
and drill bit
■ Flat-blade
screwdriver
■ ⁵⁄₁₆" or adjustable wrench
■ ⁷⁄₁₆" and ¹⁄₂" Open-end wrenches
■ Two adjustable wrenches
■ ³⁄₈" and ¹⁄₂" Socket wrenches
Door
Style
Depth
A
Depth
B
Depth
C
Flat 27¹⁄₂"
(69.8 cm)
2⁵⁄₈"(6.5cm)
maximum*
30" (76.3 cm)
maximum*
Curved 28⁵⁄₈"
(72.5 cm)
2⁵⁄₈"
(6.5 cm)
31¹⁄₈"
(79.1 cm)
Model Size Height A
69" 65³⁄₄" (166.9 cm)
72" 68¹⁄₈" (172.9 cm)
A
C
35¹⁄₂"
(90.0 cm)
23⁷⁄₈"
(60.4 cm)
15³⁄₈"
(38.9 cm)
20"
(50.8 cm)
B
⁵⁄₈"
(1.6 cm)
35³⁄₄"
(90.8 cm)
A
3
¹⁄₄"
(8.2 cm)
Loading ...
Loading ...
Loading ...