Loading ...
Loading ...
Loading ...
43
Operating
4.3 Adjusting Cropping Area
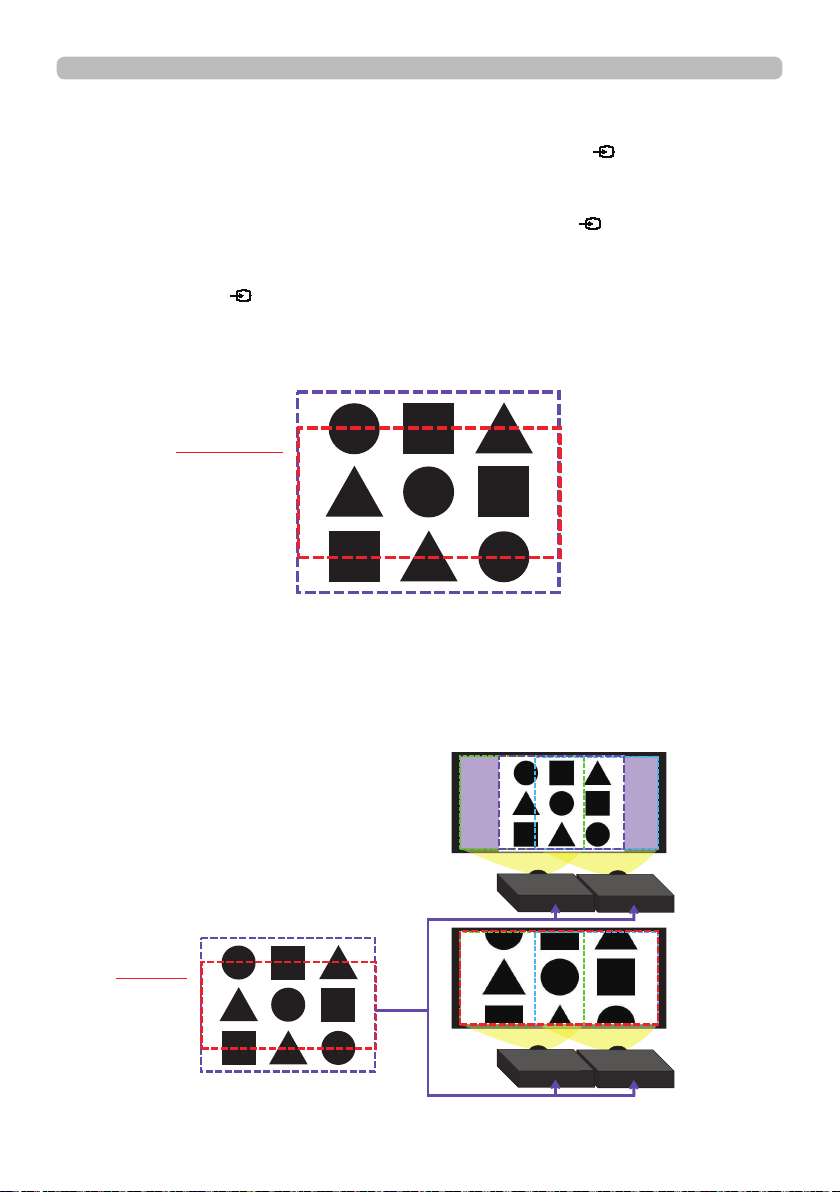
Adjust Cropping Area when cutting out a part of input image.
Select SETUP with ▲/▼ buttons and press
►
, ENTER or button.
* MODE is set to [OFF] temporarily and the guide of Cropping Area
is displayed.
Select [LT]/[WH] with ▲/▼ buttons and press ENTER or button.
Move the guide display with ▲/▼/
◄/► buttons
to select the region of the
screen to be cut out.
Press ENTER or button and then press
◄ button
to select SETUP, and
MODE switches to ON automatically.
(continued on next page)
4.4 Adjust Cropping Area of the other projector.
Set Cropping Area of the other projector with the same value as one projector.
Input image is automatically cut out according to the settings of Blending
Region.
* When you want to keep input image from not being seen while setting up, set
BLANK to ON.
Input Image
Cropping
Input Image
Cropping
Loading ...
Loading ...
Loading ...