Loading ...
Loading ...
Loading ...
20
Filters and maintenance
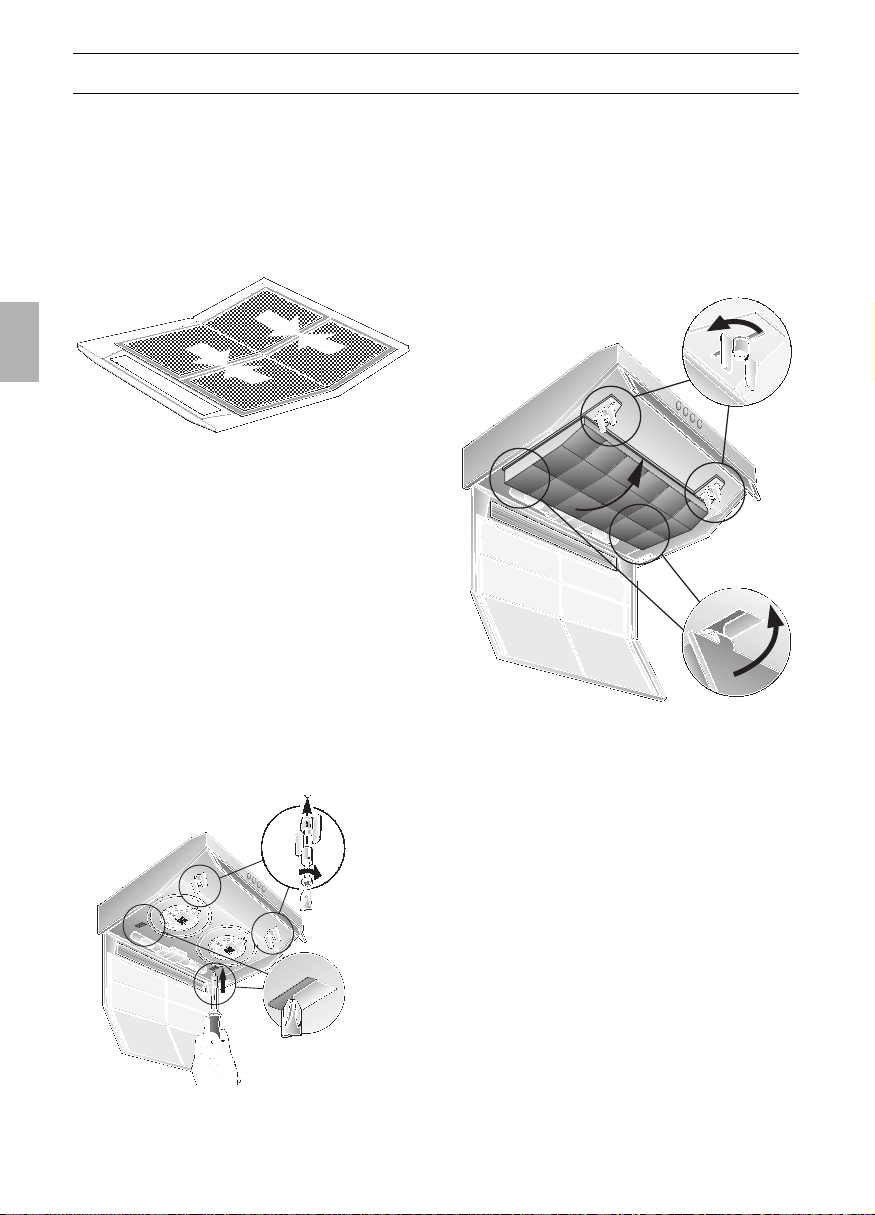
Removing and installing the metal filter
(See details for removing/inserting the
fleece filter):
1. Clean the filter grille and the filter mats.
2. Re-insert the cleaned filter mats and
clamp them with the wire grille.
Ensure that there is no gap in the middle.
Activated carbon filter:
For binding the odorous substances in
circulating-air mode.
(See details for removing/inserting the flee-
ce filter.)
1. Insert the screws through the wing nuts
and sleeves and screw the screws into
the left and right sides of the intermediate
base (required only during the initial
installation). Screws, wing nuts and
sleeves are enclosed with the
activated carbon filter –.
2. Using a screwdriver or similar tool, press
the two lugs on the housing inwards
(required only during the initial installation).
3. Insert the activated carbon filter at the
rear, fold up and lock into position on the
left and right with the wing nuts.
The lugs on the left and right sides
of the activated carbon filter are folded in
for the 50 cm wide extractor hood.
They must be folded up for the 60 cm
and 90 cm wide extractor hoods.
Replacing the activated carbon filter:
❑ During normal operation (daily 1 to 2
hours) the activated carbon filter must be
replaced approximately 1 x year.
❑ The activated carbon filter can be
purchased FROM YOUR DEALER (see
Optional accessories).
❑ Use only original filters.
These ensure optimum function.
Disposal of the old activated carbon
filter:
❑ Activated carbon filters do not contain
any harmful substances. They can be
disposed of as residual waste.
Loading ...
Loading ...
Loading ...