Loading ...
Loading ...
Loading ...
14
3. Set the Oven Function selector to the desired function – BAKE, CONVECTION BAKE, OR TRUCONVEC™, etc.
4. Set the temperature control knob to the desired baking temperature.
5. The automatic time bake program is now set!
NOTE: The display will continue to show the amount of bake time that was programmed (this will remain until the programmed start
time is reached). You can return the display to clock mode by pressing the “CLOCK” button on the Select models or “PROBE” on the
French door models. Notice that a small clock will be displayed in the upper right corner to indicate that a program is in progress.
Switch back to the timer mode by pressing the “BAKE HOURS” button.
6. When the specified time is reached, the oven will automatically turn on. It will bake for the programmed amount of time at the
selected temperature.
NOTE: At one minute from the end of the specified bake program, the oven timer will beep once. At the end of the specified bake
program, the oven will automatically turn off and the timer will sound a series of three beeps. This will continue until the “START TIME”
button is pressed. The display will then return to displaying the time.
NOTE: Setting the remaining duration time to :00 will cancel the Automatic Bake program..
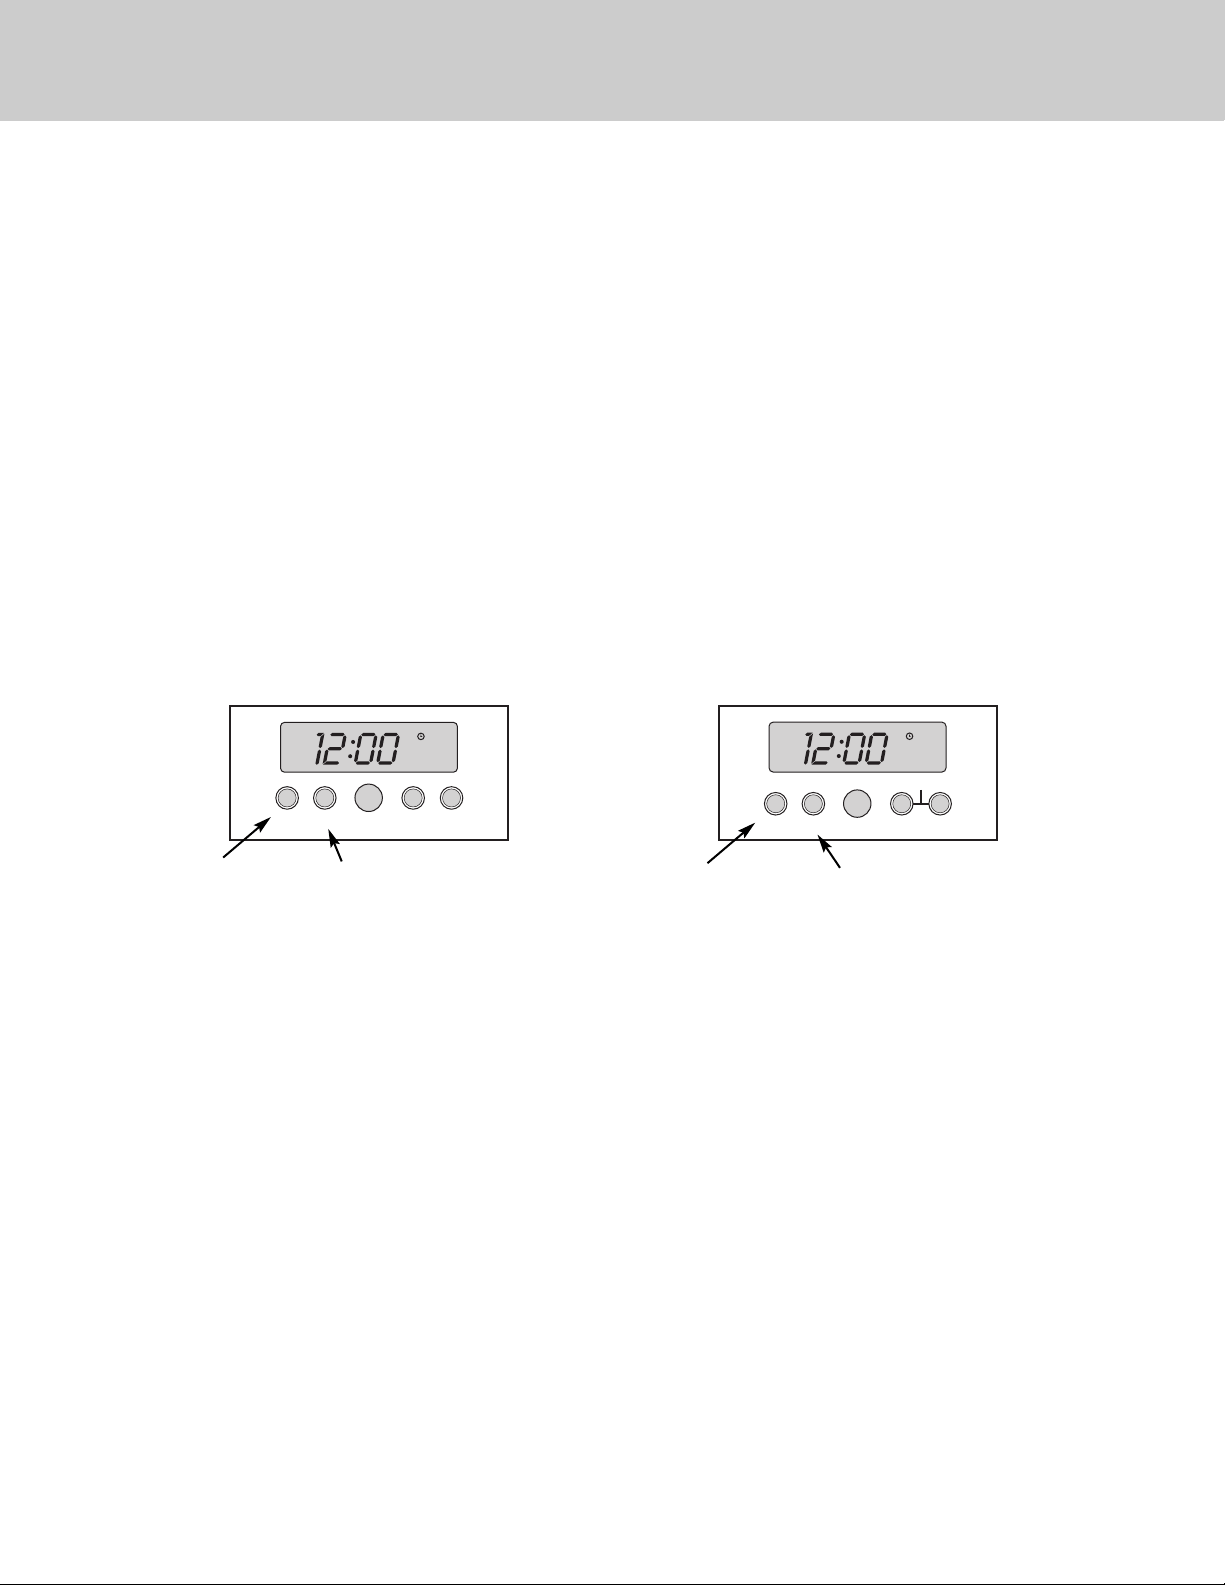
Clocks and Timers
(Digital Display - Select / French Door Models)
Night Light (French Door model only)
To activate the nightlight feature, press the “START TIME” and “PROBE” buttons and hold for 3 seconds. To turn the nightlight
feature off, press the same two buttons and hold for 3 seconds
SET
MIN/SEC
TIMER
BAKE
TIME
START
TIME
SET
PROBE
NIGHT LIGHT
SET
MIN/SEC
TIMER
BAKE
TIME
START
TIME
CLOCK
SET
To change clock settings
In order to change settings such as degrees, 12/24 hour, or showroom mode, press the first button (either Clock or Min/Sec
Timer - based on your model) and hold for three seconds. To exit the settings, press the second button (either Min/Sec Timer or
Bake Time - based on your model).
To change degrees
After pressing and holding the first button, “F” will appear in the display. To change to celsius, press the first button again.
“C” will appear in the display. Press the second button to exit the settings mode.
To change 12/24 hour clock settings
After pressing and holding the first button for three seconds, rotate the “SET” knob clockwise until H 12 appears in the display.
The H 12 indicates unit is set to display in AM/PM (12-hour clock). To change to 24 hour time, press the first button and the
display will change to H 24. Press the second button to exit settings.
Sabbath Mode
After pressing and holding the first button for three seconds, rotate the “SET” knob clockwise until SAb appears in the display.
The default is Sabbath off and “NO” will appear in the lower left corner. In order to activate te Sabbath mode, press the first
button and “ON” will appear to the right of the SAb display. Press the second button to exit settings.
Showroom Mode
After pressing and holding the first button for three seconds, rotate the “SET” knob clockwise until SHO appears in the display.
The default is Showroom off and “NO” will appear in the lower left corner. In order to activate the Showroom mode, press the
first button and “ON” will appear to the right of the SHO display. Press the second button to exit settings.
First Button
Reference
First Button
Reference
Second Button
Reference
Second Button
Reference
Loading ...
Loading ...
Loading ...