Loading ...
Loading ...
Loading ...
20
English
2) Press the bottom of the trigger and open the
change stopper.
3) Grasp the change rod between two fi ngers
and slide it downwards.
(Sets the SINGLE SEQUENTIAL ACTUATION
MECHANISM)
4) Make sure that the change rod is in its proper
position as shown in the diagram.
(If not, the tool may be set in the CONTACT
ACTUATION MECHANISM.)
2
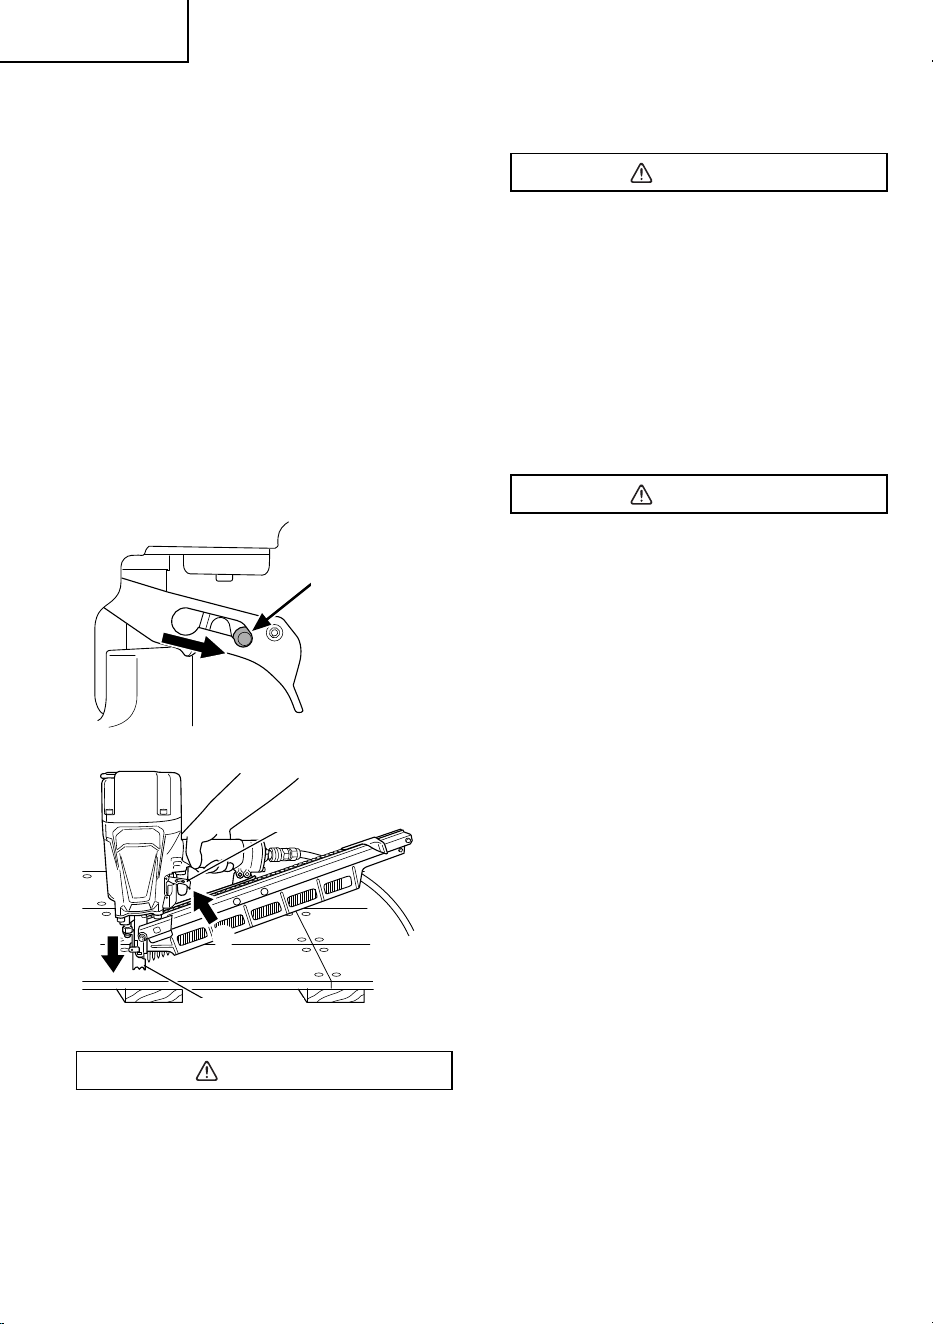
Position the nail outlet on the workpiece with
fi nger off the trigger.
3
Depress the push lever fi rmly until it is completely
depressed.
4
Pull the trigger to drive a nail.
5
Remove fi nger from the trigger.
To continue nailing in a separate location, move the nailer
along the wood, repeating steps
2
–
5
as required.
1
Position of
Change Rod
Push Lever
3
4
Trigger
WARNING
●
A nail will fi re each time the trigger is
depressed as long as the push lever remains
depressed.
(2) Continuous operation (Push lever fi re)
Using CONTACT ACTUATION MECHANISM
WARNING
●
To avoid double fi ring or accidental fi ring due
to recoil.
1) Do not press the nailer against the wood
with excessive force.
2) Separate the nailer from the wood as it
recoils after nailing.
●
If the hook is affi xed, do not operate with
CONTACT ACTUATION MECHANISM.
1
Follow the steps below to set up the CONTACT
ACTUATION MECHANISM (as shown in the
diagrams that follow).
WARNING
●
Disconnect the air hose and remove all nails.
●
Do not depress the push lever.
●
Do not apply any unnecessary pressure or
use any tools to move the switch.
●
Do not press the change stopper for any
other purpose other than to switch between
SINGLE SEQUENTIAL ACTUATION and
CONTACT ACTUATION.
1) Remove the lock pin if it is still attached.
See “How to Remove the Lock Pin” in the
“METHODS OF OPERATION”.
2) Press the bottom of the trigger and open the
change stopper.
3) Grip the change rod between two fi ngers and
slide it upwards.
(Sets the CONTACT ACTUATION
MECHANISM)
4) Make sure that the change rod is in its proper
position in the trigger as shown in the diagram.
(If not, the tool may not operate properly.)
2
Pull the trigger with the Nailer off the workpiece.
3
Depress the push lever against the workpiece to
drive a nail.
4
Move the Nailer along the workpiece with a
bouncing motion.
Each depression of the push lever will drive a nail.
As soon as the desired number of nails have been
driven, remove fi nger from the trigger.
000BookNR83A5USmetabo.indb20000BookNR83A5USmetabo.indb20 2018/05/2213:58:562018/05/2213:58:56
Loading ...
Loading ...
Loading ...