Loading ...
Loading ...
Loading ...
User Manual\07
Installation Instructions
\
Typical installation tools required You’ll most likely require the following tools/equipment (not supplied) for the
installation of your microwave.
– Electrical drill
– Tape Measure
– Screw-driver
It’s important to carefully read the following installation instructions before
beginning the installation of your microwave.
Important!
Please observe the installation instructions provided and
note that this appliance should only be installed by a
qualified technician.
ELECTRICAL CONNECTION The oven is fitted with a plug and must only be connected to a properly
installed earthed socket. The socket must only be installed and the connecting
cable must only be replaced by qualified electrician and in accordance with the
appropriate regulations. If the plug is no longer accessible following installation,
an isolating switch must be present on the installation side with a contact gap
of at least 3mm.
– The fitted cabinet must have ventilation behind the appliance.
– Do not bend the power cable.
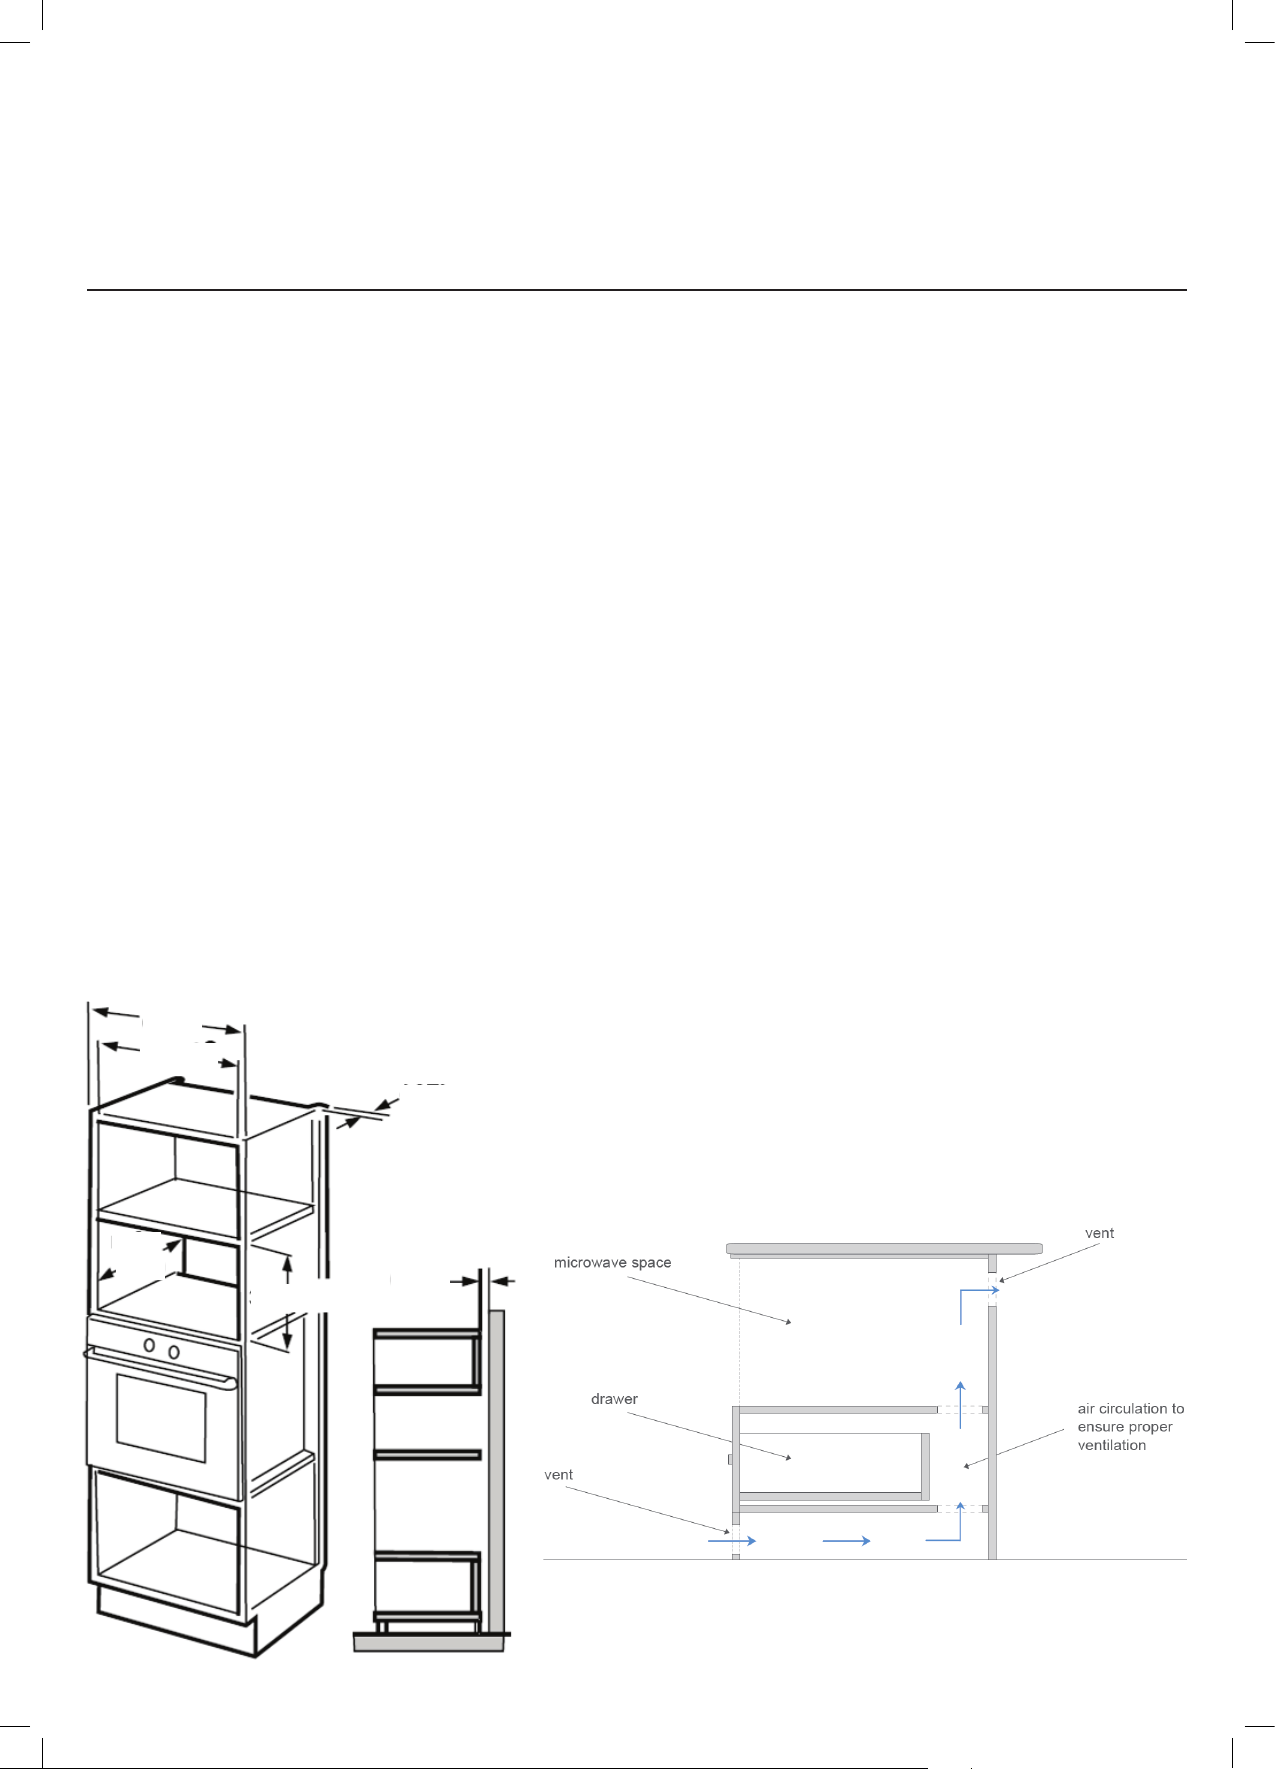
1. CABINETRY The following diagrams show the correct cabinetry construction for a built-in
installation. Failure to provide the correct ventilation, as explained below, will
void all warranty claims.
– A minimum 45mm space is required from the microwave cabinet to the
external environment.
– It is also recommended to allow ventilation down to below the base
cabinetry (i.e. under the kickboards) and to install a vent into the kickboard.
Note: Ventilation is critical for underbench installation also,
either venting through the cabinet rear or down
below the cabinetry (i.e. behind the kickboard).
380+2
45
45
600
560+8
min
550
Loading ...
Loading ...
Loading ...