Loading ...
Loading ...
Loading ...
11www.esatto.house
Installation Cont.
Electrical connection
• WARNING! It must be possible to disconnect the appliance from the mains power supply; the plug must
therefore be easily accessible after installation.
• Before plugging in your new freezer, let it stand upright for at least 2 hours. This will allow the refrigerant
gases to settle into the compressor and reduce the possibility of a malfunction in the cooling system.
• The appliance must be earthed. The plug of the power supply cord is equipped with a contact for this
purpose. Do not under any circumstances cut or remove the third (earth) prong from the power cord.
If the plug does not t your outlet, consult a licensed electrician for advice to have the outlet changed.
• Plug the unit into a dedicated, properly earthed wall outlet. Ensure that your outlet voltage and circuit
frequency correspond to the voltage stated on the rating label.
• Secure the freezer’s supply cord behind the unit. Do not leave it exposed or dangling to prevent injury and
accidental disconnection from the power supply.
• Adjust the temperature control as described below.
• When rst starting up, and after a period out of use, allow the unit to cool down for at least 2–3 hours
(4 hours if starting up during warm weather in summer) before placing food in the freezer.
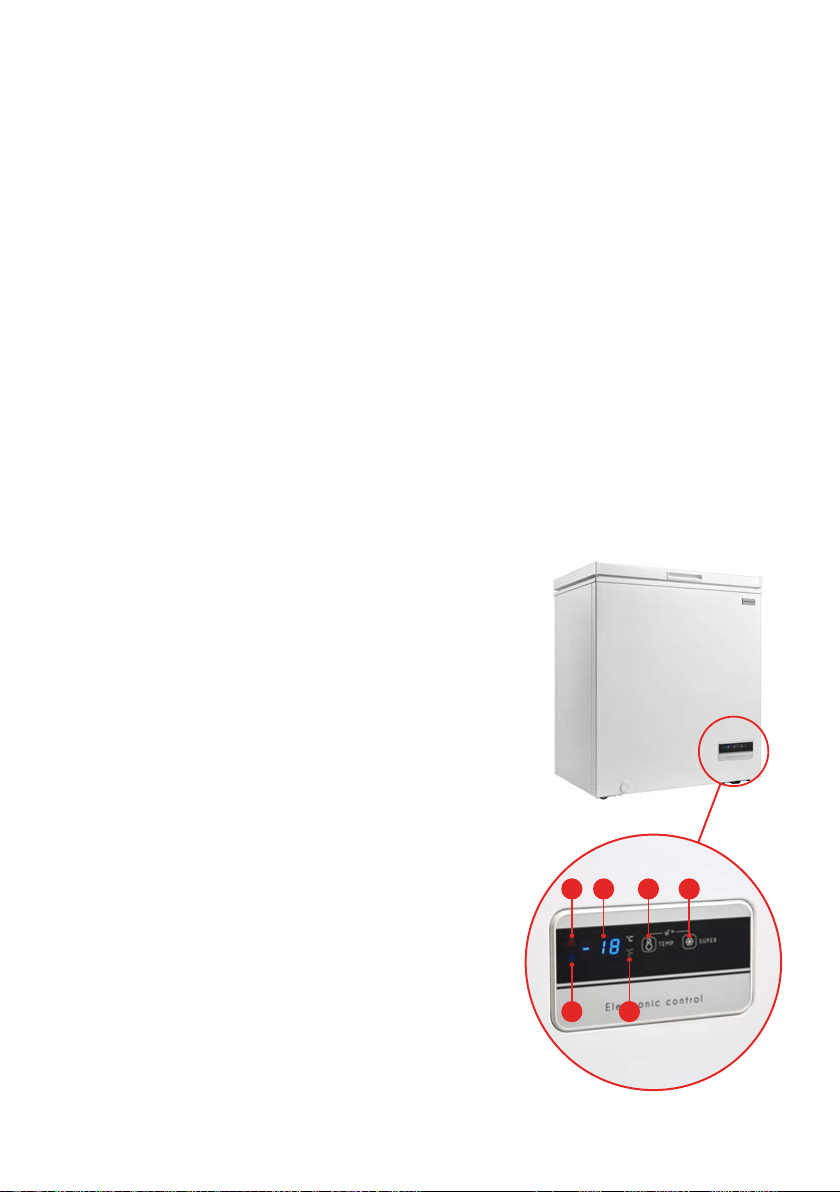
Using Your Chest Freezer
The temperature control is located at the front of the
freezer cabinet, in the bottom right corner (Fig.1).
• Display: When powering on the freezer, the display
window (Fig. 1, B) illuminates fully for 3 seconds
before entering into ‘normal’ display showing the
default temperature: -18º C (0º F). If no error occurs
the display panel shows the set temperature or mode
(if an error has occurred, the code will show in the
display).
• Locking: Press the Temperature Adjustment button
(Fig. 1, C) and the Quick Freeze button (Fig. 1, D) for
3 seconds at the same time. The display will ash for
several seconds and the unit will be locked.
• Unlocking: Press the Temperature Adjustment button
(Fig. 1, C) and the Quick Freeze button (Fig. 1, D) for
3 seconds at the same time. The unit will exit locked
mode, and the temperature can be adjusted.
NOTE: If any functions are attempted while the unit is
locked, the display will ash for 3 seconds, signaling
an invalid operation.
• Swapping between Celsius and Fahrenheit: Press
the Temperature Adjustment button (Fig. 1, C) for 3
seconds and the unit of measurement (Fig. 1, F) will
swap.
Fig. 1
A B
E F
C D
Loading ...
Loading ...
Loading ...