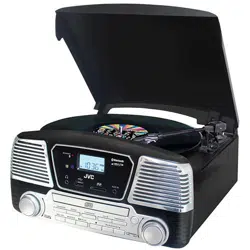
JVC UX-DN300A DVD Micro HiFi System
Product's Documents
Below are documents related to this product, you can read online or download:
- Owner's manual - (English) Read Online | Download pdf
User manual Micro HiFi System
-684137.png)
Caution: Always disconnect unit from power when making or changing any connections to avoid risk of electric shock.
Note: An AV cable is included as an accessory. This can be used to make any ONE of the following connections.
Choose one of the following two methods to connect to the TV.
1. Composite video connections
-561227.png)
2. Component (YCbCr) connection
Please note: If you use this option for video connection, you will need an extra stereo RCA cable for the audio connection (see below).
-198460.png)
The component output terminals provide Y,U,V orY,Pb,Prto correspond with the Y,U,V or Y,Pb,
Pr input of the TV. The image quality of component output is better than AV output. (In Setup Menu, set Video Output to Y,U,V or Y.Pb.Pr according to the TV inputs, otherwise the image may not be displayed.)
Please note: The component output terminals Y/g C/b C/r are same to Y, U, and V.
Connect to the L-R Audio output of the TV.
Please note: If using YCbCr connection (see above) for video, you will need an additional cable for this audio connection.
-199755.png)
-30062.png)
Please note:
Front Panel Functions:
-802139.png)
-797842.png)
-863643.png)
-952168.png)
To insert the remote control battery:
Note:
System Setup:
First press the [Setup] key on the remote control to enter the setup menu. Then press Up, Down, Left or Right to highlight the option you want to adjust in the menu and then press [Enter] to enter. To exit the setup menu, press the [Setup] key.
The Setup procedure is as follows:
I.TV System:
Enter the [TV System] option, press [►] key to enter the sub-menu and select one of the following systems: NTSC, PAL or AUTO.
-462507.png)
Enter the [Power Resume] option and press [►] key to enter the sub-menu. There are two options: "ON" or "OFF". If you choose "ON", then when the power resumes or the CD door is closed again, it will continue playing. If you choose "OFF", then when the power resumes or the CD door is closed again, it will play from the beginning.
-544472.png)
Enter the [Video] option and then press [P-] key to enter the sub-menu and select the output mode you require.
-881370.png)
Enter the [TV Type] option and press [►] key to enter the sub-menu. There are three modes to choose from: 4:3PS, 4:3LB or 16:9. Please select the mode that is the most compatible with your TV.
-600430.png)
Enter the [Password] option, and press [►] key to enter the sub-menu. When the initial setting is in “Password Lock" state, the “Rating" cannot be set and the password cannot be modified. If you need to modify the “Rating" and password, first enter the initial password and press [Enter] key to unlock (initial password: 0000 ). The new password entered must be four digits and then press [Enter] key to take effect.
-287588.png)
When playing a disc with a locking function, select the suitable play control rating. This setup can only be carried out when the password lock is off. Remember to switch the password lock back on after you have completed the setup so that the rating restrictions can be applied.
-11881.png)
Enter [Default] option, press [►] key to select "Restore", and then press [Enter] key, so each setup will restore to factory default automatically.
-81669.png)
The setup operations are as follows:
Enter the [OSD Language] option, press [►] key to enter the sub-menu and select the interface display language you want.
-467228.png)
Enter the [Audio Lang] option, press [►] key to enter the sub-menu and select the audio language you need; ensure that the disc you wish to play has the required capability.
-883859.png)
Enter the [Subtitle Lang] option, press [►] key to enter the sub-menu and select the subtitle language you want; ensure that the disc you wish to play has the required capability.
-636891.png)
Enter the [Menu Lang] option, press [►] key to enter the sub-menu and select the menu language you need; ensure that the disc you wish to play has the required capability.
-539196.png)
The setup operations are as follows:
Enterthe [Audio out] option, press [►] key to enter the sub-menu to chose audio out mode.
-265809.png)
Enter the [Key] option, and press [►] key to enter the next menu, and then use the direction keys “Up" or “Down" to adjust the key volume.
-89429.png)
Setup details as follows:
Enter the [Brightness] option, press [►] key to enter the next menu, and then use the direction keys “Up” and “Down” to adjust brightness parameters.
-234759.png)
Enter the [Contrast] option, press [►] key to enter the next menu, and then use the direction keys “Up” or “Down” to adjust contrast parameters.
-950132.png)
Enter the [Hue] option, press [►] key to enter the next menu, and then use the direction keys “Up" or “Down" to adjust hue parameters.
-841856.png)
Enter the [Saturation] option, press [►] key to enter the next menu, and then use the direction keys ‘Up’ or ‘Down’ to adjust saturation parameters.
-432304.png)
Enter the [Sharpness] option, press [►] key to enter the next menu, and then use the direction keys “Up” or ‘Down’ to adjust saturation parameters.
-484916.png)
The setup operations are as follows:
Enter the [Downmix] option, and press [►] key to enter the next menu; there are three modes to choose from: LT/RT, STEREO,VSS.
-497967.png)
Enter the [Front] option, and press [►] key to enter the next menu; there are two modes to choose from: LARGE/SMALL.
-134533.png)
To connect an external device to this unit via Bluetooth:
Please note: Bluetooth is only controlled by an external device.
When playing MP3 disc, press [Copy] key on the remote and enter the copy selection interface; the content that can be copied are the tracks of the current disc being played.
When playing MPEG4 disc, press the [Stop] key to return to the menu interface, press the [Copy] key on the remote; and enter the copy selection interface; the content that can be copied are the tracks of the current disc being played.
When playing CD disc, press [Copy] key on the remote, and enter the copy operation interface.
Move the highlight bar to the “BITRATE” option, and press [ENTER] to set up; for the file with high bit rate, the capacity will be enlarged and the quality of file will be closer to that of original file. The system default is: 128KBPS.
Move the highlight bar to “CREATE ID3 TAG" option, press [ENTER] key to select or cancel. By selecting this option during the copying process, the file will be created with ID3 information which is produced automatically by the system.
Move the highlight bar to “CREATE FILE LIST" option, press [ENTER] key to select or cancel. By selecting this option during the copying process, a file list will be produced automatically.
Move the highlight bar to “TRACK" option, press right key to select track option and then press [ENTER] key to select the song to be copied or to be cancelled.
Move the highlight bar to “START" option; at this time, the information about this copy will be shown on the right hand side (TOTAL TRACKS, TOTAL TIME and TOTAL SIZE). Then press [ENTER] key to start copying and system will write the CD in MP3 format on to the designated USB. When copying at normal speed, you can listen to the content to be copied at the same time; when selecting 4 times speed, it will be mute. Please note: when you press the [ENTER] key to switch speed, there will be slight sound which continues for a few seconds.
During copy, you can move highlight bar to “CANCEL” option and press [ENTER] key to confirm.
Move the highlight bar to “RETURN" option and press [ENTER] key to confirm return.
Please note: During copy, ensure available space on the USB is enough for the size of the file(s) to be copied and insert USB into the USB interface. If you have two tracks with the same title, rename one of the tracks, otherwise one track will be saved over the other. While copying, do not pull the USB out or shut the unit down, as this could damage the unit or USB. If the USB cannot be read after it has been copied, please format the USB on your computer;before formatting, please save the important data from the USB.
-410737.png)
Press [MENU] when using discs with VCD 2.0, or DVD format. Different formats of discs have different menus.
-889606.png)
When play DVD you can choose this play mode
-935335.png)
When playing VCD, CD and MP4, you can press “RECORD" key to transfer audio file(s) in MP3 format to the USB.
You can press the number keys on remote to directly select the required track that you want to play. When VCD is in MENU mode, the track cannot be selected and can only be selected when the MENU mode is off. Different formats of discs have different selecting approaches(for example press number key “5" to select the 5lh track. When selecting “23”, press “10+” twice and the screen will show “20+”; then press number key “3” or try to press “2" then hold “3" and the unitwill select23).
Press [ANGLE] key when playing DVD discs , you can switch to a different angle of the screen.
-25574.png)
Please note: this function is only valid for the DVD disc with angle function.
Press [P/N] key in DVD mode, you can switch to a different video system: there are four video system: NTSC PAL60 PAL AUTO; video system has to be consistent with the video system of TV.
-402712.png)
Press [DSP] key to choose different sound effect mode.
-516251.png)
In DVD mode, press [OSD] key to show information about the DVD being played.
-485809.png)
On the DVD mode, use [V-MODE] key to switch between Interlace or Progressive Scan.
-605791.png)
On the DVD mode, press I RESET] key, all preset will resume to the factory setting.
-567853.png)
In USB mode, press 'DEL1 key to delete files from the USB drive. Use the direction keys (UP, DOWN LEFT or RIGHT) to select. Press 'ENTER' key to confirm. Sub-menu explanation below:
-98494.png)
-602375.png)
-136383.png)
-8498.png)
-826640.png)
-904499.png)
Press [GOTO] key on remote and use direction keys and number keys to finish time or track selecting function, then press [ENTER] key.
-468163.png)
While playing, press [REPEAT] key on remote. Different formats of discs have different repeating approaches to be selected: single cycle, title cycle or disc cycle.
-663446.png)
During play, press [SLOW] key on the remote control. To go back to the normal speed, press [PLAY] .
Please note: In this mode, no audio will be heard and it only affects the video files.
-196353.png)
Please note: For CD and MP3 discs, the unit will copy in MP3 format on to the USB, for MPEG4 discs, it will copy directly.
Please see Copy Function Introduction for specific operating instructions.
-21982.png)
When you turn the unit on, you can press “FUNCTION” to switch between the different function modes: FM radio, LINE external audio input, Bluetooth or DVD.
The unit is set at DVD function as the default.
-694127.png)
Please note: Please see function introduction for specific operation of FM and audio input.
Volume Adjustment:
Press “VOLUME +” or “VOLUME on remote or turn the volume control knob on panel to adjust the volume.
Disc Playing Operation:
After inserting MP3 disc, the system will automatically search all directories containing an MP3 file. After searching, the system will enter the first directory by preference and play the first track of this directory (cursor stops in 01 position).The unitwill play the tracks of this directory in sequence. At this time, you can press number keys to select which song you want to play.
-850227.png)
-929153.png)
While playing, press !◄◄/PREVIOUS] or [►►I /NEXT] key to select the previous or next song.
Play JPEG Disc:
Play MP3-JPEG Disc:
-367236.png)
Play USB:
USB playability storage devices:
Supported formats:
-956244.png)
Source switching:
FM Operation:
FM Radio:
-295958.png)
Manual Search:
Press [Fast Backward] or [Fast Forward] keys on panel or remote to manually tune and search. You can search desired radio backwards or forwards.
-485376.png)
Auto Search:
Press [SEARCH] keys on the panel or press and hold [SEARCH] key on remote control then the unit will automatically search in full band. FM frequency range:87-108MHZ(50KHZ for each
-176386.png)
Please note: After you have found your specific station, the unit will automatically store it into current program. The FM search is affected by the radio signal strength. If no program is found during auto search or an offset frequency occurs, please use manual search, frequency-selecting search or adjust frequency by adjusting antenna position.
Press [GOTO] key on the remote, the unit will display frequency-selecting state and then use number keys to input your desired radio frequency. FM frequency range: 87-108 MHZ E.g. Input 1060 for 106 MHZ; input 9140 for 91.4 MHZ. The frequency input must have 4 figures.
-773912.png)
If there are only 3 effective figures, please add 0 before the first figure.
Press [!◄◄] and [ ►►! ] keys on remote or [!◄◄/PREVIOUS] and [►►l/NEXT] keys on panel to select stored radio program.
-453589.png)
After operating the "Auto Search", the unitwill automatically store the radio station/s found in sequence. After operating “manual search’ or "frequency-selecting search”, the unitwill automatically store current radio frequency into current station.
Press [FUNCTION] keyor [AUX] keyon remote or panel to switch the unit into audio input state;
-930007.png)
At this time, the unitwill display "LINE”.
-776974.png)
At this time, the “AUX" or “Audio Input" channel interface of the unit must be connected to AF generator input of any machine.
Before repairing, please take a look at the following problems and possible solutions first.
| Problem | Reason | Measure |
| No Power. | Plug is not properly connected. | Connect plug properly. |
| The unit doesn't work after the power has been switched on. | No disc, USB, inserted. | Insert disc, USB |
| No Image. | TV isn't set to DVD output. | Set TV to current output platform. |
| Bad video connection or not connected well. | Replace TV connection or connect correctly. | |
| Connected TV doesn't work. | Ensure TV works properly. | |
| No Sound. | Not set to current connecting channel. | Set to current connecting channel |
| Bad audio connection or not connected well. | Replace audio connection or connect correctly. | |
| Connected unit doesn't work or volume shut out. | Ensure connected unit works properly or turn volume up. | |
| Bad Image Quality. | Disc is dirty. | Clean disc. |
| Bad image quality of disc. | Replace disc with good image quality. | |
| DVD Player Not Activated. | No disc inserted. | Insert disc. |
| Disc installed upside down. | Place the silk-screen side upward. | |
| Disc installed incorrectly into it's slot | Place disc into it's slot correctly. | |
| Disc is dirty | Clean disc. | |
| TV displays setting screen. | Quit setting state. | |
| Locking level is activated. | Unlock or change locking level. | |
| Remote Malfunction. | Remote is not aimed at the receiving window. | Aim remote at the receiving window. |
| The remote and DVD player are too far away from each other. | Please operate within effective range of 7m. | |
| There is a large obstacle between the remote and the receiving window. | Please move obstacle. | |
| Remote has low batteries. | Please replace with new batteries. | |
| Mp3 No Sound orwith Noise. | Unsupported file format. | Skip the file. |
| USB, File(s) Unavailable. | No tile in USB, format is incorrect. | Please store supportable file formats or format the USB, then re-copy the files. |
| USB damaged. | Repair or replace USB. |