Loading ...
Loading ...
Loading ...
16
INSTALLATION
Installing the Anti-tip Device
Anti-tip
bracket
Wall plate
Screw must
enter wood or
concrete
The anti-tip bracket is packaged with an installation
template. The instructions include necessary
information to complete the installation. Read and
follow the range installation instruction sheet.
WARNING
•
Range must be secured with an approved
anti-tip device.
•
The range could be tipped by standing, sitting
or leaning on an open door if the range or
anti-tip device is not properly installed.
•
After installing the anti-tip device, verify that it is
in place by carefully attempting to tilt the range
forward.
•
This range has been designed to meet all
recognized industry tip standards for all normal
conditions.
•
The installation of the anti-tip device must meet
all local codes for securing the appliance.
•
The use of this device does not preclude tipping
of the range when not properly installed.
•
A child or adult can tip the range and be killed.
•
Install the anti-tip device to the structure and/
or the range. Verify the anti-tip device has been
properly installed and engaged by following the
guide of the Anti tip bracket template.
•
Engage the range to the anti-tip device by
following the guide of the Anti tip bracket
template. Ensure the anti-tip device is re-
engaged when the range is moved by following
the guide of the Anti tip bracket template.
•
Re-engage the anti-tip device if the range is
moved. Do not operate the range without the
anti-tip device in place and engaged.
•
See installation instructions for details.
•
Failure to do so can result in death or serious
burns to children or adults.
Optional Rear Filler
If the counter does not bridge the opening at the rear
wall the rear filler kit, that is provided with the slide in
range, will be needed.
NOTE
If the countertop depth is greater than 25" there will
be a gap between the filler kit and the back wall.
If the countertop depth is less than 24", the control
panel will not sit flush with the countertop.
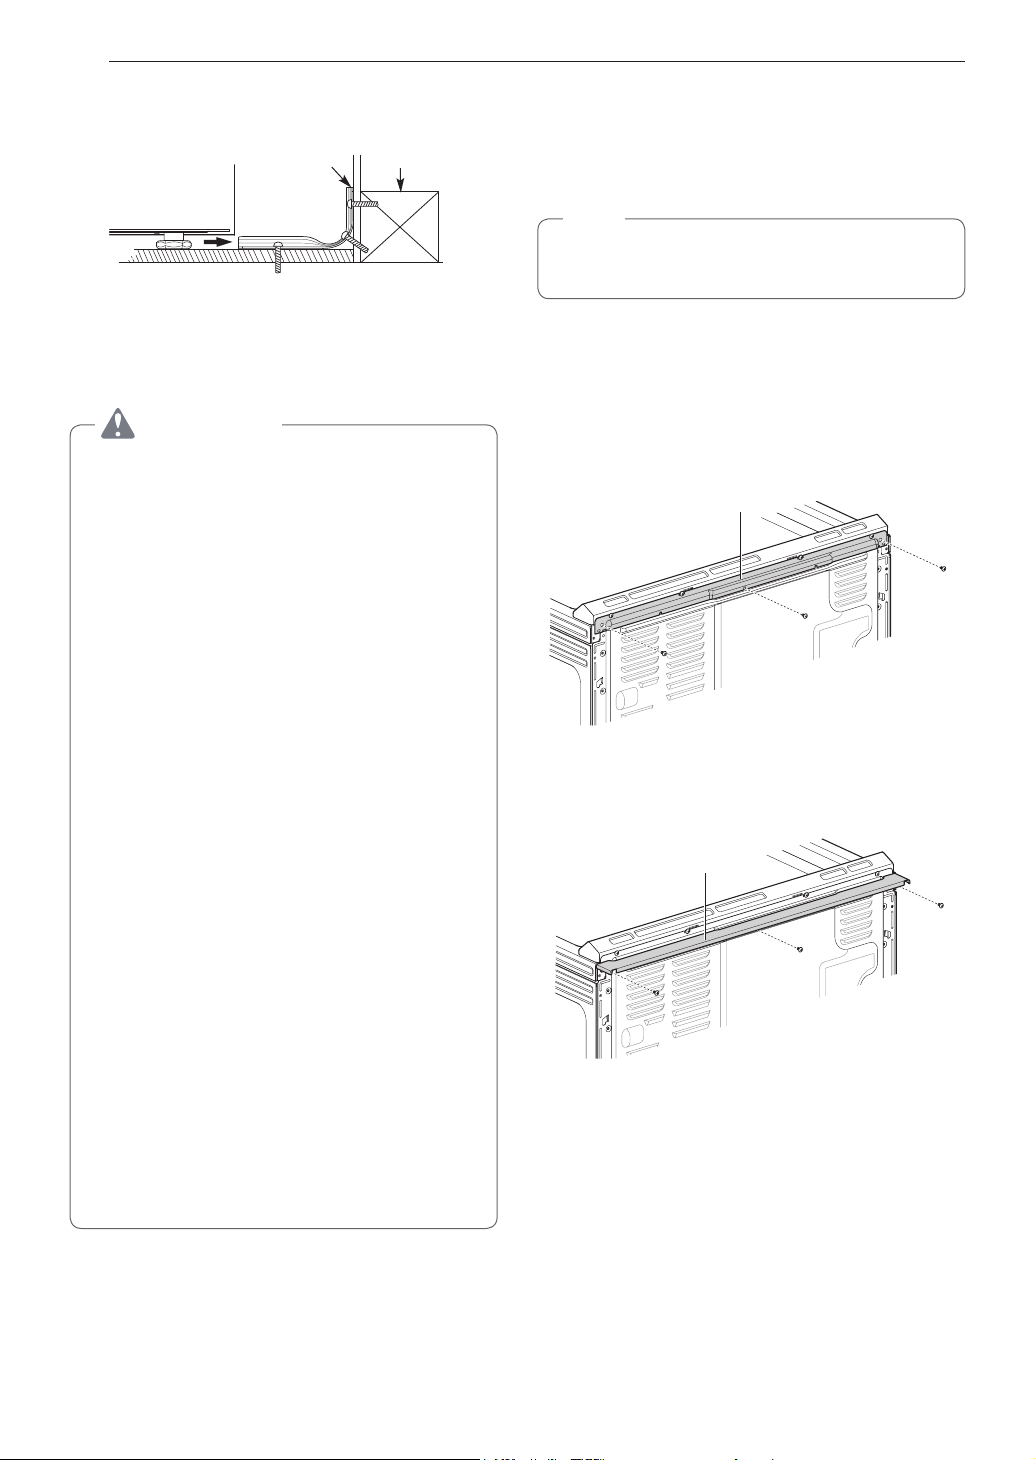
Installing the Rear Filler
1
Using a screwdriver, remove the three screws
holding the rear bracket in place.
Rear bracket
2
Attach the rear bracket and filler assembly as
shown, using the three screws removed in
step 1.
Rear ller
Loading ...
Loading ...
Loading ...