Loading ...
Loading ...
Loading ...
11
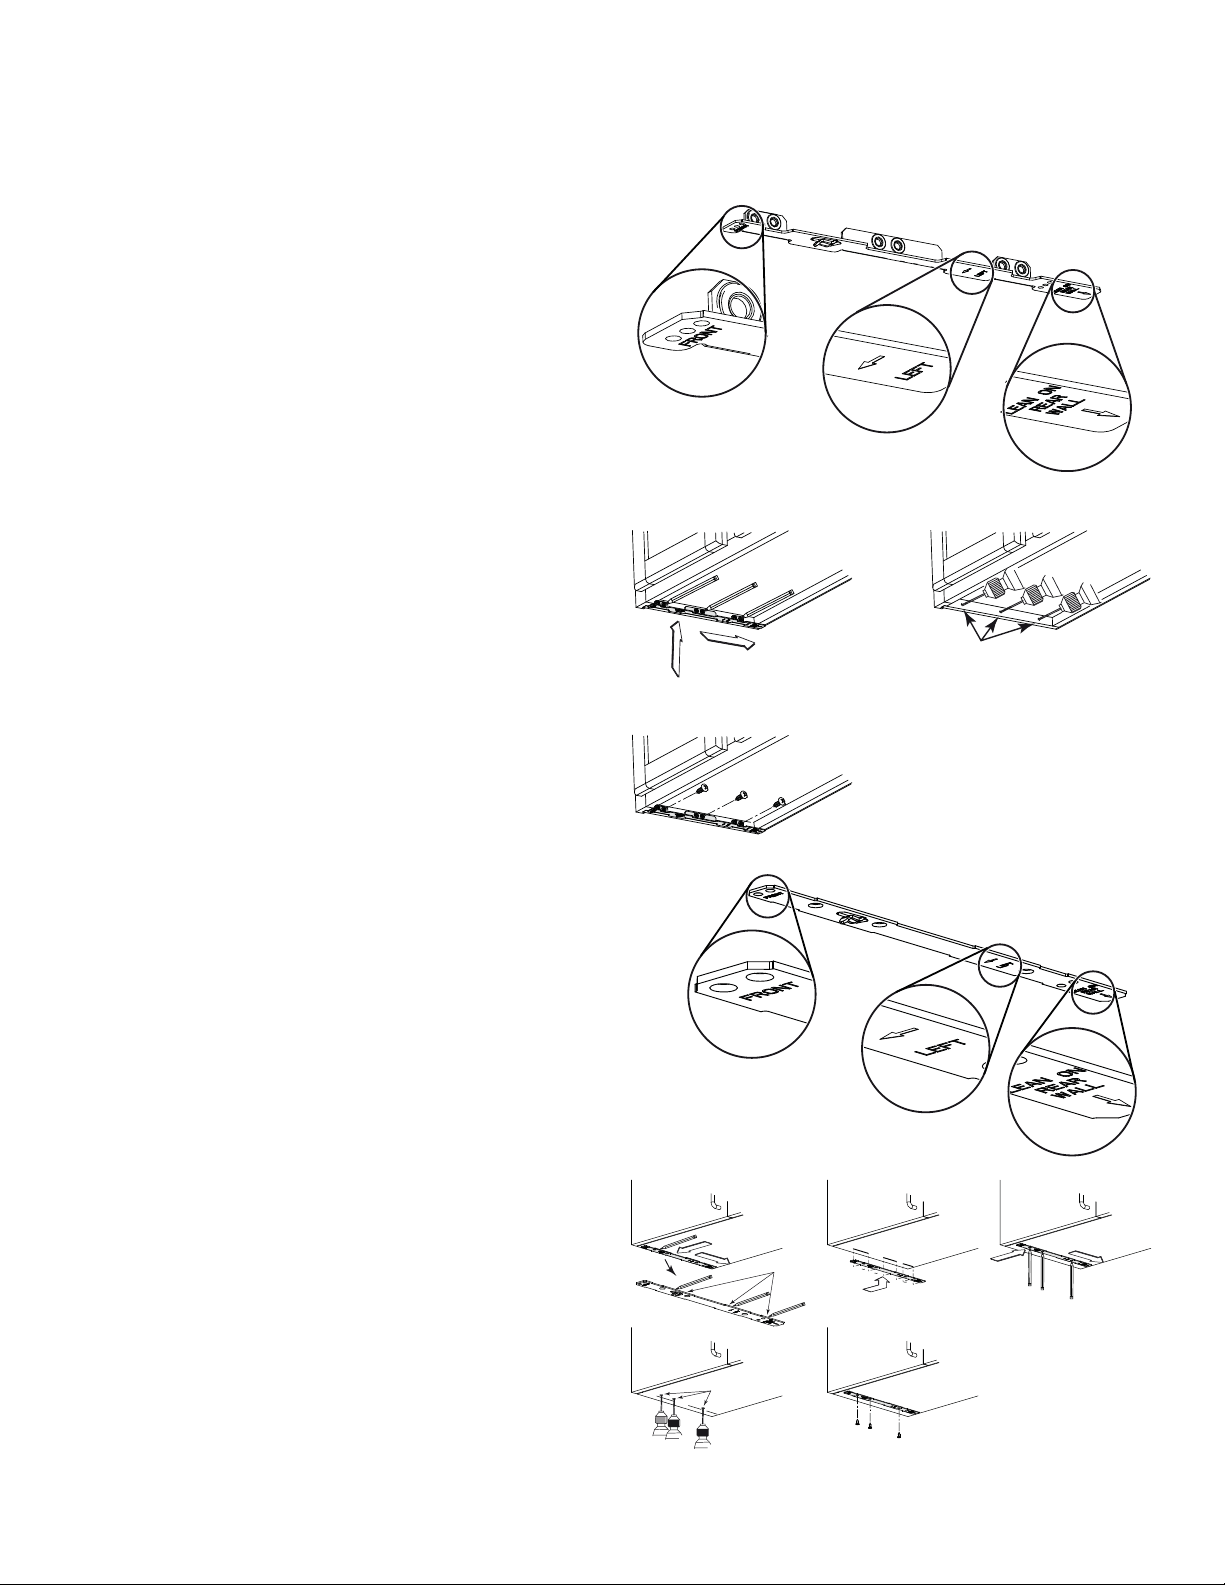
FRAMED CABINET
7/64”
XY
Z
Refer to the marking on the brackets to determine the
correct installation side and orientation.
Mate the corresponding bracket to the cabinet side
frame, while placing rear end of bracket against the
wall. Use a pencil to mark 3 holes (there are 6 holes
but only 3 are necessary).
Remove the bracket. Using a 7/64” drill bit,
drill 3 holes where marked.
7. Install the proper installation brackets according to the
type of cabinet (framed or frameless). See below.
Assemble the bracket to the side frame using a
Phillips screwdriver and 3 provided no. 8 x 5/8”
wood screws. Repeat for the other side frame.
FRAMELESS CABINET
Refer to the marking on the brackets to determine the
correct installation side and orientation.
[ \
7/64”
X
3 X
Y
Z
Align the corresponding bracket to the cabinet side, while
placing rear end of bracket against the wall. Draw a
line on the outer edge of the bracket (as shown).
Slide the bracket towards the center of cabinet and
align the outside edge of the bracket with the marked
line, keeping the rear end edge leaning on the wall.
Use a pencil to mark 3 holes.
Remove the bracket. Using a 7/64” drill bit,
drill 3 holes where marked.
Assemble the bracket to the cabinet bottom using
a Phillips screwdriver and 3 provided countersunk
wood screws. Repeat for the other cabinet side
.
Loading ...
Loading ...
Loading ...