Loading ...
Loading ...
Loading ...
TRANSPORTING
Remove all packaging material before using new . This and adhesive tape your freezer
includes the foam base and all adhesive tape holding the accessories inside and freezer
outside.
Clean both the inside and outside of the with a cloth lukewarm soapy freezer soft and
water.
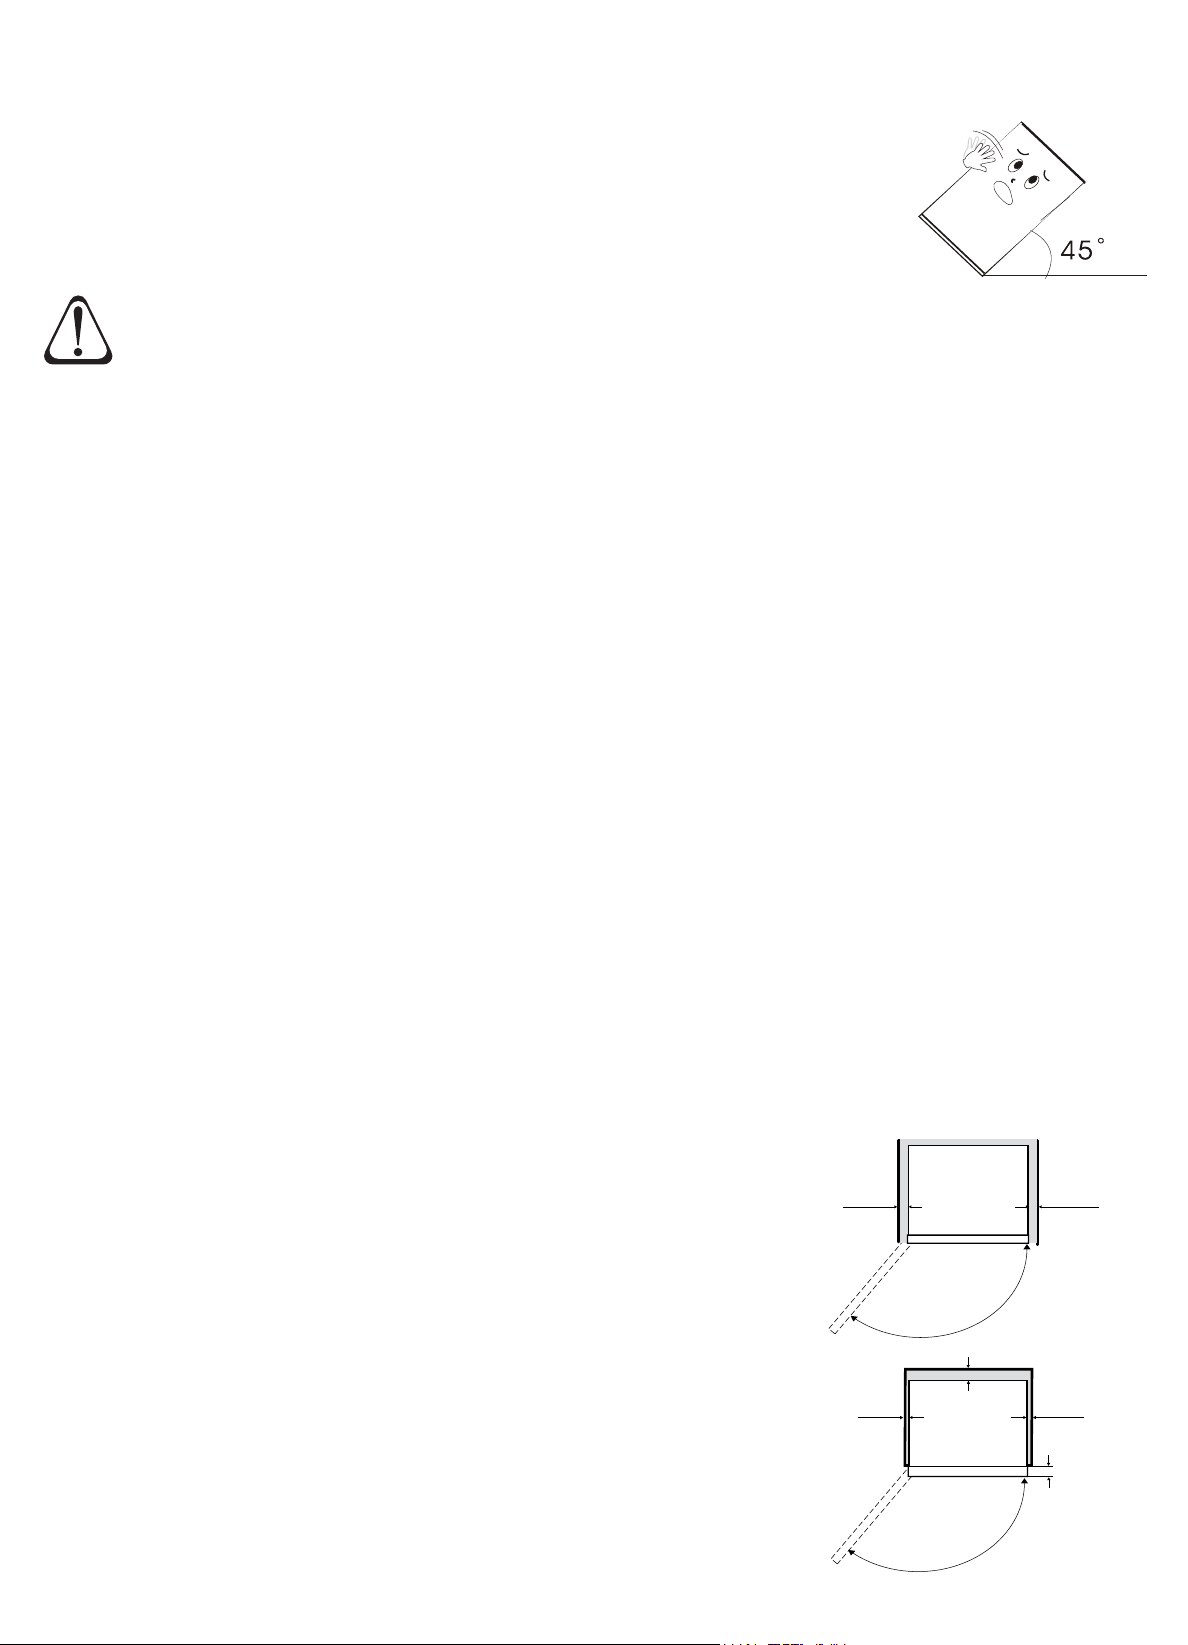
Keep the upright and avoid squeezing or vibration during freezer
transport. Avoid a slanting angle over 45 degrees during handling.
Avoid the door or top cap from being under excessive stress when
moving, otherwise it may become deformed.
5
Positioning your freezer
Place your in a well ventilated area away from a heat source and direct sunlight. freezer
Do not install the in a damp or wet location as this may cause damage to the freezer
insulation and result in leakage. Condensation may also build up on the outer cabinet
causing rust.
Use the front two adjustable feet to level the . Rotate the feet in a clockwise freezer
direction to raise the and anti-clockwise to lower. Ensure the slightly tilts freezer freezer
backwards so that the door self-close to provide a consistent closed seal.
There should be a clearance of at least 200mm from the
top of your , and 50mm from either the sides of the freezer
freezer freezer (or) the back of the unit. If the is to sit flush
with the cabinetry, then a 50mm clearance must be
available to allow the door to open freely and enable the
removal of baskets.
The minimum clearance recommended at each side is
5mm, if this is the case the door must sit proud of the
cabinetry by 50mm (not flush). A 5mm side clearance will
require 50mm of airspace at the back of the unit to allow for
adequate ventilation.
50mm
5mm
DOOR
5mm
50mm
50mm
CAUTION
Allow for adequate ventilation around your freezer
INSTALLATION
Do not connect your freezer to the power supply immediately after it is placed
vertically. You should keep it standing for at least 3 hours before connection to let
it settle.
50mm
Minimum
recommended
airspace around
freezer
Loading ...
Loading ...
Loading ...