Loading ...
Loading ...
Loading ...
10
CARE AND CLEANING
(continued)
Filtering and Treating Water
In most areas it will be beneficial to filter or treat the
water being supplied to the icemaker. It can improve
the reliability of the icemaker, reduce water system
maintenance and produce the best quality of ice.
The installation of a polyphosphate feeder will
generally reduce scale build-up and the icemaker will
require less frequent cleaning.
Municipal water systems are generally treated with
chlorine to maintain a safe drinkable water supply.
Activated carbon filters will sufficiently remove the
residual chlorine from the water to reduce surface
staining of stainless steel materials in the icemaker.
For more information on filtering and treating the
water, see the dealer from whom you purchased
your icemaker.
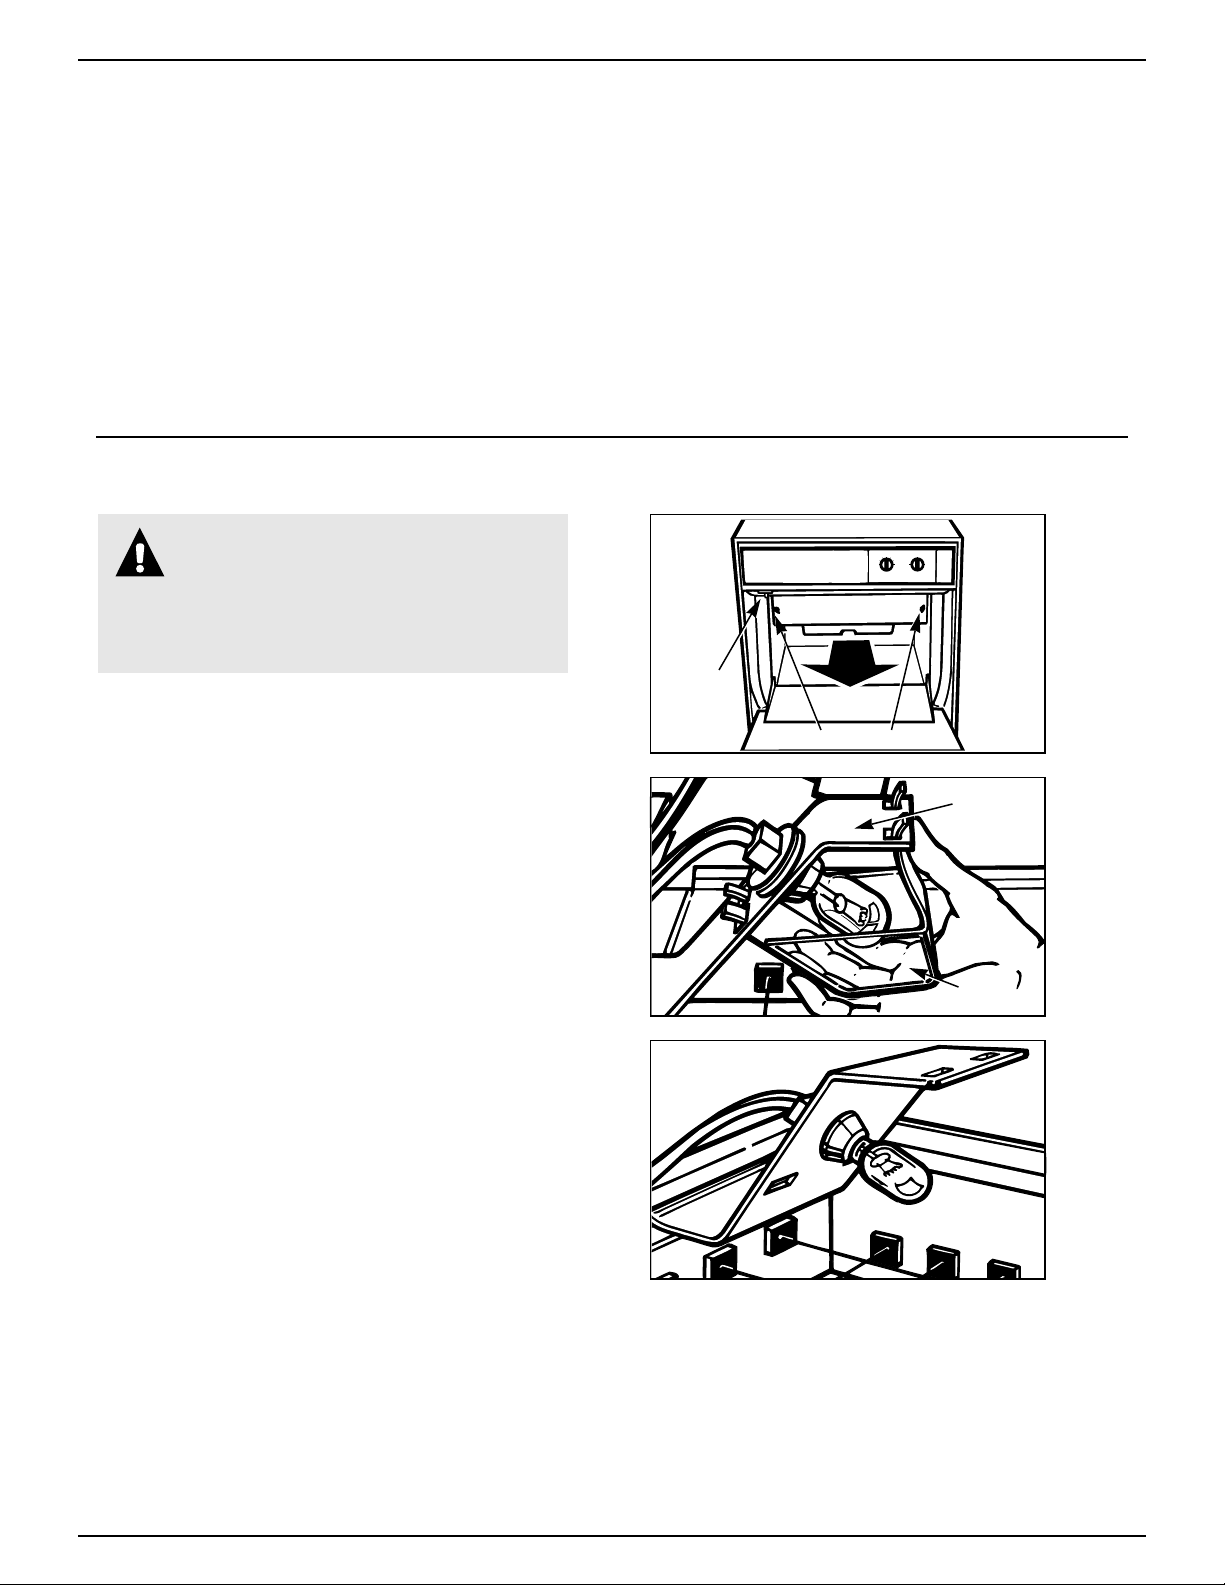
Changing the Light Bulb
The icemaker has a light bulb in the top of the storage
bin. To replace it, open the bin door and follow these
instructions:
1. Disconnect the icemaker from the power supply.
2. Remove the two screws and slide the ice cutter grid
forward, out of the two slots near the water pan. Set
the ice cutter grid on the bin door.
3. Press the front of the light shield in while pulling
down to remove it from the light bracket.
4. Remove the bulb. Replace it with a 15-watt bayonet
base type bulb.
5. Replace the light shield, ice cutter grid and two
screws.
6. Reconnect the power supply.
NORMAL
THICK
THIN
ICE
ON
CLEAN
OFF
CYCLE
WARNING: Before removing the light
bulb, either unplug the icemaker or
disconnect the electricity leading to
the icemaker at the main power supply.
Shock and injury can occur if electricity
remains connected.
Light
Switch
Light
Bracket
Light
Shield
Screws
Loading ...
Loading ...
Loading ...