Loading ...
Loading ...
Loading ...
10
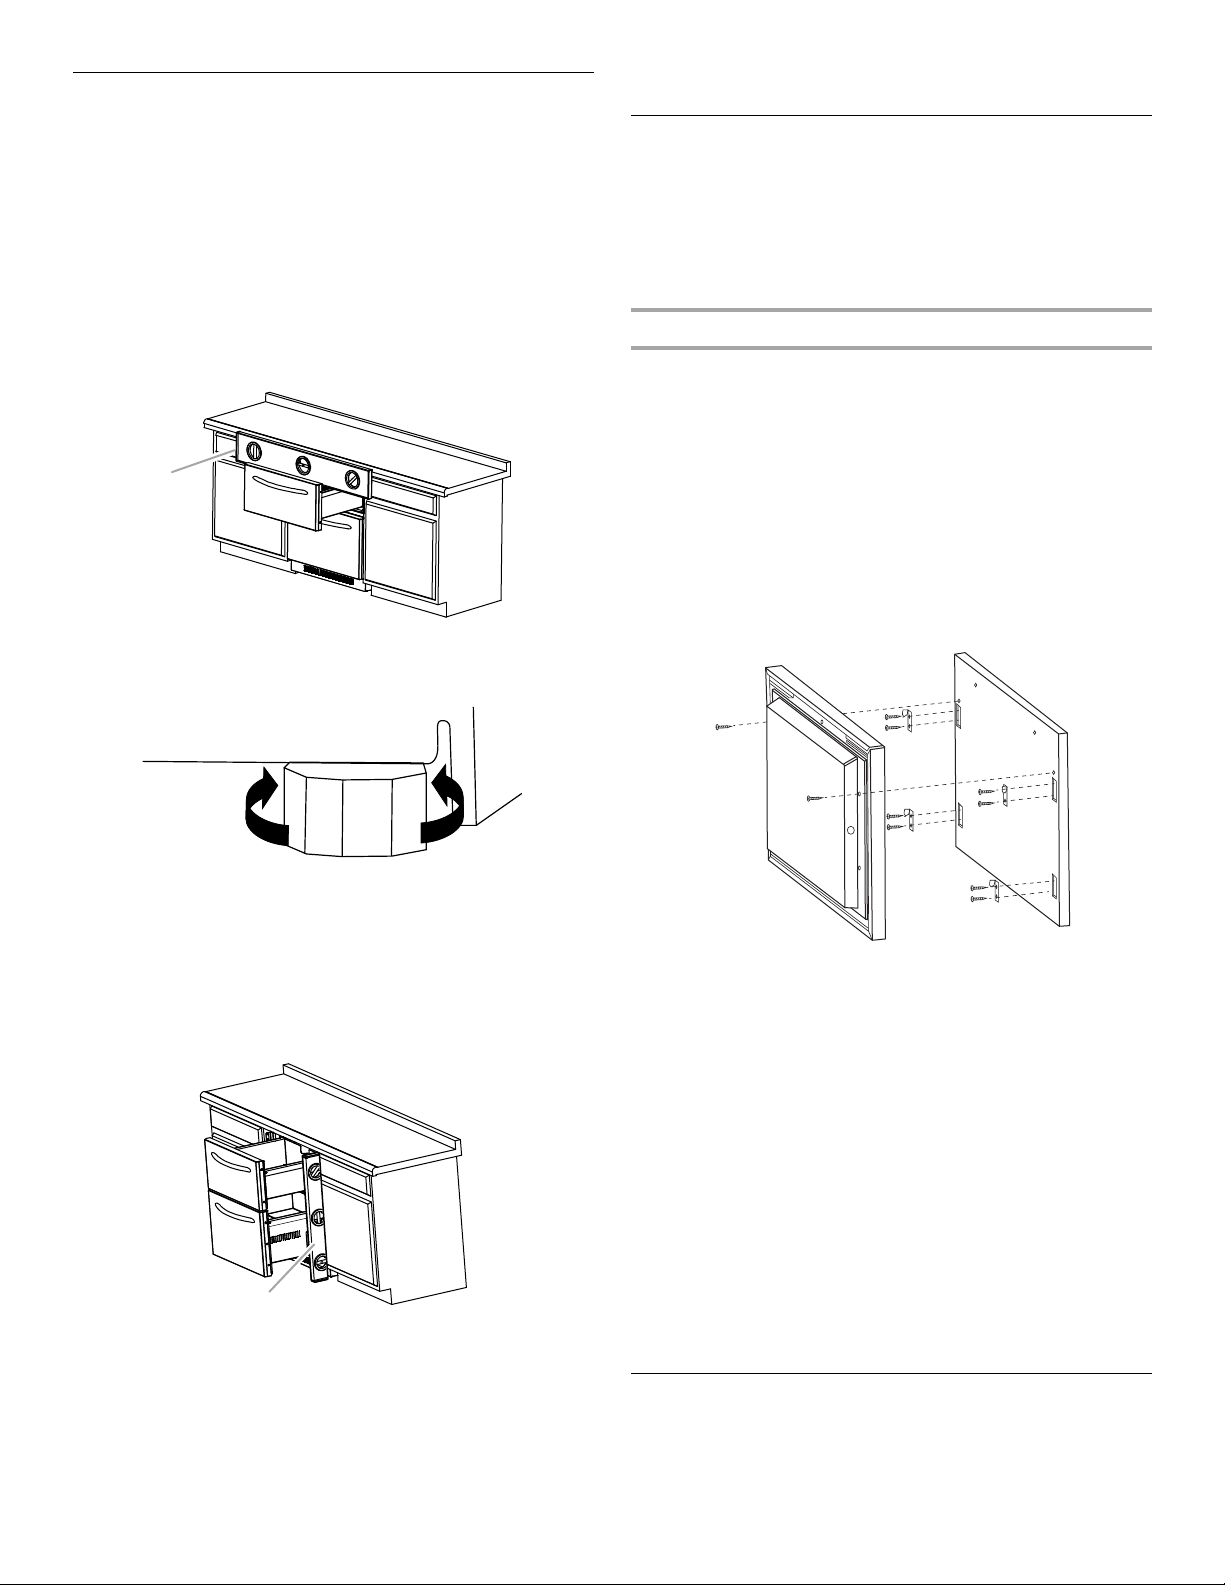
Level the Refrigerator Drawers
IMPORTANT:
■ Overlay Model—Be sure to install the custom overlay drawer
panels before leveling the refrigerator drawers. See “Install
Custom Overlay Panel.”
■ Before installing the refrigerator drawers, be sure that the
countertop is level.
■ If the countertop is not level, adjust the refrigerator drawers’
leveling legs until the appliance is square with the countertop.
Be sure to maintain ³⁄₈" (9.5 mm) minimum gap between the
top of the drawer and the countertop.
1. Open the top drawer and place the level across the top
drawer as shown. Check the level from left to right.
2. Turn the leveling legs (front and back) until the top drawer
measures level from left to right.
3. Remove the level and close the top drawer. Check the gap
between the top of the drawer and the countertop. If the gap
measures less than ³⁄₈" (9.5 mm) minimum, turn all four
leveling bolts equally to the left to raise the leveling legs
(this will lower the appliance). Recheck the level.
4. Open both drawers less than midway. Place the level on
the side flange beside the drawers as shown. Turn the front
leveling bolts together in order to either raise or lower the
appliance until the sides of the refrigerator drawers are
plumb.
5. Remove the level and close the drawers. Recheck the gap
between the top of the drawer and the countertop. If the gap
measures less than ³⁄₈" (9.5
mm), turn all four leveling bolts
equally to raise the leveling legs (this will lower the appliance).
Recheck the level.
NOTE: Be sure to recheck the horizontal level of the top
drawer.
6. Be sure all four levelers are on the floor and supporting the
full weight of the refrigerator drawers.
Install Custom Overlay Panel
IMPORTANT:
■ Create a custom overlay panel according to the
specifications in “Custom Overlay Drawer Panels.”
■ Jenn-Air is not responsible for the removal or addition of
molding or decorative panels that would not allow access
to the refrigerator for service.
Attach the Overlay Panel
NOTE: If the overlay hooks are not installed, see “Custom
Overlay Drawer Panels” for overlay hook locations. The location
of the hooks must be as precise as possible. If the custom panel
is incorrectly placed, the panel may interfere with optimal use of
the drawers.
1. Attach the custom handle of your preference on the overlay
before attaching the overlay to the drawer of the refrigerator.
NOTE: Custom handles may vary in dimensions. Holes must be
made on the panel according the specific dimensions of your
handle.
2. Attach the hooks to their corresponding recessions on the
panel, using the SS Flat M4x12 screws. Two screws are
needed per hook. The hooks must be on the outer edge
of the panel.
3. Gently pull back the gasket from the top corners of the door
until you can see the screw that is behind the gasket. There is
one screw on each side. It is not necessary to remove the
gasket.
4. Remove the screws behind the gasket (one per side).
5. Align the panel to the drawer and position the overlay panel
½" (12.5 mm) higher than the door. Position the overlay hooks
with the pilot holes and push the hooks into the holes. The
drawer has insulant foam in its interior so you may feel some
interference while pushing. Push until the hooks go through
the foam.
6. Push straight down on the overlay panel to secure the overlay
hooks to the drawer.
7. Using the self-tap wood screws (two per drawer; one in each
corner of the drawers), attach the panel to the drawer.
NOTE: Do not put the screws removed in step 4 back on the
door.
8. Once the overlay is securely attached to the drawer with the
two screws, put the gasket back in its place by pressing it
against the door until the gasket is even and firmly secured.
Complete Installation
1. Remove all boxes, parts packages and packing materials
from the interior of the refrigerator drawers.
2. Remove the film.
3. Clean the refrigerator drawers before use.
A. Check the level from left to right.
A. Check the level from front to back.
A
A
Loading ...
Loading ...
Loading ...