Loading ...
Loading ...
Loading ...
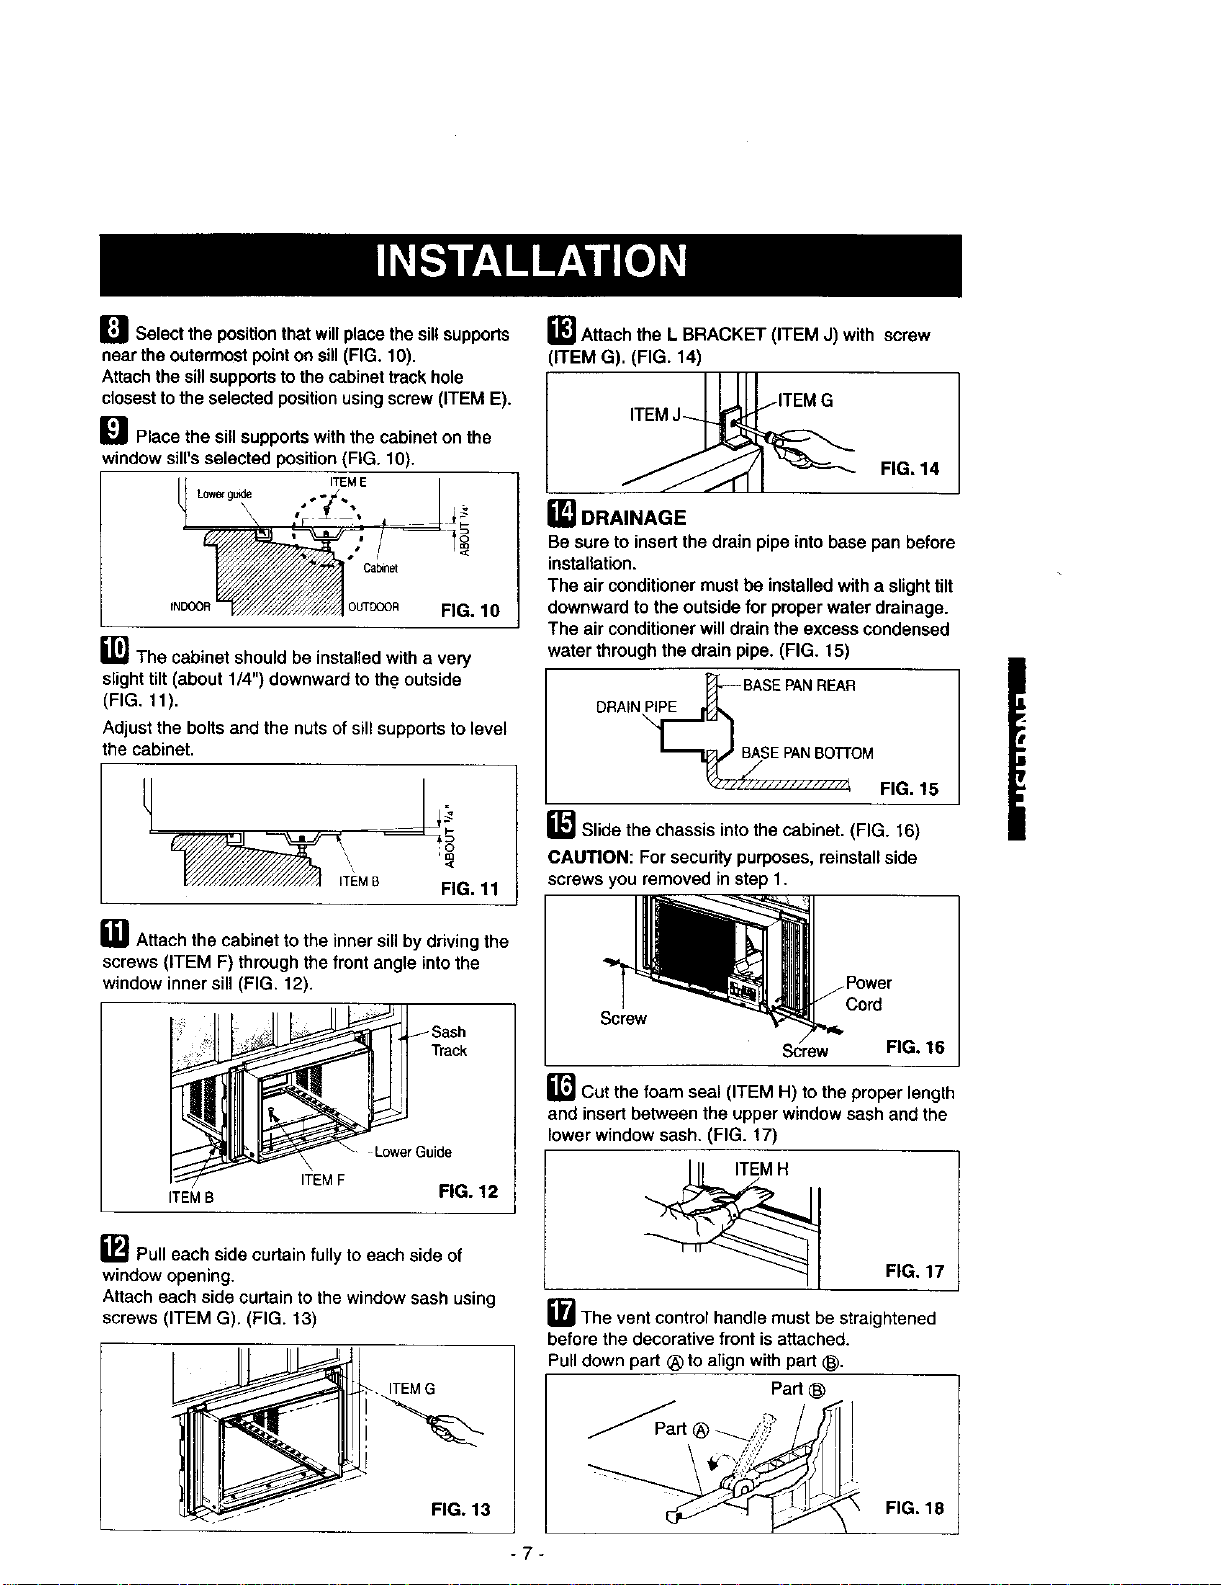
_J Select the positionthat will placethe sillsupports
near the outermost point on sill(FIG. 10).
Attach the sillsupportstothe cabinet track hole
closestto the selected positionusing screw (ITEM E).
_1 Place the sill supportswith the cabinet on the
window sill's selected position (FIG. 10).
ITEME ,1
Lowe_gulde s_. "'_ ,
Ca_net
,,o.,o
[]The cabinet should be installedwith a very
slight tilt (about 1/4") downward to the outside
(FIG, 11).
Adjust the bolts and the nuts of sillsupports to level
the cabinet.
_1 Attach the L BRACKET (ITEM J) with screw
(ITEM G). (FIG. 14)
_ FIG. 14
[] DRAINAGE
Be sure to insert the drain pipe into base pan before
installation.
The air conditioner must be installed with a slight tilt
downward tothe outside for proper water drainage.
The air conditionerwill drain the excess condensed
water through the drain pipe. (FIG. 15)
DRAIN PiPE
FIG. 11
FIG.15
]Slide thechassisintothecabinet. (FIG. 16)
CAUTION: Forsecuritypurposes,reinstallside
screwsyouremovedin step1.
_ Attach the cabinet to the inner sill by driving the
screws (ITEM F) through the front angle into the
window inner sill (FIG. 12).
ITEMB
Track
LowerGuide
ITEMF
FIG. 12
]Pull each side curtain fully to each side of
window opening.
Attach each side curtain to the window sash using
screws (ITEM G). (FIG. 13)
Screw
Screw FIG. 16
]Cut the foam seal (ITEM H) to the proper length
and insert between the upper window sash and the
lower window sash. (FIG. 17)
FIG. 17
_The vent control handle must be straightened
before the decorative front isattached.
__3 Pulldown part (_)to align with part _).
,. Part
FIG. 18
-7-
Loading ...
Loading ...
Loading ...