Loading ...
Loading ...
31-3000210 Rev. 2 3
Installation Instructions
3
INSTALL WASHER/DRYER
BRACKETS
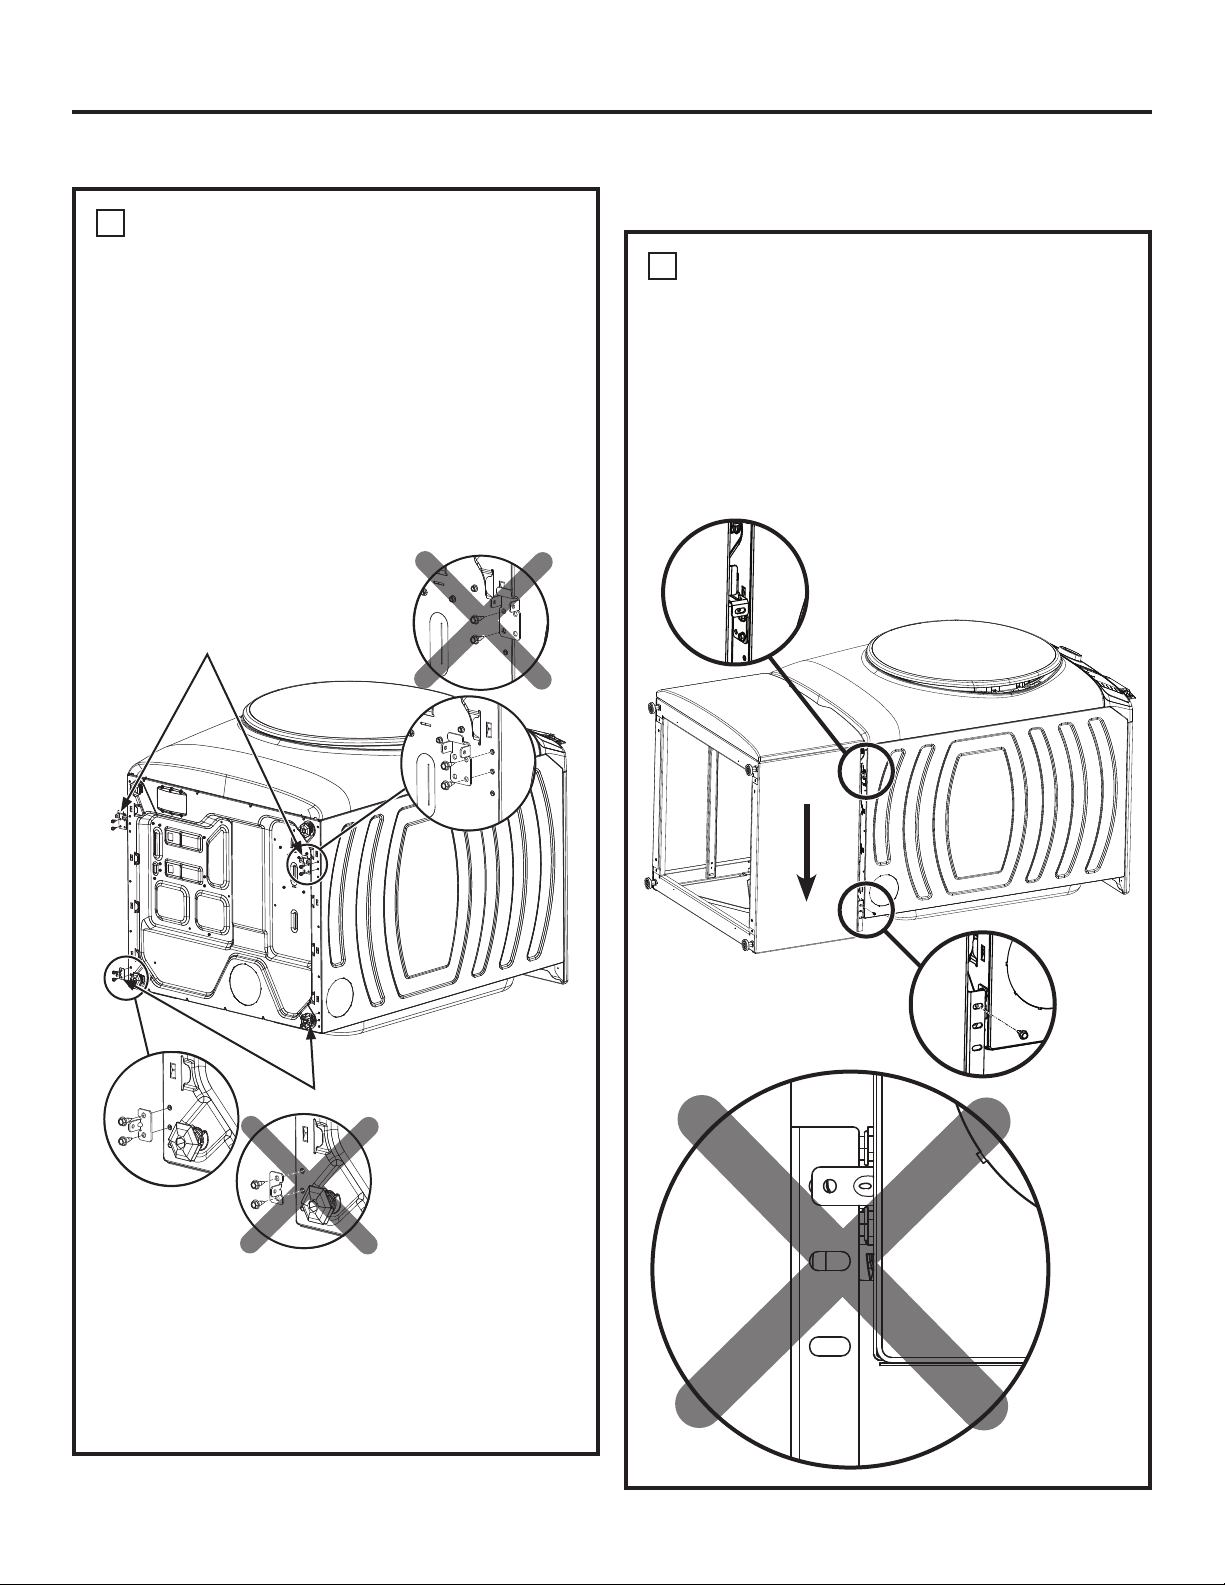
Front Brackets
Ŷ/D\WKHXQLWRQLWVEDFNRQDSURWHFWLYHVXUIDFH
Ŷ(QVXUHOHYHOLQJOHJVDUHWKUHDGHGLQWR
minimum height position.
Ŷ,QVWDOOIURQWEUDFNHWVRQWKHERWWRPRIWKH
washer or dryer as shown. Use the 2 holes
closest to the front and the 2 outermost holes
on the bracket. The bracket should not go
beyond the edge of the appliance.
Rear Brackets
Ŷ,QVWDOOUHDUEUDFNHWVRQWKHERWWRPRIWKH
washer or dryer as shown above. Use the top
2 holes on the bottom of the appliance with the
tab on the bracket facing the outside.
PREPARE THE UNIT
4
JOIN REAR BRACKETS
Ŷ/LIWSHGHVWDOULVHUDQGKRRNIURQWEUDFNHWVRI
pedestal/riser to front brackets of washer or
dryer.
Ŷ$OLJQUHDUEUDFNHWVRQZDVKHURUGU\HUZLWK
rear brackets on pedestal/riser and fasten
with screws. Make sure the bracket from the
appliance is to the INSIDE of the pedestal/riser
bracket and not the outside.
ATTACH PEDESTAL/RISER
TO UNIT
Front Brackets
Rear Brackets
J
Loading ...
Loading ...
Loading ...