Loading ...
Loading ...
Loading ...
15INSTALLATION
ENGLISH
Removing/Assembling
Handles
x When moving the refrigerator through a narrow
opening, removing the doors is preferred.
x The appearance of the handles may vary from what
is shown.
WARNING
When assembling or disassembling the
refrigerator handles:
x *UDVSWKHKDQGOH¿UPO\WRDYRLGGURSSLQJLW
x Do not swing the handle into nearby people or
animals.
x Make sure that the bracket hole of the handle
¿WVSURSHUO\LQWRWKHVWRSSHUEROWRIWKHGRRU
$VVHPEOHWKHVHWVFUHZVWR¿[WKHKDQGOHLQWR
place.
x Make sure that there is not a gap between the
door and handle after assembling the handle.
Tools Needed
3/32 in. Allen wrench
1/8 in. Allen wrench
1/4 in. Allen wrench
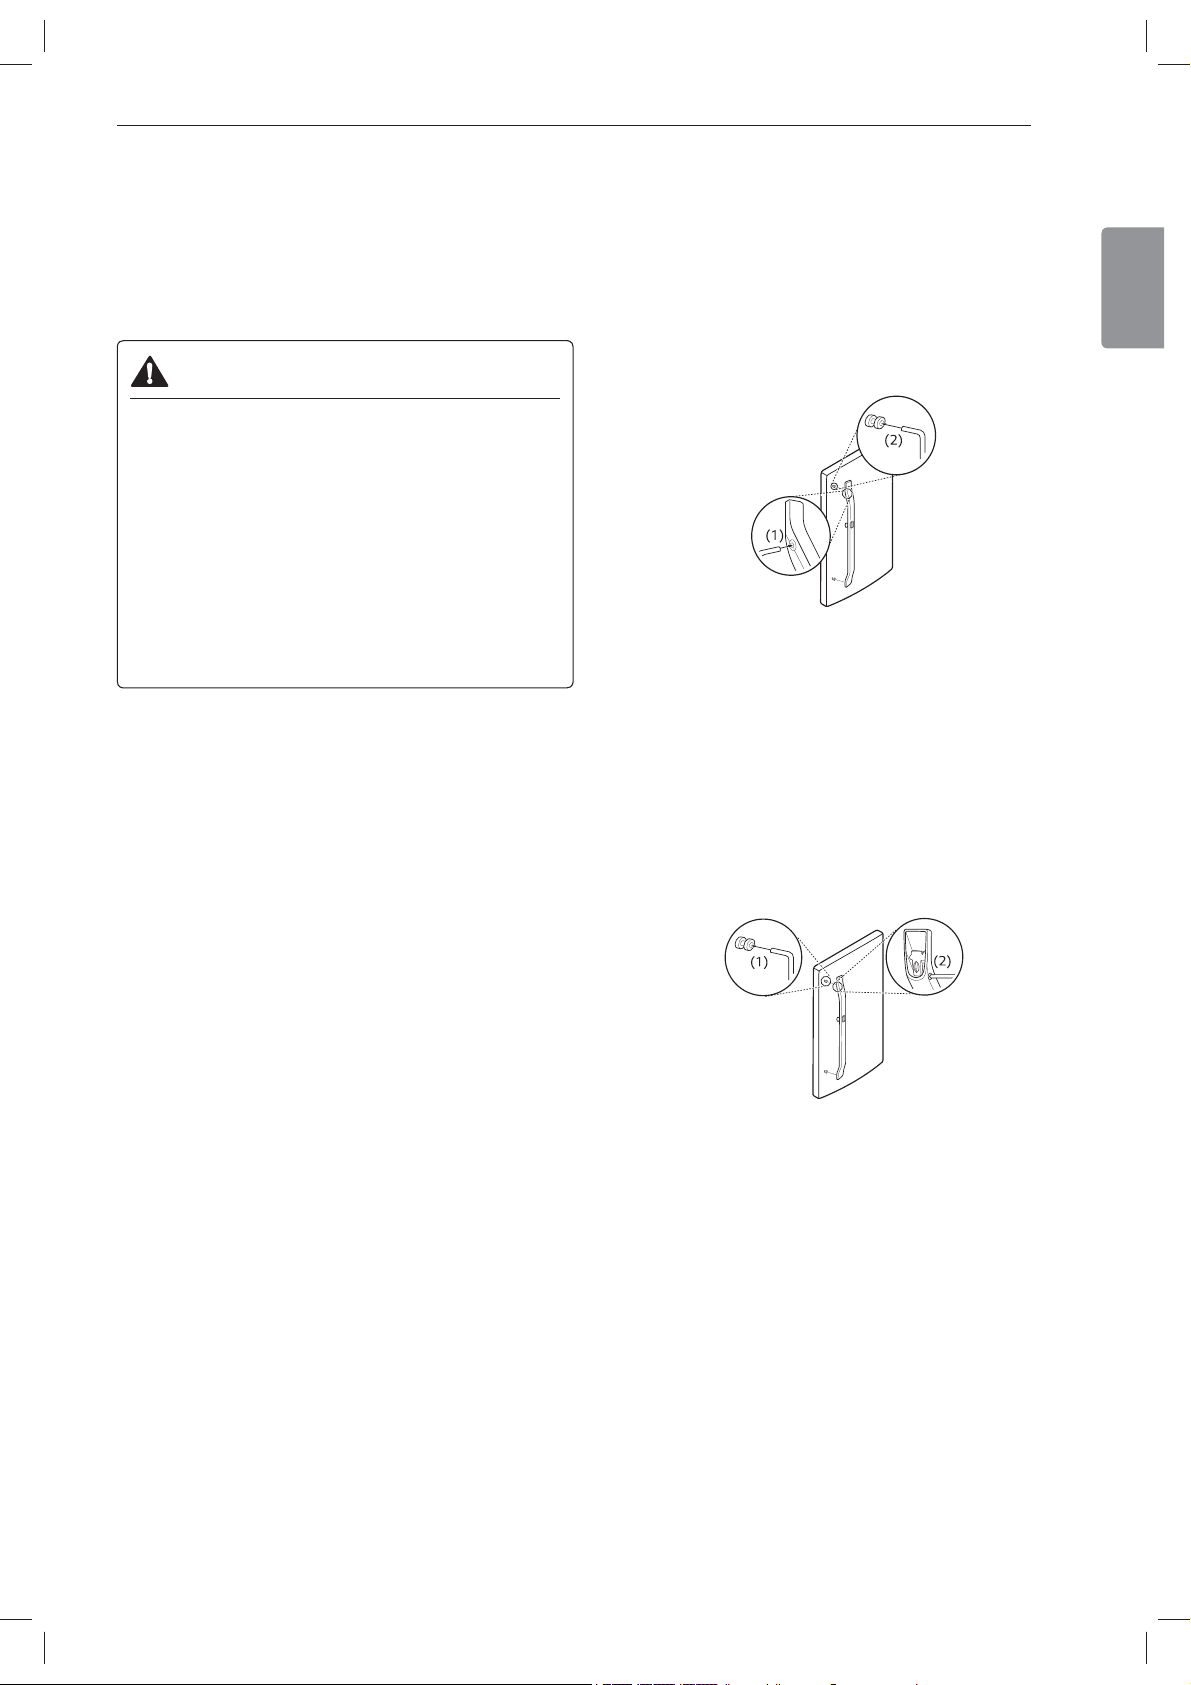
Removing the Refrigerator Handles
1
Loosen the set screws (1) with a 3/32 in. Allen
wrench and remove the handle.
2
Loosen the mounting fasteners (2) that connect
to the refrigerator door and handle using a 1/4
in. Allen wrench, and remove the mounting
fasteners.
Assembling the Refrigerator Handles
1
Assemble the mounting fasteners (1) at both ends
of the handle with a 1/4 in. Allen rench.
2
3ODFHWKHKDQGOHRQWKHGRRUE\¿WWLQJWKHKDQGOH
footprints over the mounting fasteners and
tightening the set screws (2) with a 3/32 in. Allen
wrench.
Loading ...
Loading ...
Loading ...