Loading ...
Loading ...
Loading ...
12 / 62 EN
Range Hood / User Manual
4 Installng your applance
4.1 Installation - Ducting
version
• If possible, disconnect and move freestanding or
slide-in range from cabinet opening to provide
easier access to rear wall. Otherwise put a thick,
protective covering over countertop, cooktop or
range to protect from damage and debris. Select
a flat surface for assembling the unit. Cover that
surface with a protective covering and place all
canopy hood parts and hardware in it.
• Determine and mark the centerline on the wall
where the canopy hood will be installed.
• Select a mounting height comfortable for the
user and mark on wall.
• Tape template, matching center-line and hood
bottom.
4.2 İnstall hood onto wall
A
IMPORTANT:
Framing must be
capable of supporting up to 150 lbs.
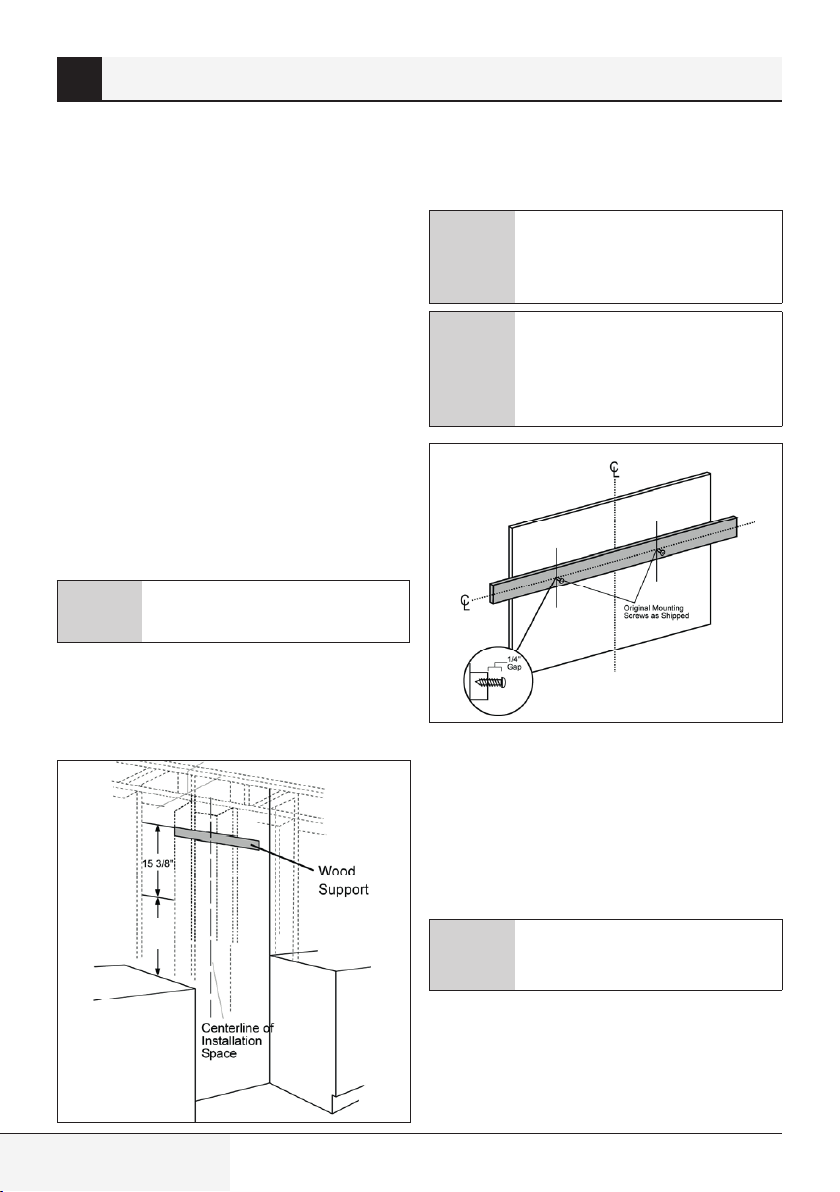
• Locate at least.2 vertical studs at the wood
support.
• Center the supplied wood support, left to right
and below the 15 3/8” marked line.
30”
• Secure the wood support to 2 or more vertical
studs, using at least 2 of the 4 supplied long
screws.
A
IMPORTANT:
Screws must
penetrate at least 1 1/2” into vertical
studs. Countersink screws into
support.
C
The mounting screws must remain
in their original shipping location.
These screws are positioned to
engage the keyhole slots in the back
of the hood.
• Adjust depth of original mounting srcrews in the
wood support until they protrude 1/4” forward.
This 1/4” gap will provide clearance to hang the
hood.
4.2.1 Install Transition Onto Top
of Hood
A
IMPORTANT:
Remove shipping
tape from damper and check that
damper moves freely.
• Place the transition piece over the hood exhaust
and secure with 4 screws provided.
• Use duct tape to seal the connection. Check to
be sure the damper moves freely.
Loading ...
Loading ...
Loading ...