Loading ...
Loading ...
Loading ...
7
CLEANING AND MAINTENANCE
CAUTION
• Do not use any cleaning agent with chlorine or chlorine compounds on stainless steel fi nish. Chlorine
and chlorine compounds are corrosive to stainless steel
•Do not use a metal knife or any other metal tool to scrape stainless steel parts
•Do not permit citrus or tomato juice to remain on stainless steel surfaces, as citric acid will permanently
discolor stainless steel. Wipe up spills immediately.
•Do not use abrasive cleaners, steel wool pads, or abrasive cloths as they will scratch the fi nish.
1. Carefully remove protective plastic peel coat from each stainless steel surface. Clean stainless with stainless steel
cleaner in direction of grain. Clean the stainless with any product made for stainless. Always rub with the grain
direction. Rubbing across the grain direction may produce minor scratches. Some good cleaners are Stainless Steel
Magic™, and Sheila Shine™.
2. In a salt air environment, small amounts of rust may accumulate on stainless steel. A slightly more oily cleaner like
Sheila Shine™ will protect better against oxidation or slight surface rust. Cleaning the surfaces periodically will protect
the fi nish for many years.
INSTALLATION
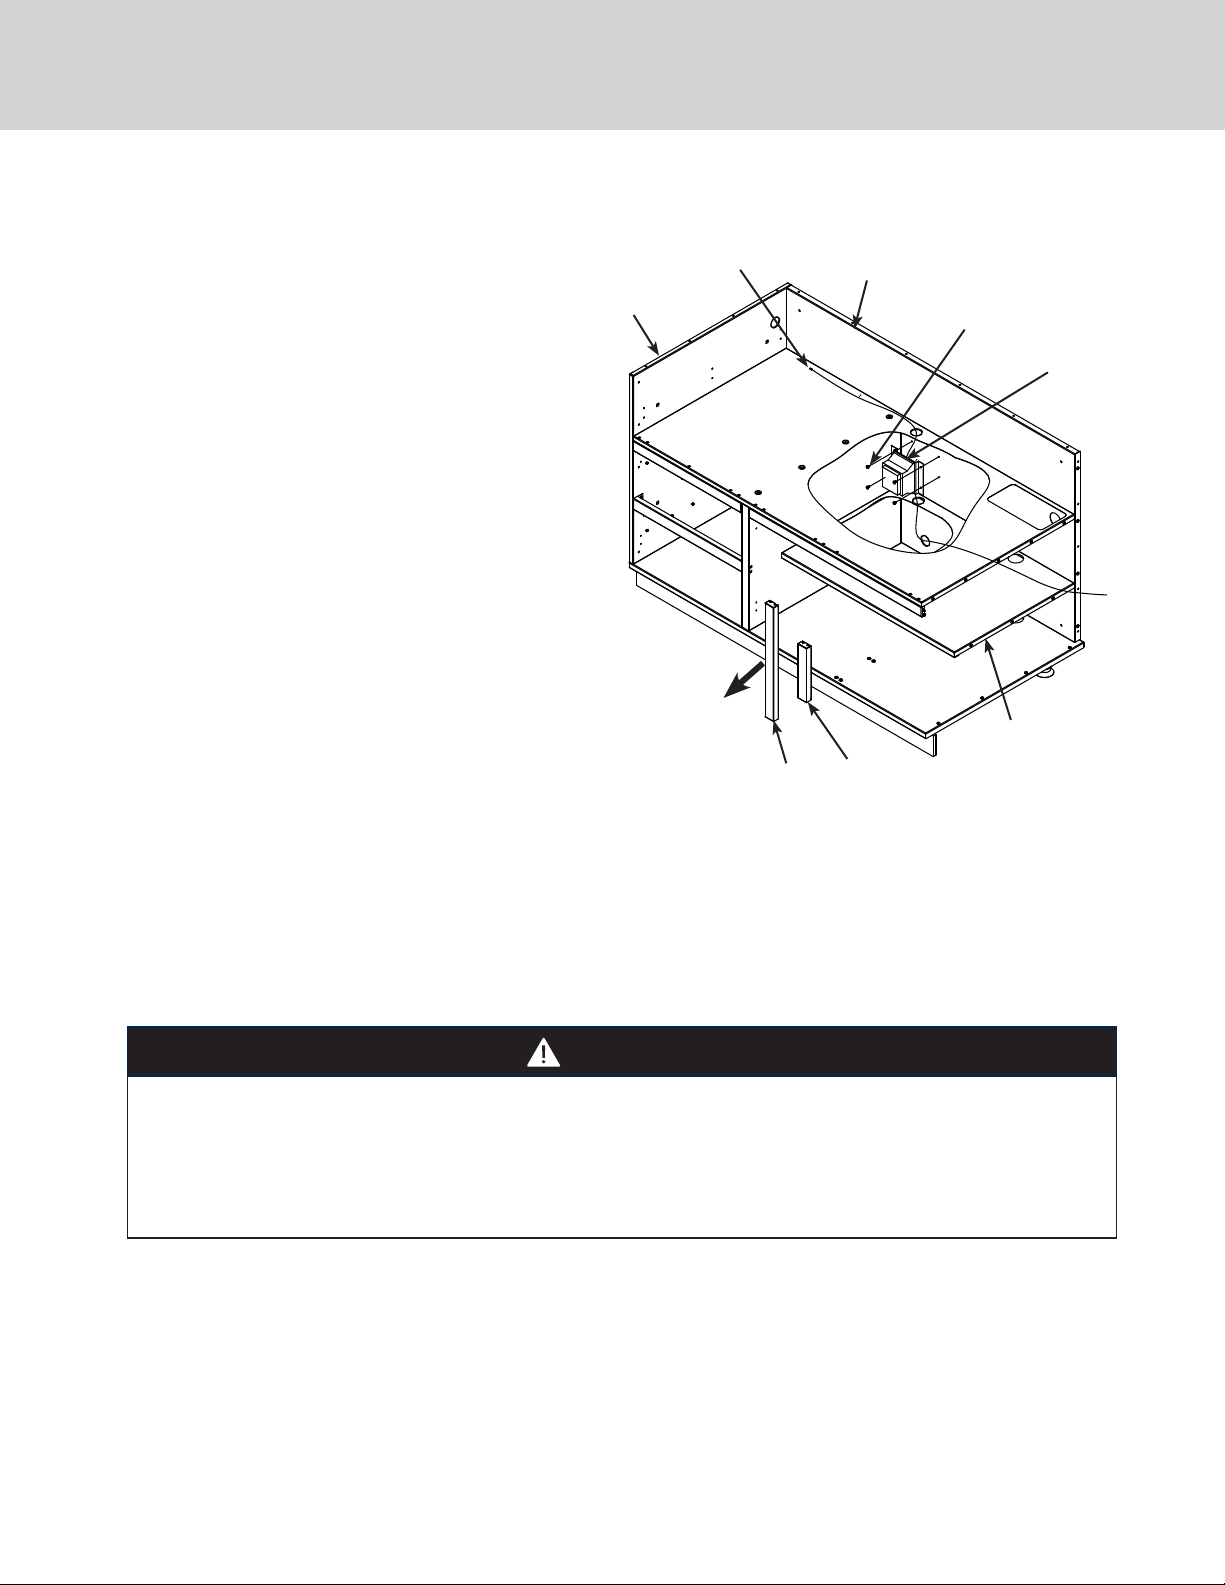
Installing the Transformer on Grill Base
For Models VQBO5540
1. The transformer must be mounted inside the
cabinet
2. Grip the center divider between the two doors
inside the cabinet and fi rmly pull it straight out.
3. Grip the shelf support (behind the center divider
that was just removed) and fi rmly pull it straight
out.
4. Locate the four holes in the back panel and feed
the AC plug through the hole in the shelf and out
the hole in the rear panel.
5. Line up the holes in the transformer with the holes
in the rear panel
6. Using the (4) #10-12 screws that were provided,
attach with a drill with a T25 torx bit to secure the
transformer to the back panel.
7. Feed the connector through the hole above to
connect it to the grill.
8. Reattach the shelf support by lining up the slots
with the shoulder screws and sliding it straight back
in.
9. Reattach the center divider by lining up the slots
with the shoulder screws and sliding it straight back
in.
10. If you are installing a Viking side burner or power
burner on either side of the grill, there is a hole
on either side of the cabinet provided to feed the
connector from the grill to the burners.
Rear
panel
Side
panel
(4) #10-12
screws
Transformer
Power
Supply
Shelf
power to
the unit
Center
divider
Shelf
support
Loading ...
Loading ...
Loading ...