Loading ...
Loading ...
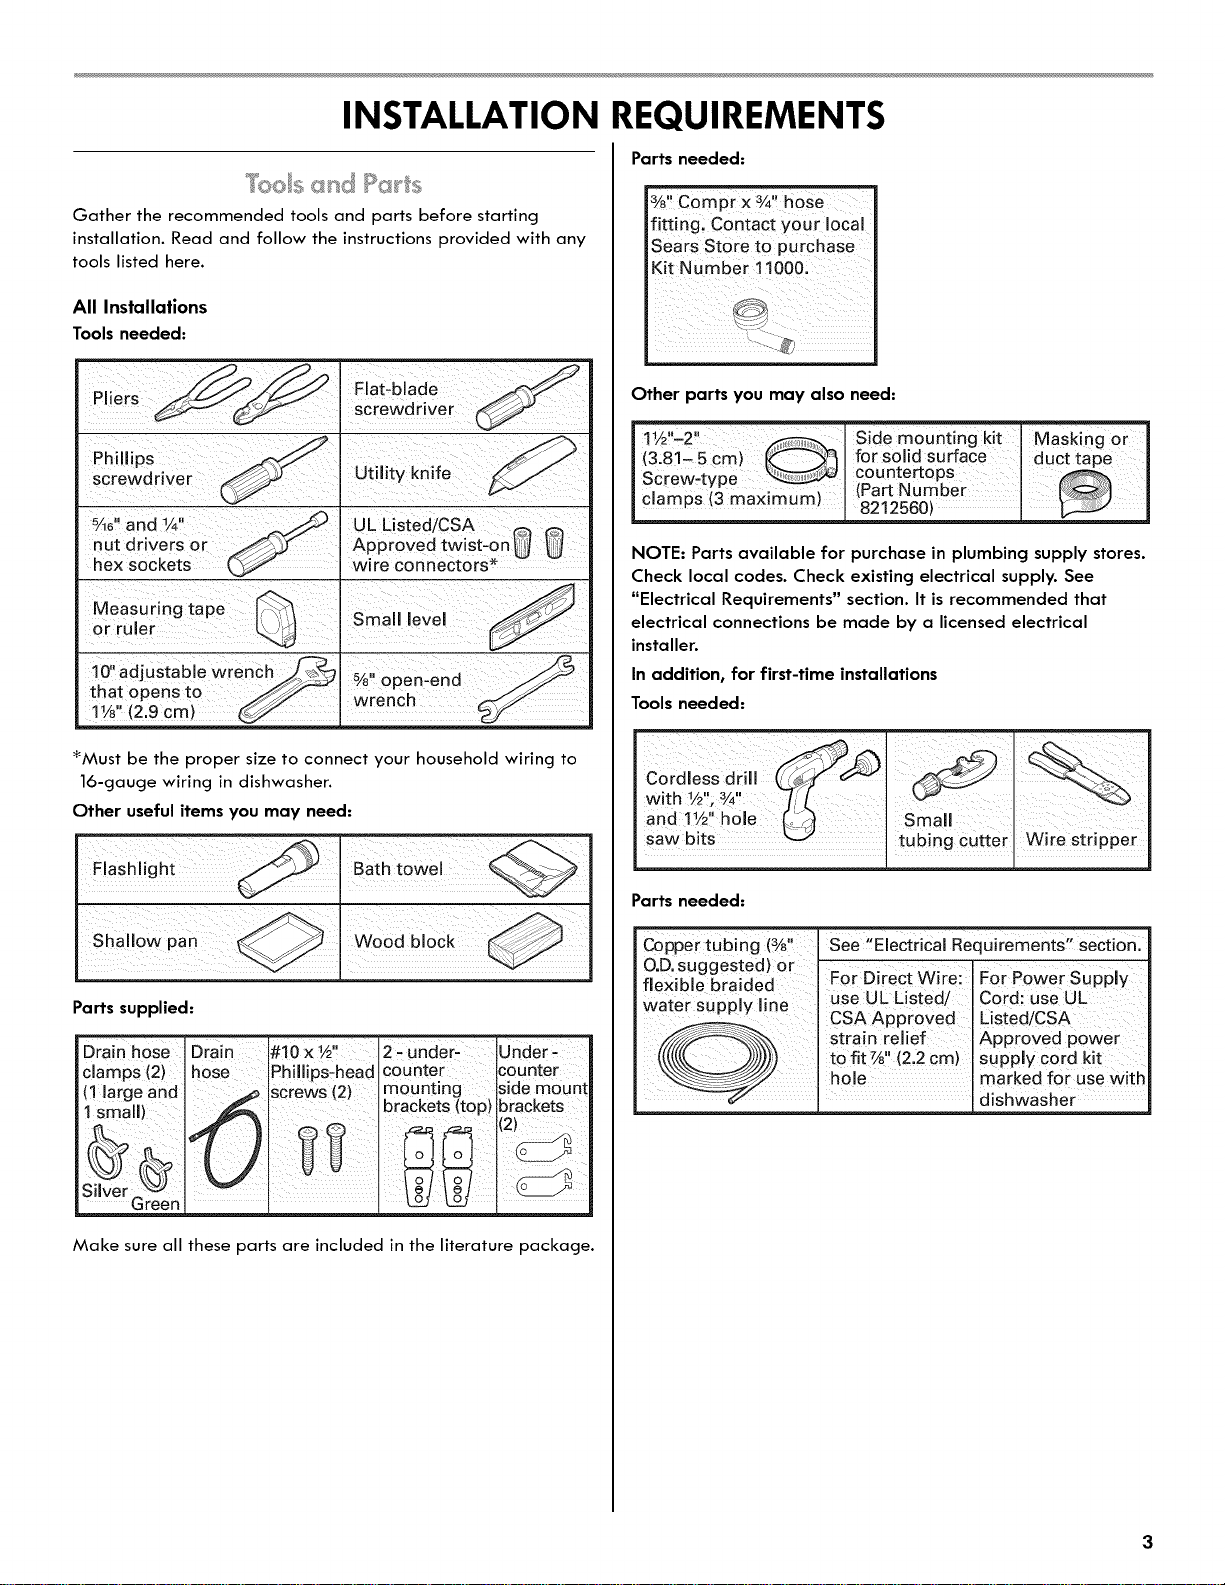
INSTALLATION REQUIREMENTS
Gather the recommended tools and parts before starting
installation. Read and follow the instructions provided with any
tools listed here.
All Installations
Tools needed:
Phillips
screwdriver
%e"and 1A"
ut drivers or
ex sockets
Measuring tape
or ruler
10"adjustable wren
that opens to J_
11/8 (2.9 cm)
Flat-blade
screwdriver
Utility knife
UL Listed/CSA _
pproved twist-on U U
wire connectors*
Small level
%" open-end
wrench
Flashlight
_Must be the proper size to connect your household wiring to
16-gauge wiring in dishwasher.
Other useful items you may need:
Bath towel
Shallow pan ,
Wood block
Parts supplied:
Drain hose Drain #10x½"
clamps (2) hose Phillips-head
(1 large and screws (2)
1small) O _ __@
3liver Green
2 - under-
counter
mounting
brackets (top)
Under -
counter
side mounl
brackets
Make sure all these parts are included in the literature package.
Parts needed:
3 iJ 3 _
Y8Compr x 3/4hose
fittingl Contact your local
Sears stOre t0 purchase
Other parts you may also need:
111/2-2 _1 Sidem0unting kit I Maskiag or I
(3,8!- 5 cm) for solid surface I du _
I countertops I
clamps (3 maximum)J (Part Number I
8212560)
NOTE: Parts available for purchase in plumbing supply stores.
Check local codes. Check existing electrical supply. See
"Electrical Requirements" section. It is recommended that
electrical connections be made by a licensed electrical
installer.
In addition_ for first-time installations
Tools needed:
Parts needed:
Copper tubing (3/8" Isee "ElectriCal Requirements" section:
O.D suggested) or I _. . I _. X ,
flexib e b adedlr i For direct, wire'. For _'ower buppuy
water suaalv line use UL Dsted/ Cord: useUL
I CSA Appr°ved I Listed!CSA
I strain relief I Approved powe r
t{,.t.t.t_..._ J_/_)_) I tOfit %' (2,2 cm) I sUPply cord kit
hole I marked for use with
--//" dishwasher
Loading ...
Loading ...
Loading ...