Loading ...
Loading ...
Loading ...
En
14
Operation
Turning the power on
1 Make all the connections, then plug the power cord
into a power outlet.
= Connections (p. 12 )
2 Change the [POWER] switch to the [ON] side to turn
on the power of the unit.
This unit’s indicators light and the power turns on.
Turning the power off
Change the [POWER] switch to the [OFF] side to turn off
the power of the unit.
This unit’s power turns off.
Playback
Prepare as follows.
! Place a record on the turntable.
! Remove the stylus cover and arm clamper.
1 Change the [POWER] switch to the [ON] side to turn
on the power of the unit.
2 Select the rotation speed to match the record to be
played by pressing a speed change button.
3 Press the [START/STOP] button.
The turntable rotates.
4 Pull up the lifter lever and move the tone arm onto
the record.
5 Push down the lifter lever.
The tone arm slowly descends and playback begins.
Pausing playback
Pull up the lifter lever.
The stylus of the cartridge lifts away from the record.
! To resume playback, push down the lifter lever.
Finishing playback
1 Pull up the lifter lever to return the tone arm to the
arm rest and then push down the lifter lever.
2 Press the [START/STOP] button.
The turntable stops smoothly.
3 Change the [POWER] switch to the [OFF] side to turn
off the power of the unit.
Use the arm clamper to secure the tone arm.
To protect the stylus tip, attach the stylus cover.
Close the dust cover.
Adjusting the pitch
Move the [TEMPO] slider forward or backward.
Moving the slider forward increases the rotation speed and moving it
backward decreases the rotation speed.
! When the [TEMPO] slider is at the center, the indicator lights in
yellow-green and the rotation speed becomes the specified rpm
(33 1/3 rpm, 45 rpm, or 78 rpm).
! The scale of the [TEMPO] slider is a rough value. Please use it as a
guide.
! You can confirm that the rotation speed has become the specified
rpm by looking at the four rows of strobe patterns inscribed around
the turntable.
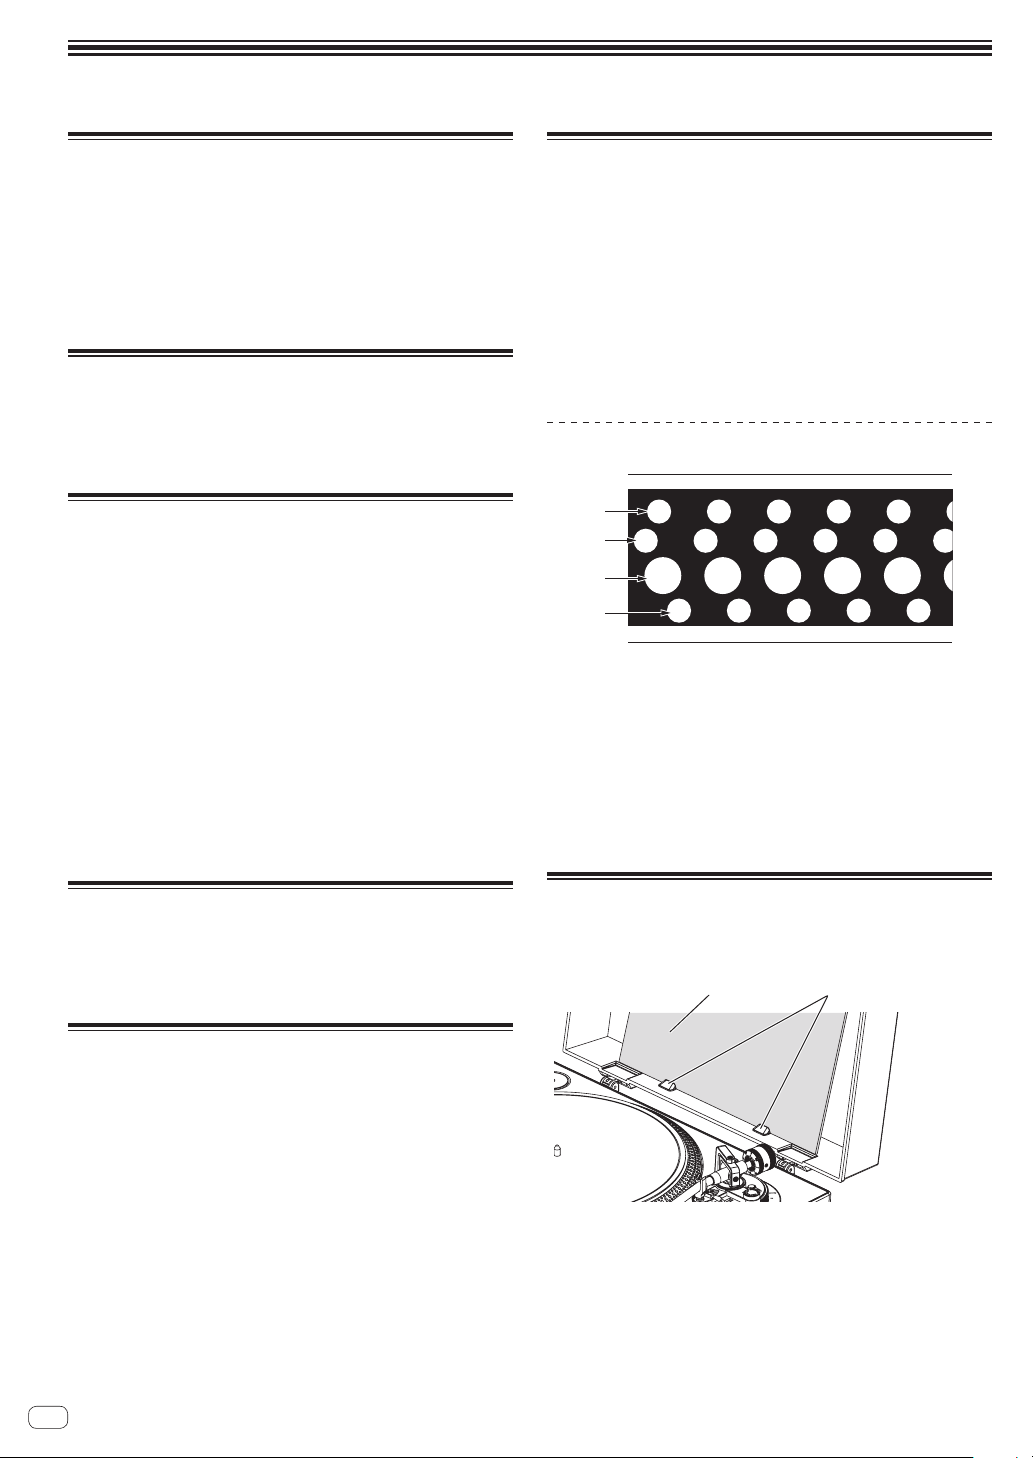
Strobe pattern
①
②
③
④
1 When the strobe pattern appears stopped, 33 1/3 rpm (50 Hz power
supply)
2 When the strobe pattern appears stopped, 45 rpm (50 Hz power
supply)
3 When the strobe pattern appears stopped, 33 1/3 rpm (60 Hz power
supply)
4 When the strobe pattern appears stopped, 45 rpm (60 Hz power
supply)
! A strobe illuminator (red LED light) is used to illuminate the strobe
pattern of this unit. When checking the pitch, always use the strobe
illuminator light.
Displaying a record jacket
Place the record jacket behind the stoppers attached to the dust cover
as shown in the figure.
StoppersRecord jacket
! Do not place anything other than a record jacket.
! Place the record jacket secured behind the stoppers properly.
! When using this feature during playback, be careful that the record
jacket does not fall. The record or stylus may be damaged.
! Be careful not to close the dust cover while a record jacket is placed
on it.
Loading ...
Loading ...
Loading ...