Loading ...
Loading ...
Loading ...
12 13
FITTING THE REMOVABLE COVERS
(ONLY AVAILABLE ON DESIGNATED MODELS)
Ensure the heated blanket is correctly fitted to
the mattress before fitting the removable cover
(if applicable).
When fixing the removable cover to the heated
blanket, ensure the fleecy or quilted cover is
facing upwards with the studs facing down.
Secure the removable cover to the heated
blanket using the studs provided. Ensure that
all studs are fastened to prevent the cover from
moving.
No other cover other than that supplied with
the blanket should be used with the heated
blanket.
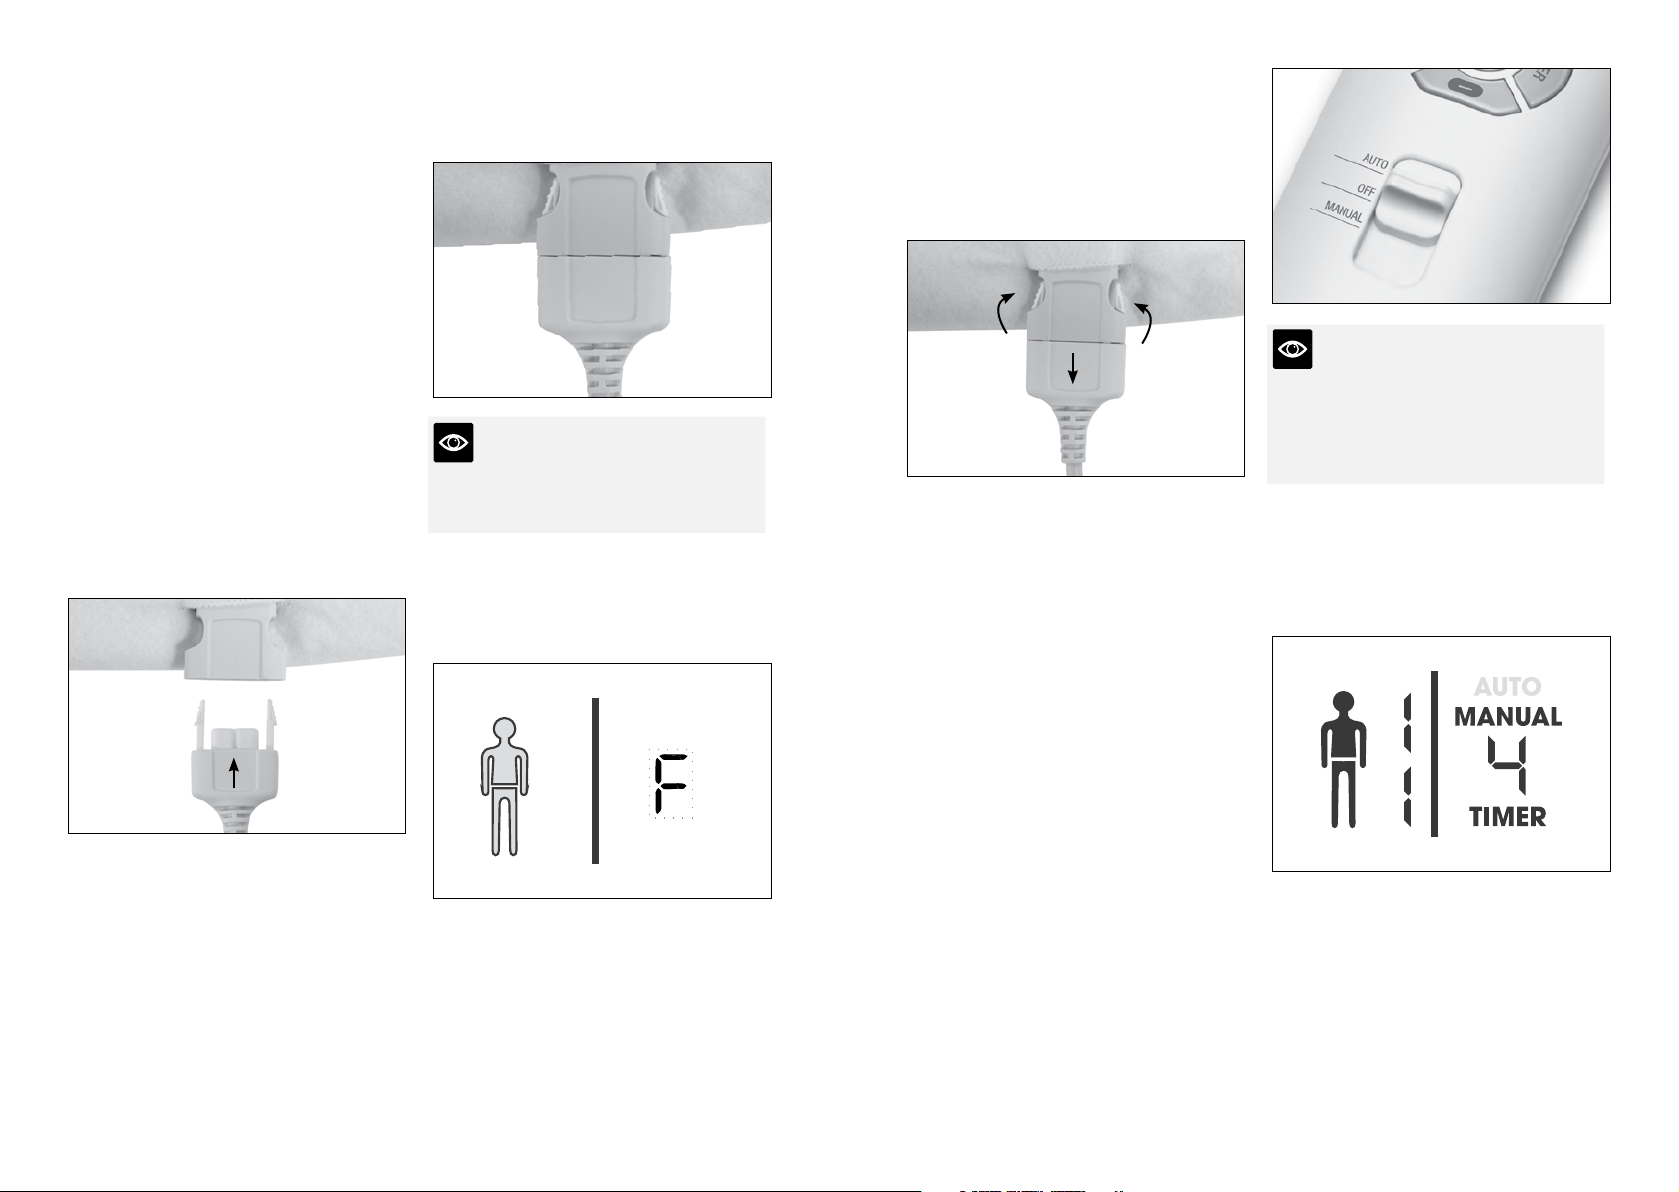
TO CONNECT THE CONTROLLER/S
Ensure the heated blanket controller is in the
‘OFF’ position and not connected to the power
outlet.
To connect your controller, insert the controller
plug into the controller socket on the heated
blanket.
Ensure that the plug is securely fastened in
the socket so that the locking clips are fully
inserted and no gap between the plug and
socket, as per picture below.
NOTE
The controller plug is designed to only fit the
socket correctly one way – if the plug does not
push in fully, turn the plug around.
If the LCD screen displays an ‘F’ error message
and the blue screen flashes continuously, this
is an indication that the controller plug may
have a loose connection or an interference has
occurred with the power supply.
To correct, turn the controller switch to the
‘OFF’ position and turn the power off at the
outlet, then disconnect and reconnect the
controller plug into the controller socket,
ensuring a correct fit.
Turn the power outlet back on and reset the
electric blanket controller to continue using.
TO DETACH THE CONTROLLER/S
Ensure the heated blanket controller is in the
‘OFF’ position and disconnect from the power
outlet.
Push the locking clips on the controller plug
together to release and withdraw the plug from
the controller socket.
STORING YOUR CONTROL UNIT
Remove the controller(s) when laundering
your blanket. Store your controller(s) during
summer months while your blanket remains on
the bed as a comfortable under blanket.
DUAL CONTROL UNITS
Your Double/Queen/King/Super King size
heated blankets features two controllers for
individual left and right side heating comfort.
OPERATING YOUR HEATED BLANKET
Your BodyZone by Breville heated blanket has
dual zone heating technology that allows you
to choose from 6 heat settings for your upper
and lower body and an auto-off timer which
allows you to pre-program the blanket to turn
off after a set number of hours (up to 9hrs).
Ensure the heated blanket controller(s) is
switched to the ‘OFF’ position. Connect the
controller to the blanket. Plug the cord into a
230V or 240V power outlet and switch the
power on. Slide the control switch to either the
‘MANUAL’ or ‘AUTO’ function.
The LCD screen illuminates when initially
switched on and when programming the heat
and timer settings for easier visibility, but will
dim after 10 seconds of inactivity.
NOTE
On initial use, it is recommended that the
blanket be set on highest setting (6,6) for 3
hours before sleeping on the bed. This will
assist in drying out any moisture which has
been accumulated in the mattress.
USING THE MANUAL SETTING
Slide the control switch down from ‘OFF’ to
‘MANUAL’. The LCD screen will illuminate
showing the default settings (1,1) and auto shut
off timer of 4 hours.
SELECTING A HEAT SETTING
The BodyZone heated blankets have a heat
setting range of 0 to 6 for each zone. This is
displayed on the left hand side of the LCD
display.
Press the ‘HEAT’ button; the upper body of
the icon will start flashing, indicating that the
temperature is being adjusted for this zone of
the heated blanket.
Loading ...
Loading ...
Loading ...