Loading ...
Loading ...
Loading ...
17
To Use:
1. Press KEEP WARM.
2. Press the number keypads to set the desired temperature.
Atone will sound if the minimum or maximum temperature
is reached.
3. Press START.
4. Place food in the oven.
5. Press STOP when nished.
NOTE: The temperature may be changed at any time by
repeating steps 2 and 3.
Aluminum Foil
IMPORTANT: To avoid permanent damage to the oven bottom
nish, do not line the oven bottom with any type of foil or liner.
For best cooking results, do not cover entire oven rack with foil
because air must be able to move freely.
Positioning Racks and Bakeware
IMPORTANT: To avoid permanent damage to the porcelain
nish, do not place food or bakeware directly on the oven
door orbottom.
Bakeware
To cook food evenly, hot air must be able to circulate. Allow
2"(5cm) of space around bakeware and oven walls. Make
sure thatno bakeware piece is directly over another.
Racks
■ Position racks before turning on the oven.
■ Do not position racks with bakeware on them.
■ Make sure racks are level.
To position a rack, pull it out to the stop position, raise the
front edge, and then lift out. Use the following illustration and
table asa guide.
The oven has 7 positions for a at rack, as shown in the
previous illustration and the following table.
Flat Rack Position* Type of Food
7 Broiling/searing meats,
hamburgers,steaks
6 Broiled meats, poultry, sh
3 or 4 Most baked goods, casseroles,
frozen foods
2 Roasted meats
1 Large roasts or poultry
For hamburger patties to have a well-seared exterior and a
rare interior, use a at rack in rack position 7. Side 1 should
cook for approximately 2
1
/
2
to 3
1
/
2
minutes. Side 2 should
cook for approximately 4 to 5 minutes. Expect a moderate
degree of smoke when broiling.
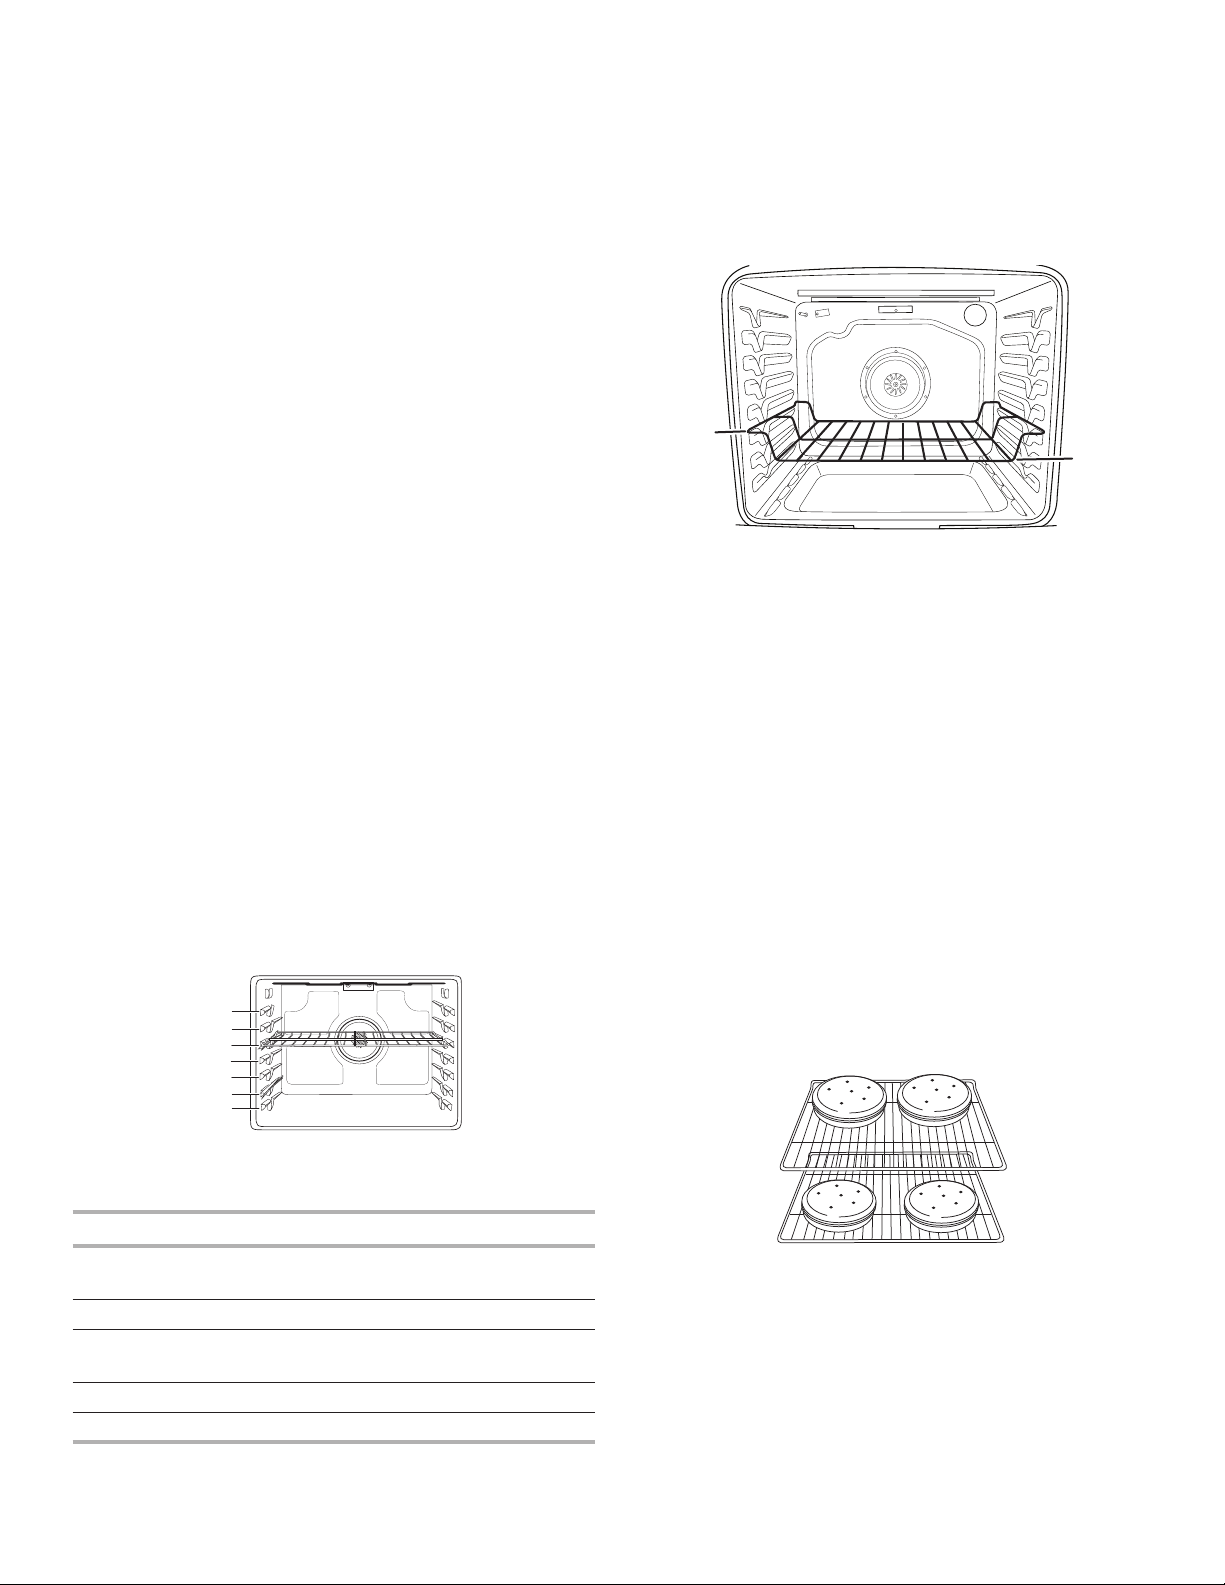
* If your model has a Max Capacity Oven Rack, the recessed
ends must be placed in the rack position above the desired
position of the food. See the following illustration.
IMPORTANT: These rack positions are for at racks. If a
Max Capacity Oven Rack is used, the rack position must be
adjusted as shown in the previous gure.
Multiple Rack Cooking
2-rack (non-convection): Use rack positions 2 and 5 or 3 and 6.
2-rack (convection): Use rack positions 2 and 5 or 3 and 6.
3-rack (convection): Use rack positions 2 and 7 and a Max
Capacity Oven Rack in rack position 5.
Baking Cookies and Layer Cakes on 2 Racks
Baking Layer Cakes
For best results when baking cakes on 2 racks, use the Bake
function, a at rack in rack position 5, and a at rack in rack
position 2. If you do not have 2 at racks, use a Max Capacity
Oven Rack in rack position 6. Place the cakes on the racks as
shown. Keep at least 3" (7.6 cm) of space between the front of
the racks and the front cakes.
Baking Cookies
For best results when baking cookies on 2 racks, use the
Convection Bake function, a at rack in rack position 6,
andaatrack in rack position 3.
If you do not have 2 at racks, use a at rack in rack position
2and a Max Capacity Oven Rack in rack position 6.
If you do not have Convection Bake, use the standard
Bakefunction.
7
6
5
4
3
2
1
A
B
A. Ends of rack in position 3
B. Food in position 2
Loading ...
Loading ...
Loading ...