Loading ...
Loading ...
Installing the Washing Machine
2
SAMSUNG
Washing Machine Owner’s Instructions
SAMSUNG
Washing Machine Owner’s Instructions 3
Installing the Washing Machine
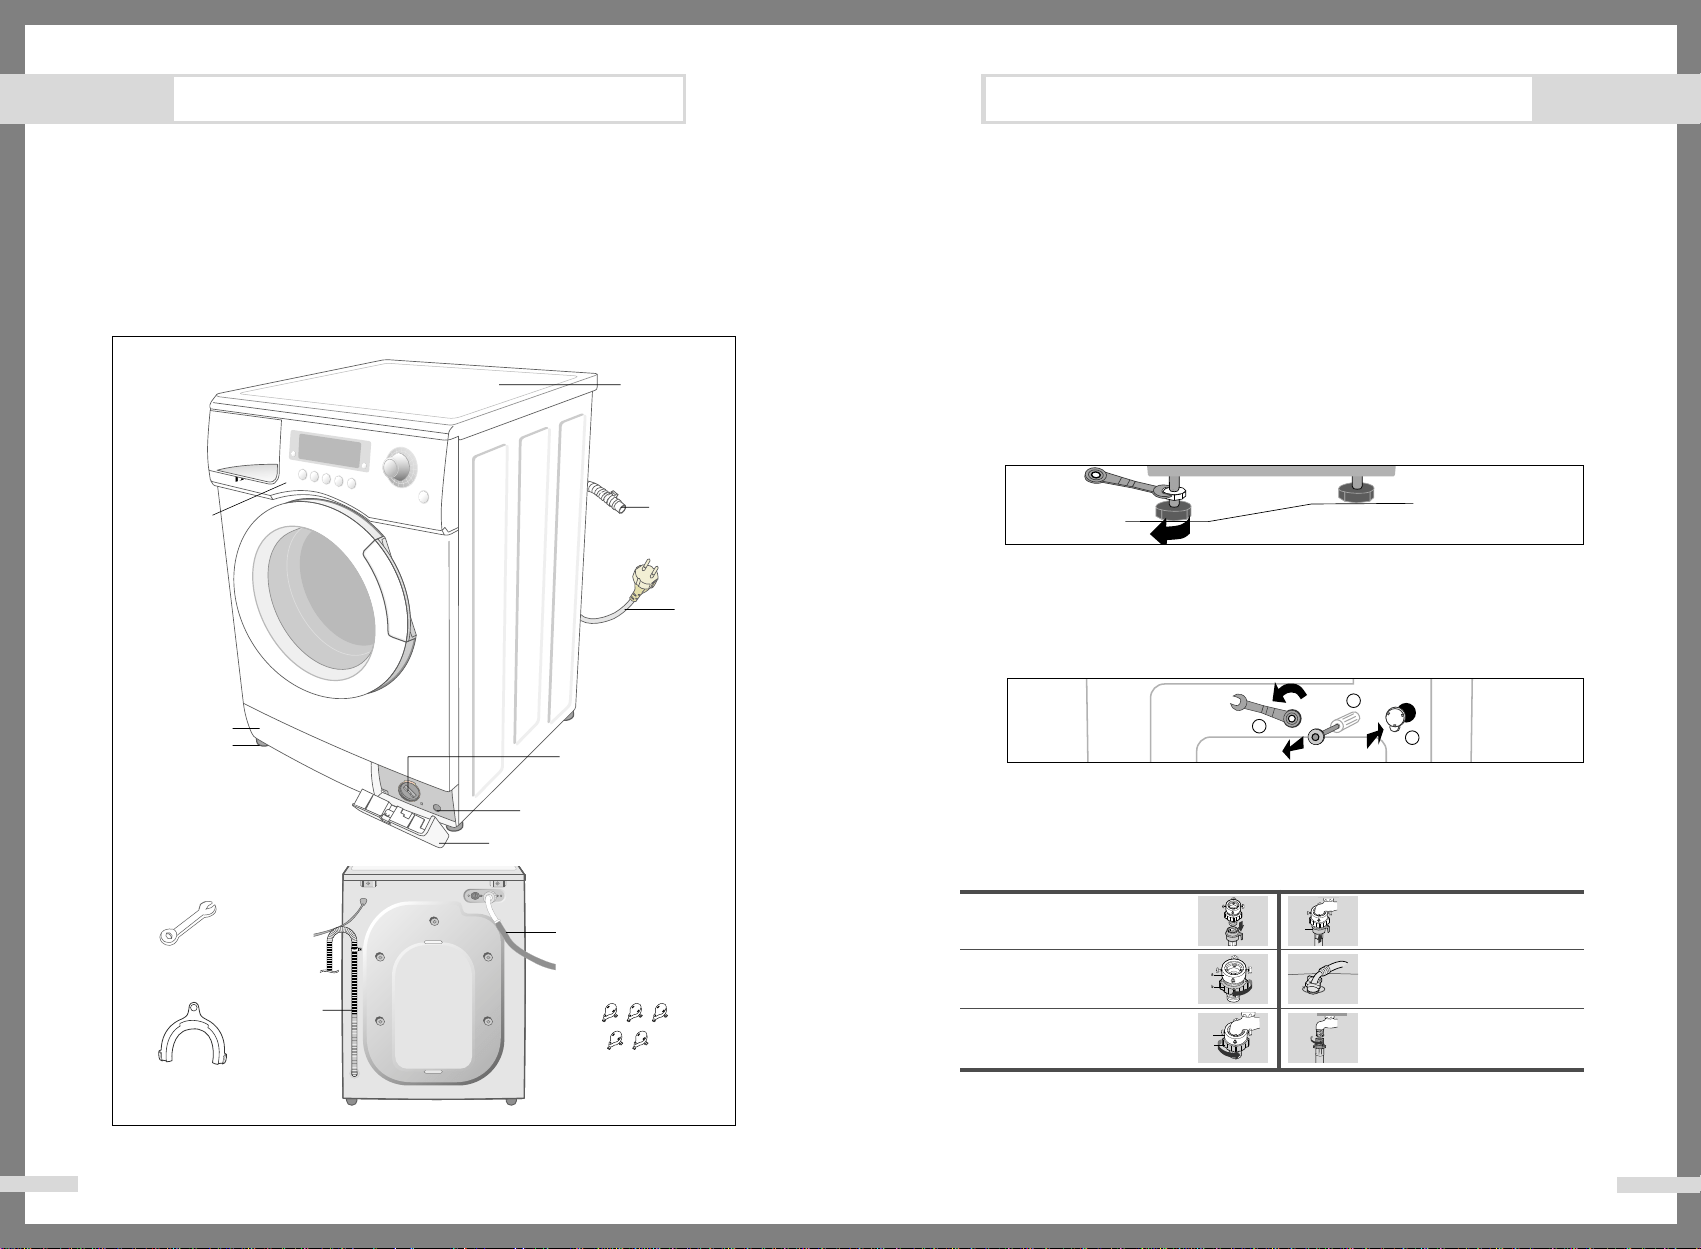
Unpacking the Washing Machine
Unpack your washing machine and inspect it for shipping damage. Also make sure that
you have received all of the items shown below. If the washing machine was damaged
during shipping or you do not have all of the items, contact your Samsung dealer
immediately.
Overview of the washing machine
Hose guide
Plug
Cold Water
supply hose
Bolt hole
covers
Drain Hose
Detergent
drawer
Door
Worktop
Debris filter
Emergency drain
tube
Filter-cover
Base cover
Adjustable feet
Control panel
Wrench
Drain hose
Selecting a location
Before you install the washing machine, select a location with the following characteristics:
• A hard, level surface (if the surface is uneven, see "Adjusting the leveling feet," below)
• Away from direct sunlight.
• Adequate ventilation
• Room temperature that will not fall below 0 ˚C
• Away from sources of heat such as coal or gas
Make sure that the washing machine does not stand on its power cord.
Ventilation openings must not be obstructed by carpeting when the washing machine is
installed on a carpeted floor.
Adjusting the leveling feet
If the floor is uneven, adjust the feet (do not insert pieces of wood or any other objects under
the feet):
1. Loosen the leg bolt by turning it with your hand until it is at the desired height.
2. Tighten the locking nut by turning it with the supplied wrench.
• Place the washer on a sturdy, flat surface.
If the washer is placed on an uneven or weak surface, noise or vibration occurs.
(Only a l degrees angle is allowed.)
Removing the shipping bolts
Before using the washing machine, you must remove the five shipping bolts from the back
of the unit. To remove the bolts:
1. Loosen all bolts with the supplied wrench before removing them.
2. Take each bolt head and pull it through the wide part of the hole.
Repeat for each bolt.
3. Fill the holes with the supplied plastic covers.
4. Keep the shipping bolts for future use.
Connecting the water supply hose(Option)
NOTICE After completing connection, if water leaks from the hose, then repeat the same steps. Use
the most conventional type of faucet for water supply. In case the faucet is square or too
big, remove the spacing ring before inserting the faucet into the adaptor.
1
2
3
a
b
c
1. Remove the adaptor from the
water supply hose.
2. First, using a “+” type screw driver, loosen the
four screws on the adaptor. Next, take the
adaptor and turn part(b) following the arrow until
there is a 5mm gap.
4. Connect the water supply hose to the adaptor.
Pull down part (c) of the water supply hose.
When you release part (c) the hose automatically
connects to the adaptor making a ’click’ sound.
5. Connect the other end of the water supply hose
to the inlet water valve at the top of the washer.
Screw the hose clockwise all the way in.
•
If the water tap has a screw type faucet, connect
the water supply hose to the tap as shown.
3. Connect adaptor to the water tap by tightening
the screws firmly.
Then, turn part (b) following the arrow and put(a)
and (b) together.
Loading ...
Loading ...
Loading ...