Loading ...
Loading ...
Loading ...
Installation and connection en
9
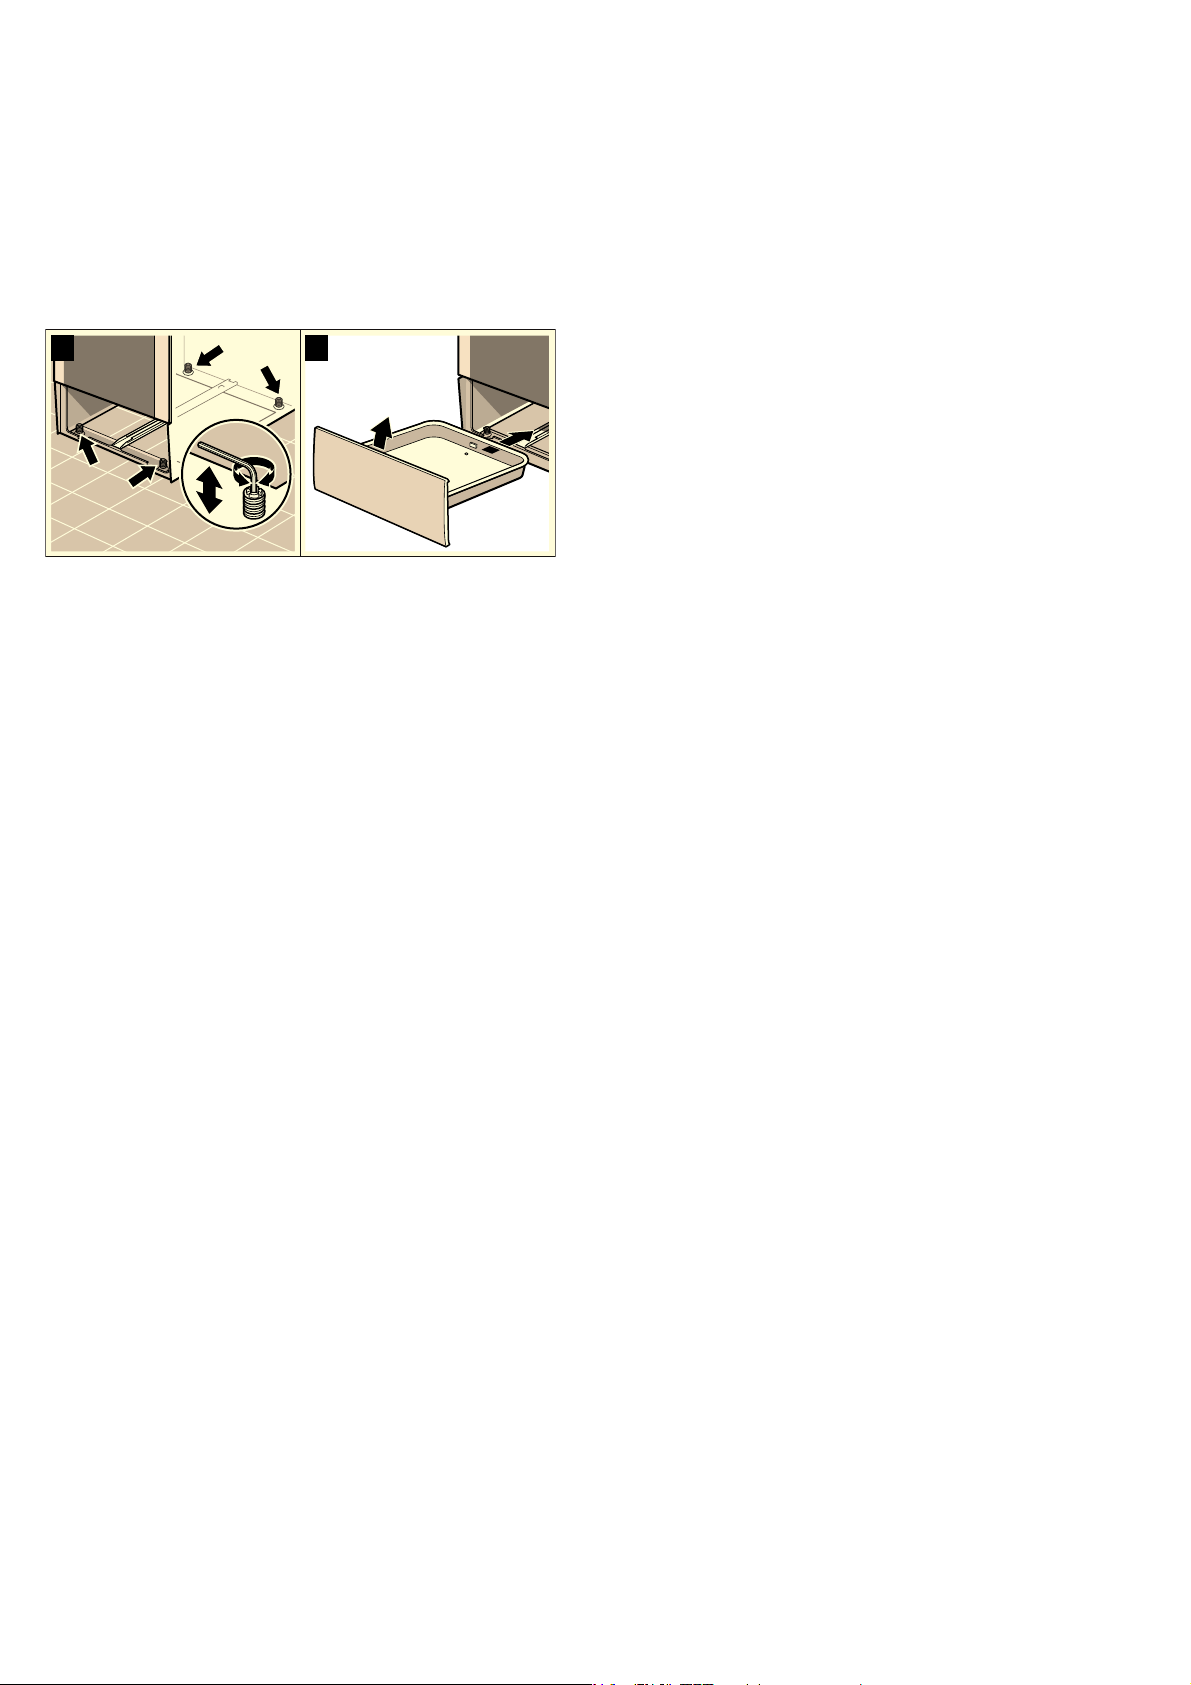
Levelling the cooker
Always place the cooker directly on the floor.
1. Pull out the plinth drawer and lift it up and out.
There are adjustable feet at the front and rear on the
inside of the plinth.
2. Use an Allen key to raise or lower the adjustable feet
as necessary until the cooker is level (picture A).
3. Push the plinth drawer back in (picture B).
Adjacent units
Any adjacent units must not be made of flammable
materials. The fronts of any adjacent units must be heat-
resistant up to at least 90 °C.
Wall fixing
To prevent the cooker from tipping over, you must fix it
to the wall using the enclosed bracket. Please observe
the installation instructions for fixing the oven to the
wall.
Measures to be noted during transport
Secure all mobile parts in and on the appliance using
an adhesive tape that can be removed without leaving
any traces. Push all accessories (e.g. baking tray) into
the corresponding slots with cardboard at the edges, in
order to avoid damaging the appliance. Place
cardboard or similar between the front and rear side to
prevent knocks against the inside of the glass door.
Secure the door and, if available, the top cover to the
appliance sides using adhesive tape.
Keep the original appliance packaging. Only transport
the appliance in the original packaging. Observe the
transport arrows on the packaging.
If the original packaging is no longer available
pack the appliance in protective packaging to
guarantee sufficient protection against any transport
damage.
Transport the appliance in an upright position. Do not
hold the appliance by the door handle or the
connections on the rear, as these could be damaged.
Do not place any heavy objects on the appliance.
%$
Loading ...
Loading ...
Loading ...