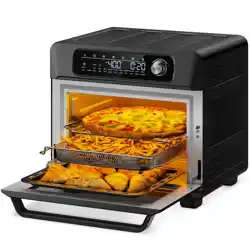
The convenient Cooking rack provides optimal cooking positions for up to 6 slices of toast, and the rack is reversible for optimal cooking heights.
Rack-Positioning Slots
Using the reversible Cooking Rack, the oven can accommodate up to 6 rack positions. There are upper, middle, and lower rack slots along the sides of the oven interior. The middle rack position slot contains a rack stop.
Removable Crumb Tray
The Crumb Tray can be accessed by opening the oven door, and is located at the bottom, inside the oven. The tray can be easily removed for cleaning. Hand washing is recommended. Allow oven to cool prior to removal.
Convection System
Convection fan system that circulates air around the food for faster and more even cooking. It is activated by default for the bake, cookies, pizza, and reheat cooking functions. It can also be turned on during the warm cycle. The fan icon to the right of the temperature display will indicate when the convection fan is activated. Most recipes recommend reducing the temperature by 25°F when cooking with convection.
Always check the food 10 minutes before the suggested cooking time is reached to avoid overcooking. For optimum results, maximize airflow by placing items in the center of the rack, leaving the food uncovered, and using bakeware with lower sides when possible.
Advanced Cooking Technology
The heating elements utilize halogen and quartz infrared technology with a total power output of 1500 watts. These elements use infrared light waves to preheat the oven and cook foods faster than conventional ovens. The elements will cycle on and off during normal operation to cook food more evenly.
PowerPlus® Preheat
Due to the rapid heating of the infrared elements, preheat times are much shorter than toaster ovens with conventional heating elements. For example, the preheat phase for the bake function to reach 325°F with the convection fan on takes approximately 3 minutes. The preheat phase is indicated by the flashing up arrow to the right of the temperature display on the LCD.
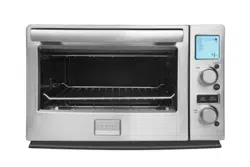
Control Panel
The large, easy to read LCD display indicates the cooking functions and settings selected. The large knobs and control buttons provide easy navigation of the different cooking functions and settings.
Time Control
For toast and bagels, the timer will display the time remaining based on which of the 5 darkness levels was selected. For pizza, the timer will display the time remaining based on which size pizza was selected. Alternatively, the cook time for pizza can also be adjusted. For all other functions, the timer will allow the user to set the cook time and, during cooking operation, see the time remaining.
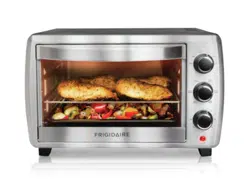
Non-Stick Toaster Oven Interior
The non-stick interior provides an easy to clean interior surface. The 0.6 cubic foot interior is large enough to cook a 12” pizza or make 6 slices of toast.
COOKING with the Toaster Oven
Bake Function
Food Position:
Center food on the cooking rack and adjust the rack height so the food is centered in the Toaster Oven. The lower slots with the rack in the up position is a good starting point. Be sure to account for foods that rise when cooked by placing them lower in the Toaster Oven. Because the top and bottom heating elements are activated during this function, adjusting the rack height up or down may be necessary for even cooking
Convection Fan:
Turned on by default for faster, more even cooking. This will shorten cooking times for most foods by circulating air inside the Toaster Oven. Centering the food and using cookware that allows more circulation will provide the best results. This may be turned off by pressing the Convection button.
1. After centering the food in the Toaster Oven and closing the door, turn the Function/Mode control knob to BAKE.
2 Press the Temp/Darkness button, and then turn the Temp/Time control knob to the desired cooking temperature per recipe or packaging instructions and press the Set button. Pressing the Set button will select the current temperature (or darkness, Time/Size/Slice setting when adjusting those settings); however, pressing the Time/Size/Slice button or Start/Cancel button or simply waiting five seconds will also set the current temperature, darkness, time, size, or slice.
3. Press the Time/Size/ Slice button, and turn the Temp/Time control knob to the desired cooking time.
4. Press the Start/Cancel button to begin cooking.
5. When the time has elapsed, the tone will sound and the oven will automatically shut off.
6. If food is to be removed before the cycle ends, simply press the Start/Cancel button to shut the oven off. Then, remove the food.
Broil Function
Food Position:
Broiling is typically used to cook food from the top down and promotes browning on top by only activating the top heating elements. Food will brown quicker the closer it is placed to the top heating elements by utilizing the middle or upper slots; however, food should always be at least 1” (2.5 cm) away from the heating elements. If food is browning too much then the rack height should be lowered or the temperature turned down.
1. Place the food to be broiled toward the center of the rack, and then close the oven door. The Toaster Oven does not have an open door feature, so the door must be closed during use.
2. Set the Function/Mode control knob to BROIL.
3. The default cooking temperature for broiling is preset to 400°F. If you would like to change the temperature setting, press the Temp/Darkness button, and then turn the Temp/Time control knob to select 300°F for low.
4. Press the Time/Slice/Size button, and then turn the Temp/Time control knob to the desired cooking time.
5. Press the Start/Cancel button to start the oven.
6. Monitor the broiling progress since browning with infrared elements can be achieved very quickly.
7. When broiling food on both sides, set the time for each side. When the tone sounds, the oven will automatically shut off, and you can then turn the food over and reset the oven for the other side.
8. When the time elapses, a tone will sound and the oven will automatically shut off.
9. If food is to be removed before the cycle ends, simply press the Start/Cancel button to shut the Toaster Oven off. Then, remove the food.
Toast Function
Food Position:
Regardless of the number of slices, bread should always be positioned directly on the cooking rack and as close to the center of it as possible for the most even toasting. Generally, the lower slots with the rack in the up position will provide the most even results as both the top and bottom heating elements are activated during this function. Adjust the cooking rack height as needed depending on the type of bread being toasted.
1. Place the bread to be toasted directly on the rack. Toast up to six slices of bread at once. When toasting only one or two slices, place the bread in the center of the cooking rack.
2. Close the Toaster Oven door
3. Turn the Function/Mode control knob to the Toast setting.
4. Press the Temp/Darkness button and turn the Temp/ Darkness control knob to the desired darkness setting on the LCD screen.
5. Press the Time/Slices/Size button, and then turn the Temp/Time control knob to select the number of slices that you are toasting. That number will be reflected on the LCD screen.
6. Press the Start/Cancel button to start the oven.
7. When the time elapses, a tone will sound and the oven will automatically shut off.
8. If food is to be removed before the cycle ends, simply press the Start/Cancel button to shut the Toaster Oven off. Then, remove the food.
Cleaning Your Toaster Oven
• Prior to cleaning, turn the Toaster Oven off and unplug the unit from the electrical outlet.
• Make sure the Toaster Oven and all surfaces have had ample time to cool.
• For daily cleaning, wipe the outside surface with a clean, damp cloth. To further enhance the finish of the Stainless Steel exterior, Frigidaire recommends Ecosential Stainless Steel Cleaner, by Smart ChoiceTM. You can order on line at: frigidaire website, or by calling 1-800-599-7579.
• The cooking rack, pizza pan, bake pan, and Crumb Tray are dishwasher-safe, but must be washed in the top rack of the dishwasher. To clean by hand, wash in hot soapy water, rinse, and dry thoroughly before placing these items back in the toaster oven.
• The interior of the oven was manufactured with a nonstick surface. Wash only with cloth, or other soft-surface material. Do not use abrasive or metallic cleaners on the interior, as damage to the nonstick surface may occur.
• Do not use metal scouring pads. Pieces can break off the pad and touch electrical parts involving a risk of electrical shock.
• Do not immerse the Toaster Oven in water or any other liquid.
Troubleshooting
Issue
Possible Solutions
The oven does not turn on.
• Check that the power plug is securely inserted into the outlet.
• Insert the power plug into a different outlet.
• Reset the circuit breaker if necessary
The LCD display is not backlit.
• The display will go into standby mode after 60 seconds of not being used. Pressing any button will illuminate the display.
The time, temperature, size, slice, or darkness is not changing when turning the temp/time knob.
• The current setting of the time, temperature, size, slice, and darkness will be automatically selected after 5 seconds of inactivity. To adjust the setting, simply press the button for the setting that you wish to change and adjust to your preference.
The bottom heating elements are not glowing like the top heating elements.
• This is normal because the top heating elements are halogen infrared which emit a brilliant glow while the bottom heating elements are not.
The heating elements do not stay on during the entire cooking cycle.
• This is normal as the oven will regulate the temperature by pulsing the heating elements on and off during the cooking cycle.
Larger foods such as pizza are not cooking or browning uniformly.
• Larger items such as 12” pizzas may brown more evenly if they are rotated 90 degrees half way through the cooking time.
If after reading the entire Use and Care Guide you still have questions:
• Contact customer service at the phone number listed in the warranty section of this Use and Care Guide.
#1 Why is there a color difference between the two sides of my bread when I toast it?
This can happen if the position of the cooking rack needs to be adjusted. Try putting the rack in the lowest rung, keeping the "bridge" up.
#2 Why does the Convection button work sometimes, while other times it doesn’t?
The Convection function is designed to be used only in certain modes. You can use it when you choose Bake, Cookies, Pizza, Reheat, or Warm. The button won't work in other modes.
#3 Why doesn’t the flashing number appear when I use the Reheat function?
The Reheat function is set for 30 seconds. Because this is a relatively short amount of time, there is no reminder when you use this setting, so you won’t see the flashing number.
#4 How do I set the temperature, size, and time for cooking pizza?
Choose the Pizza mode, and then:
Press the Temp (Darkness) button, turn the Temp/Timer knob to the temperature you want and press Set. Press the Time (Slices/Size) button, turn the Temp/Timer knob to the size you want and press Set. Press the Time (Slices/Size) button, turn the Temp/Timer knob to the time you want and press Set. Press the Start/Cancel button to start cooking your pizza.
#5 How do I set the temperature and time for baking?
After you choose the Bake mode:
Press the Temp (Darkness) button, turn the Temp/Timer knob to the temperature you want and press Set. Press the Time (Slices/Size) button, turn the Temp/Timer knob to the time you want and press Set. Press the Start/Cancel button to start baking.
#6 How do I set the color and slices for toasting?
After you choose the Toast mode:
Press the Temp (Darkness) button, turn the Temp/Timer knob to set how dark you want to toast your bread and press Set. Press the Time (Slices/Size) button, turn the Temp/Timer knob to the slice you want and press Set. Press the Start/Cancel button to start toasting.