Loading ...
Loading ...
Loading ...
10
Operation and Controls
SETTING THE TEMPERATURE CONTROL
During normal operation, the temperature display on the control panel shows the temperature inside the
appliance.
When the unit is plugged in for the first time, the unit will power up automatically to the preset defaults.
The preset temperature is 38ºF (3ºC).
You can press the UP and DOWN keys to control the internal temperature of the appliance.
The temperature that you desire to set will increase 1ºC or 1ºF if you press the UP key once and will de-
crease 1ºC or 1ºF if you press the DOWN key once. The display flashes while you make the setting.
After the temperature has been set, the display will flash three times before it shows the current internal
temperature of the particular temperature zone.
To view the set temperature at any time, press the UP or DOWN key, the set temperature will temporarily
flash in the display for 3 seconds. Then the display shows the current internal temperature again.
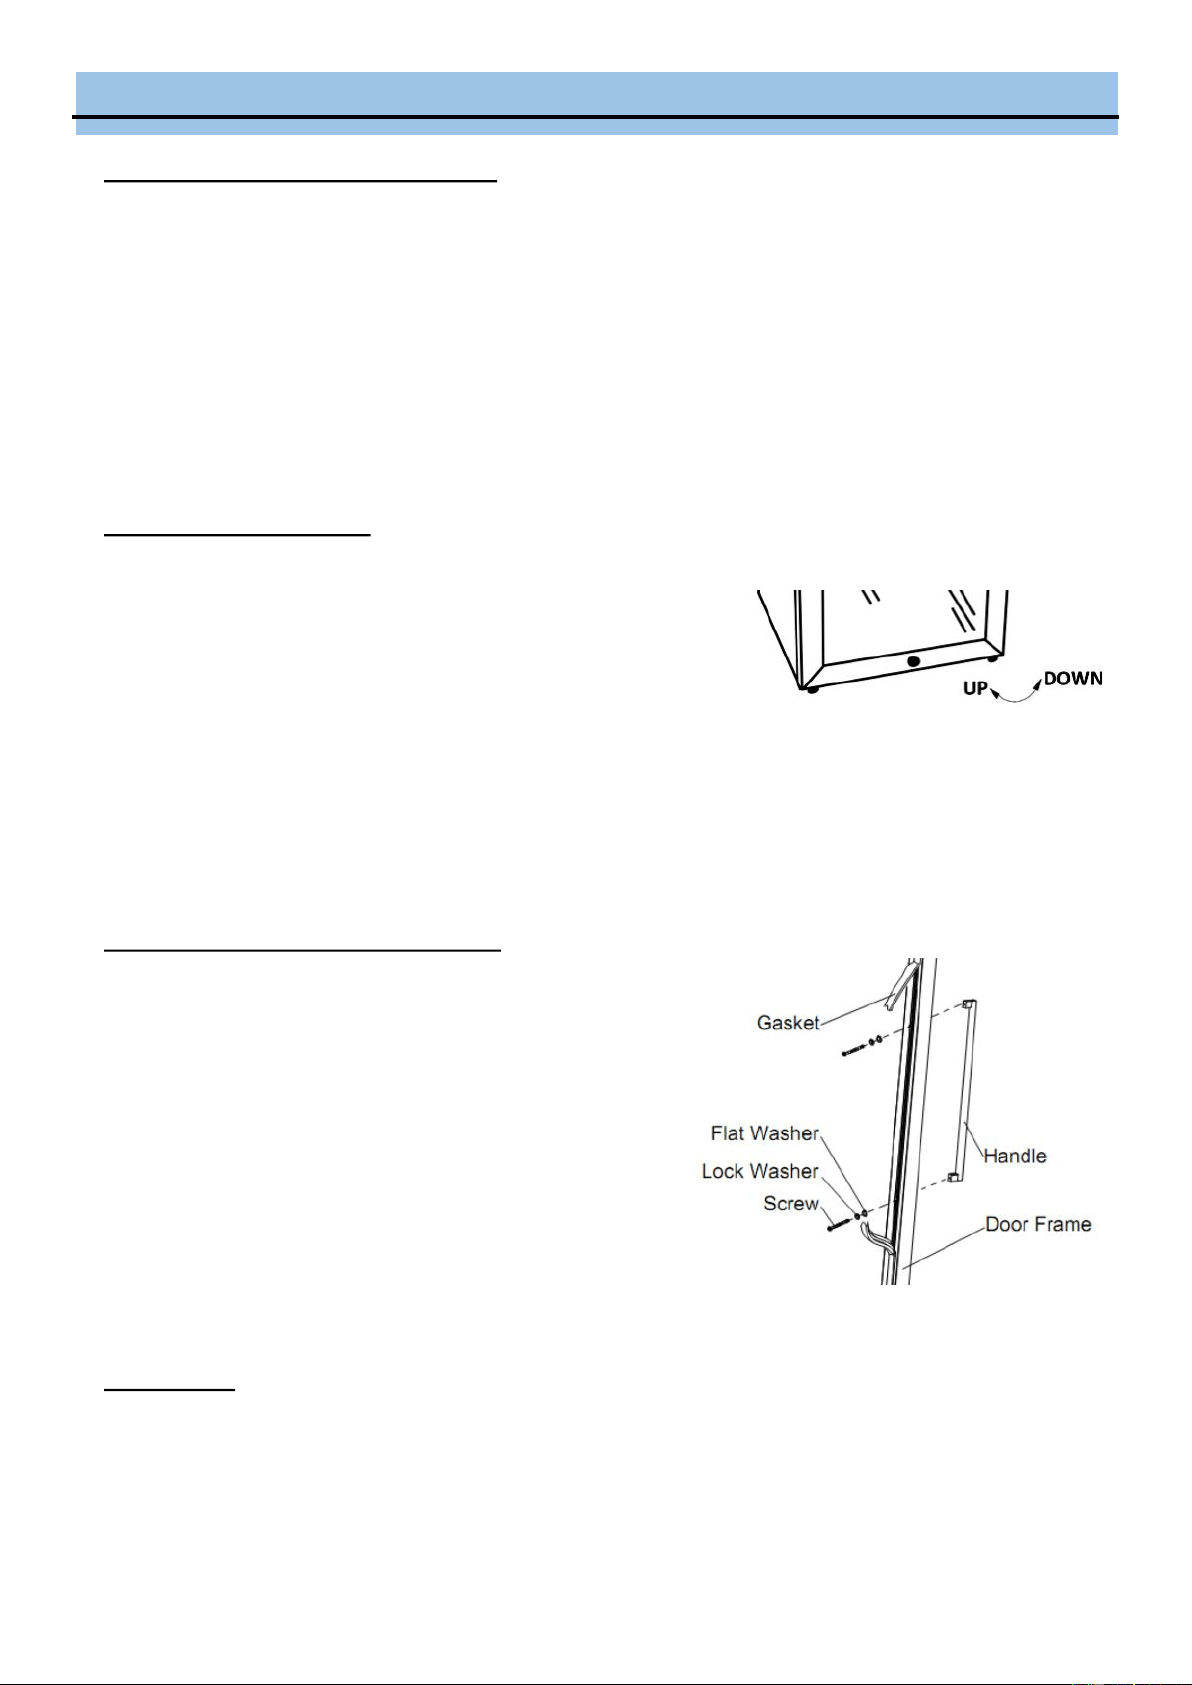
LEVELING THE APPLIANCE
It is important for the beverage refrigerator to be leveled in order to
work properly. It can be raised or lowered by rotating each of the feet
on the bottom of the machine. If you find that the surface is not level,
rotate the feet until the beverage refrigerator becomes level .You
may need to make several adjustments to level it. We recommend
using a carpenter’s level to check the machine.
1. Place a carpenter’s level on top of the product to see if the bever-
age refrigerator is level from front to back and side to side.
2. Adjust the height of the feet as follows: Turn the leveling feet to
the right to lower that side of the refrigerator. Turn the leveling feet to
the left to raise that side of the refrigerator.
IMPORTANT: Once you are ready to install, you must adjust the
feet to level the beverage refrigerator .
INSTALLING STAINLESS STEEL HANDLE
This appliance includes stainless steel handle that is not required to operate this appliance. To install the han-
dle, please follow the below instructions:
1.Remove door gasket. The gasket can be easily displaced
by hand, no tools are necessary.
2.Use a flat-head screwdriver to remove the two pre-
installed decorative plugs from the back of door.
3.Install the handle tightly as shown with two screws, lock
washers and flat washers provided. (DO NOT over tighten
as this will cause damage to the handle and stainless steel
door frame).
4.Replace the door gasket to its original position.
DEFROSTING
Under most ambient conditions, the appliance does not need to be defrosted. In cold ambient temperatures
and/or high humidity, some frost may build up. To defrost the appliance, set the thermostat dial to “0”, remove
frozen or perishable items and defrosting should occur in a few hours. After defrosting, return the thermostat
dial to the desired position. For faster defrosting, remove all items from the appliance, unplug the appliance
and leave the door open. Never use a knife or other metal instrument to scrape ice/frost from the evaporator.
Loading ...
Loading ...
Loading ...