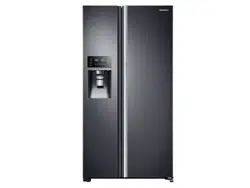
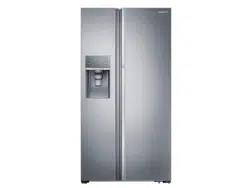
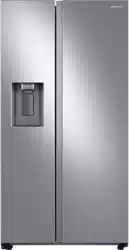
Owner's Guide Refrigerator
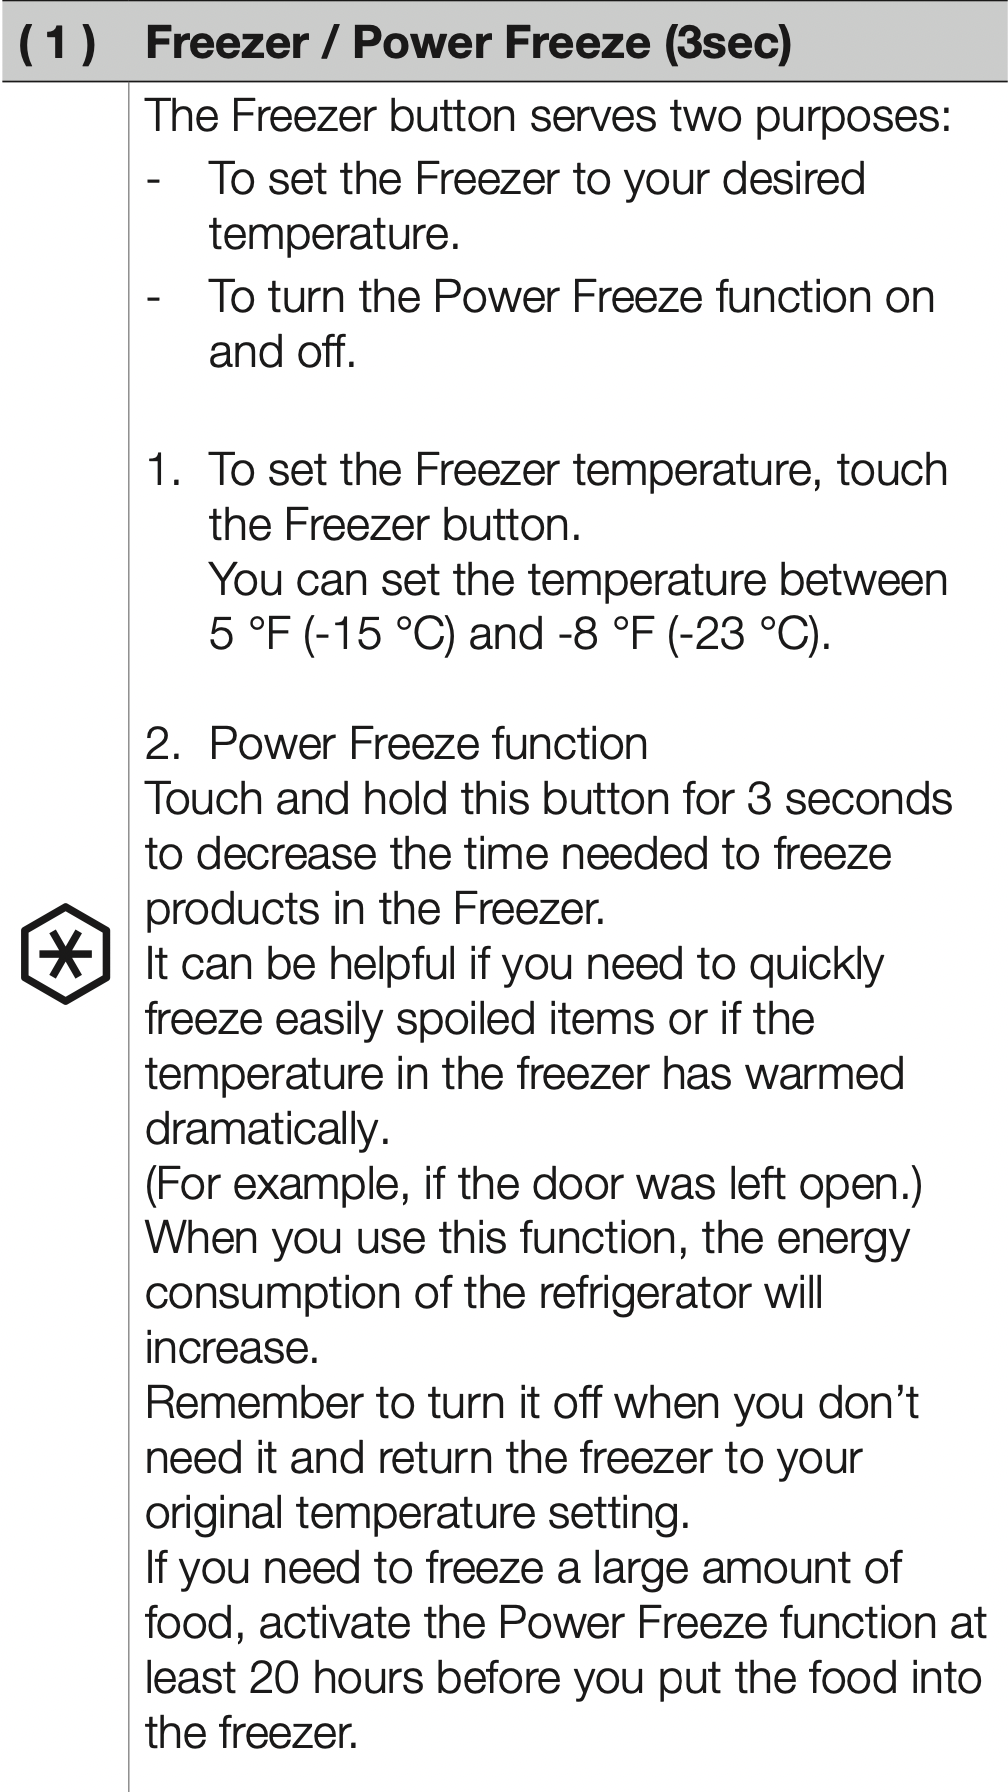
OPERATING THE SAMSUNG SIDE-BY-SIDE REFRIGERATOR
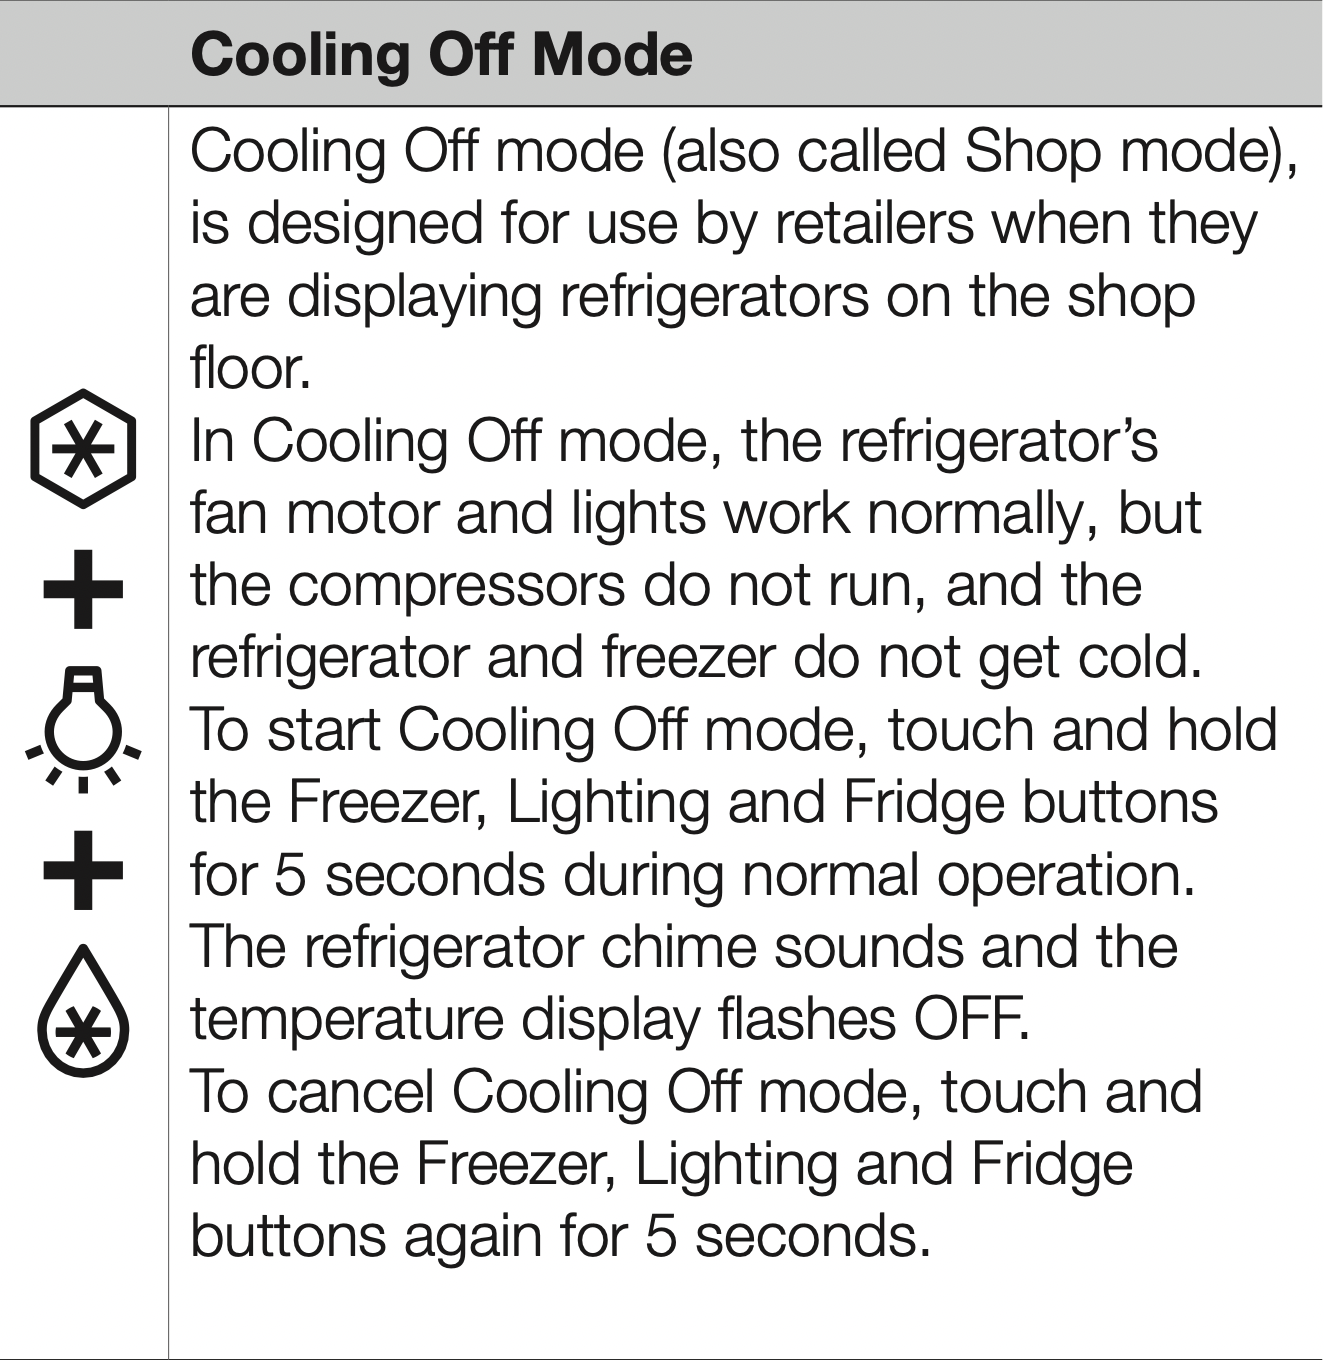
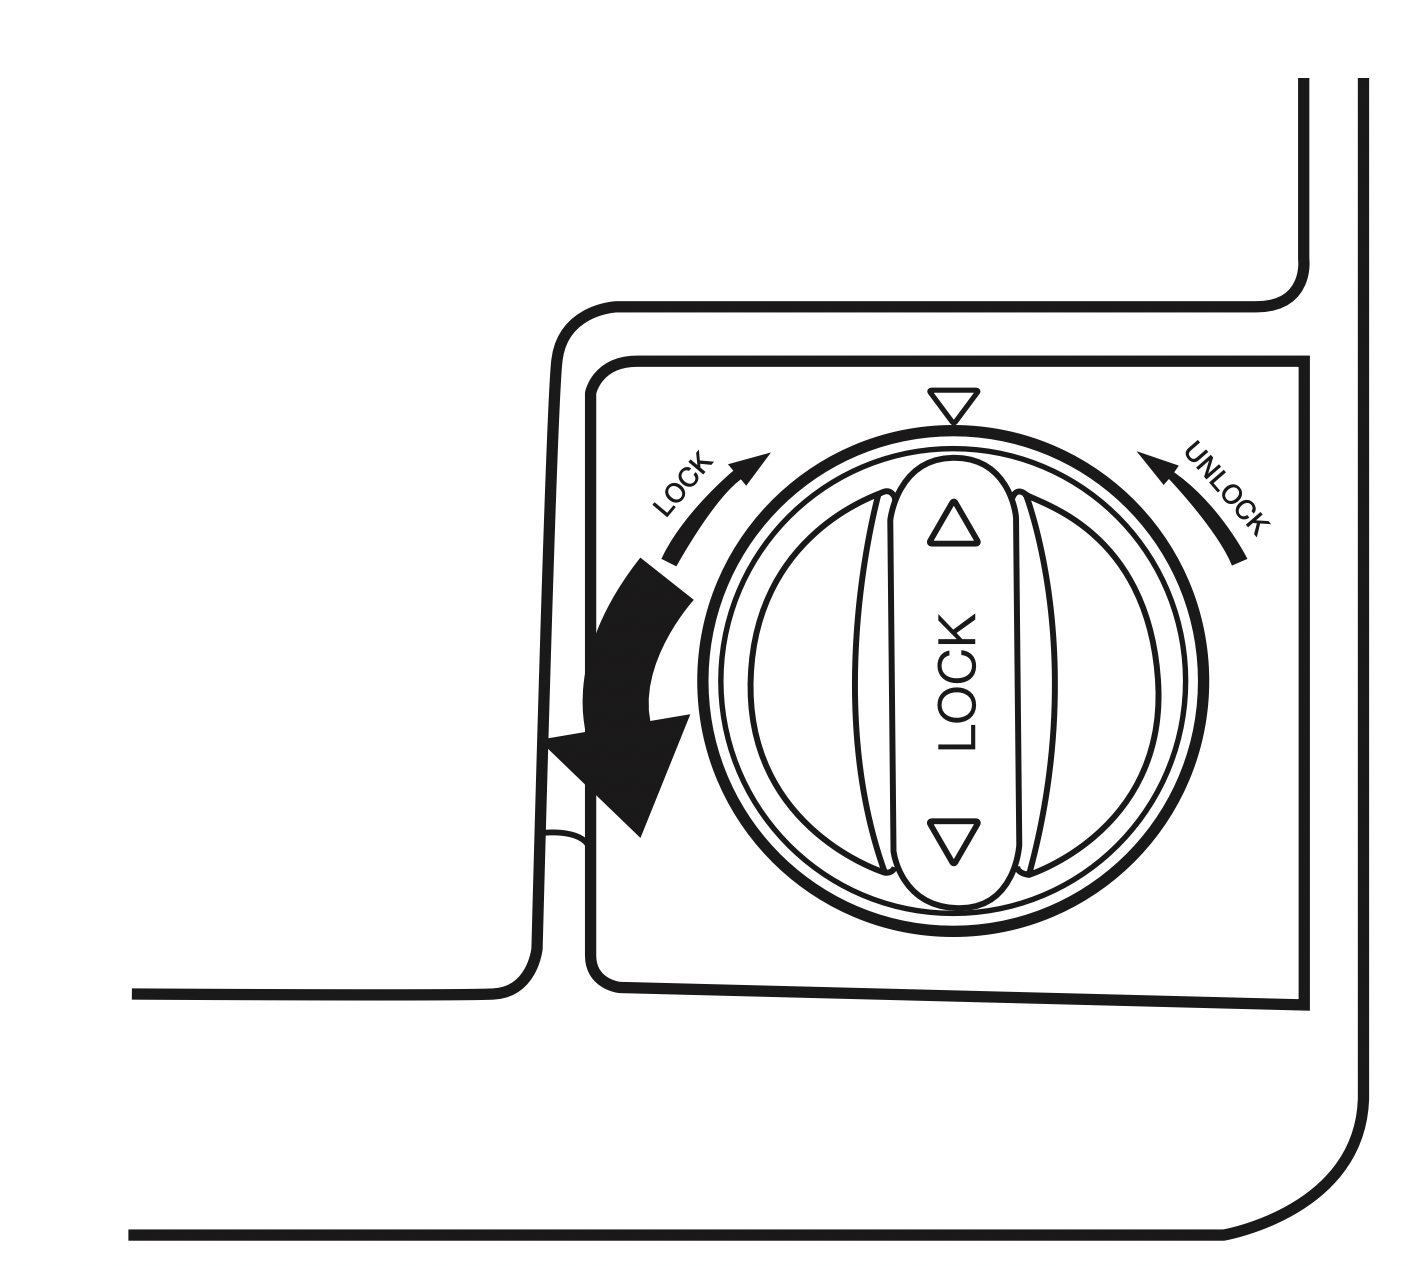
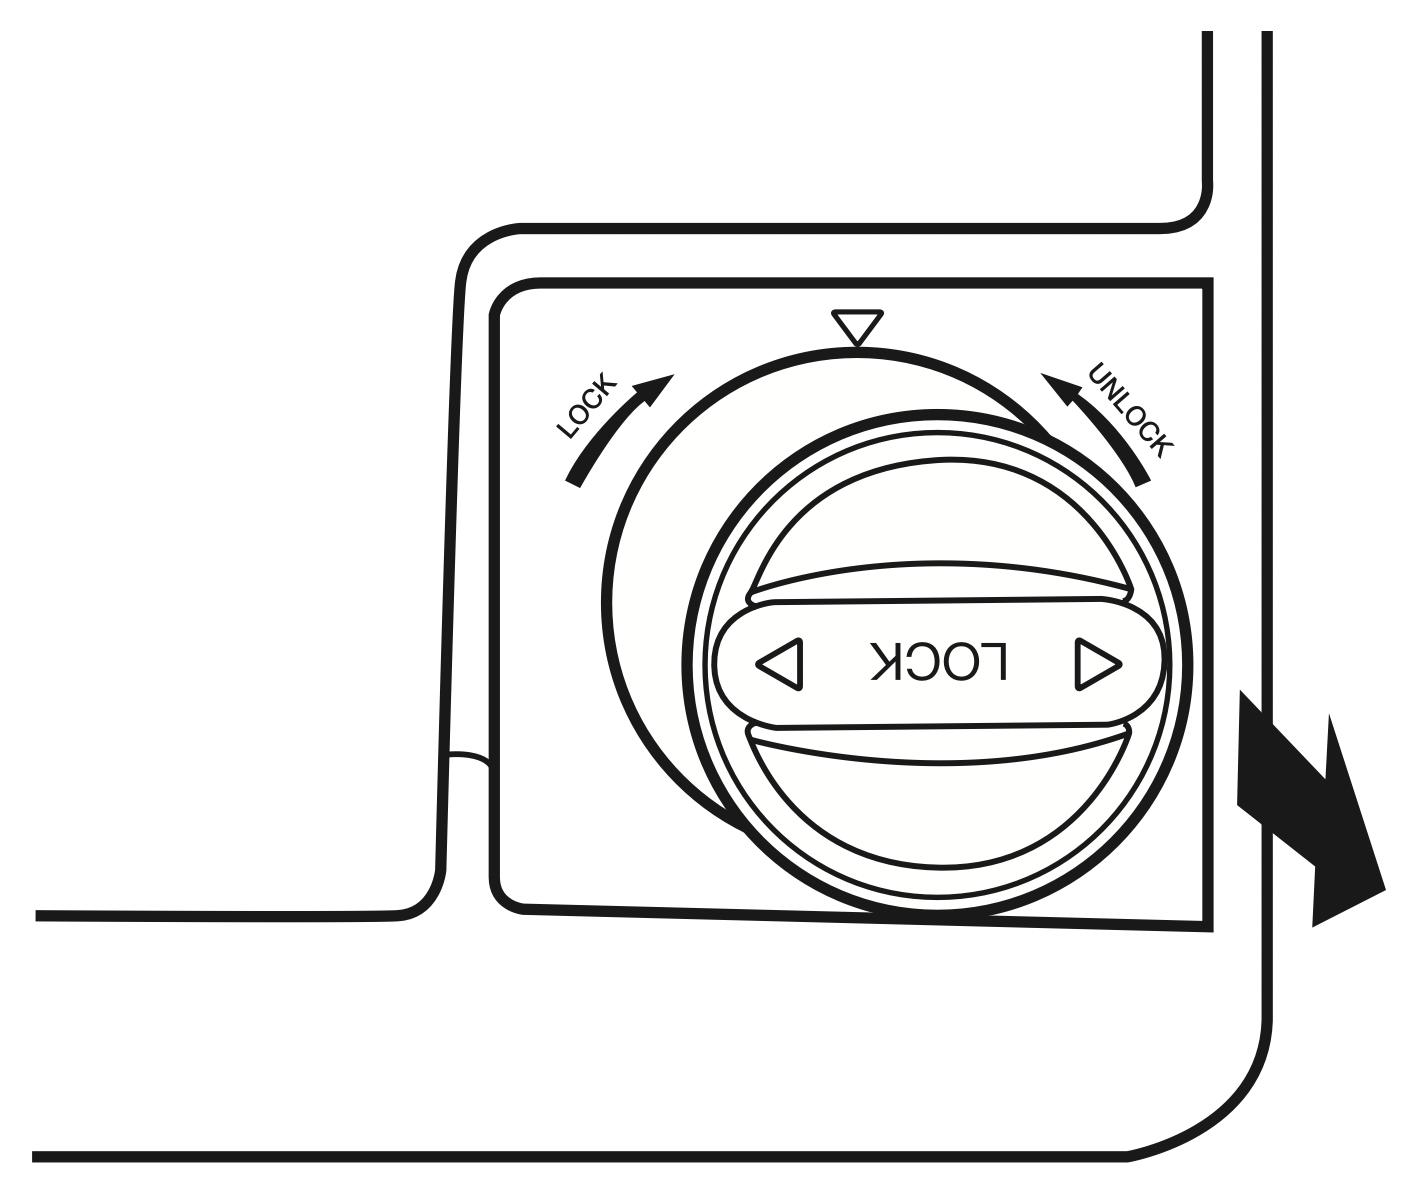
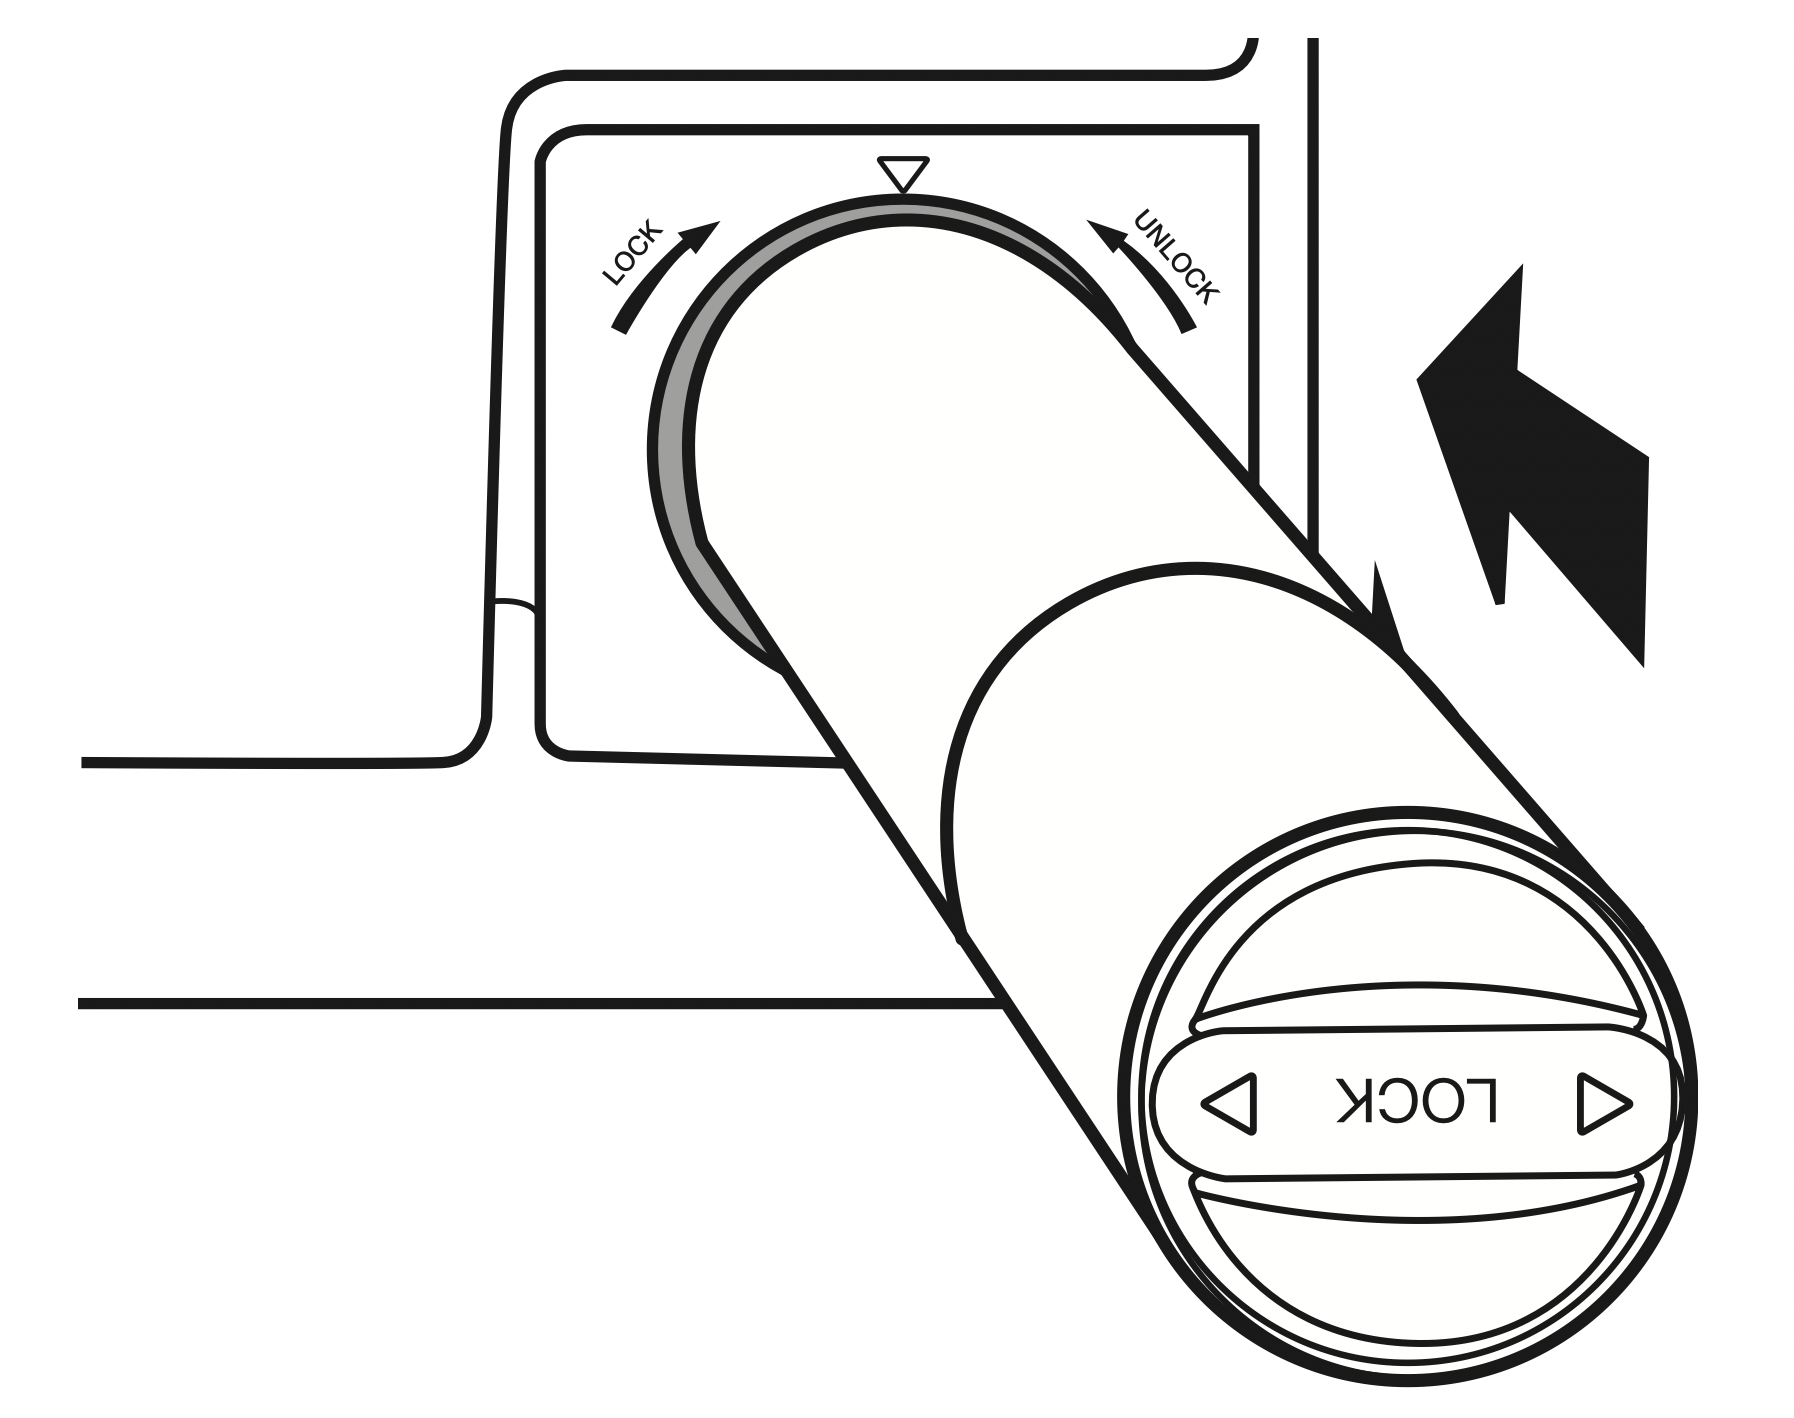
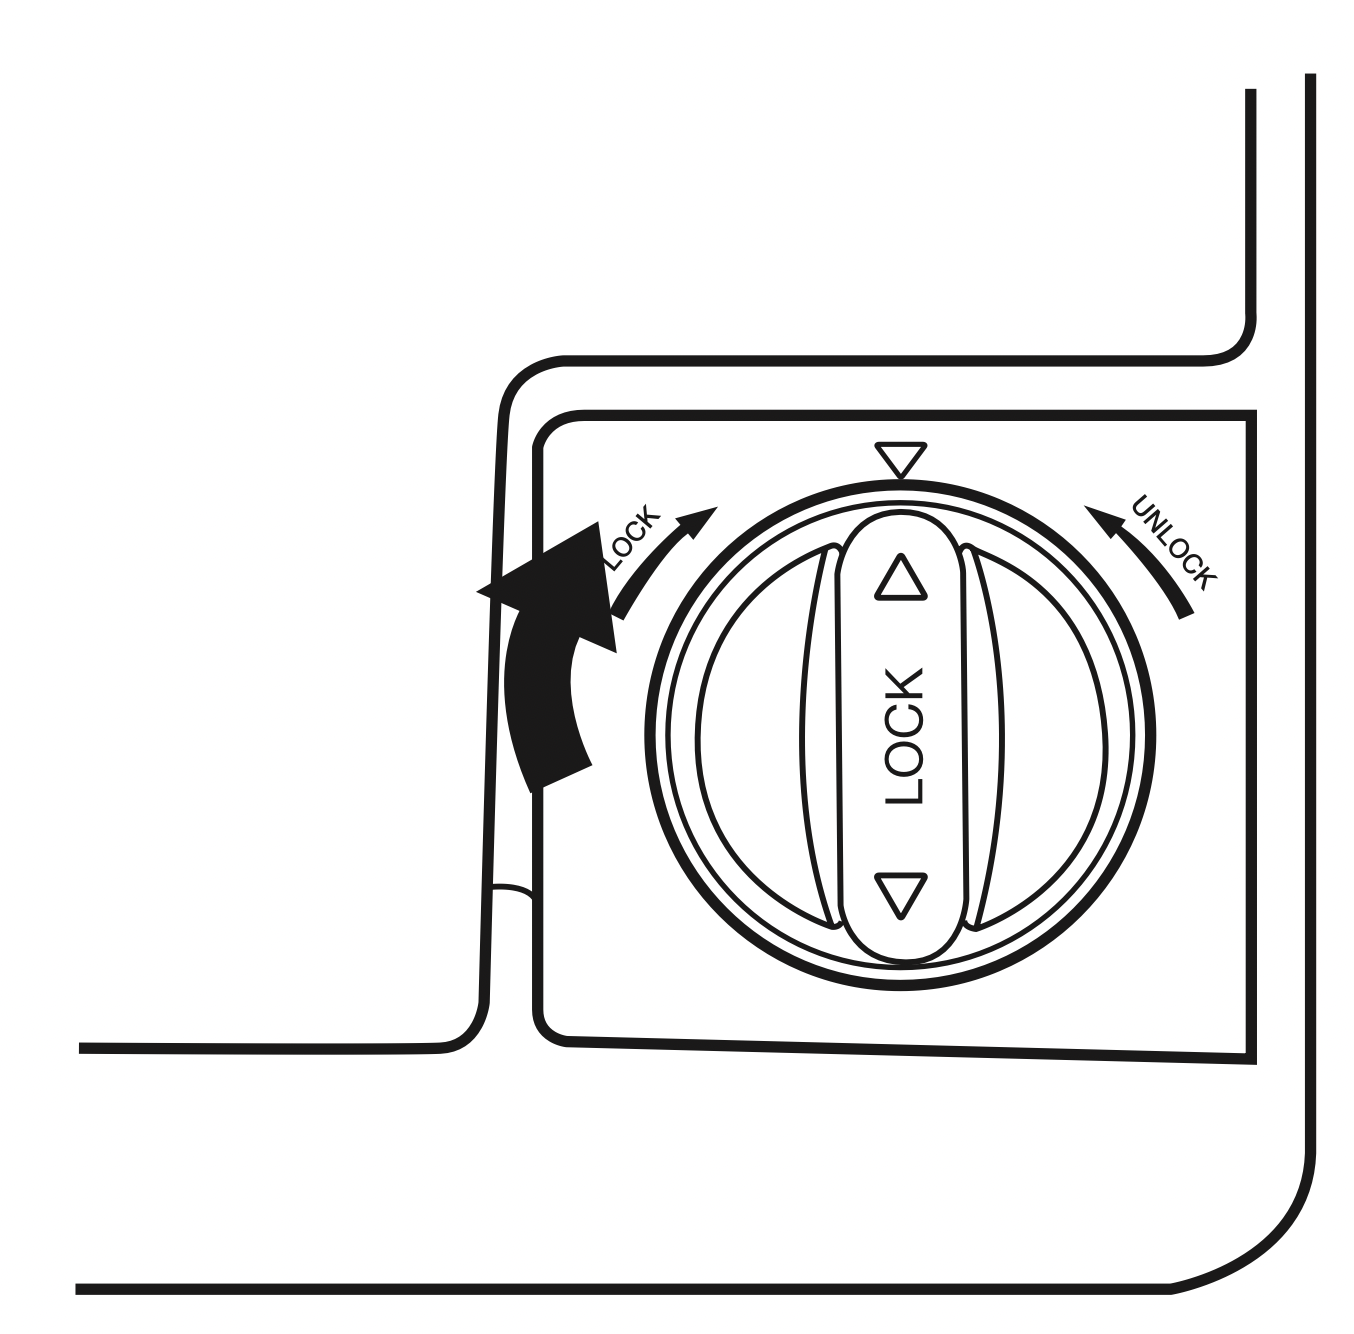
USING THE CONTROL PANEL
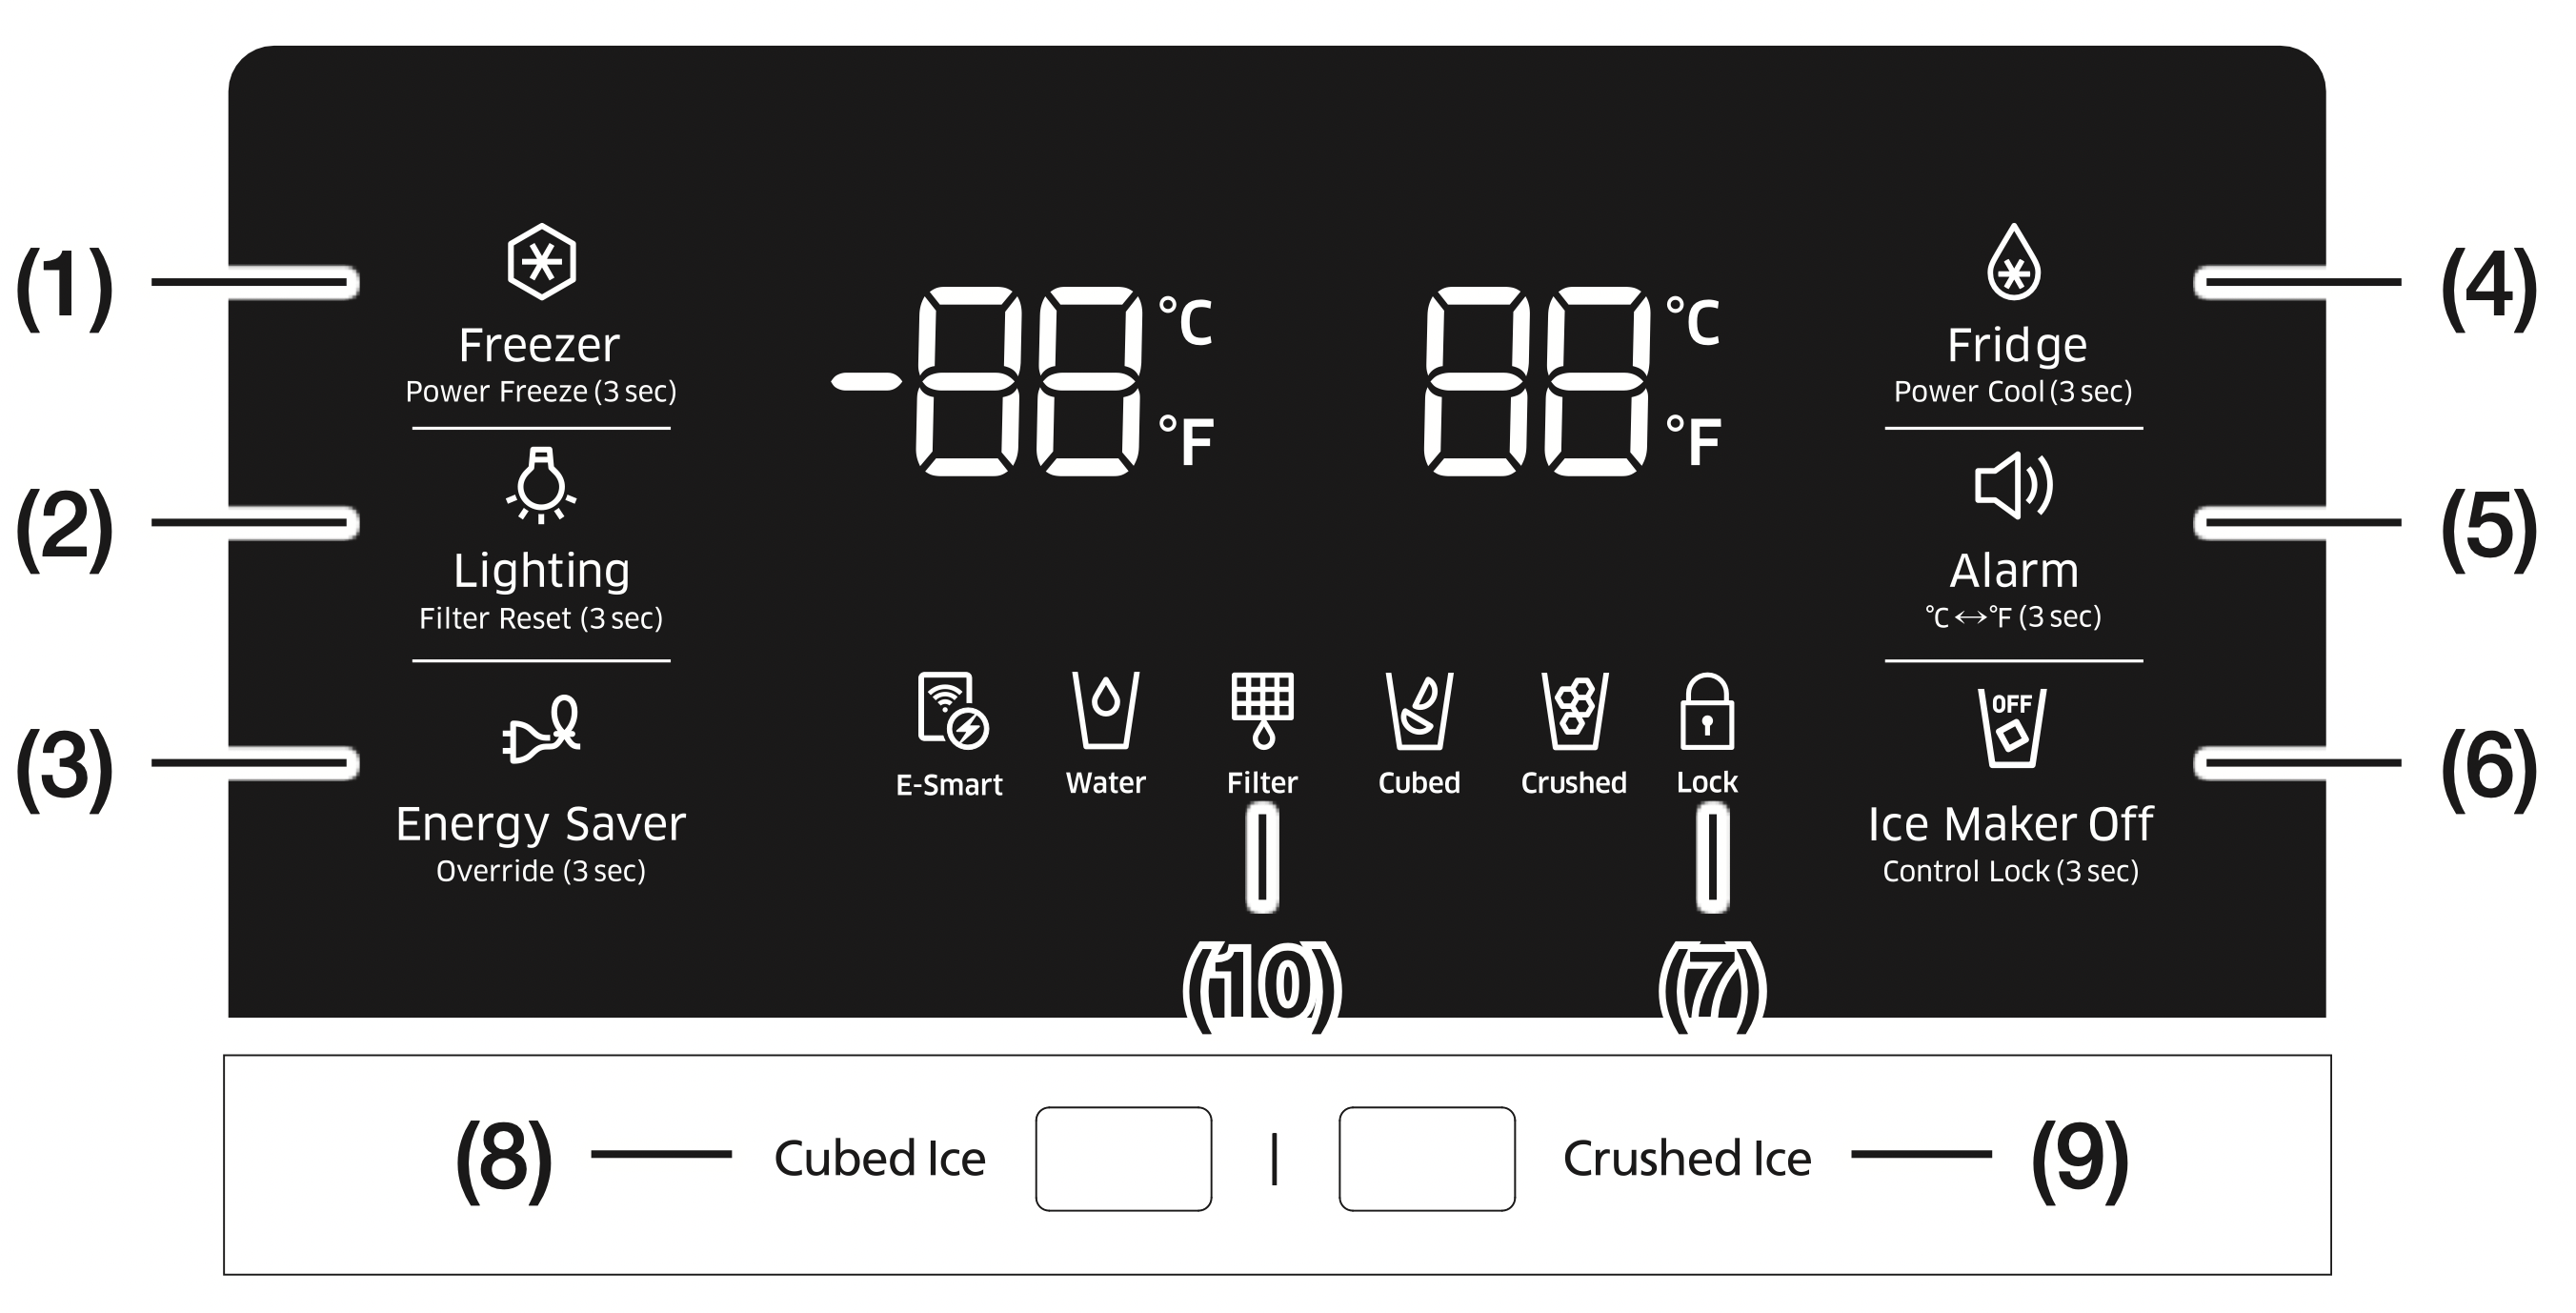
Display Off
To conserve energy, the Panel Display turns off automatically under the following conditions: When no button has been pressed, when no doors are open, or when no Dispenser Lever has been pushed for a period of time.
However, the icon indicating your cubed or crushed ice selection, will stay on.
When you press a button, open a door, or push a Dispenser Lever, the Panel Display turns on again. Except for the Water, and Cubed / Crushed Ice buttons, all function buttons become operational after you remove your finger from the button you are currently pressing.

CAUTION
If your refrigerator appears to be working, but it is not cooling, and the Freezer and Fridge Temperature Indicators are moving, the Fridge is in Cooling Off mode.
To cancel Cooling Off mode, follow the directions above.
PARTS AND FEATURES
Use this page to become more familiar with the parts and features of the Refrigerator. (This image may different depends on the model.)

RH22*
NOTE: For the greatest energy efficiency, leave all selves, drawers, and baskets in their original positions, as shown in the illustrations above.
- Freezer Shelves
Use for storing meat, fish, frozen dumplings, ice cream and other types of frozen food.
- Multipurpose Freezer Compartments
Features tall freezer compartments for more efficient food storage.
Do not use these compartments for ice cream or items you intend to store for a long time.
- Dried Food and Meat Storage Bin
Use for long-term storage of dried food and meat.
Wrap the items in aluminum foil or kitchen wrap before storing them.
- Cheese Case
Use for storing eggs, cheese, butter, and other types of dairy products.
- Sauce Case
Use for storing different types of sauces.
- Refrigerator Shelves
Use for storing general types of food that require refrigeration.
- Drink Case
Use for storing water, milk, juice, and other types of beverage.
- Snack Case (Optional)
Use for storing salads and side dishes.
- Well-Being Vegetable Bin
Use to keep fruit and vegetables fresh.
- Kids’ Case (Optional)
Located at a height within easy reach of children. Use for storing yogurt, snacks, and other items for kids.
- Multi Case
It is used for storing the dehydrated food such as dried noodle (spaghetti), beef jerky etc.
- EZ slide shelves (Optional)
Makes it easier to take out food.
WARNING
- If you plan to go away for a significant amount of time, empty the refrigerator and turn it off. Wipe the excess moisture from the inside of the appliance and leave the doors open.
This helps keep odor and mold from developing.
- If you do not intend to use the refrigerator for a long period of time, pull out the power plug.
- Deterioration in the power cord insulation may cause a fire.
- Do not change the arrangement of shelves. (only RH22**model)
- If you try to change the arrangement of shelves, you can damage to door.
CONTROLLING THE TEMPERATURE
Basic temperature of Freezer and Refrigerator Compartments
The basic and recommended temperatures of the Freezer and Fridge compartments are 0 °F and 37 °F (or -18 °C and 3 °C) respectively.
If the temperature of the Freezer or Refrigerator Compartments are too high or low, adjust the temperature manually.
Controlling the Freezer temperature
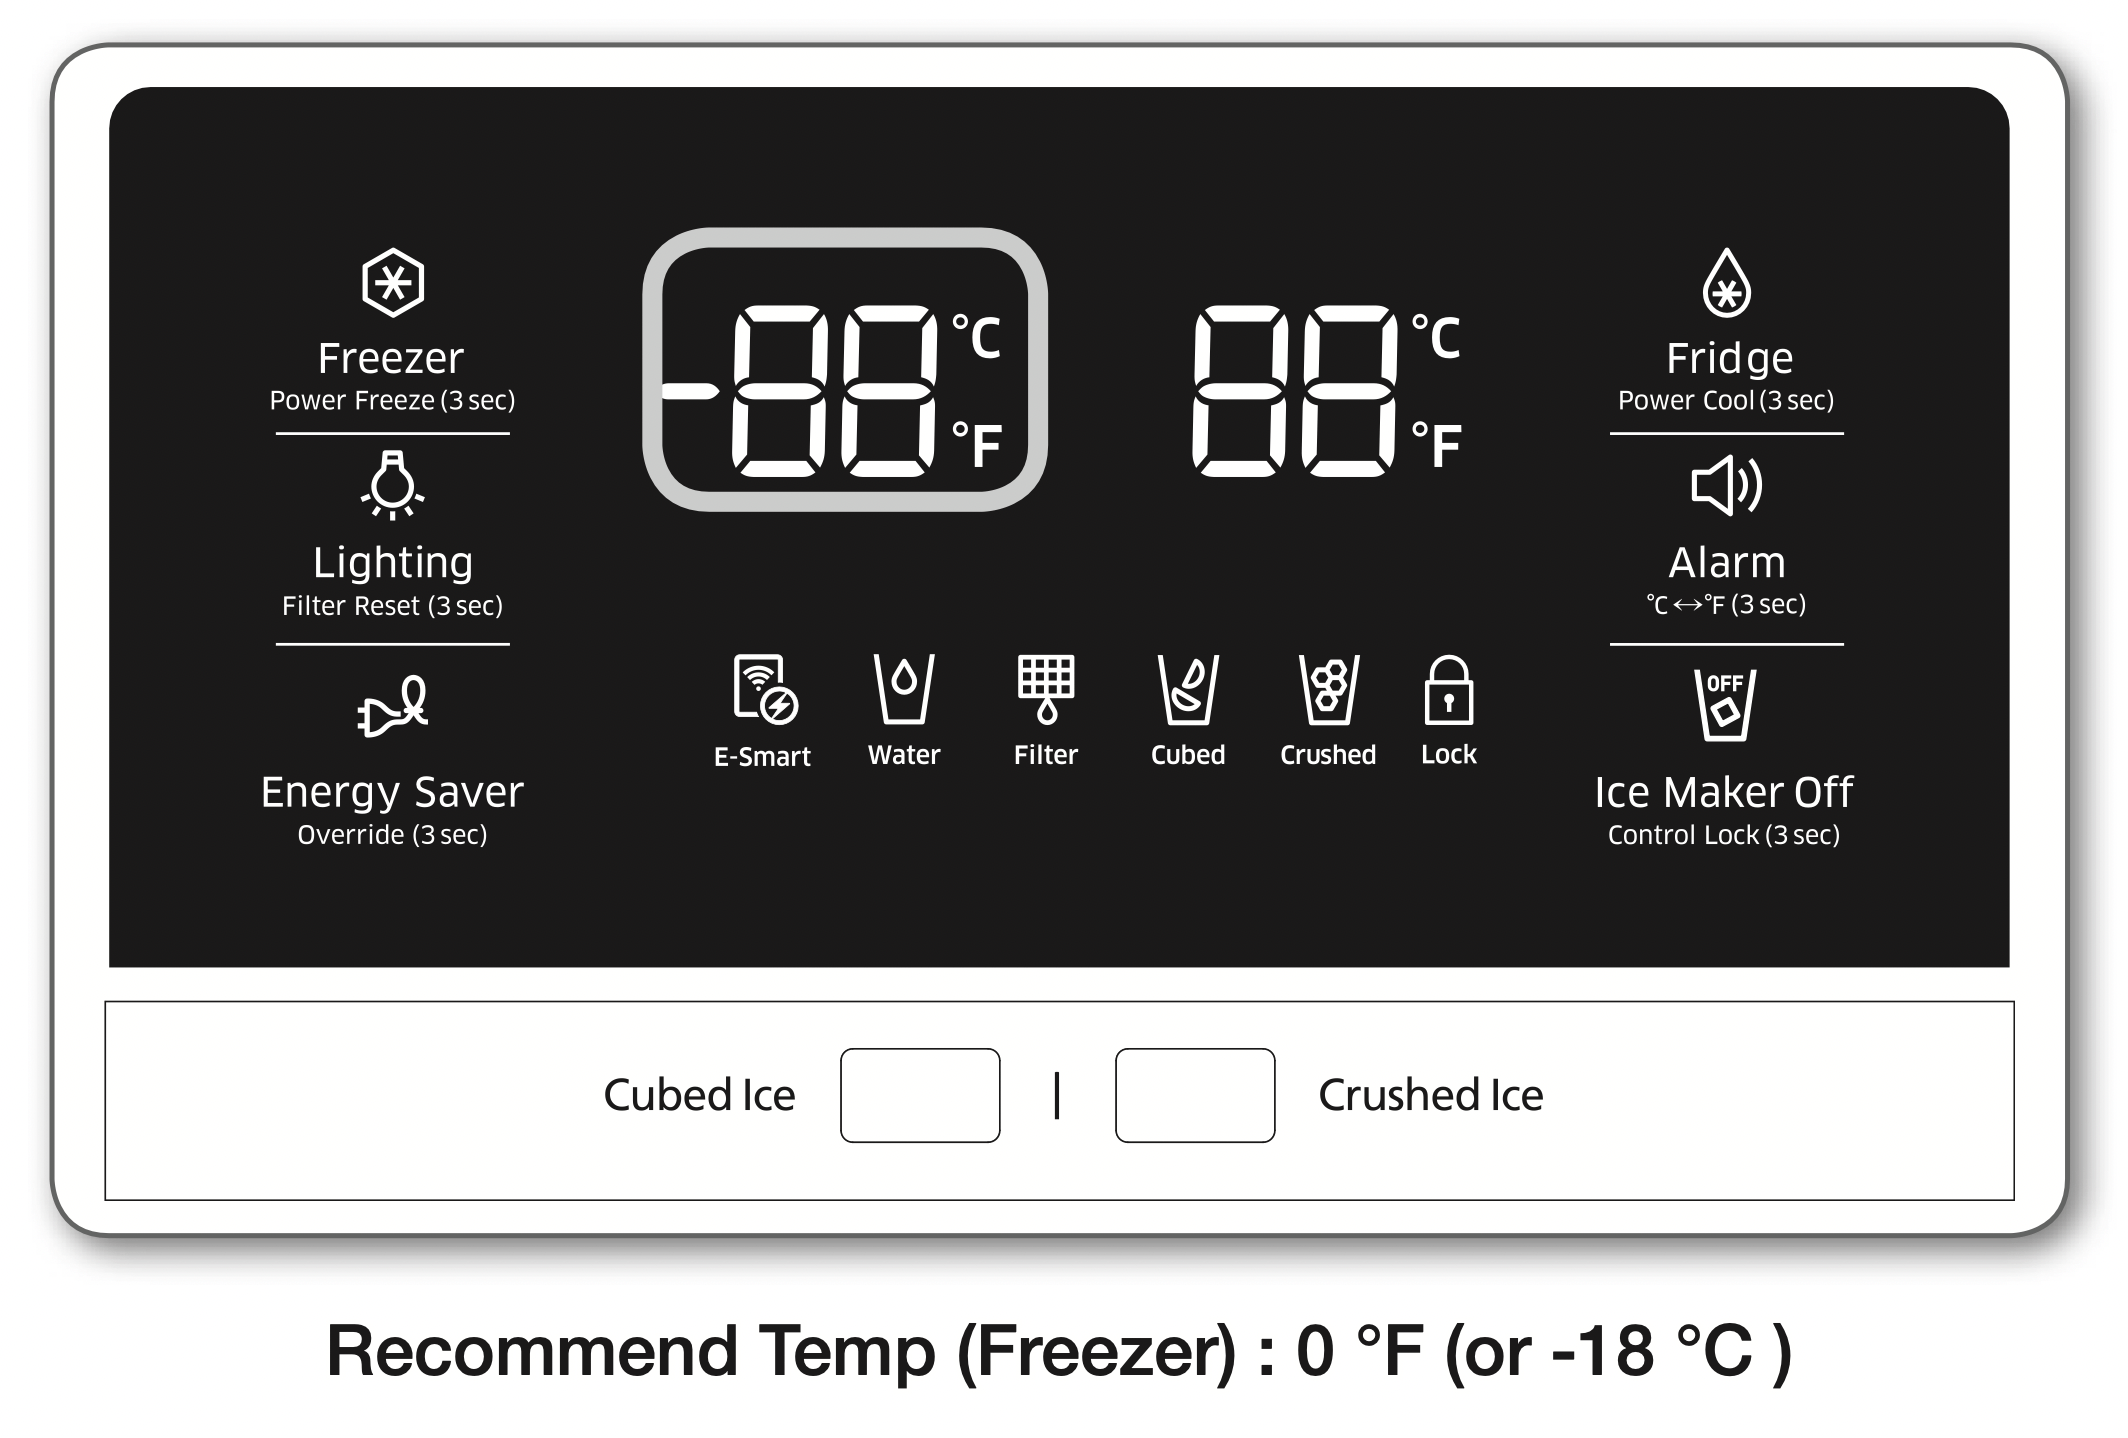
The Freezer temperature can be set between -8 °F and 5 °F (or between -23 °C and -15 °C) to suit your particular needs.
Press the Freezer button repeatedly until the desired temperature is shown in the temperature display.
The temperature will change by 1 °F (or 1 °C) with each press. See below.
Fahrenheit : 0 °F → -1 °F → -2 °F → -3 °F → -4 °F → -5 °F → -6 °F → -7 °F → -8 °F → 5 °F → 4 °F → 3 °F → 2 °F → 1 °F → 0 °F.
Centigrade : -18 °C → -19 °C → -20 °C → -21 °C → -22 °C → -23 °C → -15 °C → -16 °C → -17 °C → -18 °C.
Keep in mind that foods such as ice cream may/ melt at 4 °F (or -15.5 °C).
The temperature display will move sequentially from -8 °F to 5 °F (or from -23 °C to -15 °C).
Controlling the Fridge temperature
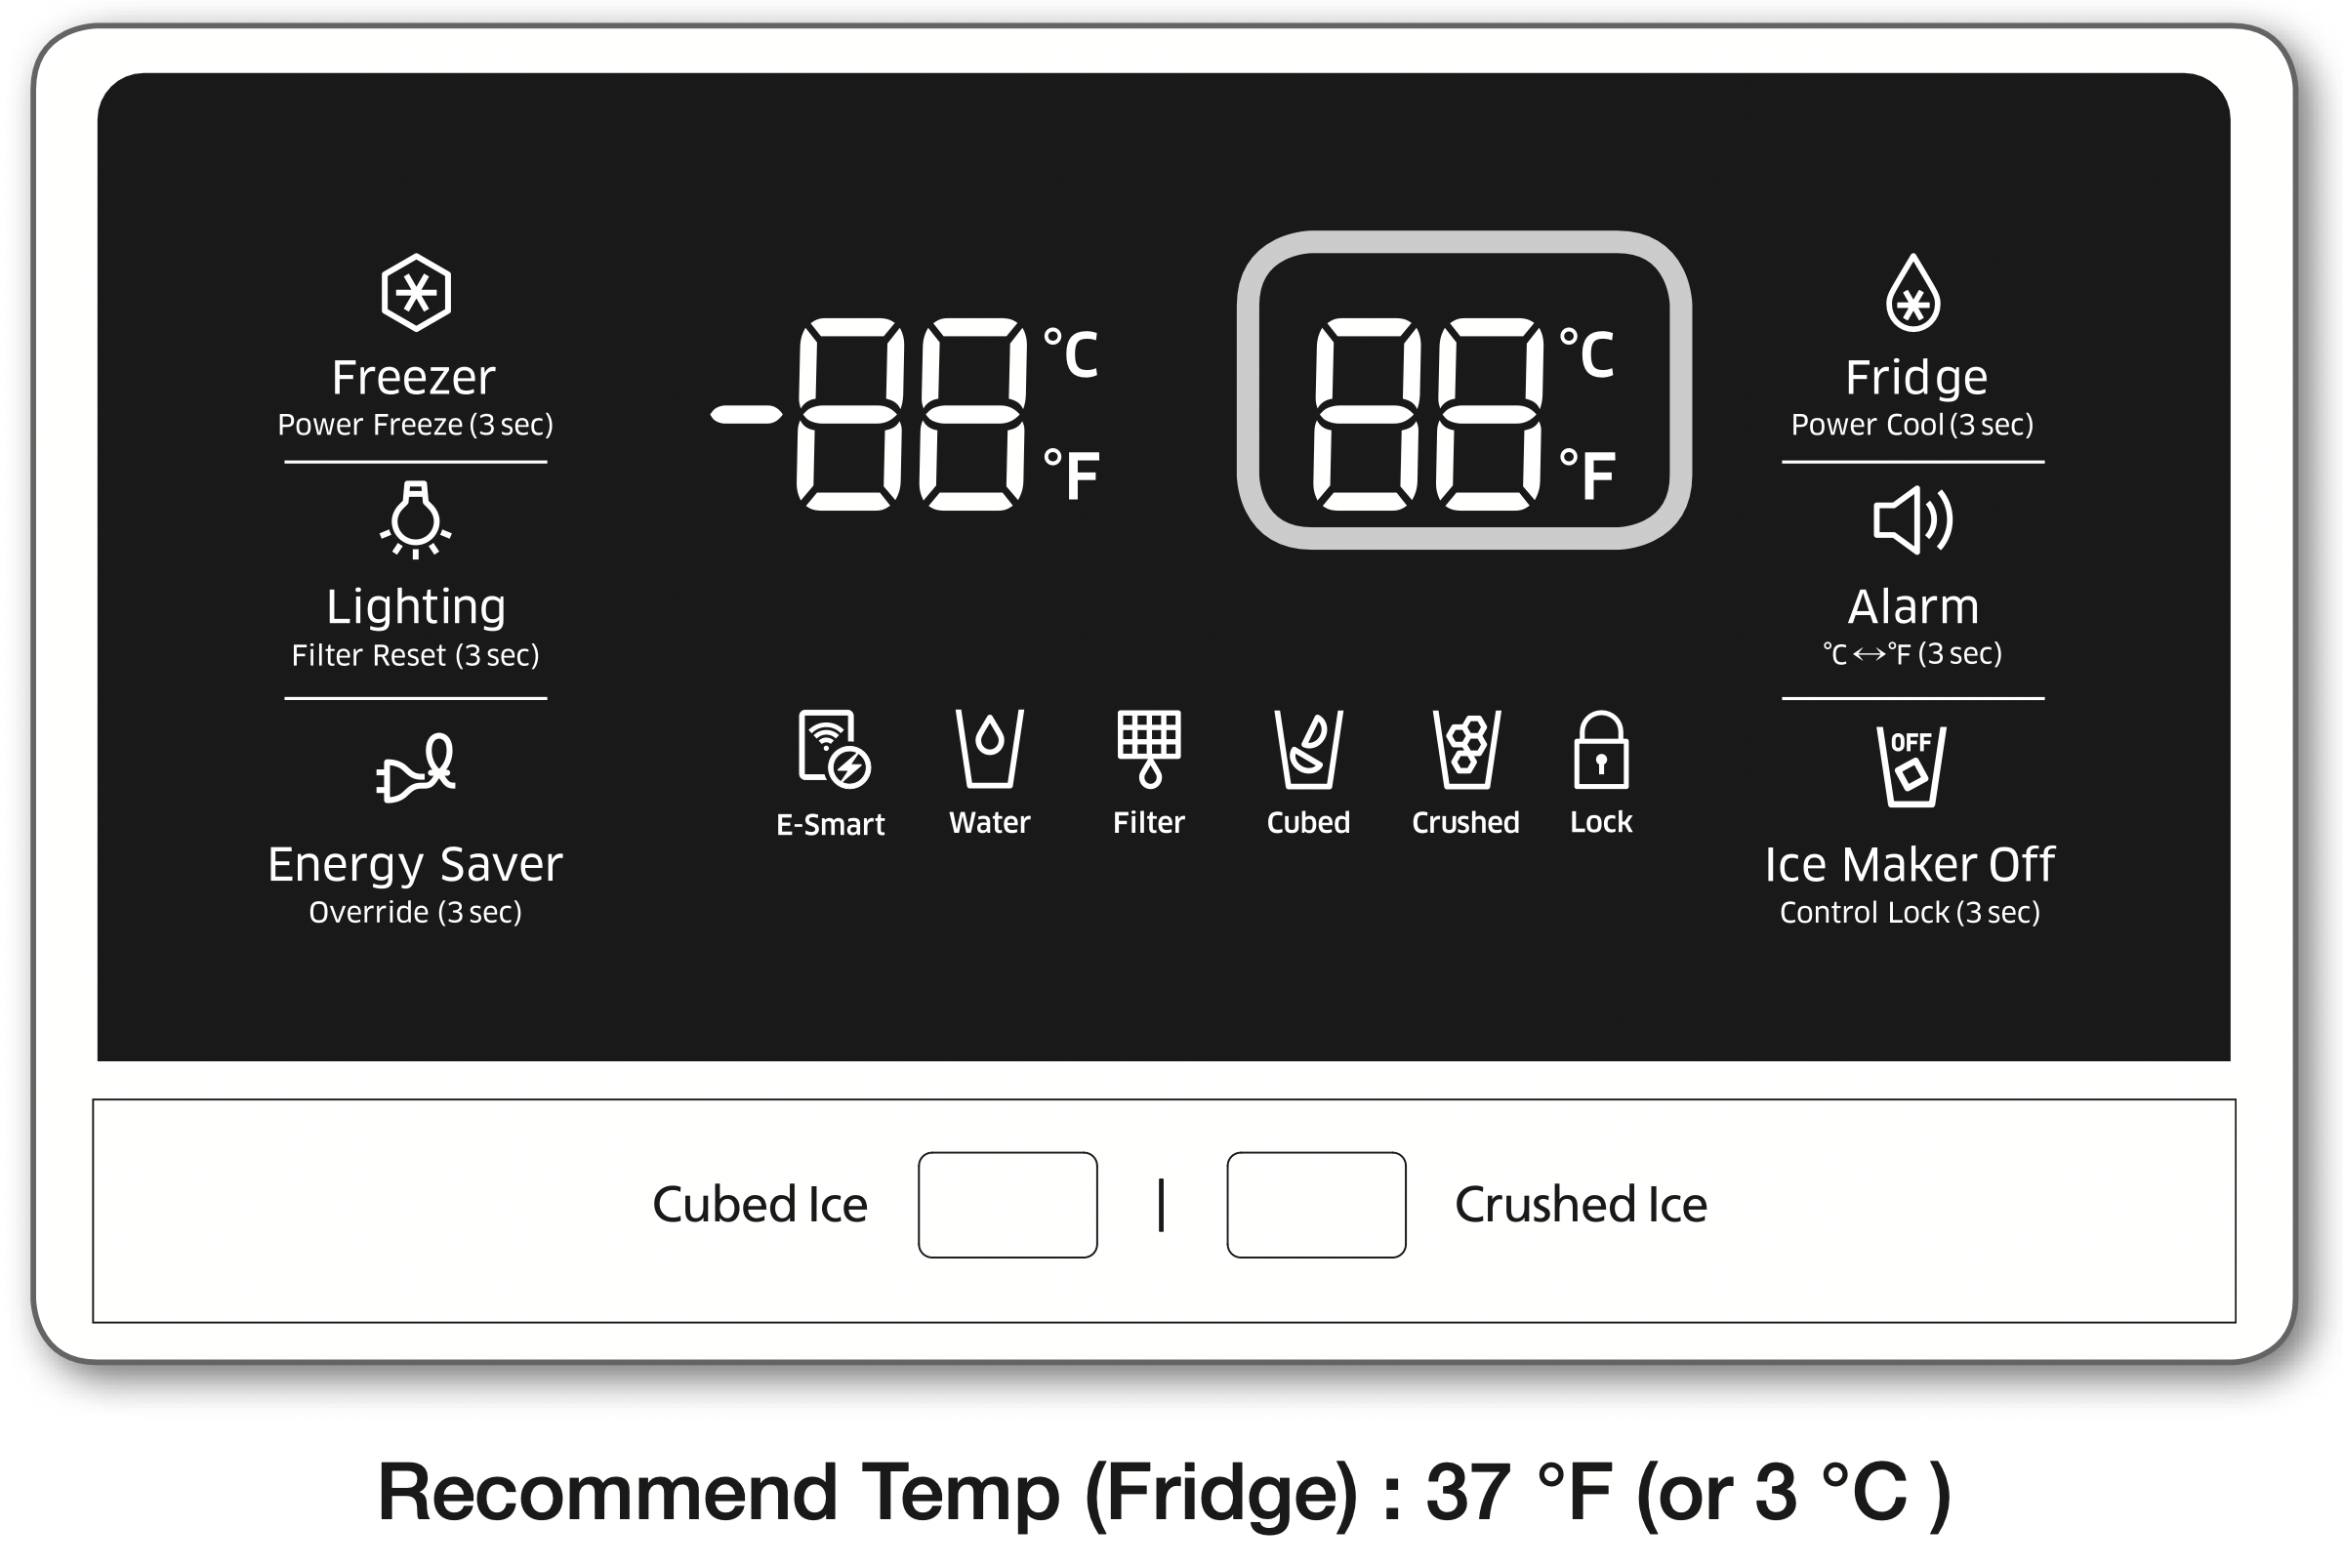
The fridge temperature can be set between 34 °F and 44 °F (or between 1 °C and 7 °C) to suit your particular needs.
Press the Fridge button repeatedly until the desired temperature is shown in the temperature display. The temperature will change by 1 °F (or 1 °C) with each press. See below.
Fahrenheit : 37 °F → 36 °F → 35 °F → 34 °F → 44 °F → 43 °F → 42 °F → 41 °F → 40 °F → 39 °F → 38 °F → 37 °F.
Centigrade : 3 °C → 2 °C → 1 °C → 7 °C → 6 °C → 5 °C → 4 °C → 3 °C.
The temperature control process for the Fridge works just like the Freezer process.
Press the Fridge button to set your desired temperature.
After a few seconds, the Fridge will begin adjusting towards the newly set temperature.
This will be reflected in the digital display.
NOTE:
- The temperature of the Freezer or Fridge may rise when you open the doors too frequently, or if a large amount of warm or hot food is placed inside.
- This may cause the digital display to blink.
Once the Freezer and Fridge temperatures return to their normal set temperatures, the blinking will stop.
- If the blinking continues, you may need to “reset” the Refrigerator.
Try unplugging the appliance, waiting for around 10 minutes, and then plugging the power cord back in.
USING THE ICE AND COLD WATER DISPENSERS
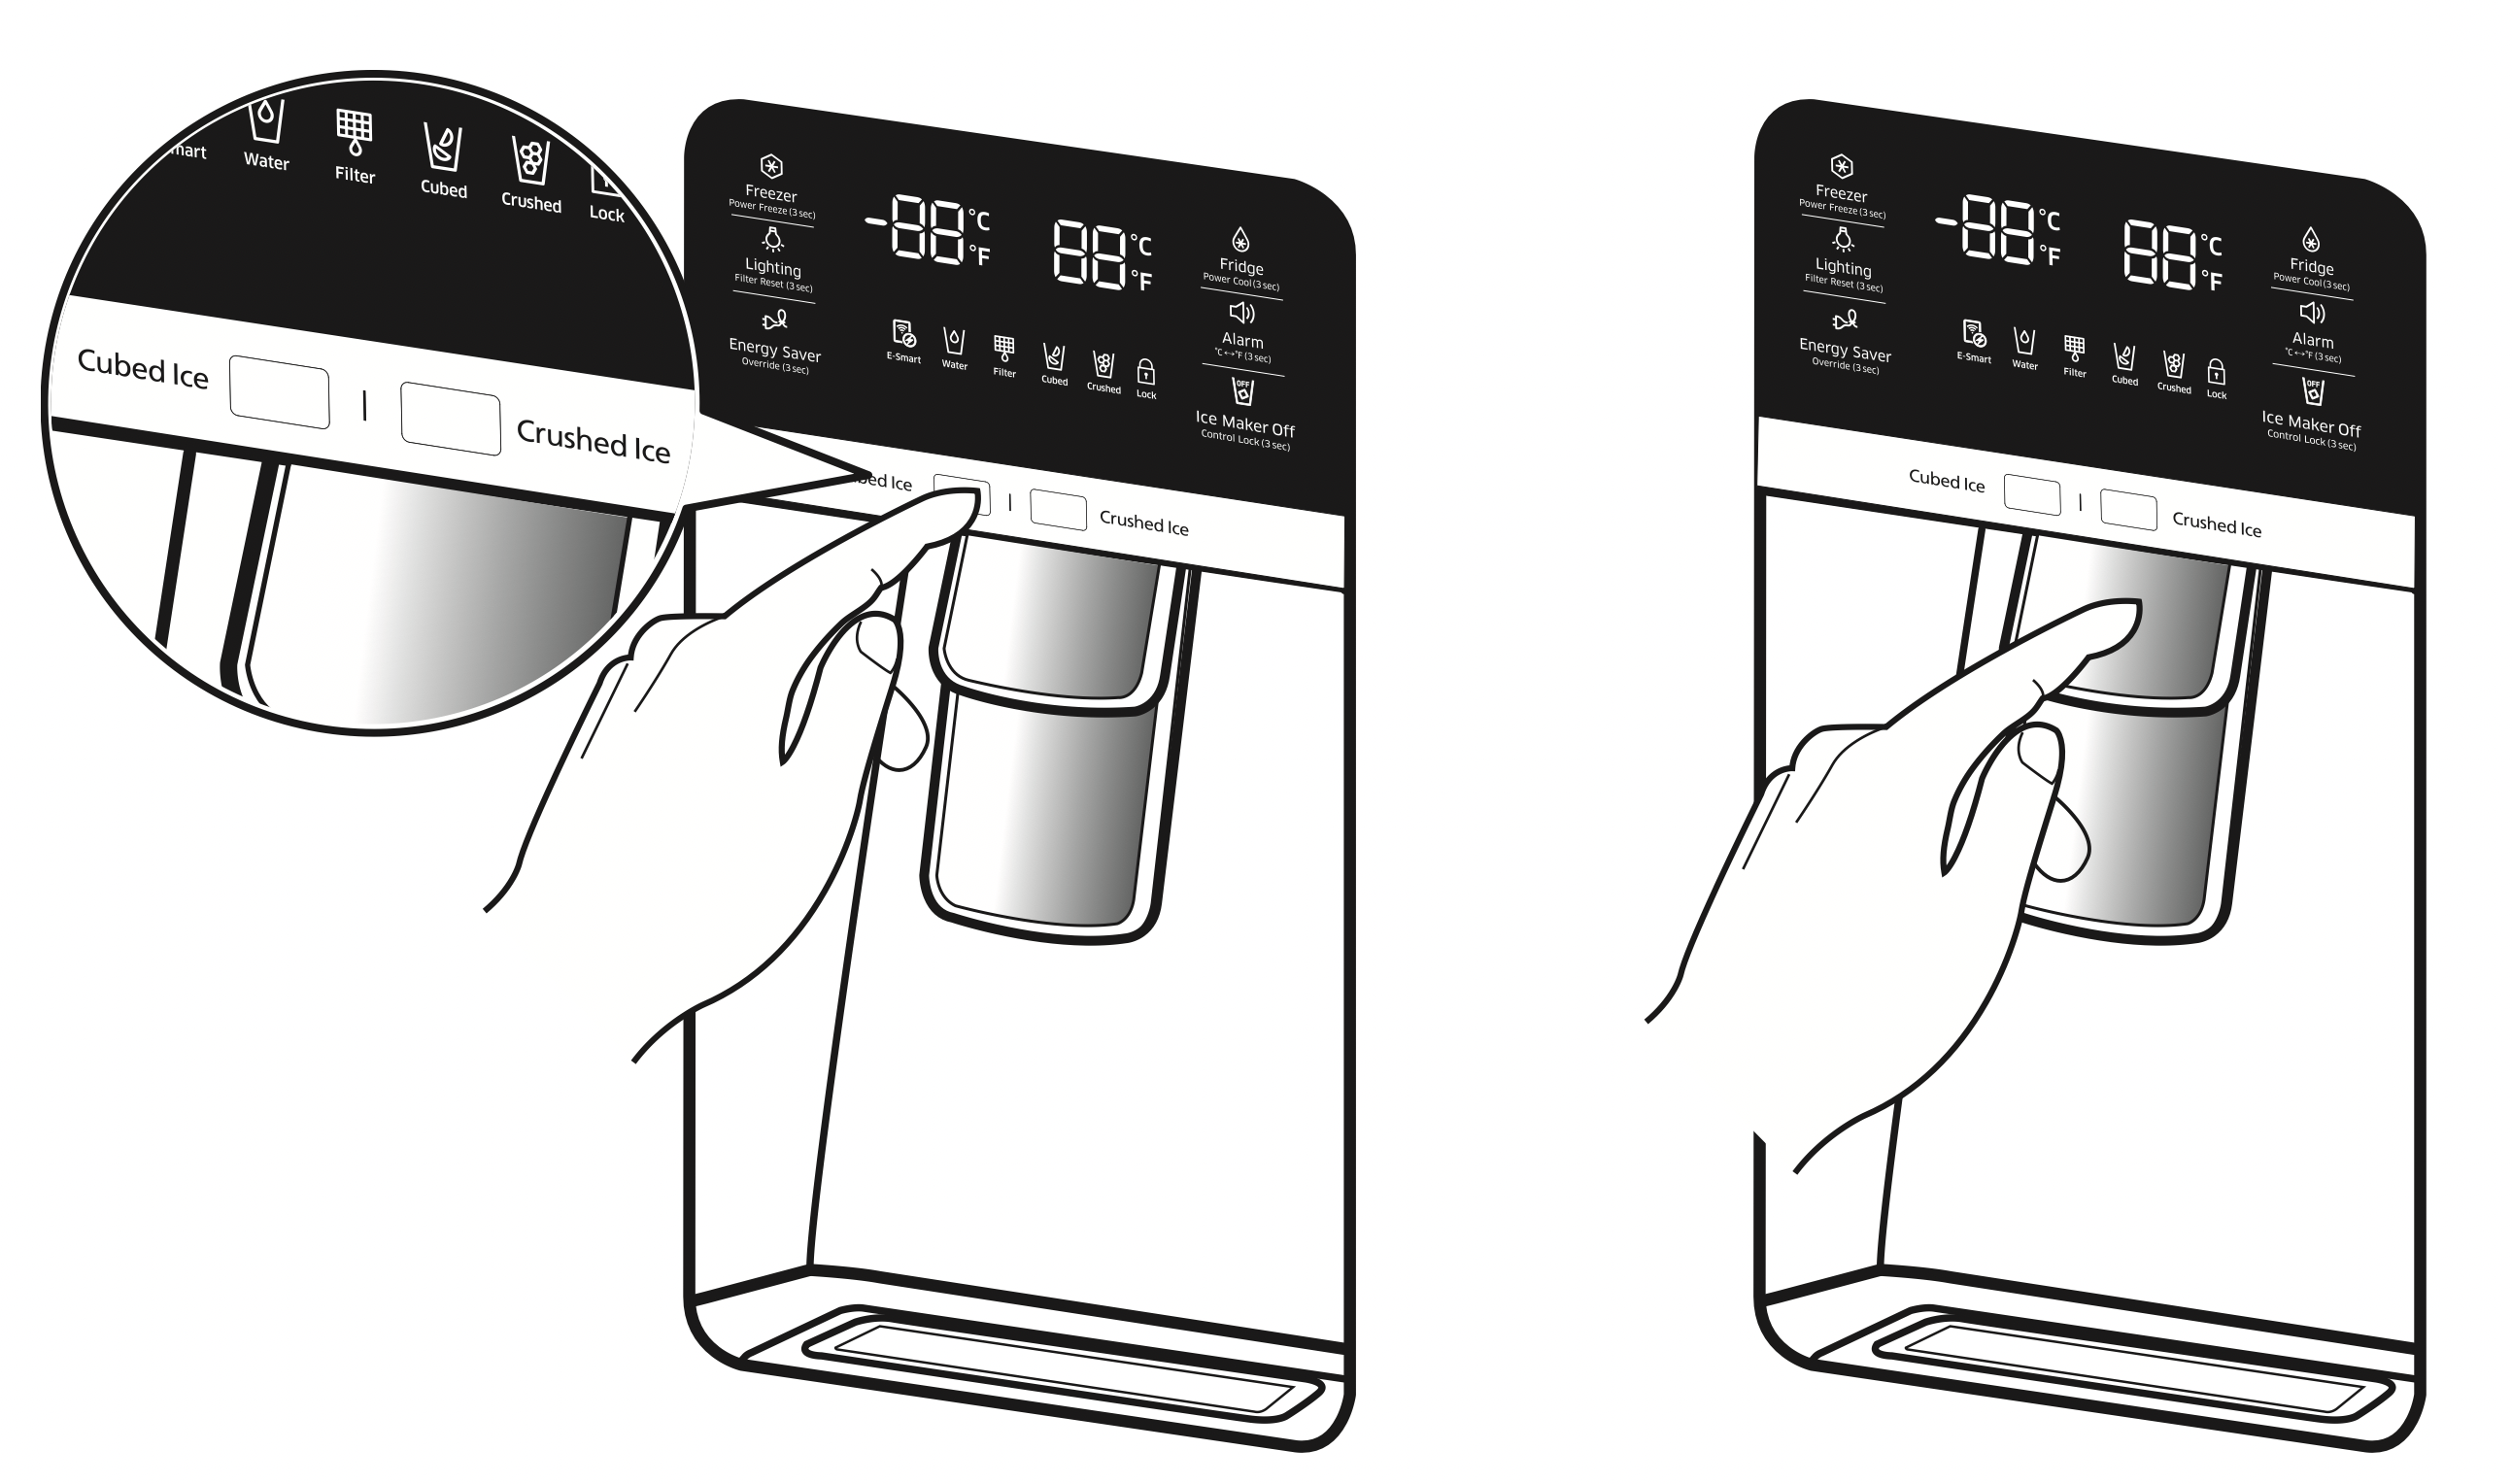
Push the appropriate button to select what you want dispensed.
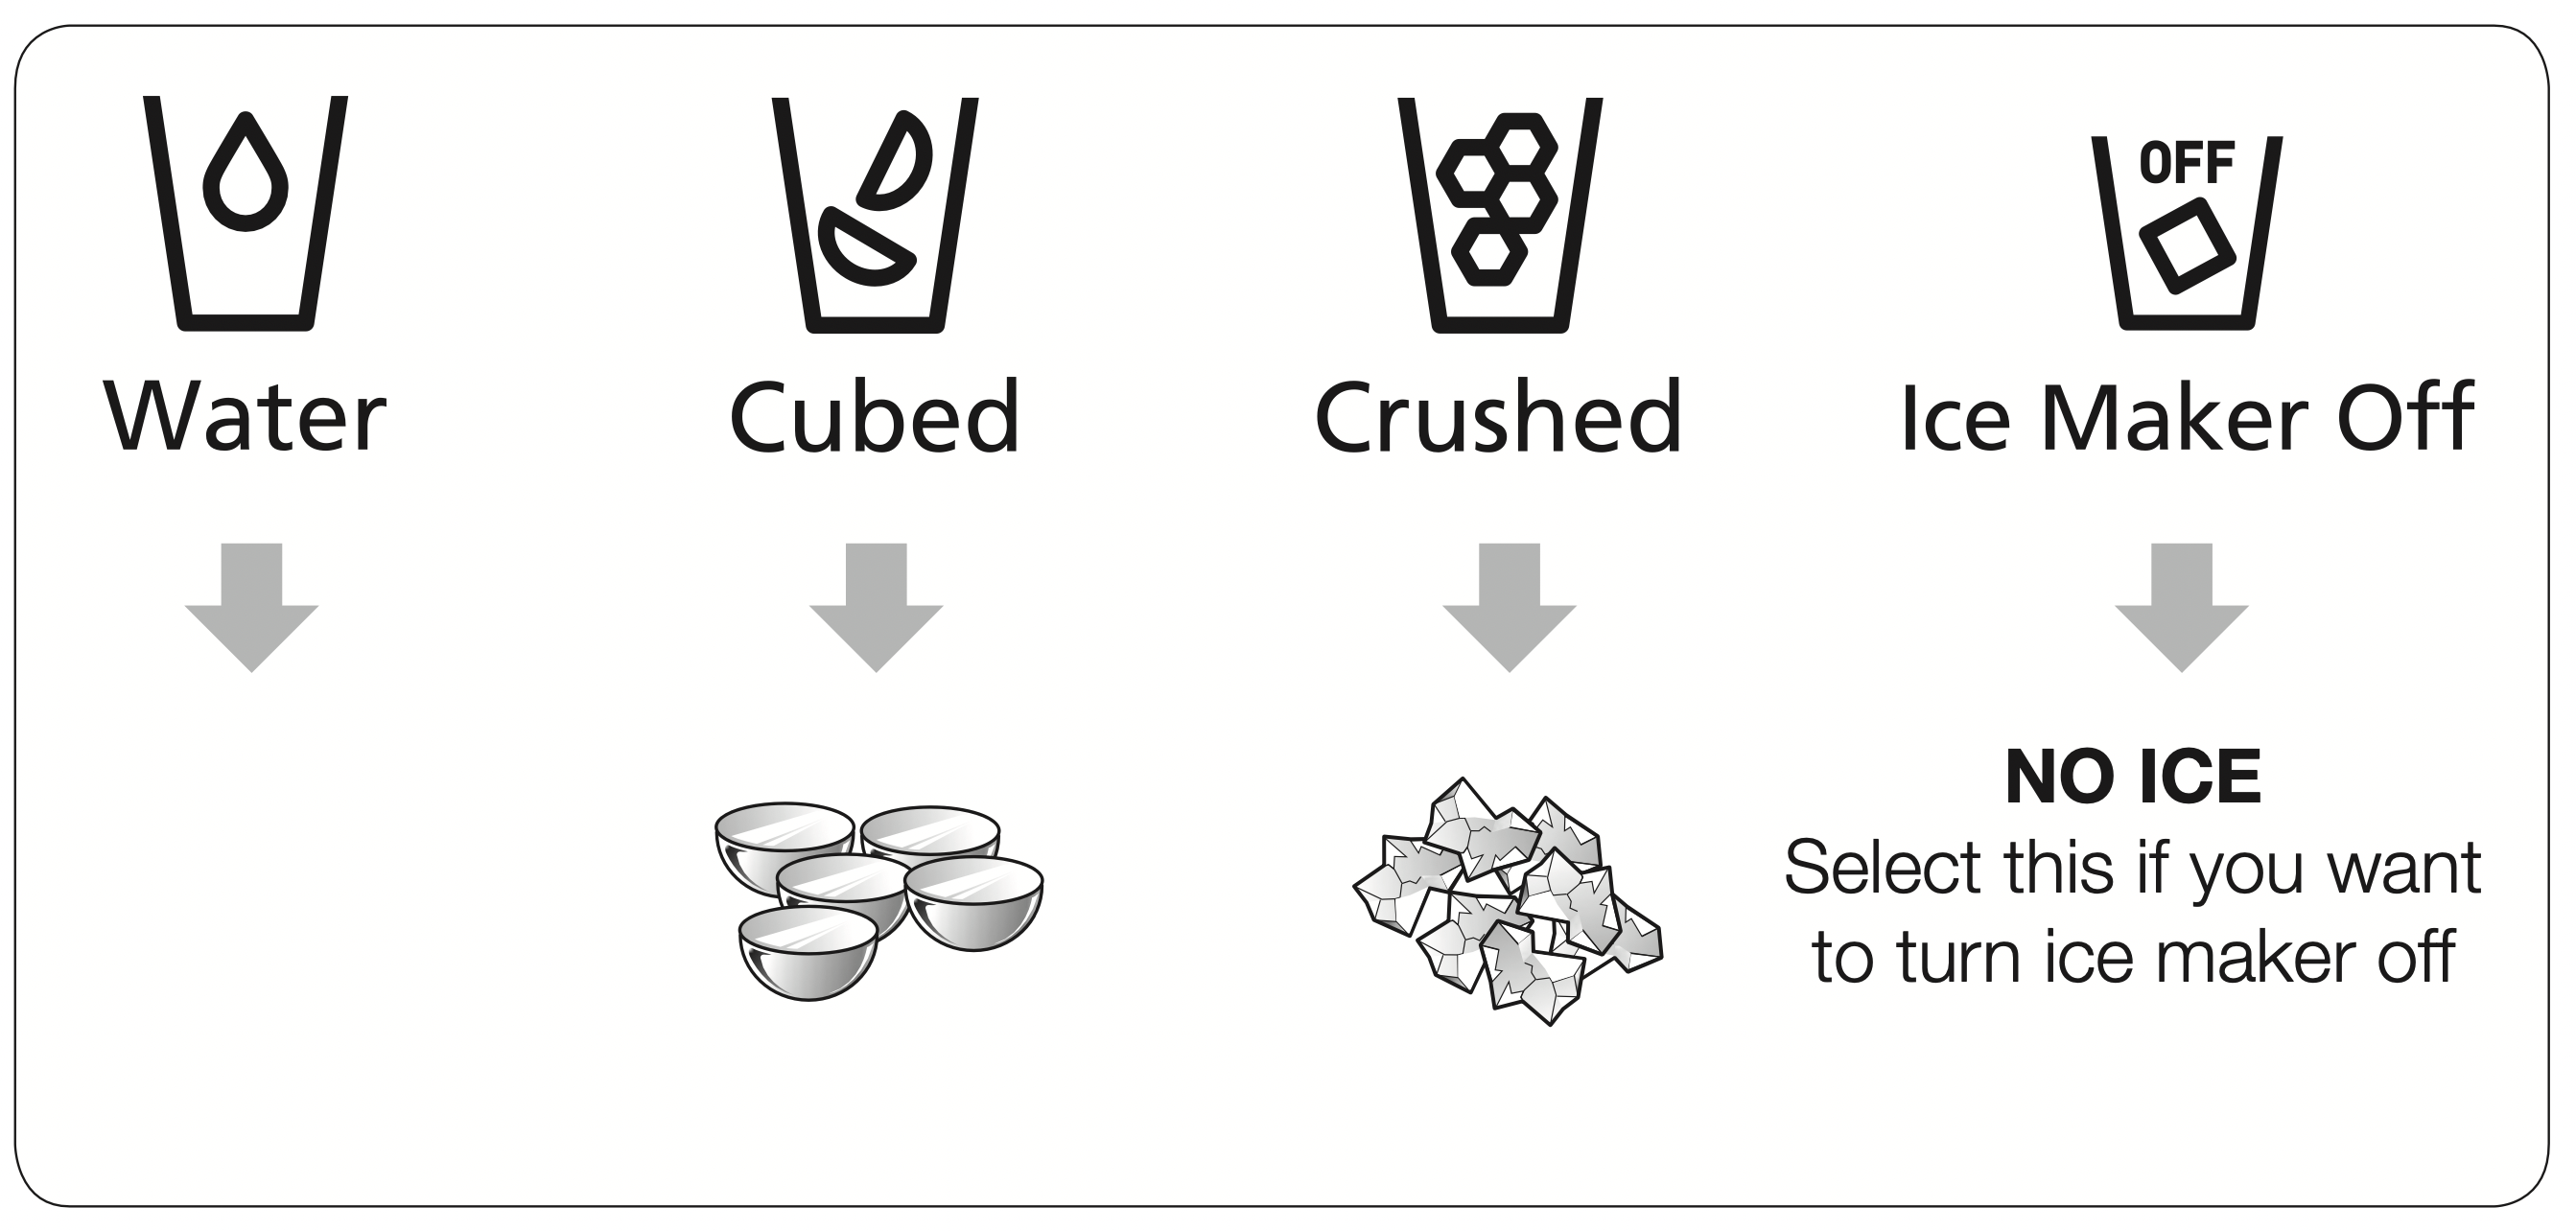
Using the ice lever ( 1 )
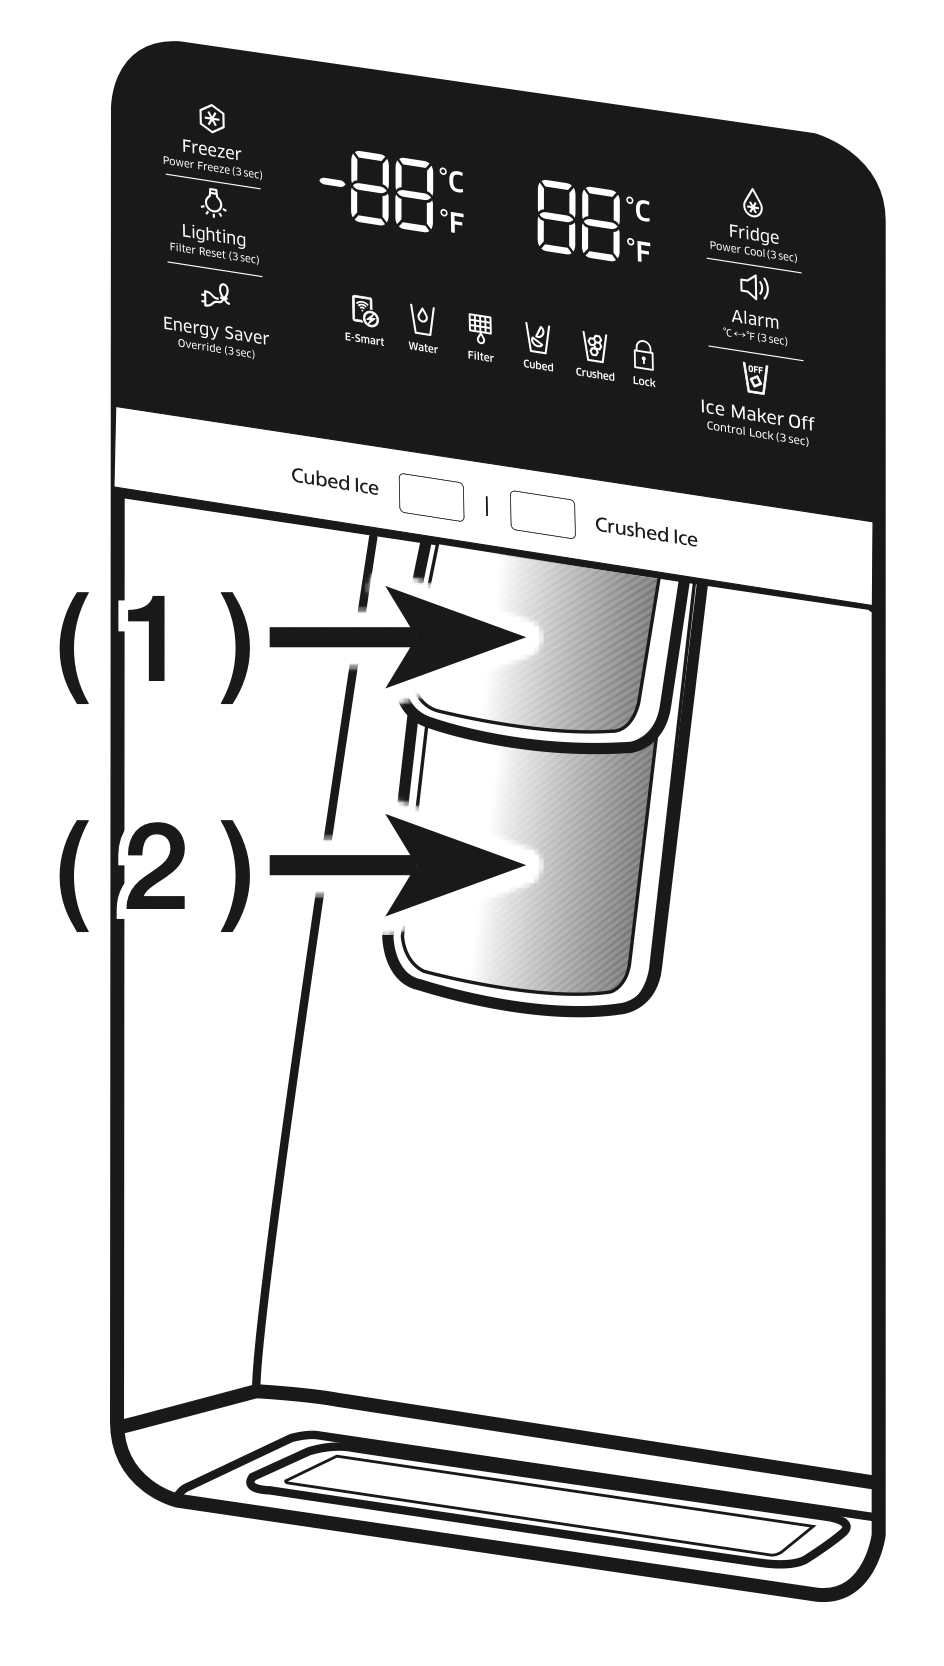
Push the Ice lever dispenser ( 1 ) gently with your glass.
Ice will be released from the dispenser.
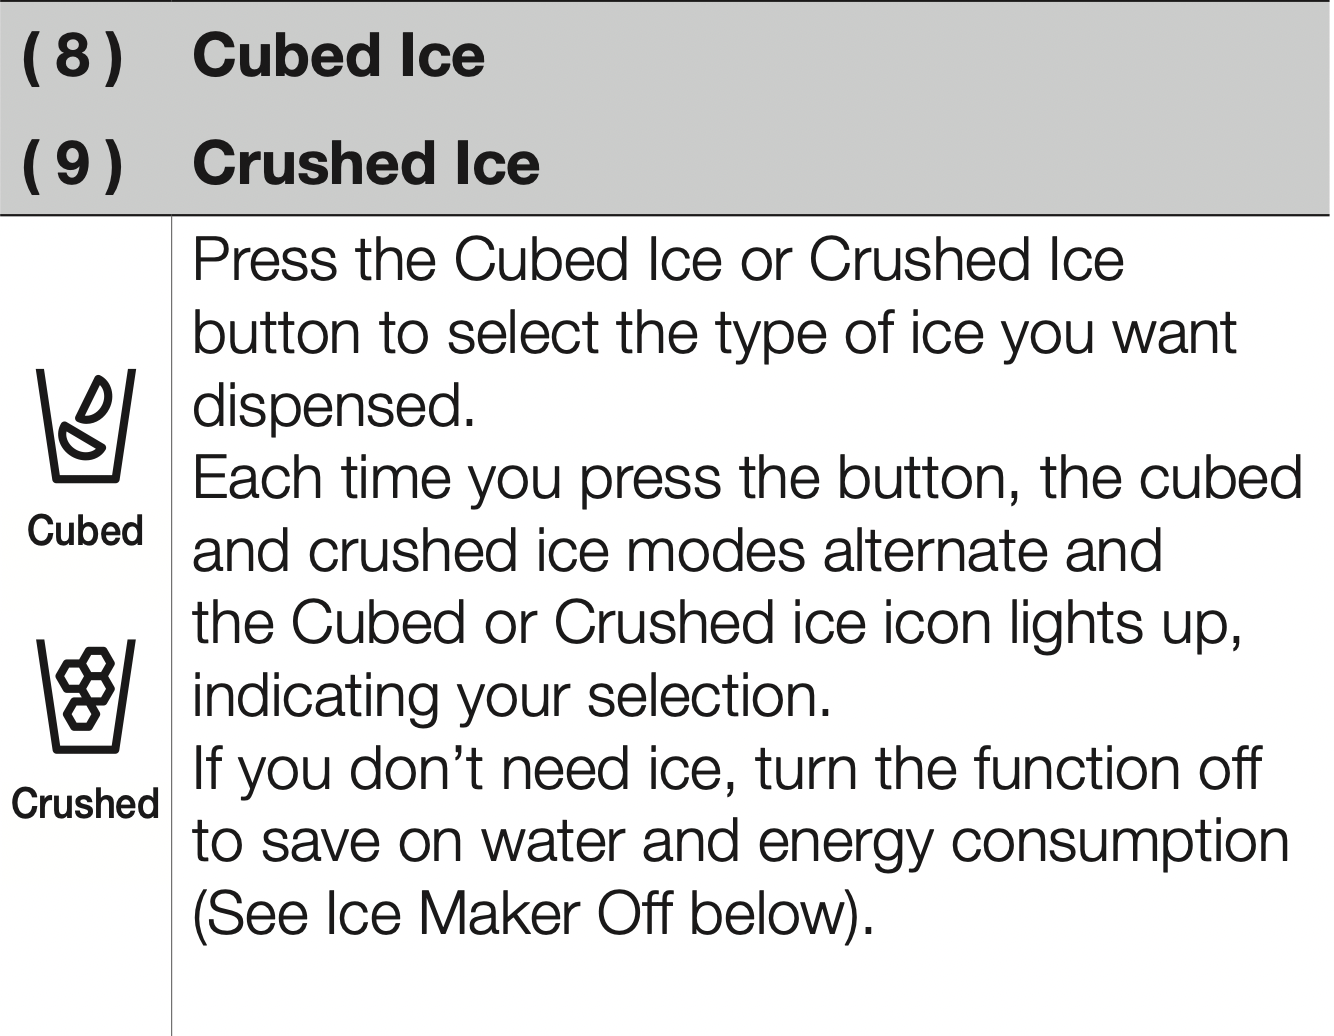
You can choose the type of ice by pushing the cubed or crushed button first.
Make sure the glass is in line with the dispenser to prevent the ice from bouncing out.
If you select Cubed Ice after using the Crushed Ice feature, a small amount of residual crushed ice might be produced.
Using the Water lever ( 2 )
Push the Water lever dispenser ( 2 ) gently with your glass.
Water will be released from the dispenser.
NOTE: Even if you push the water and Ice lever at about the same time, the dispenser glass only the option you actually selected or pushed first.
NOTE: Please wait 1 second before removing the cup after dispensing water to prevent spills.
Do not pull out the lever dispenser after dispensing ice or water.
It comes back automatically.
Using the Ice & Water Dispenser together
To get Ice and water, push the Ice lever ( 1 ) first for ice, then move your glass down and press the water dispenser lever ( 2 ) for water.
CAUTION
Please wait 2 seconds before removing the glass under the dispenser to prevent spills.
If the Refrigerator door is open, the Dispenser does not work.
- Do not pull the lever out.
You could damage or break the lever’s spring.
- To clean the ice bin/bucket, wash with a mild detergent, rinse well, and dry thoroughly it. Do not use harsh or abrasive cleaners or solvents.
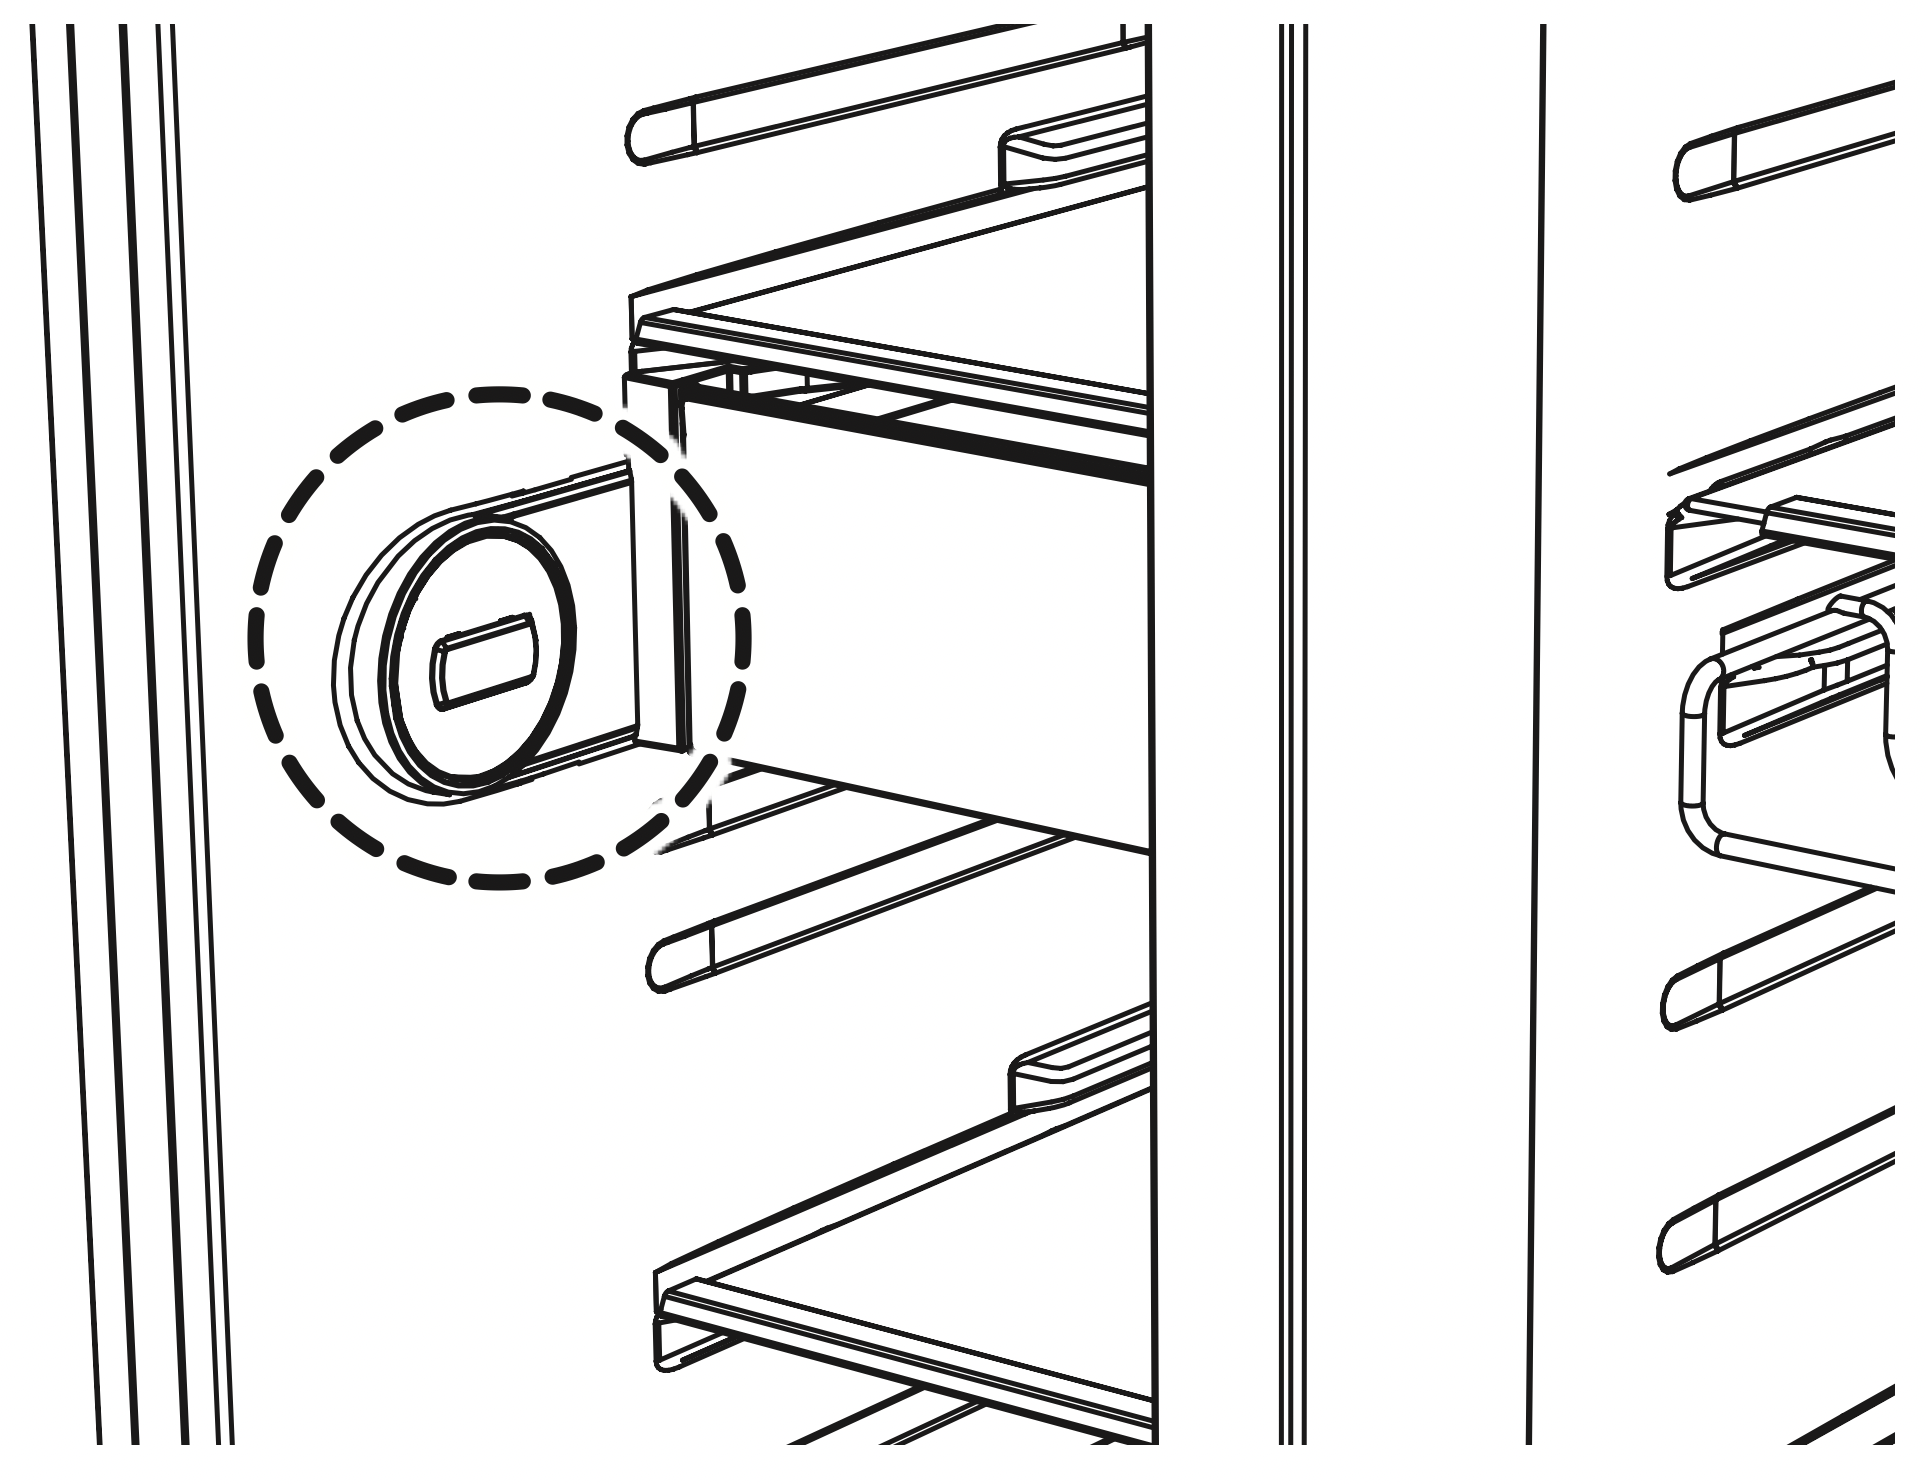
- In case ice doesn’t come out, pull out the ice bucket and press the test button located on the right side of ice maker.
- Do not press the test button continuously when the tray is filled with ice or water. Water may overflow or ice may jam the bucket.
NOTE:
- When you press the Test button, you will hear the refrigerator chime (ding-dong). When the chime sounds, release the Test button.
- The chime sounds automatically again to let you know the ice maker is working well.
CAUTION
If a power failure occurs, ice cubes may melt then freeze together when the power comes back on, causing the dispenser to be out of order.
To prevent this problem, after a power failure, pull out the ice bucket and discard the residual ice or water.
After you dump the ice from the ice bucket, you should press the dispenser lever once with the ‘ICE CUBED’ or ‘CRUSHED’ function ON.
The ice maker will make new ice faster after you return the ice bucket to the refrigerator.
WARNING
- Do not put your fingers, hands, or any unsuitable objects in the chute or ice-maker bucket.
- This can cause personal injury or material damage.
- Use only the ice maker provided with the refrigerator.
- Have the refrigerator’s water supply connected only to a potable water supply.
- The ice maker requires water pressure of 20 - 125 psi (138~862 kPa) to operate properly.
CAUTION
- If you are going on a long vacation or business trip and won’t be using the water or ice dispensers for that period of time, close the water valve to prevent leaks.
- If you have not used the Ice maker for a while, or you have opened the Freezer door frequently, the Ice may stick together.
If this occurs, empty the ice bucket or break up the ice with a wood kitchen tool.
Do not use sharp items such as knives or forks.
- When you remove the ice bucket, there may still be some residual ice in the ice maker.
The ice maker may eject this ice into the freezer.
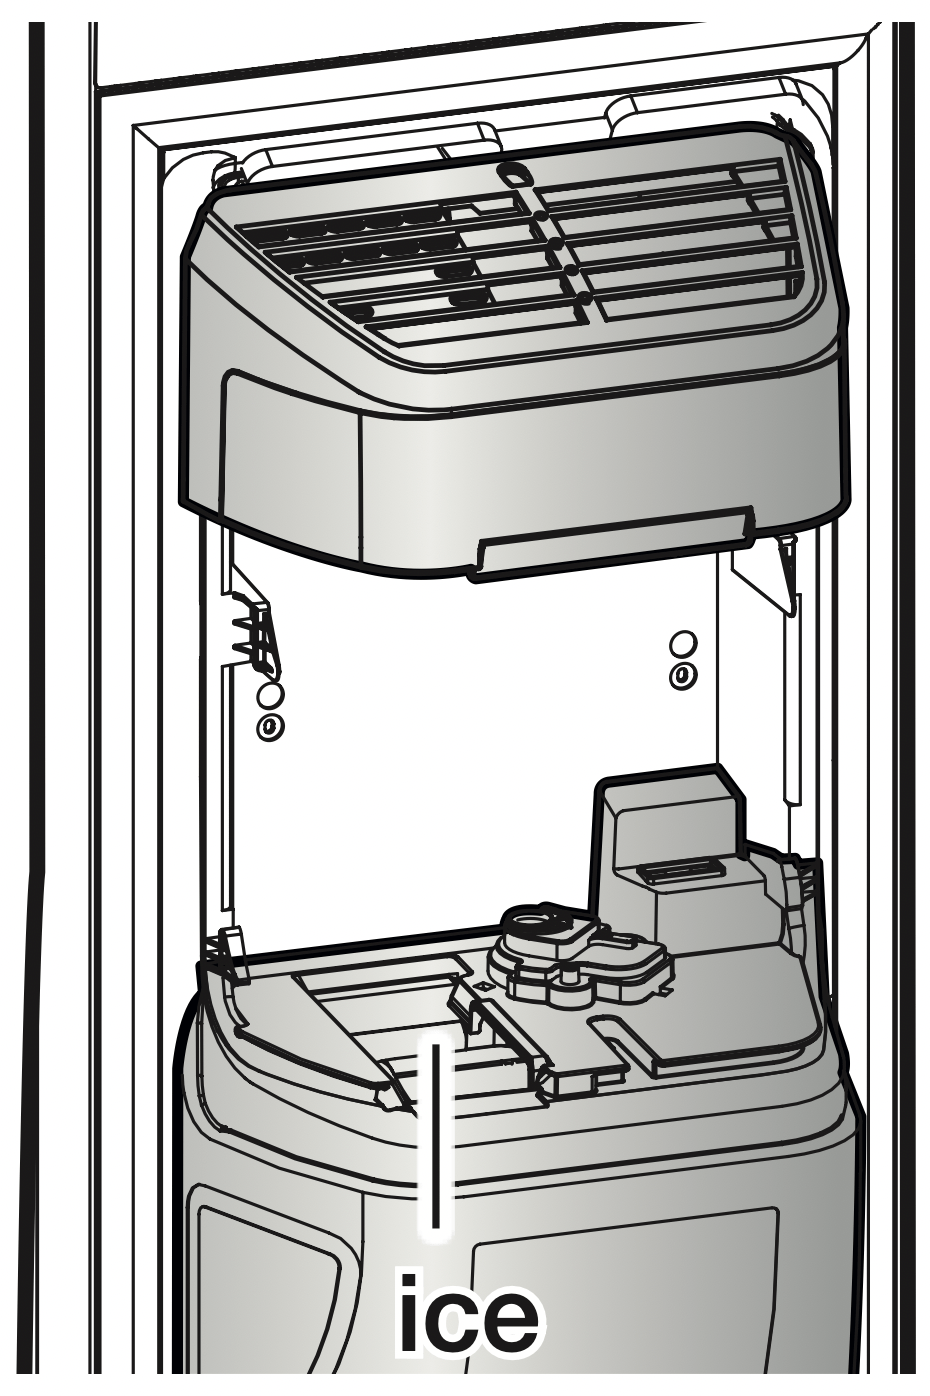
USING THE ICE MAKER
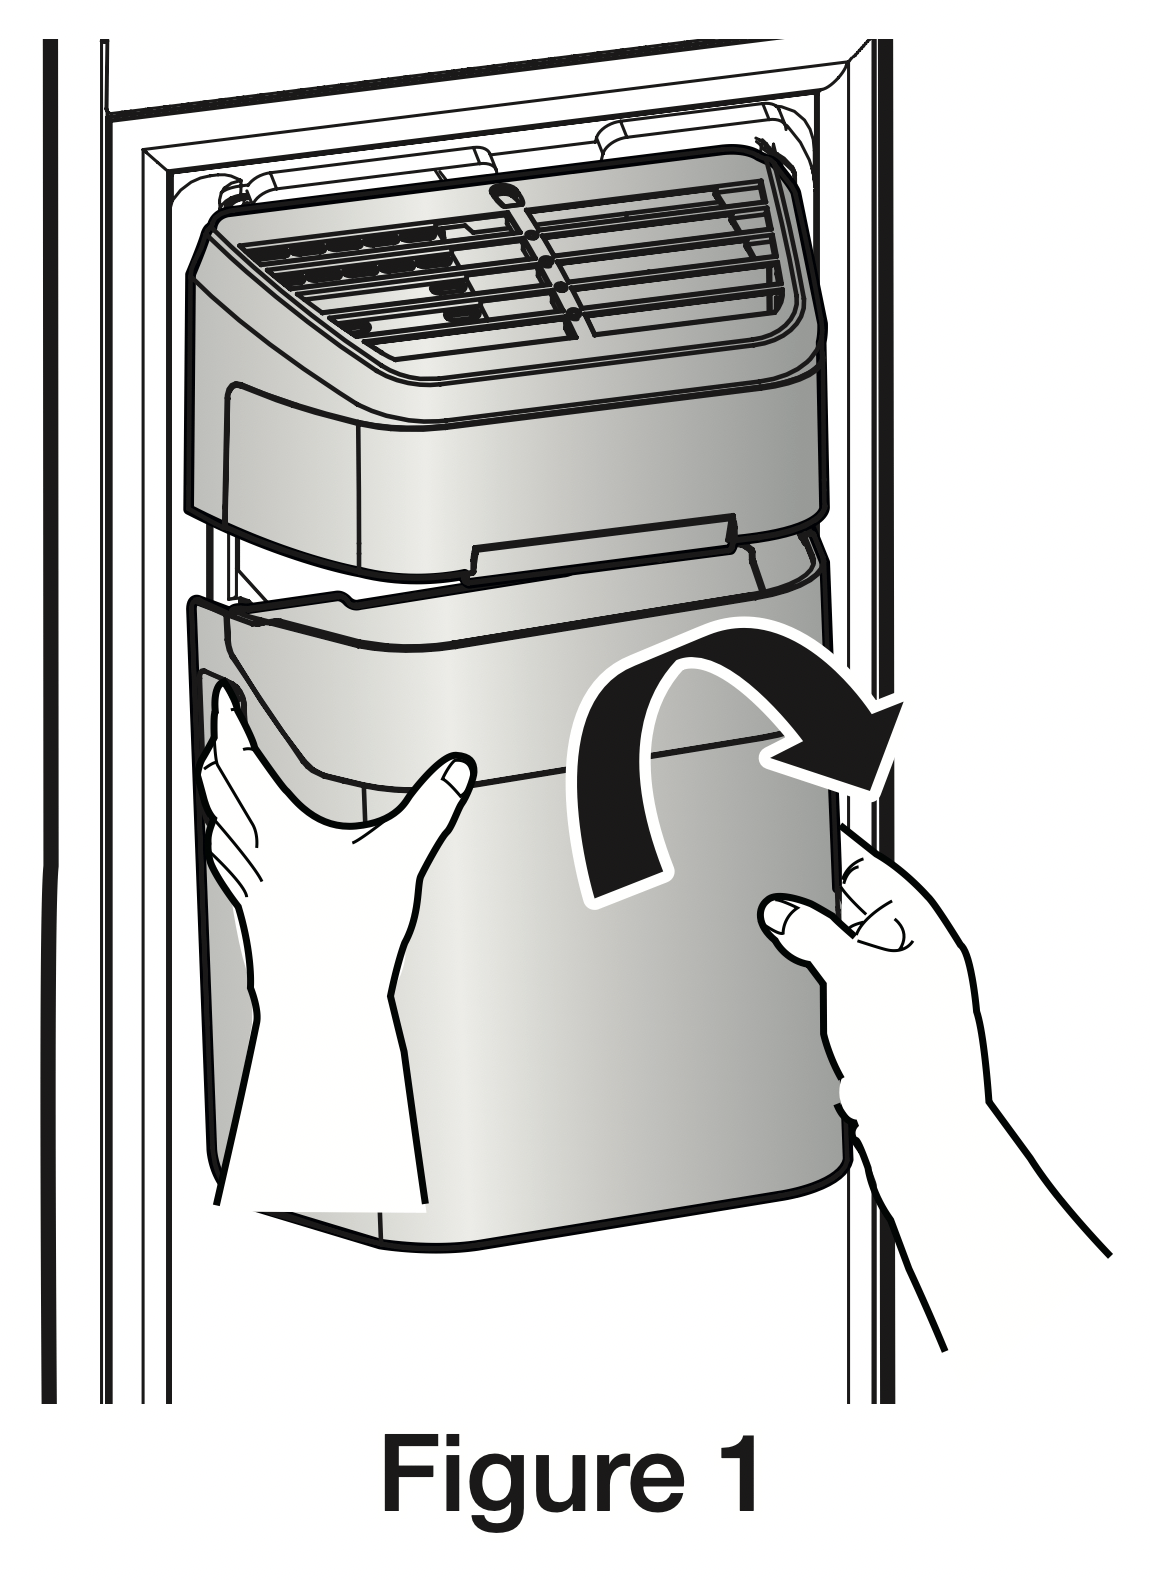
- To Remove the Ice Bucket.
- Hold the handle as shown in figure1.
- Lift up and pull the Bucket out slowly.
- Take out Ice Bucket out slowly to prevent damage.
- When you reinstall the ice bucket, press and hold the ICE button for 6 seconds.
- Normal Operation
- Any sounds you hear when the ice maker dumps ice into the bucket are part of normal operation.
- Ice may clump in the bucket if you do not dispense ice for long periods of time.
If this occurs, remove all the ice and empty the bucket.
- If ice does not come out, check for any ice stuck in the chute and remove it.
- The first batch of ice cubes after installation may be small because air has entered the water line.
Any air will be purged during normal use.
CAUTION
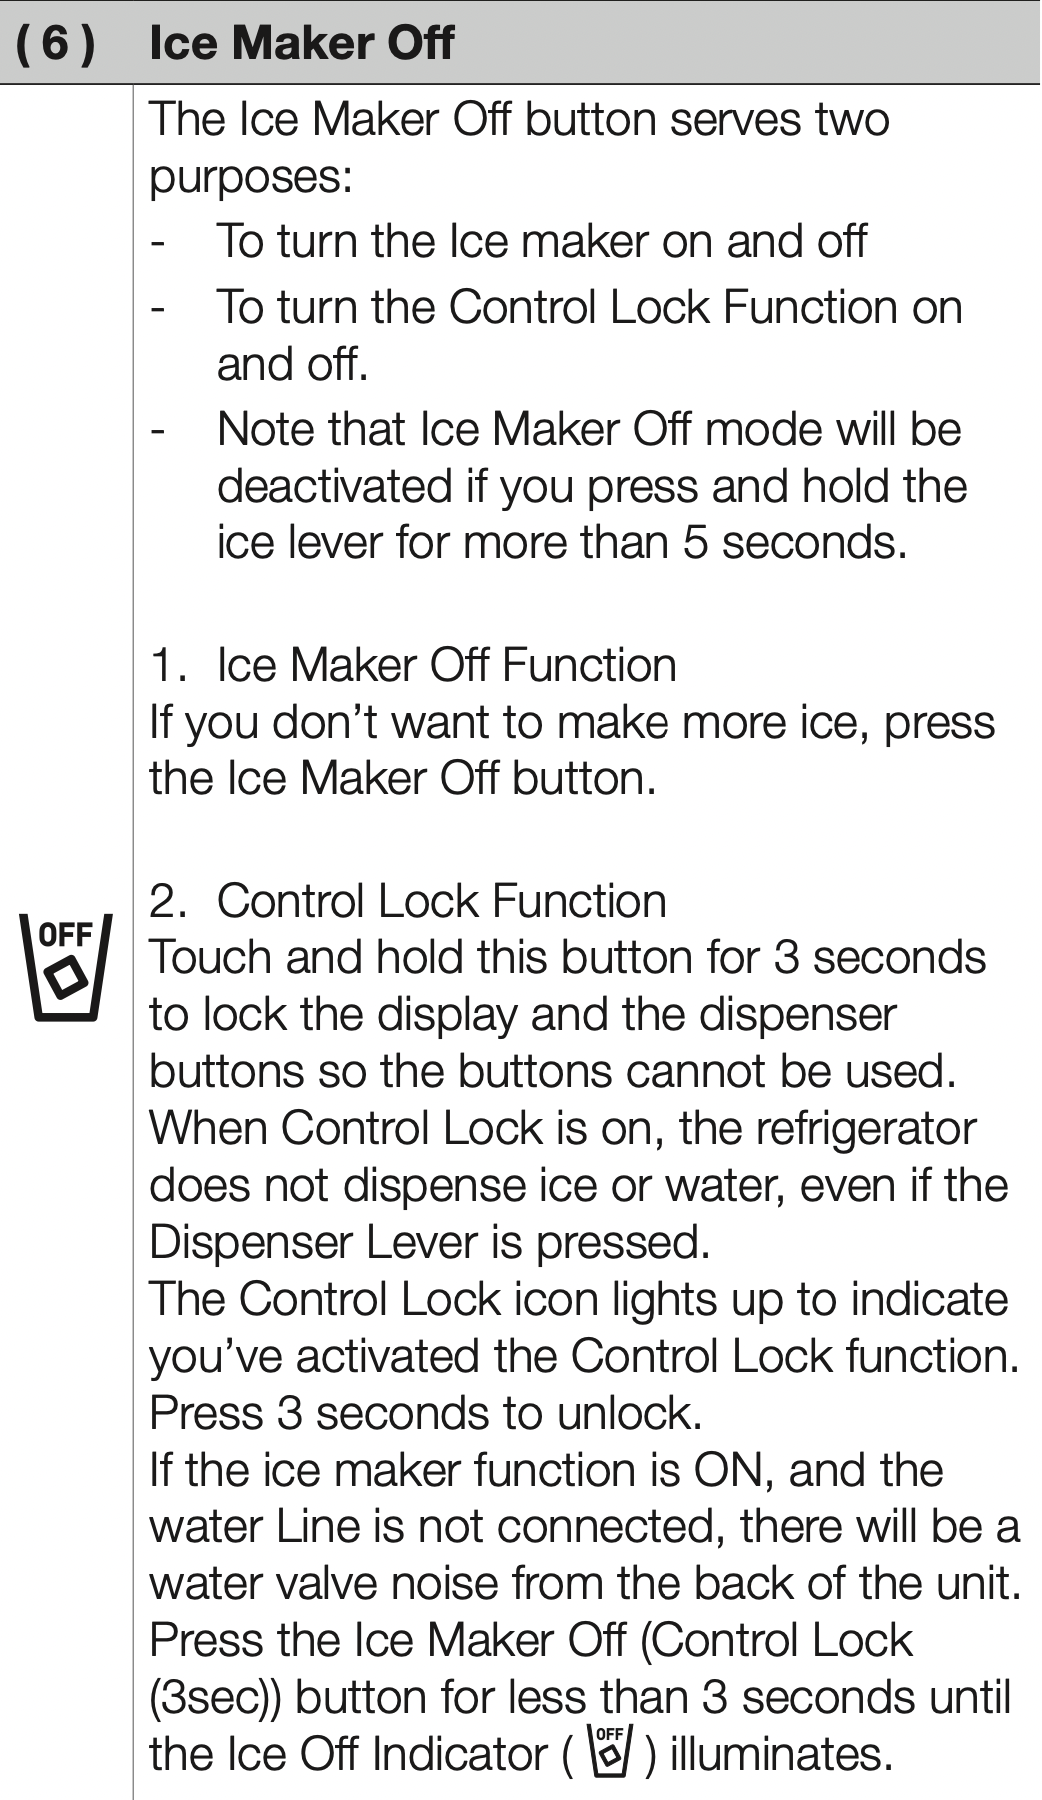
- When Ice Maker Off blinks on the display panel, reinsert the ice bucket and/or make sure it’s installed properly.
- When the door is open, the Ice and water dispenser do not work.
- If you close the door hard, it may cause water to spill over the ice maker.
- To prevent the ice bucket from dropping, use both hands when removing it.
- To prevent injury, be sure to clean up any ice or water that may have dropped on the floor.
- Do not let the children hang on the ice dispenser or on the bucket.
They may get hurt.
- Be sure not to put your hand or any object into the ice chute.
It may cause personal injury or damage mechanical parts.
- Use care when storing food in plastic bags in the freezer.
Incorrectly stored bags can get caught in the ice bucket’s Auger Motor and prevent the refrigerator from dispensing ice or cause the freezer door to open unexpectedly.
SMART ECO FEATURES
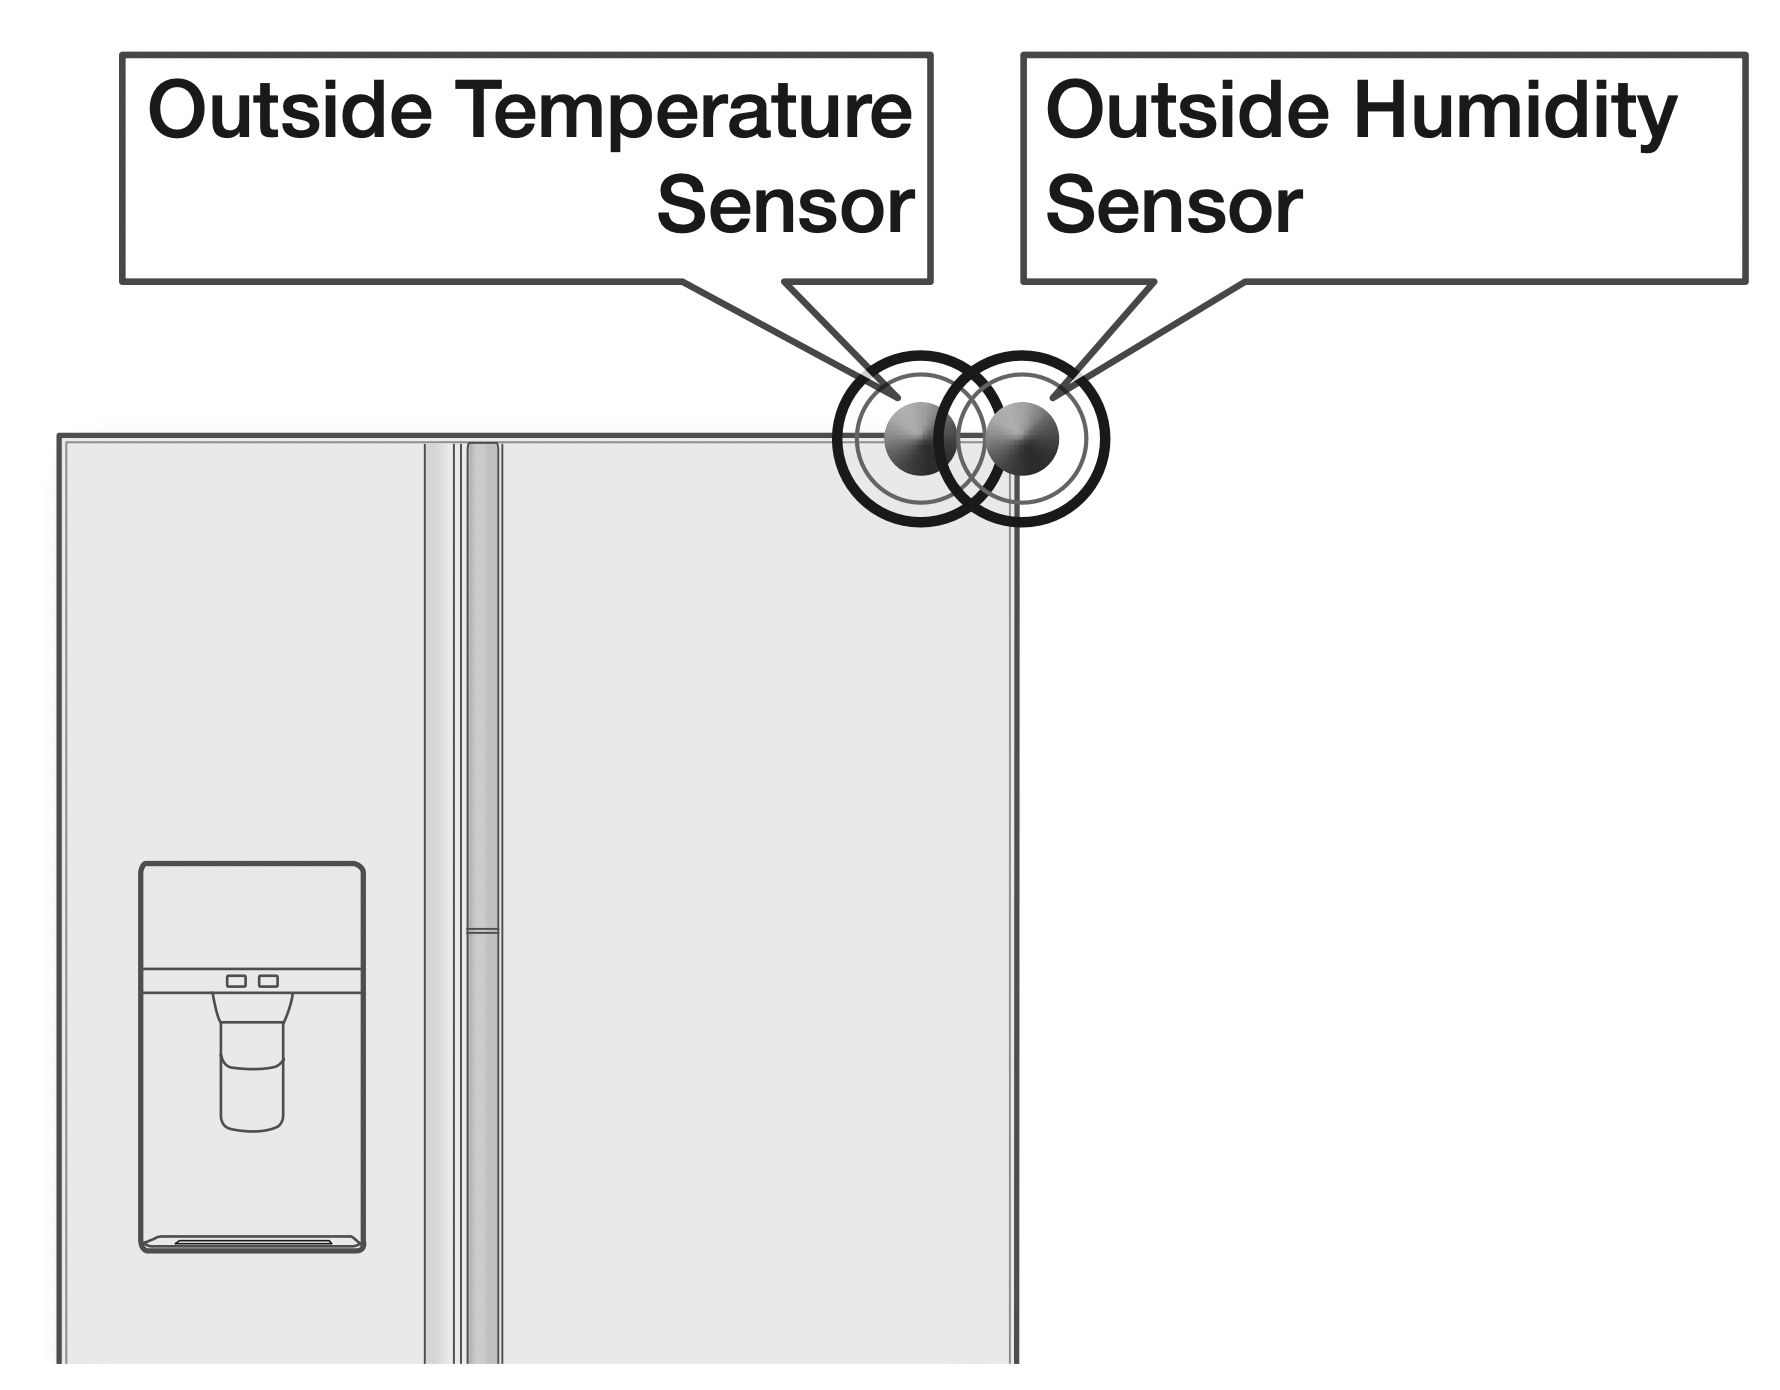
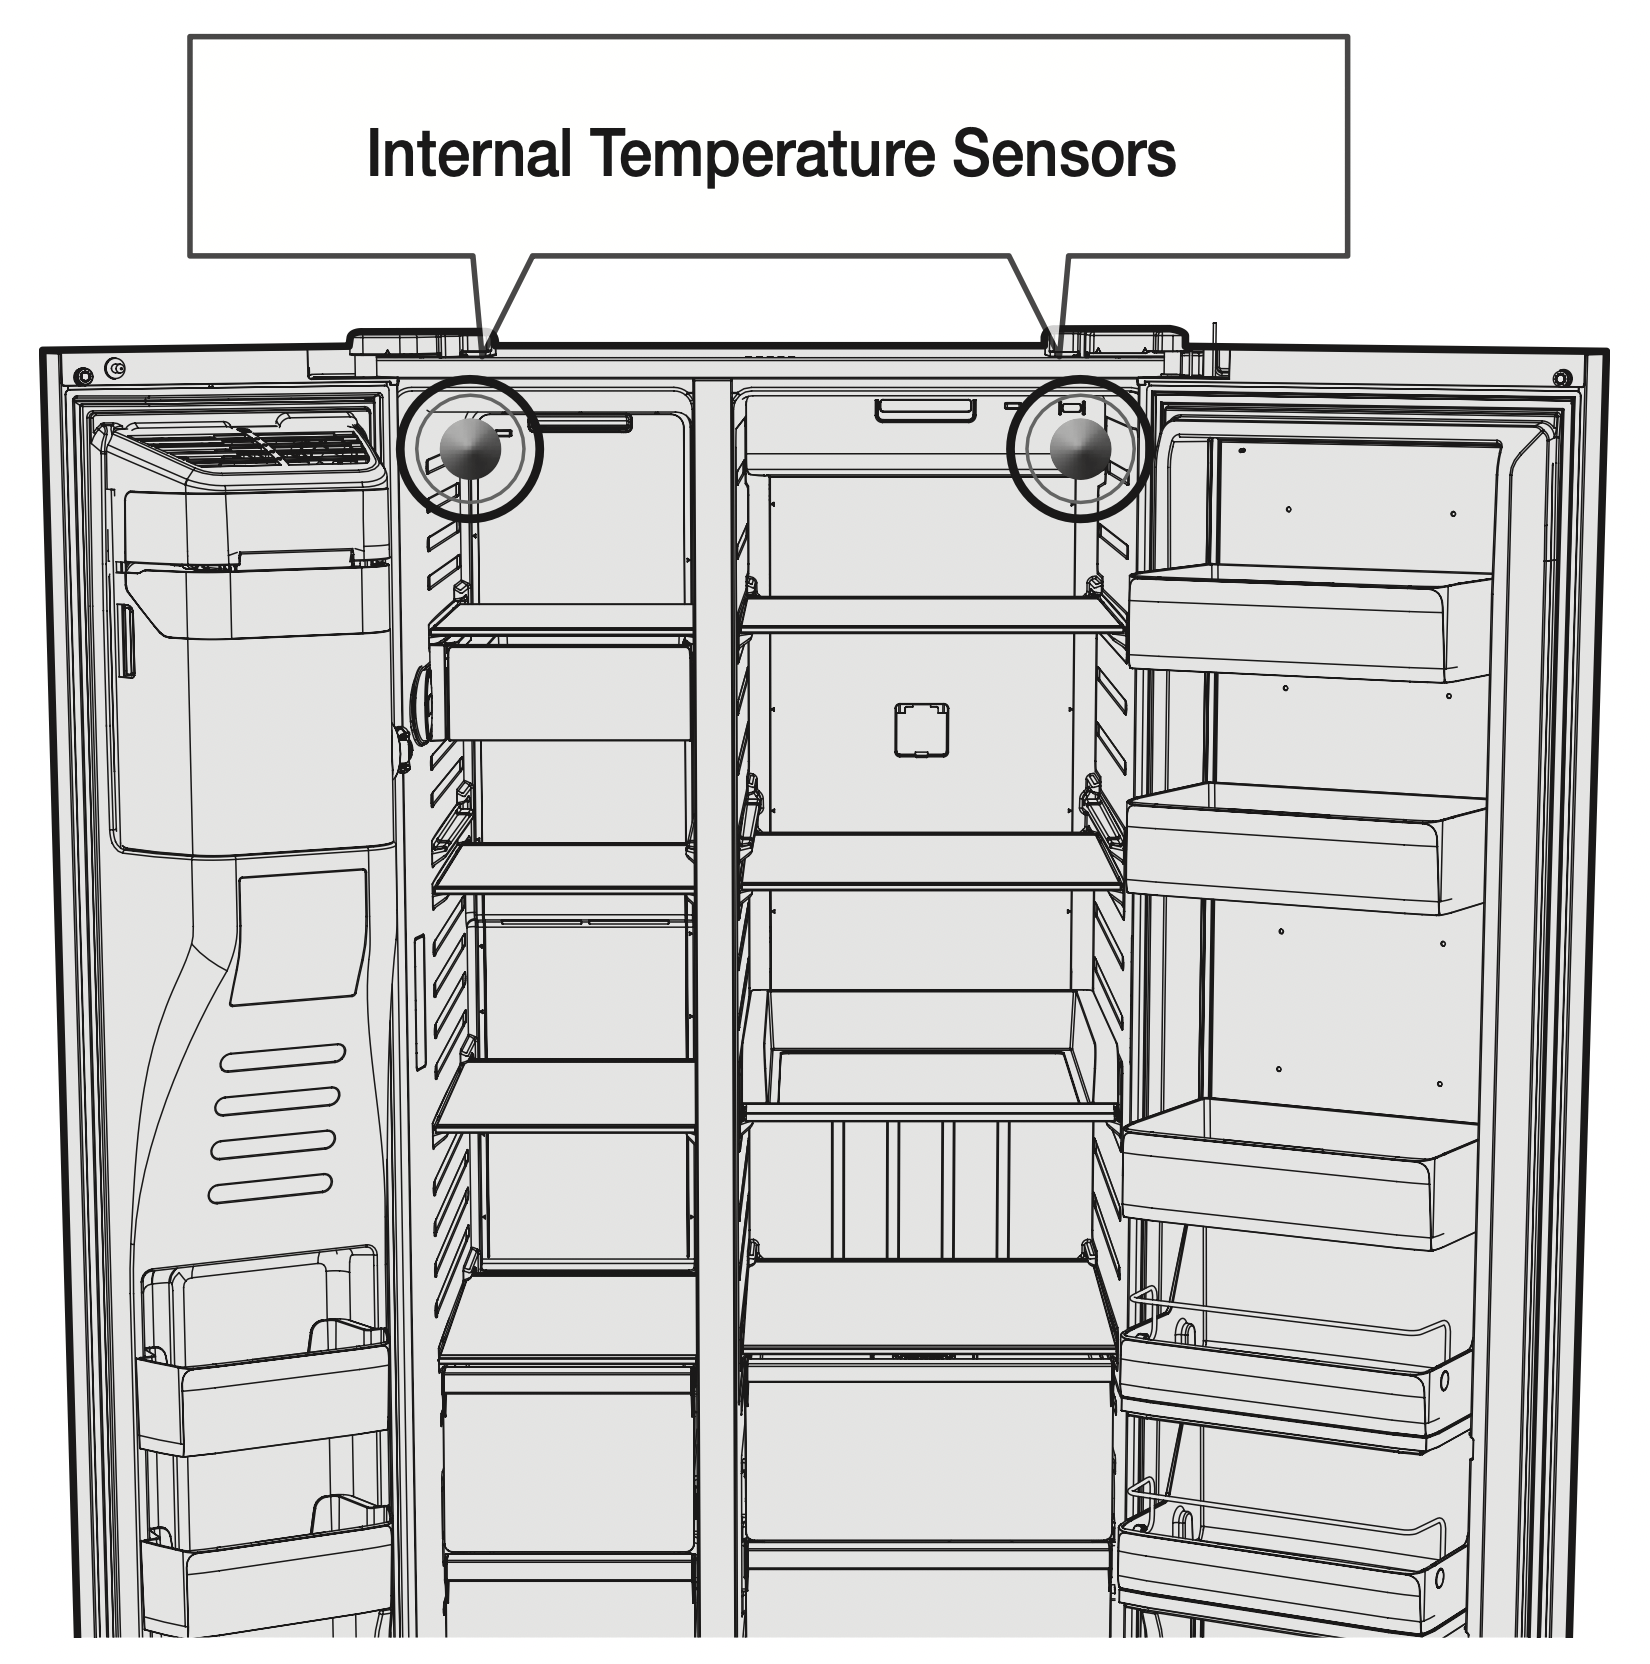
Smart Eco System
Keeps food at its freshest by using four sensors to monitor the external environment, usage patterns, and the refrigerator’s operating status while conserving energy and saving on electricity costs.
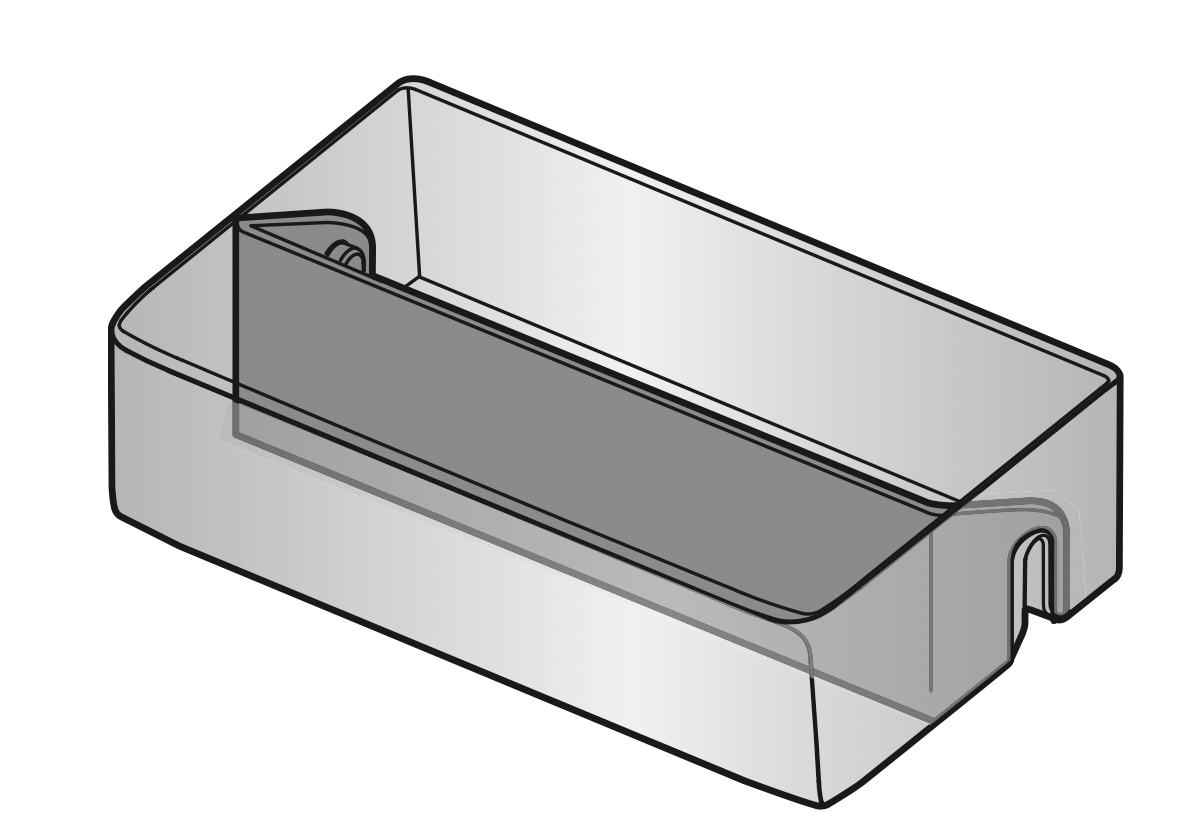
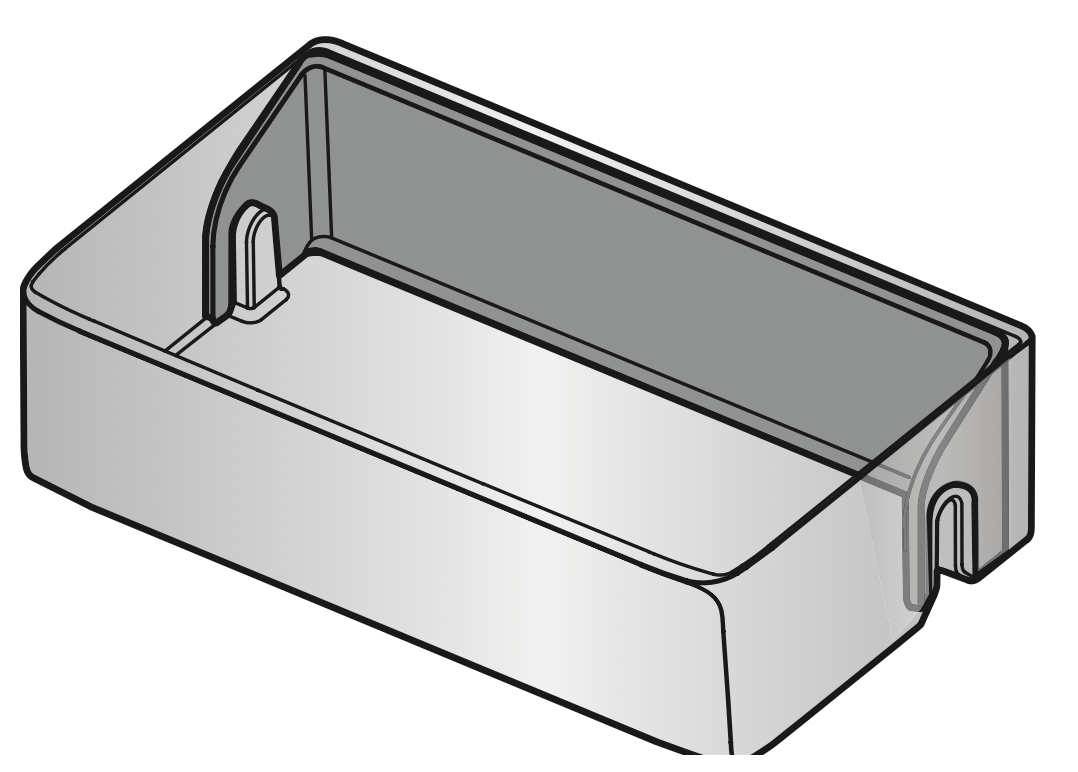
FRIDGE MULTI-PURPOSE DOOR BIN
A detachable divider makes it easy to store food in convenient, temporary compartments.
Food products can be stored by type or size.
- Put the divider in place when storing slim-size condiment bottles and canned drinks together.
- Take out the divider when storing cartonsize milks or drinks.
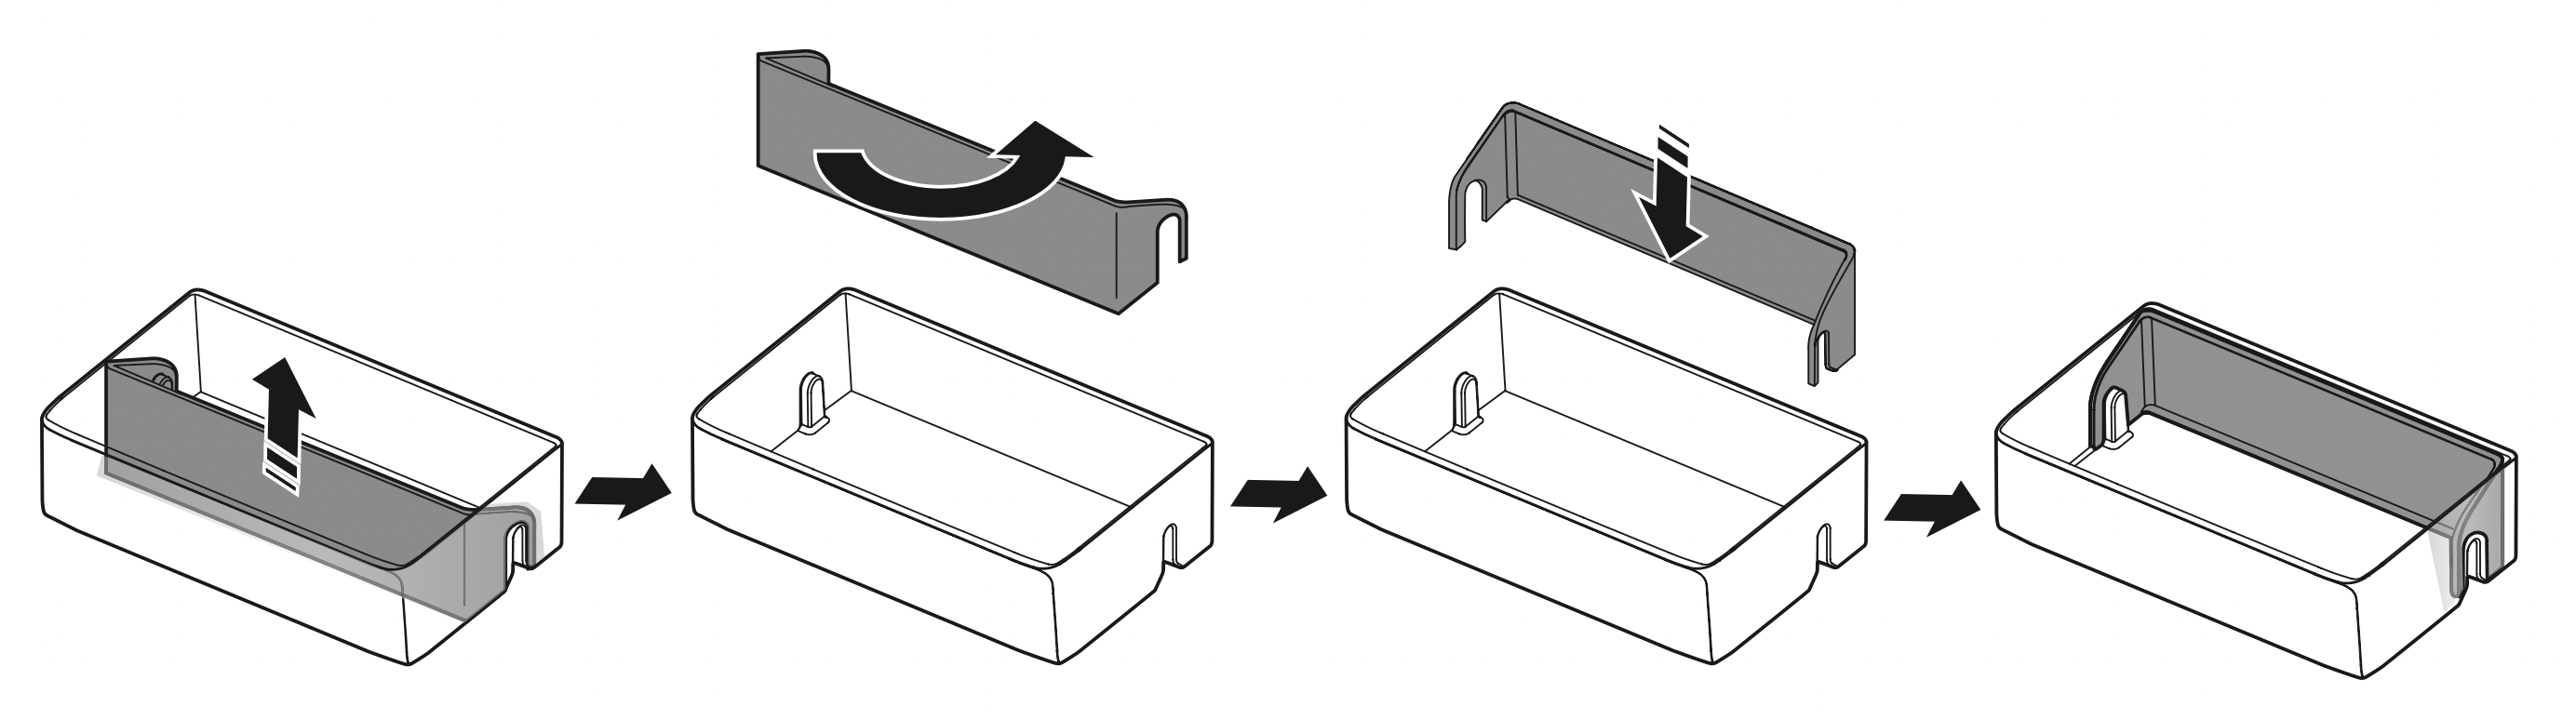
How to Use the DIVIDER
- Insert the divider as shown in the diagram to compartmentalize the case.
- When not in use, simply flip it around and move it out of the way as shown in the diagram.
How to Use the MULTI SUPPORTER
- When not in use, leave the Multi Supporter flipped over as shown in the diagram.
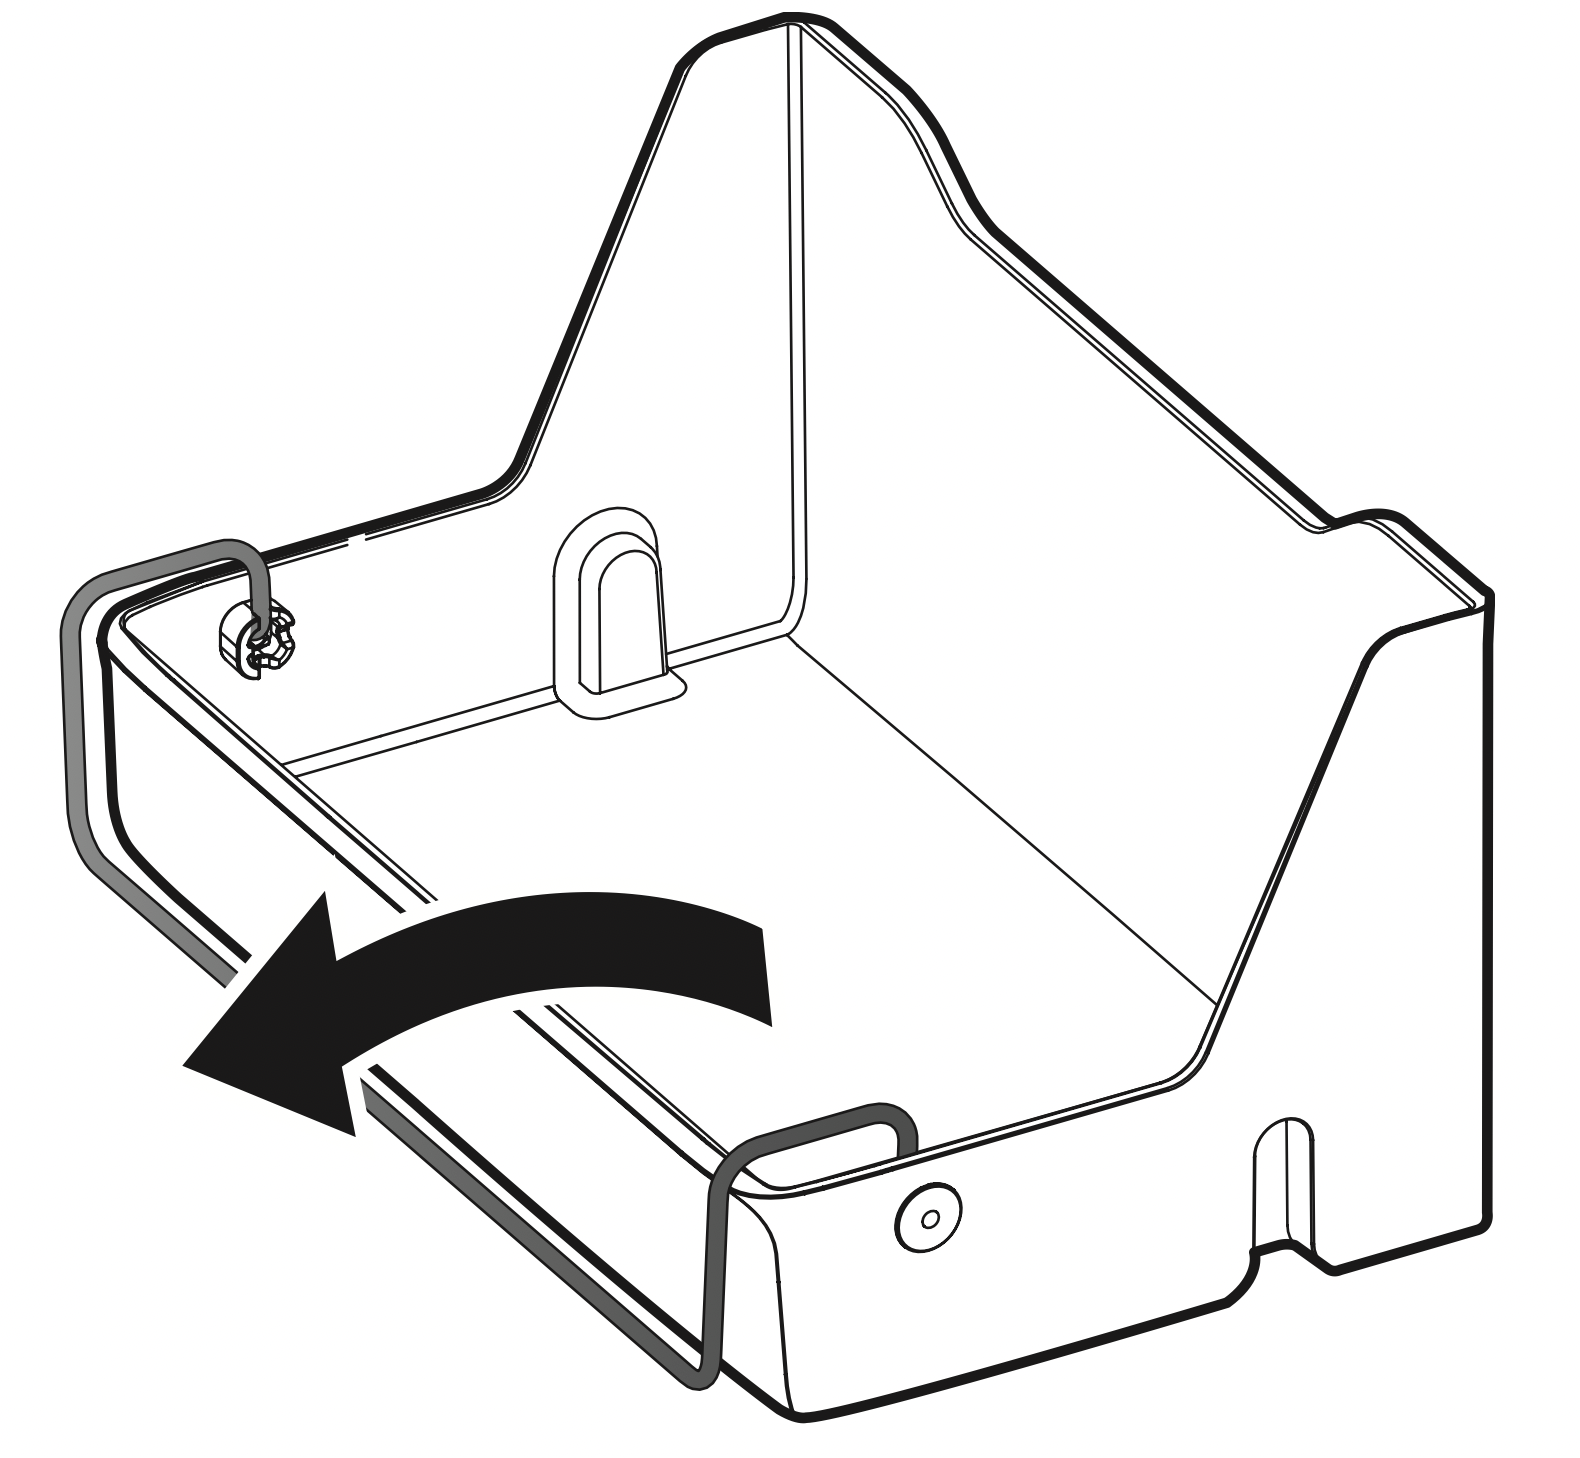
- Flip the Multi Supporter to position ( 1 ) to prevent items from falling out and over.

- Flip the Multi Supporter to position ( 2 ) to use it as a divider.
REMOVING THE REFRIGERATOR ACCESSORIES
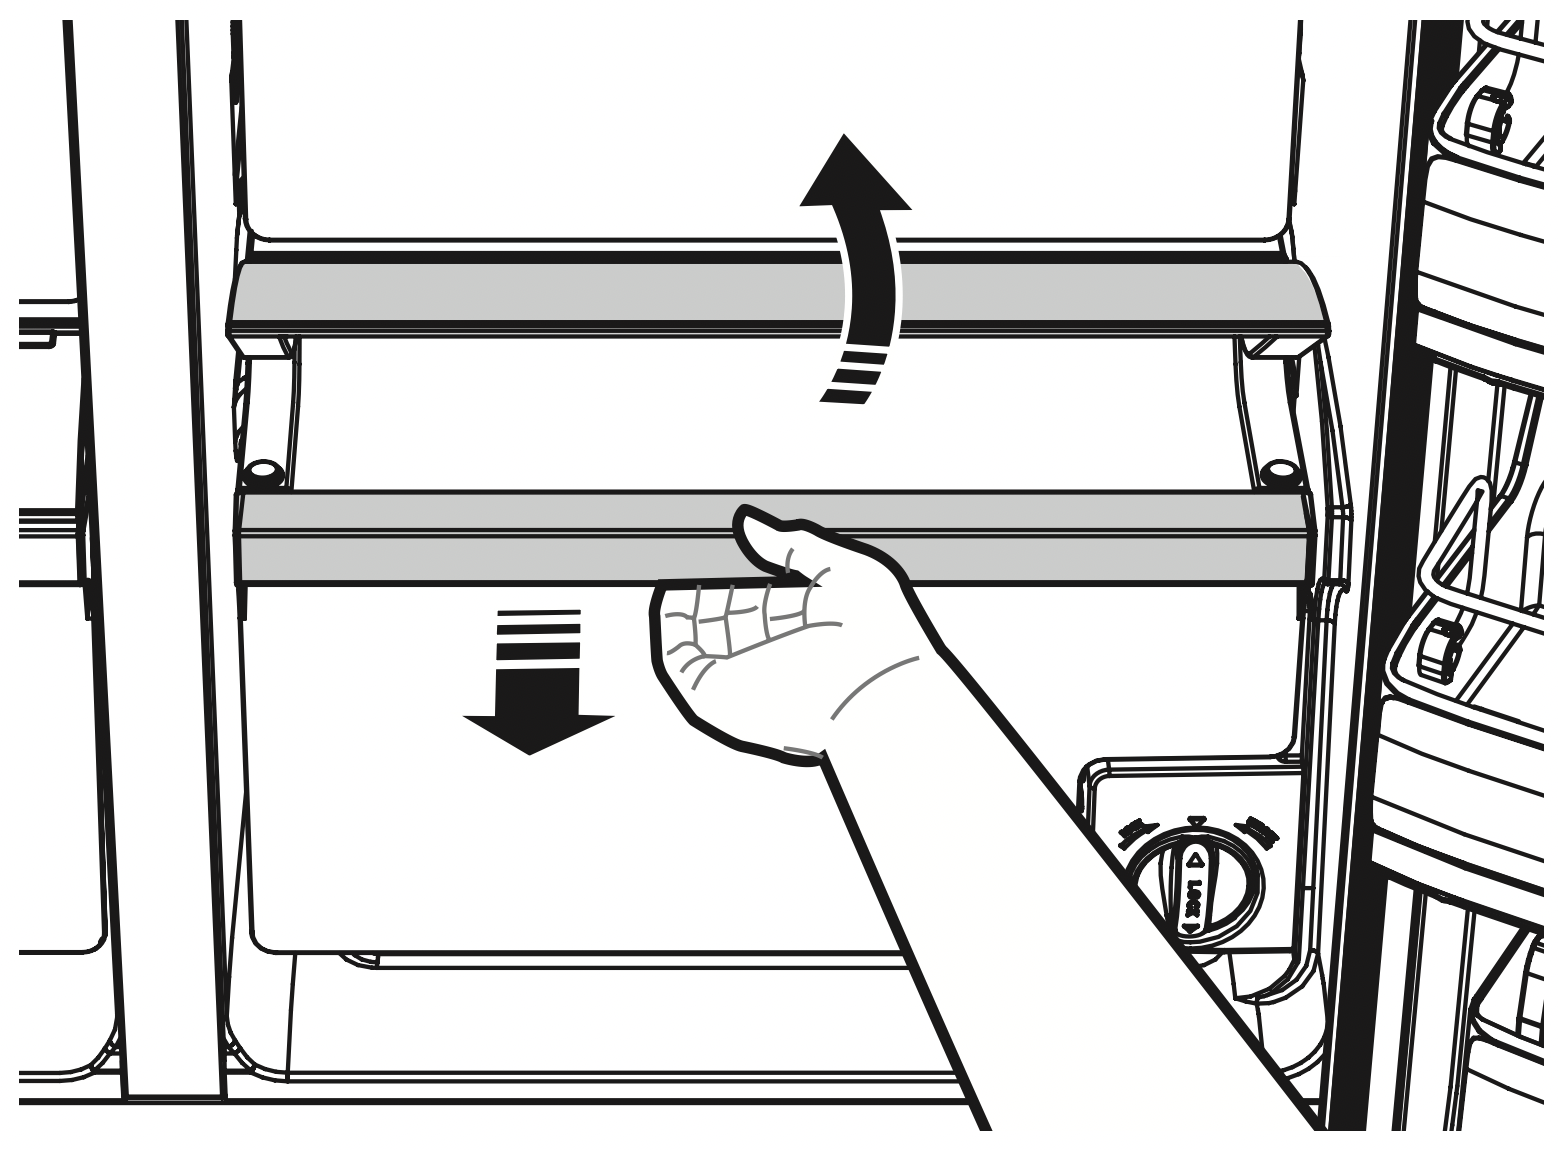
1. Shelves (Freezer/Fridge)
- Open the door completely and then lift up the shelf as you pull it out to remove it.
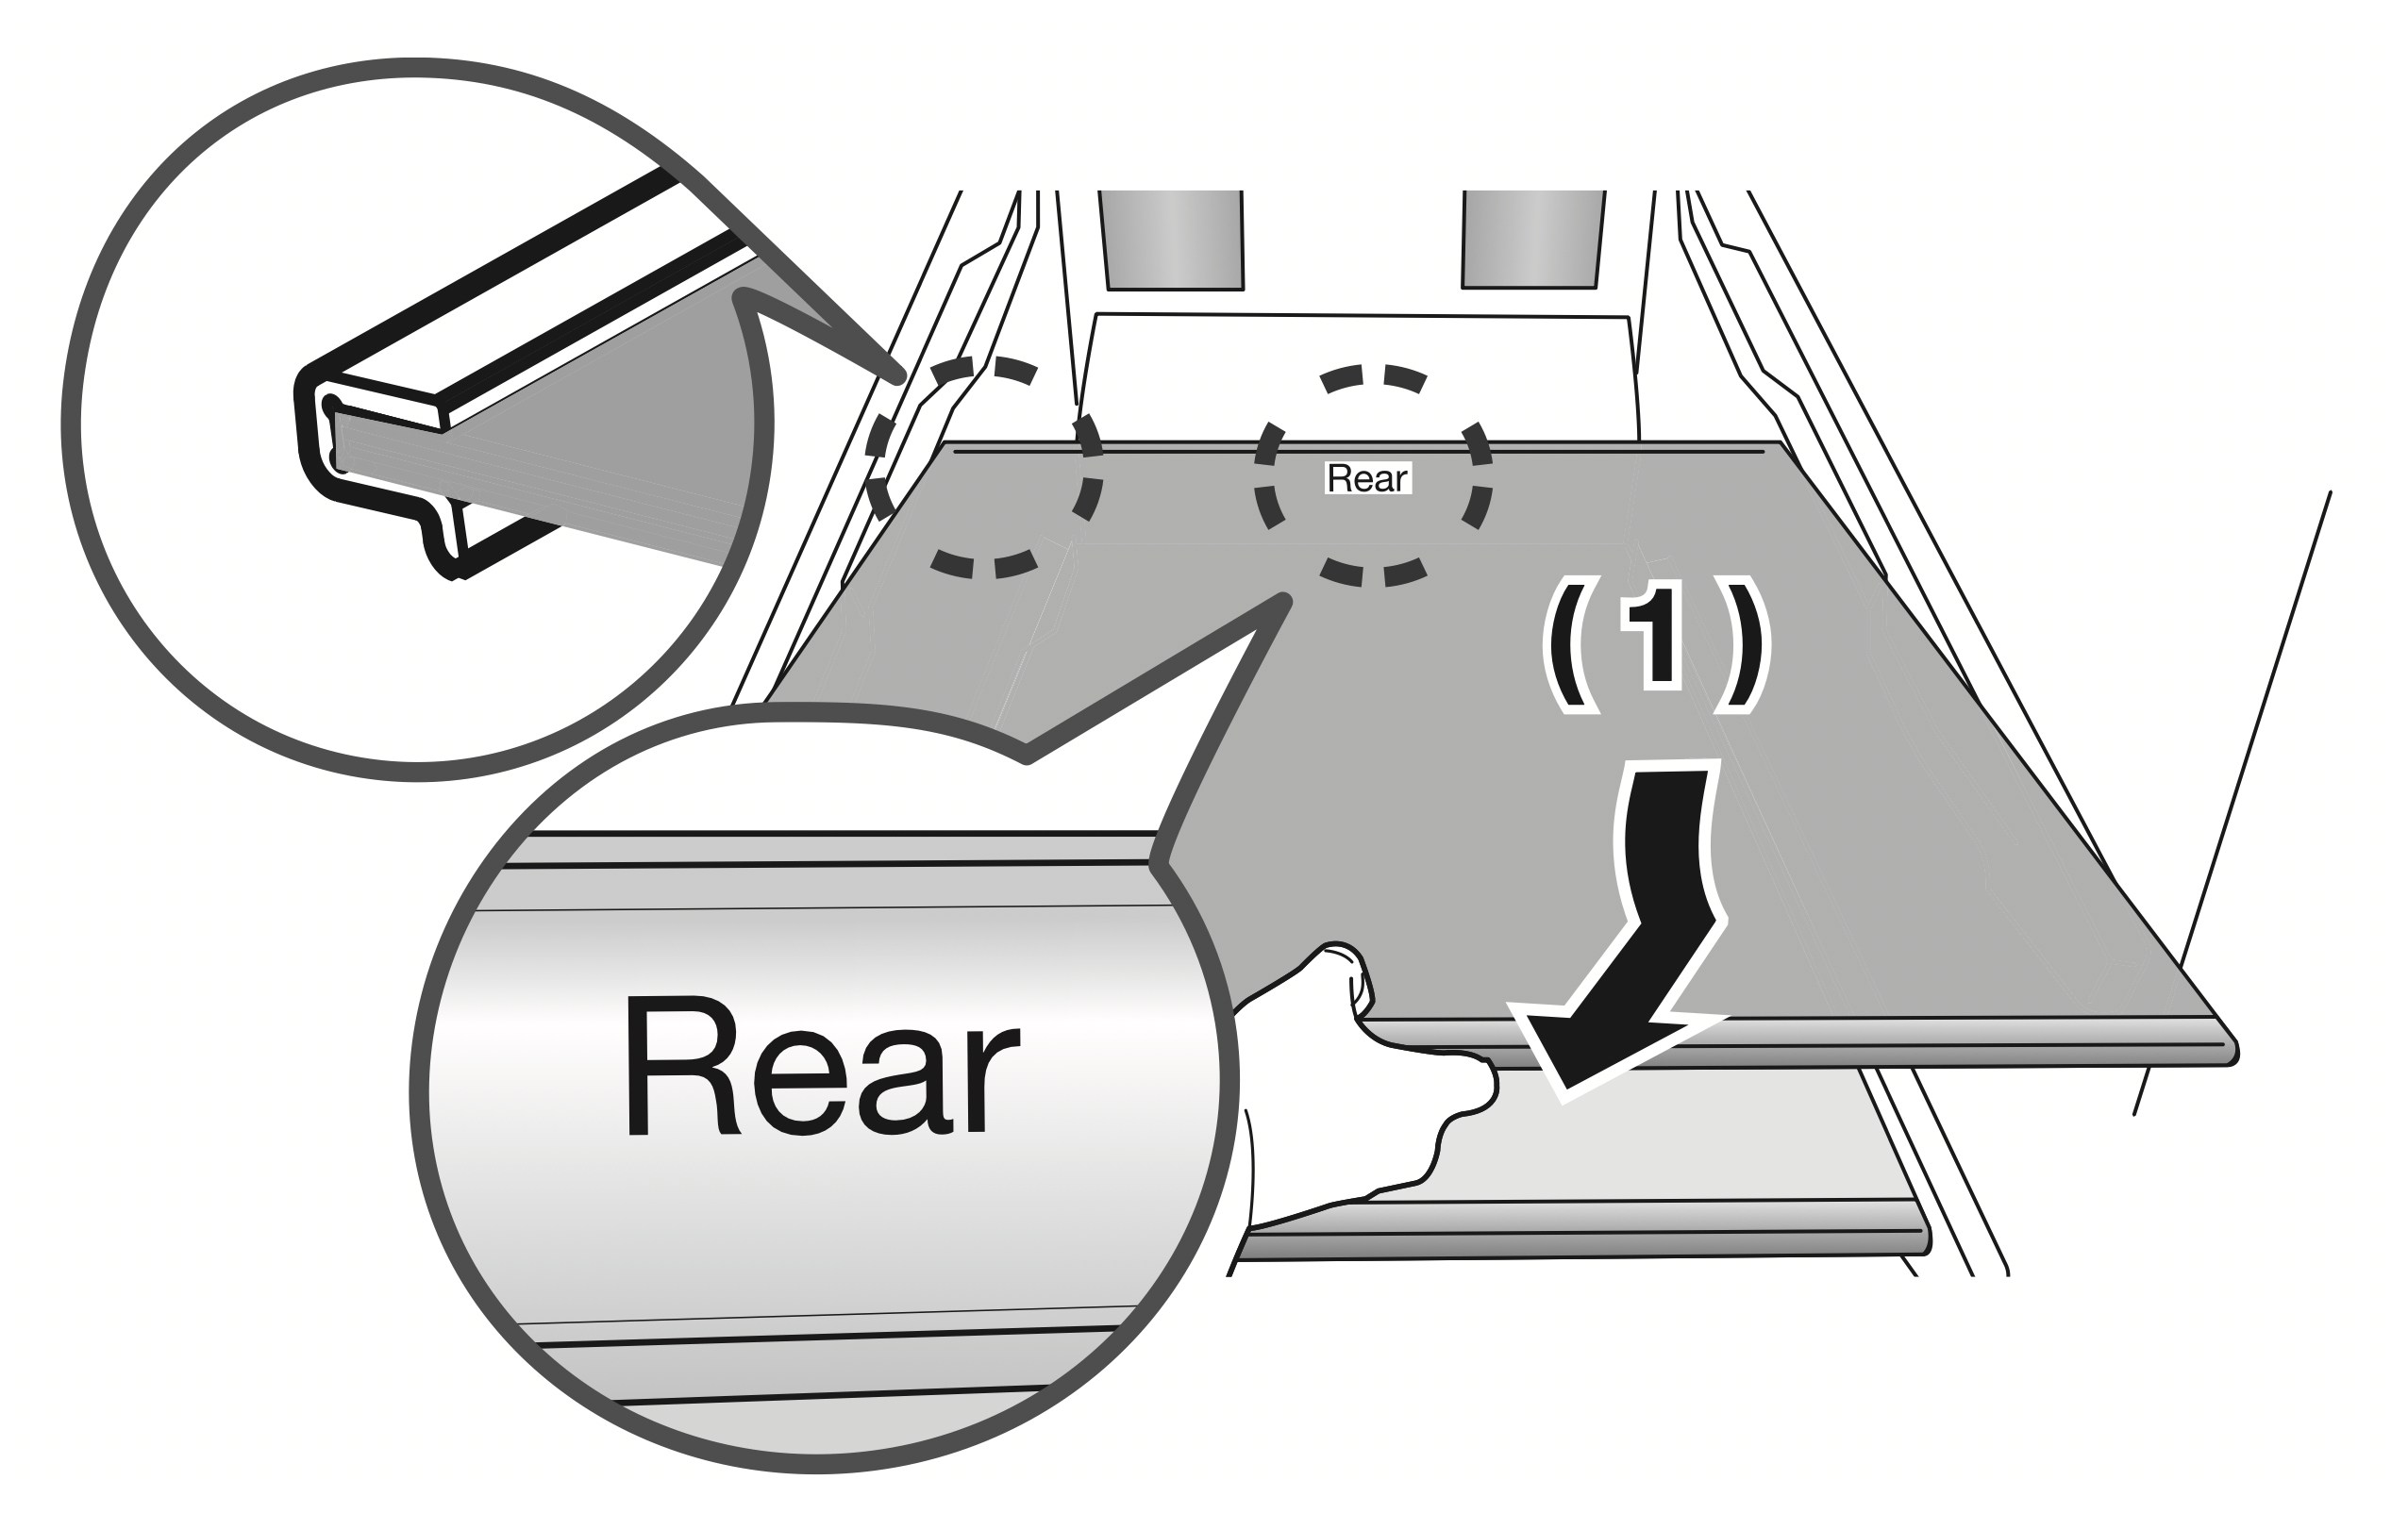
- If you are unable to open the door completely, pull out the shelf, lift it up, and turn it to remove it.
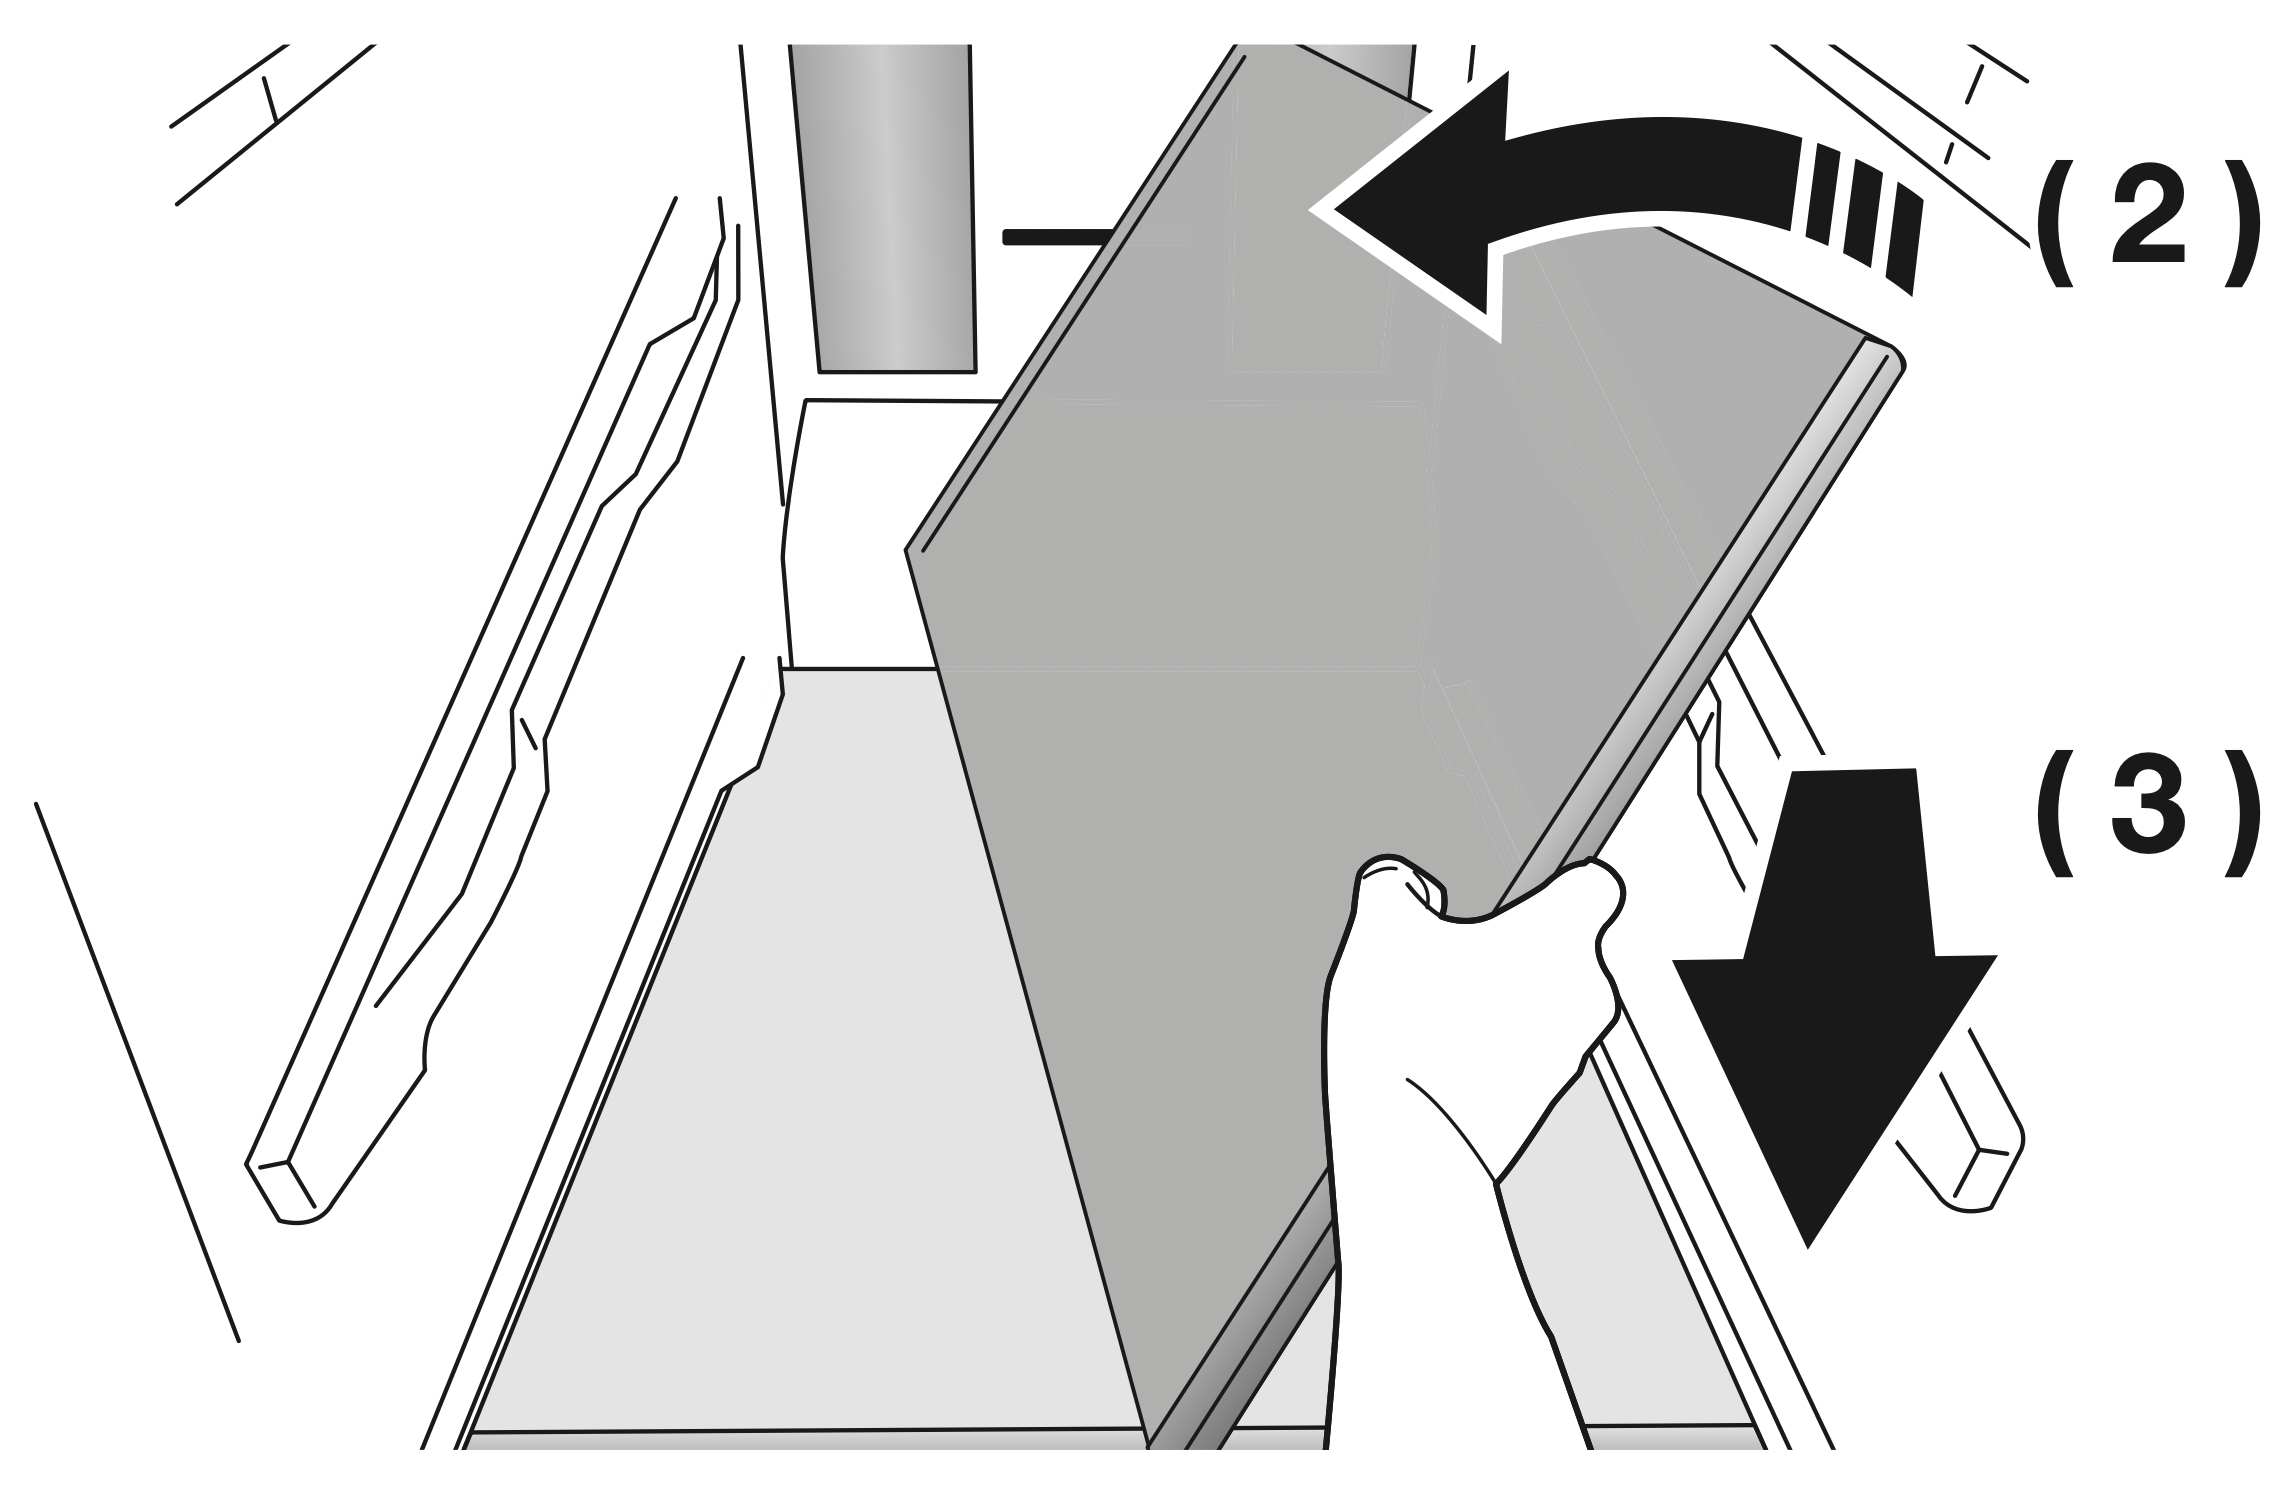
CAUTION: Be careful not to insert the shelf upside down.
NOTE: Glass containers can scratch the surface of the glass shelves.
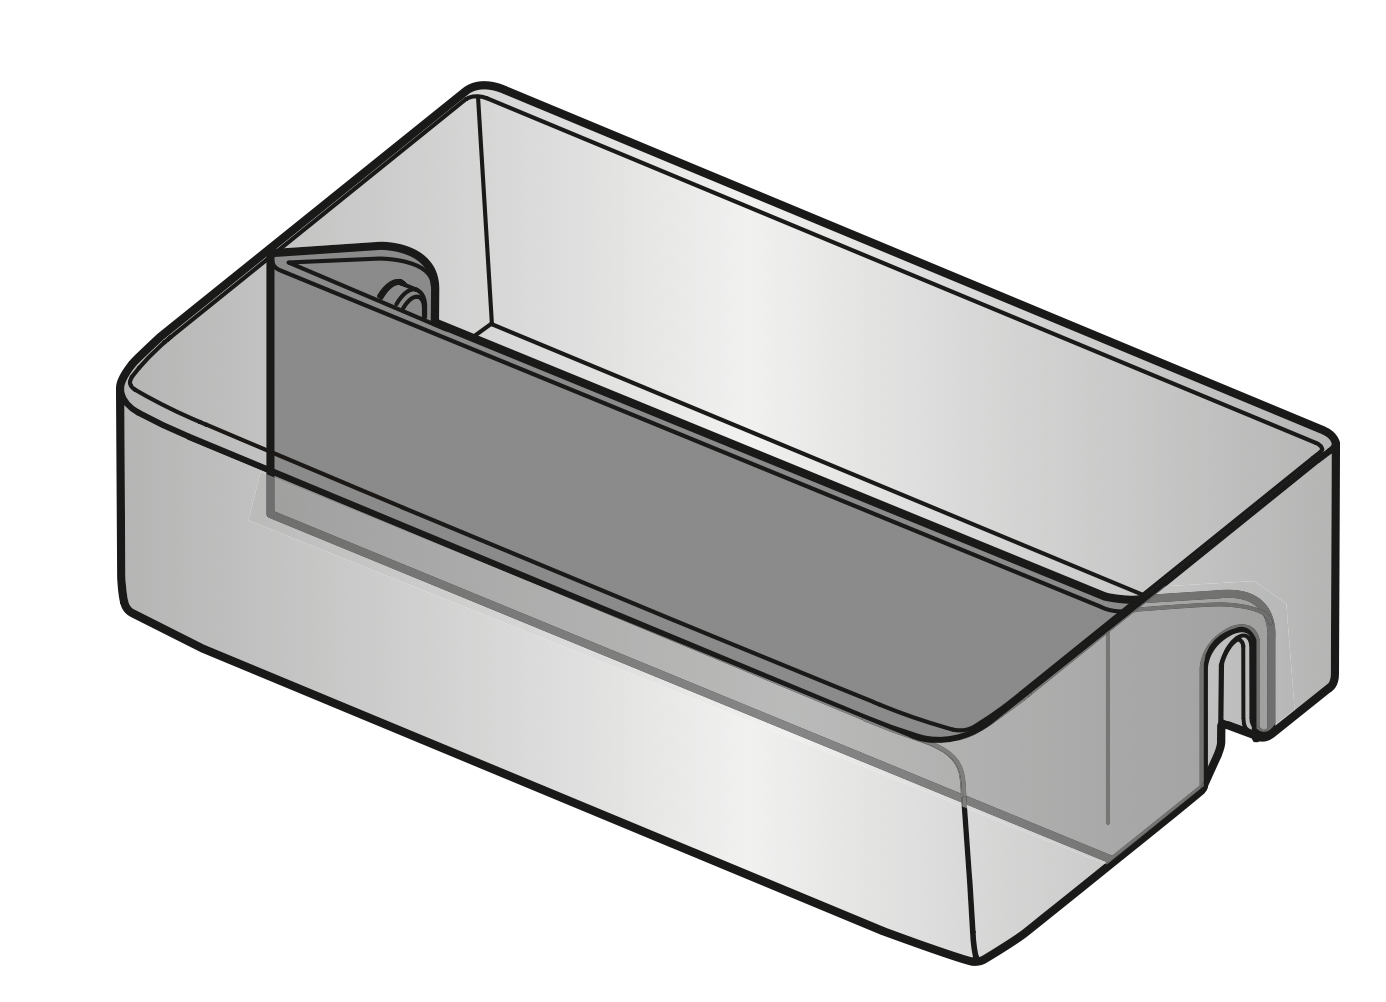
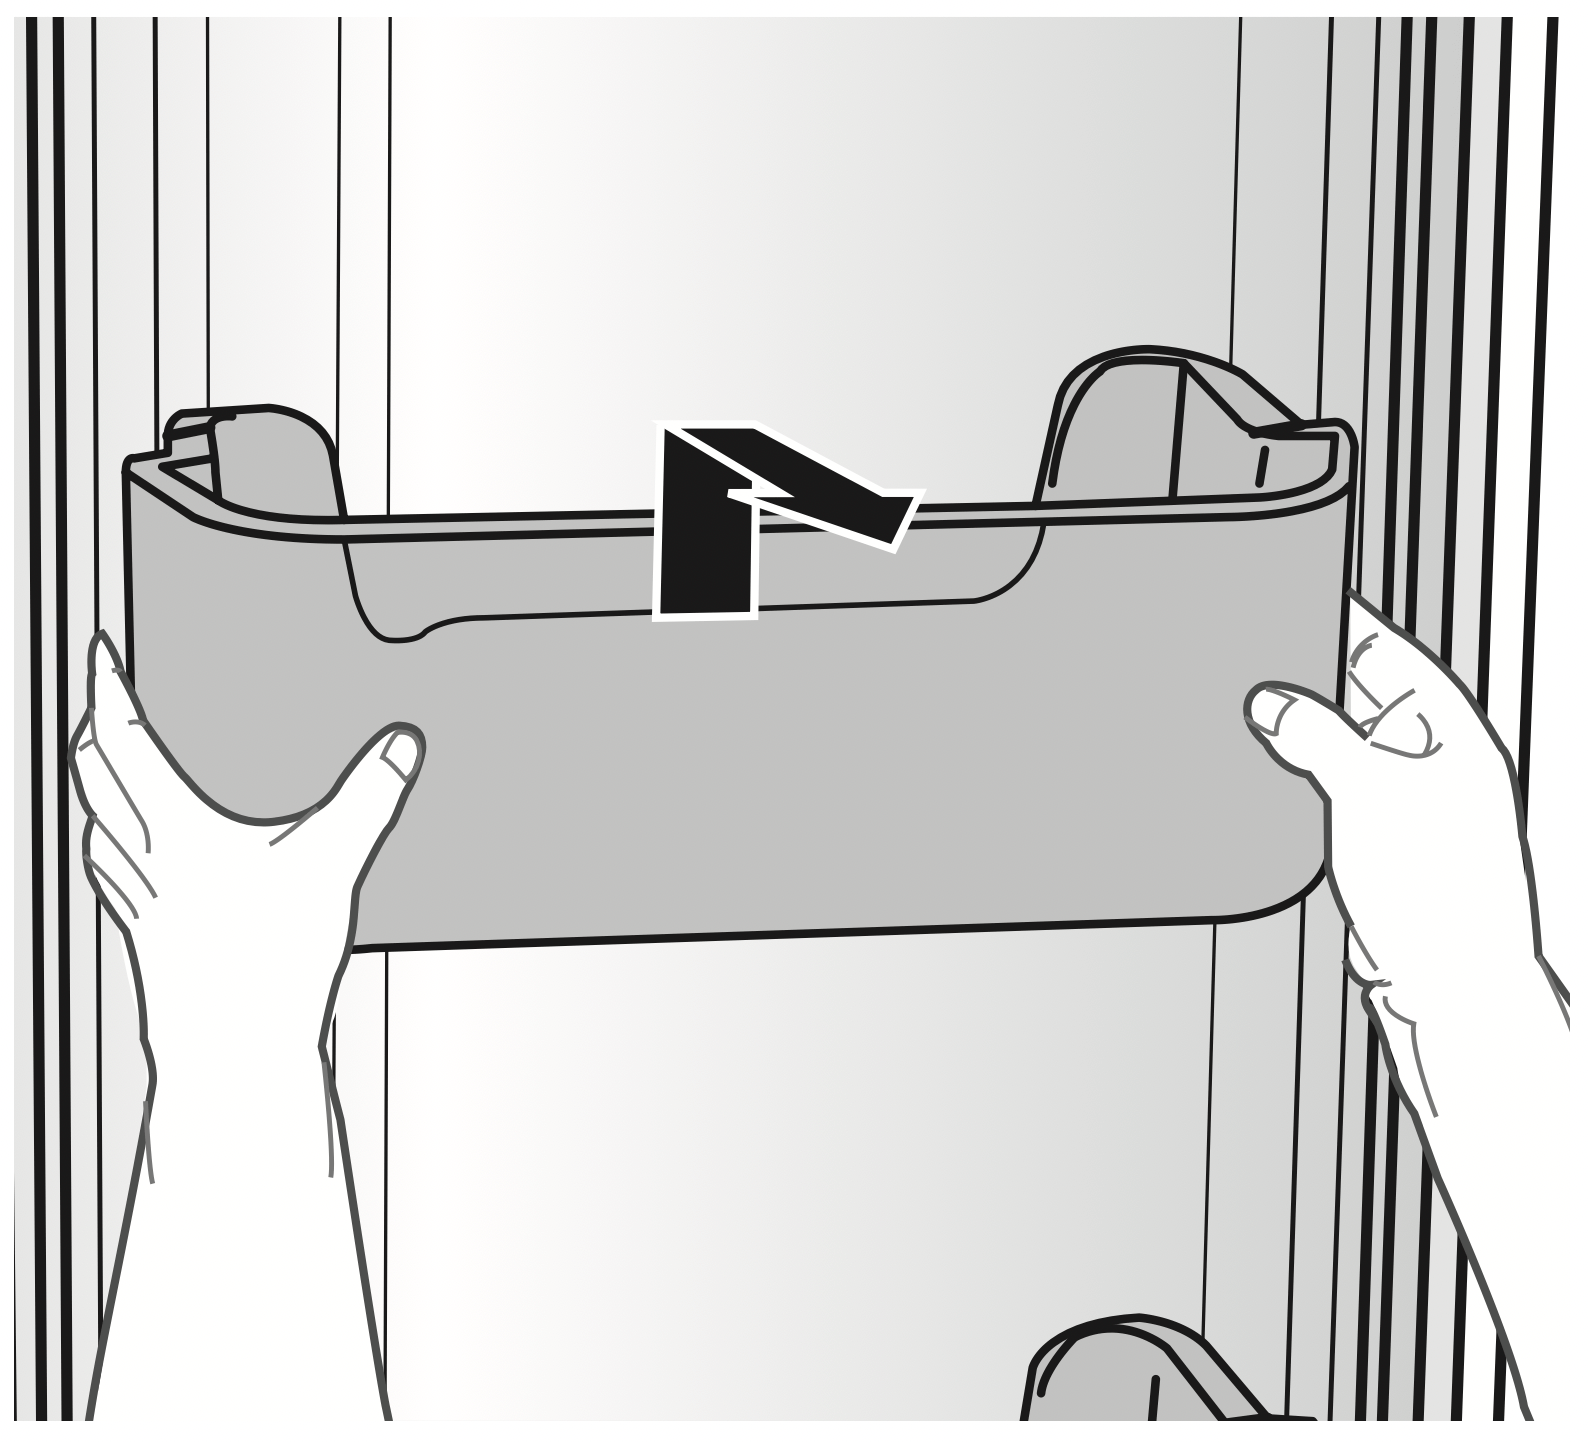
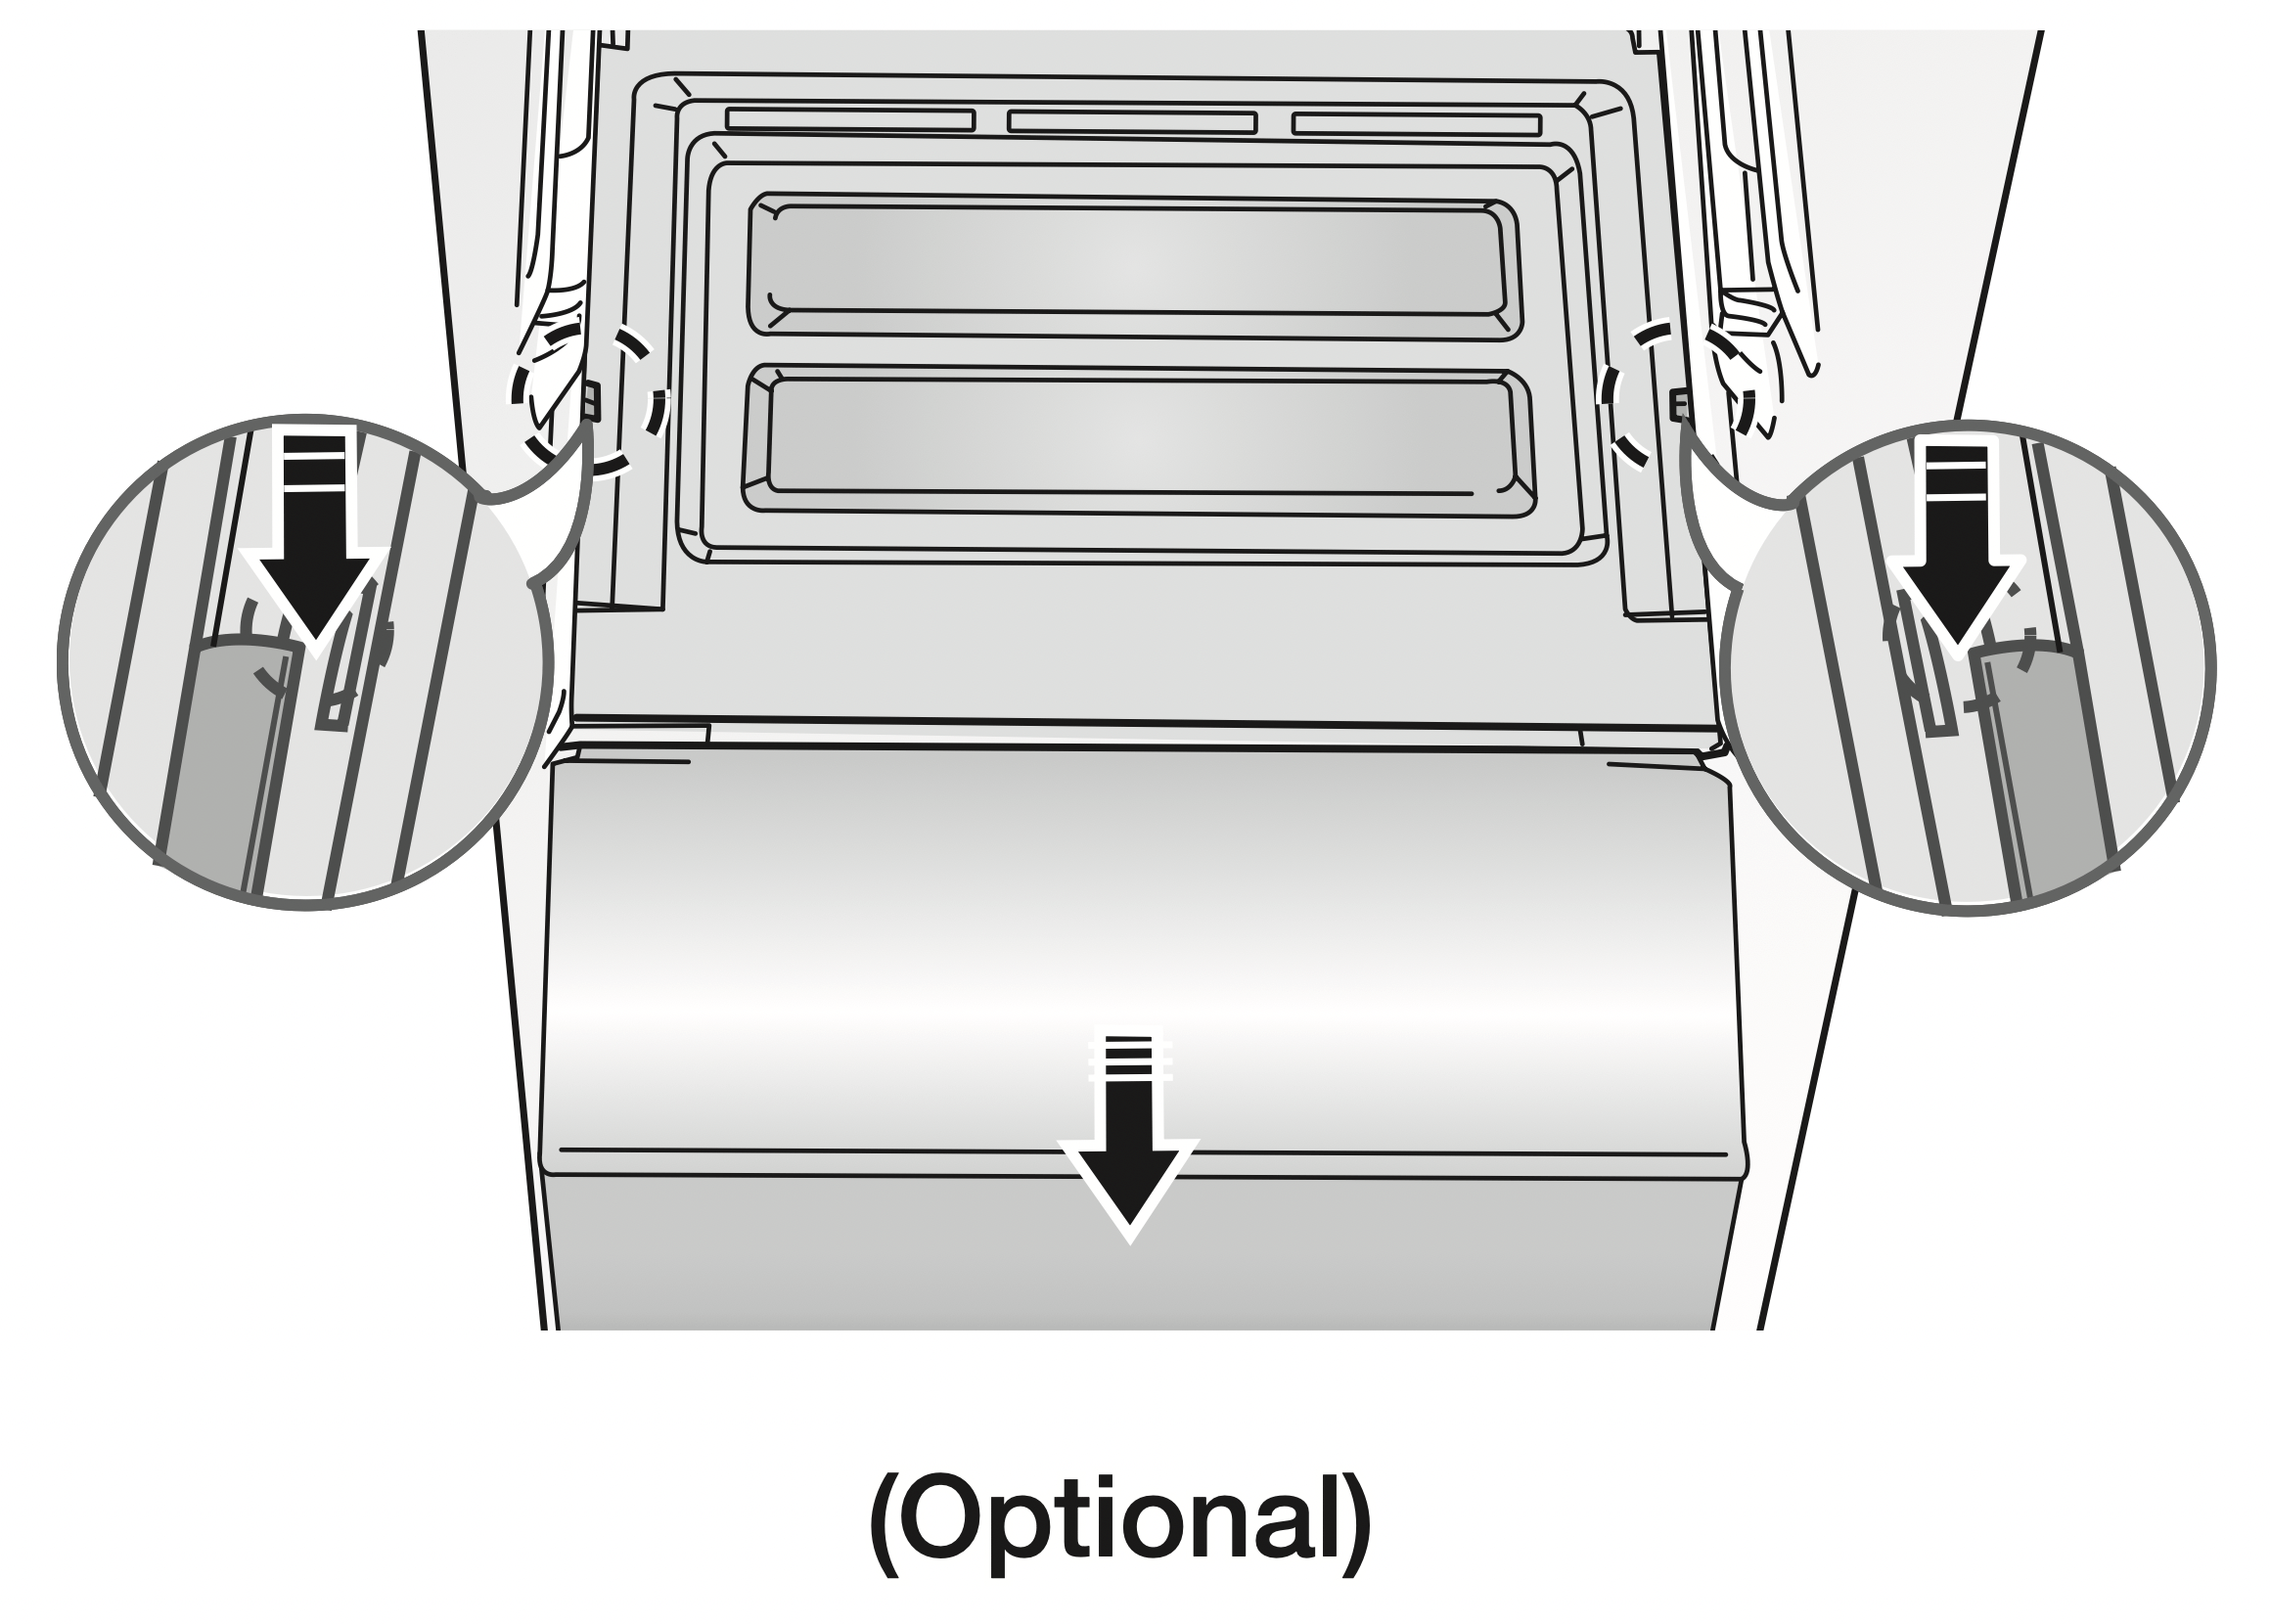
2. Door Bins
- To remove a Door Bin, hold the bin with both hands, and then gently lift it up.
3. Drawers
- To remove a Drawer, pull the drawer out, and then lift it up slightly.
4. Vegetable Bin/Dry Bin Cover
- Take out the bin above the Vegetable Bin (refrigerator)/Dry Bin (freezer).
- Press down on the clips on either side of the Vegetable Bin (refrigerator)/Dry Bin (freezer) and pull it out towards you.
5. Vegetable Bin/Dry Bin
- Before taking out the Vegetable Bin/Dry Bin, you need to remove the multipurpose compartments from the door.
- Lift the bin up slightly as you pull it out.
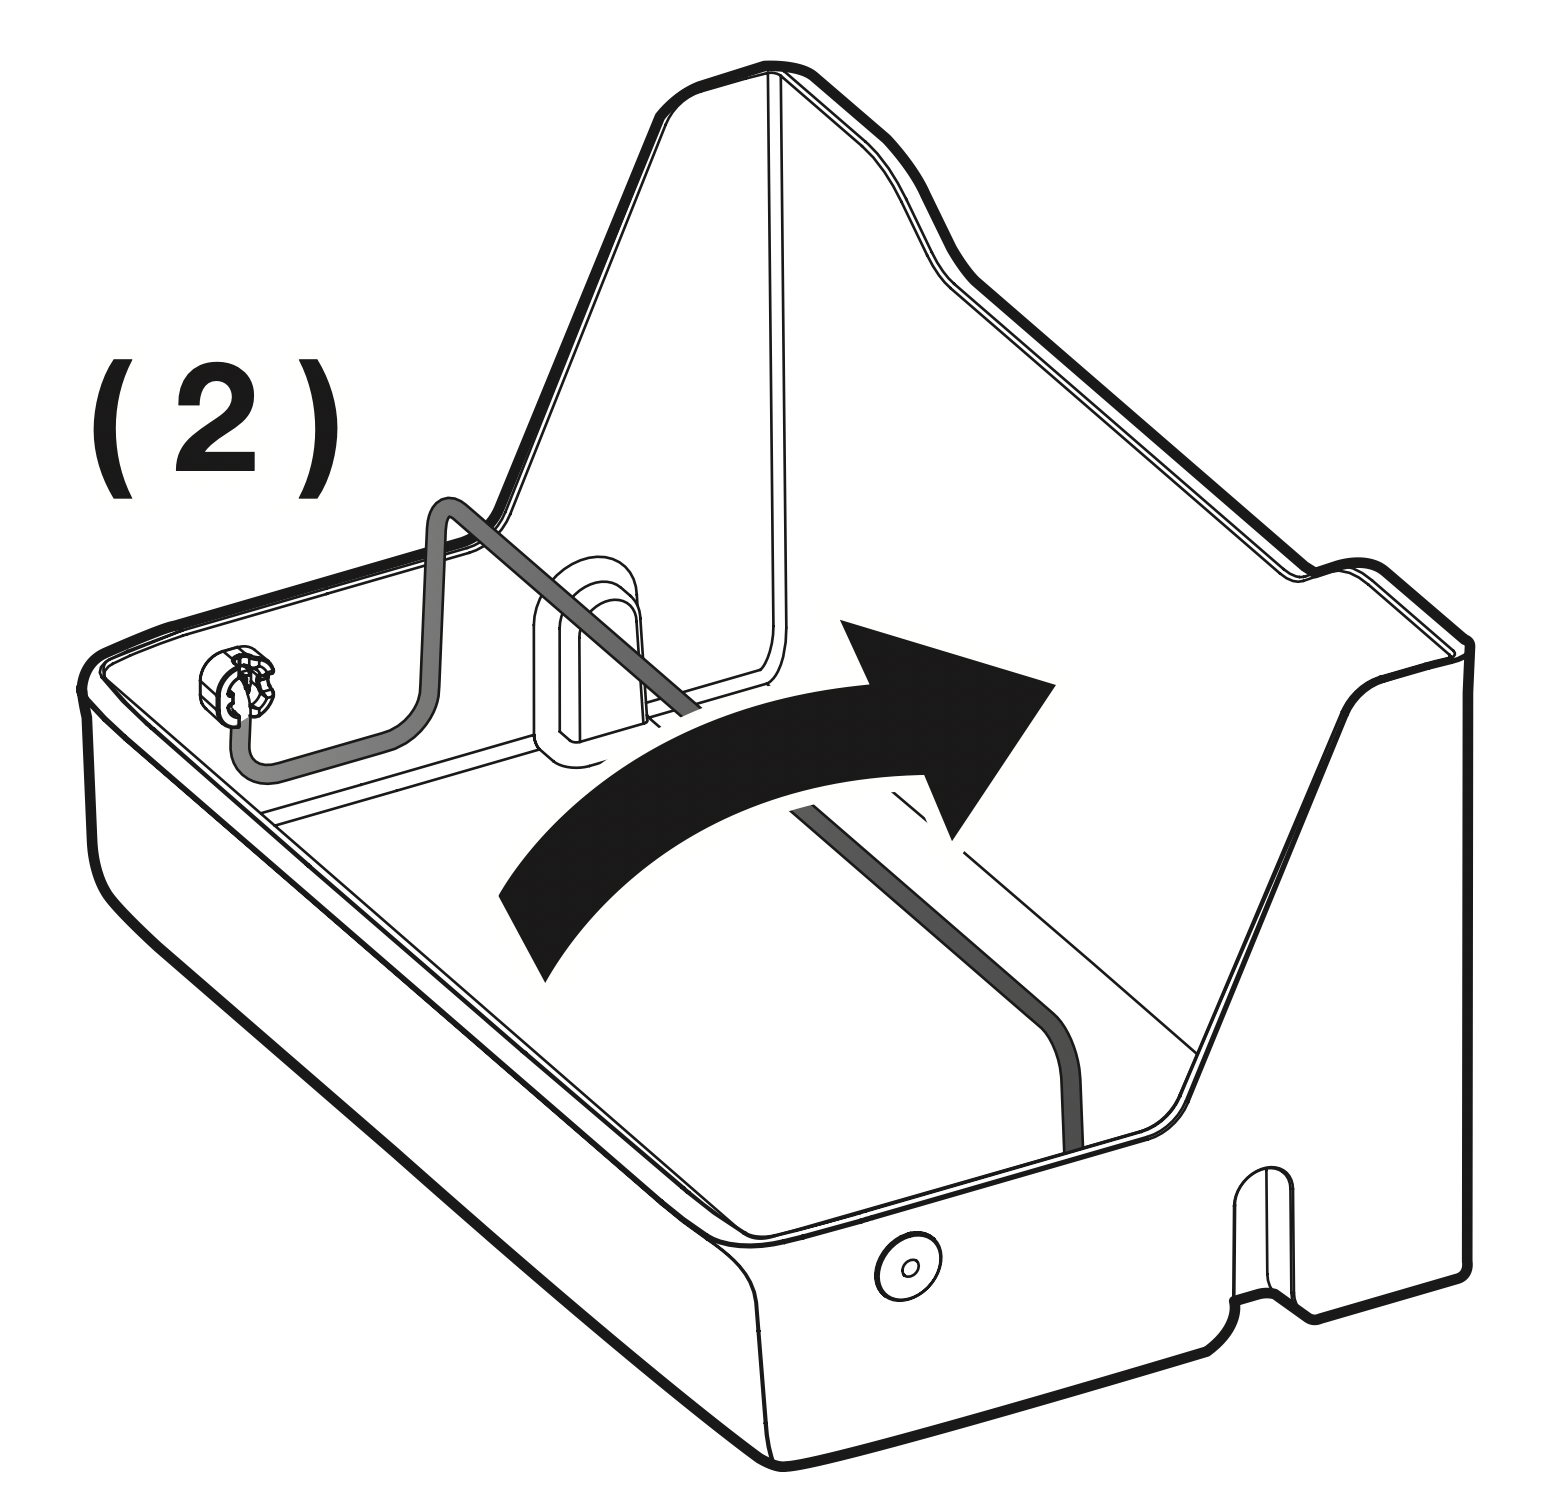
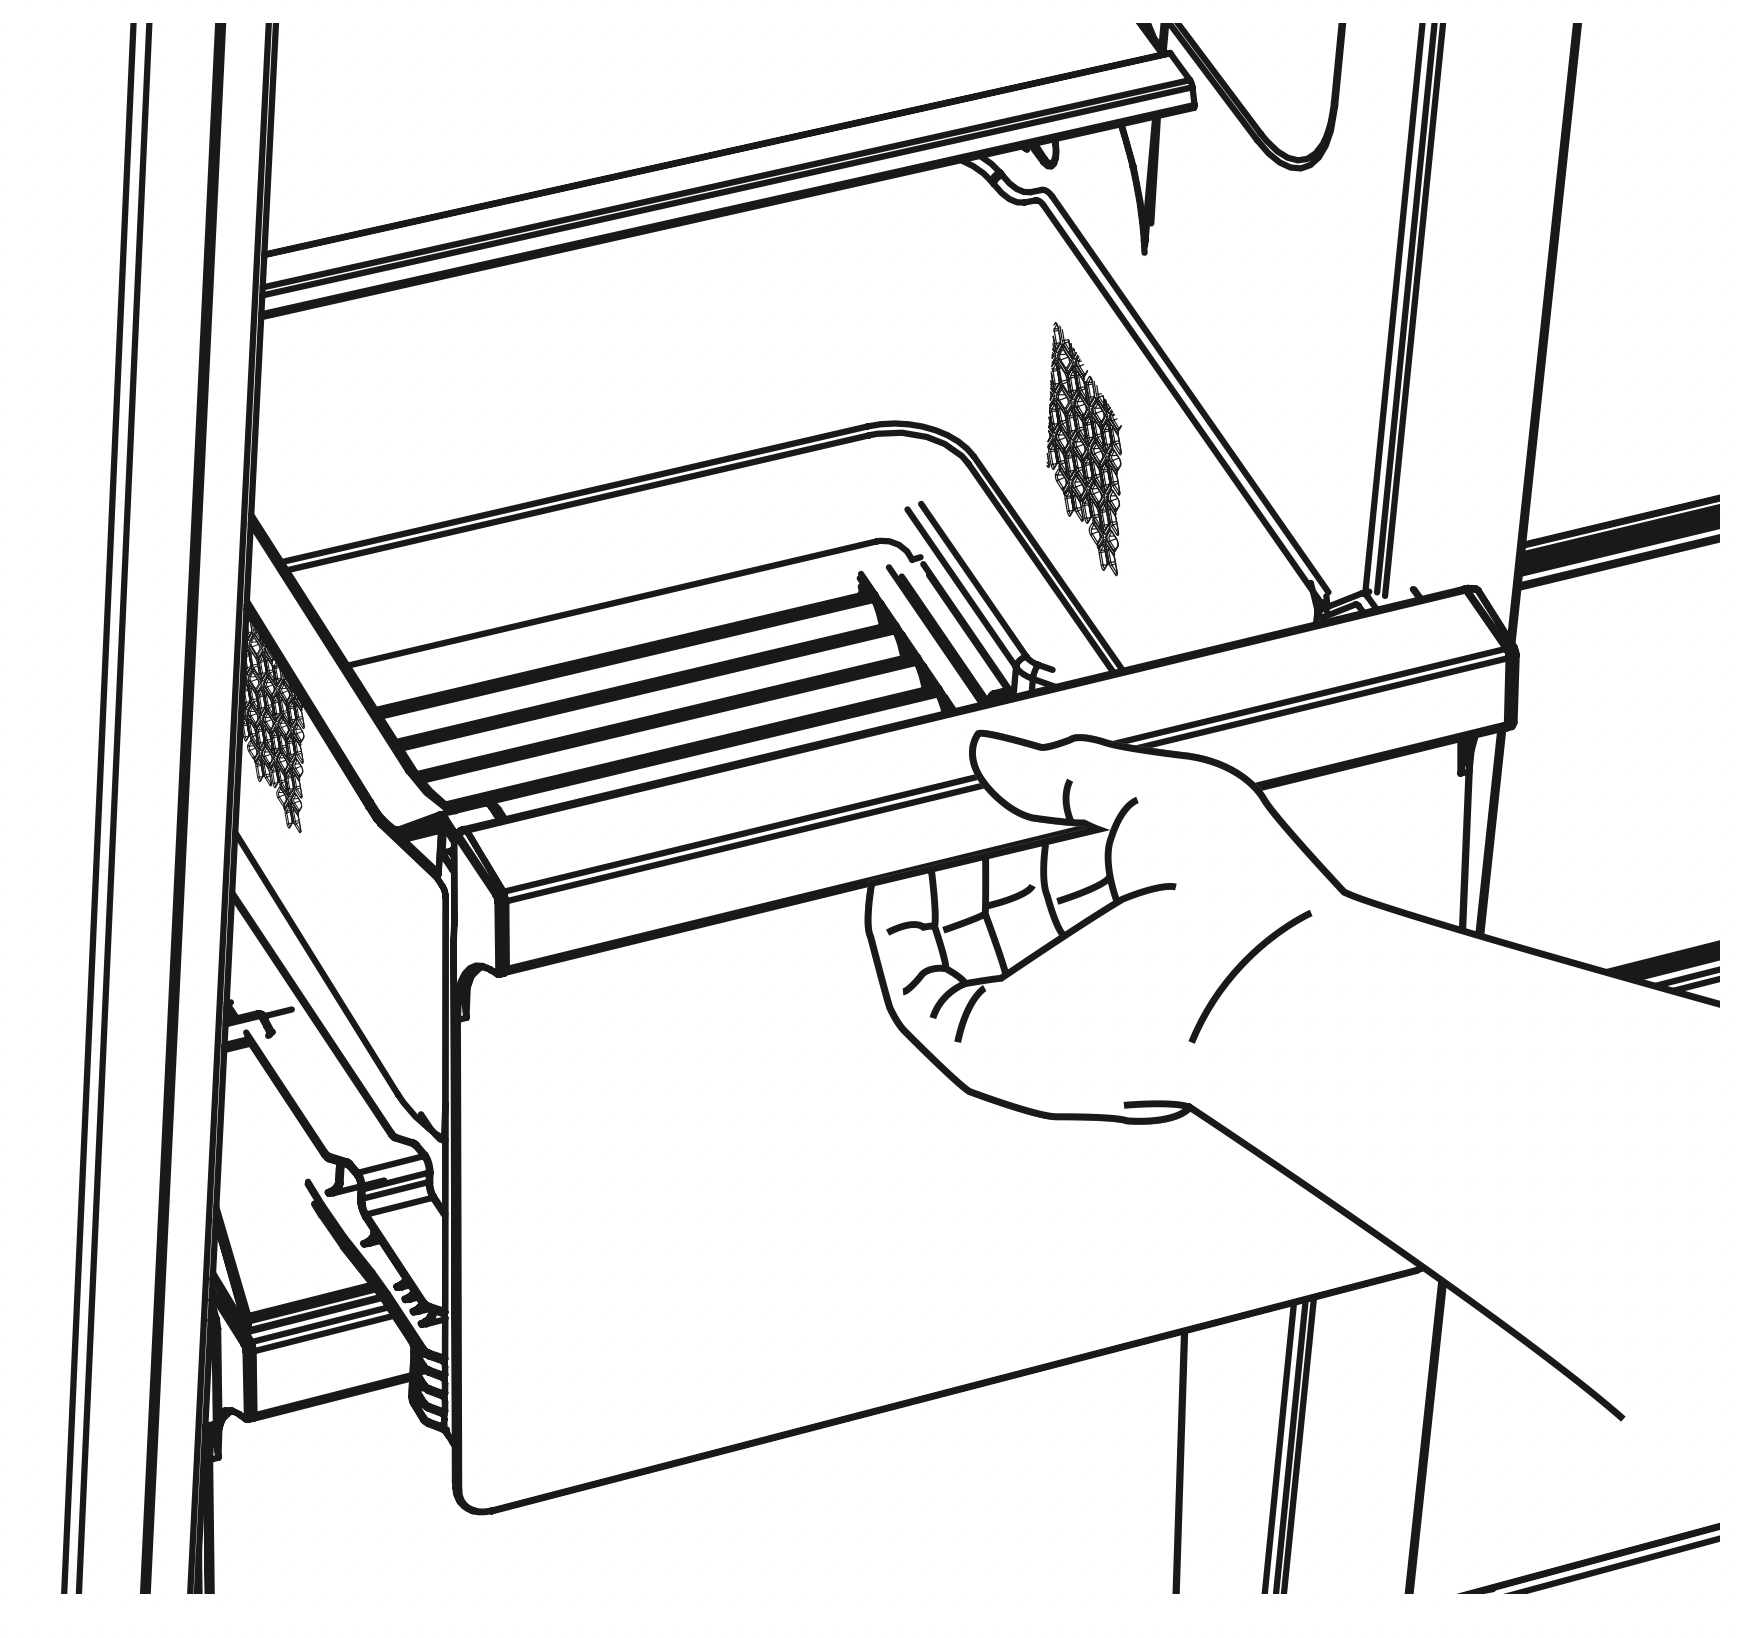
6. Ice Bucket (Freezer)
- Remove the Icemaker Bucket by lifting it up and pulling it out slowly.
- Grip the handle as shown in the figure.
- Remove the Ice Bucket slowly to prevent damage.

NOTE: Do not use excessive force when removing the drawer cover.
You can break the cover and cause injury.
NOTE: Before removing any accessories, make sure that no food is in the way.
When possible, remove the food altogether to reduce the risk of accidents.
7. Removing the Deodorizer
- Pull out the shelf slightly and then pull out the unit while pushing the deodorizer cover clip up using a flathead screwdriver.

8. Cleaning the Deodorizer
- The Deodorizer helps remove odors from the refrigerator.
The deodorizing function may diminish over time.
However, you can prolong its lifespan, if you wash and dry the Deodorizer as below.
- Wash the Deodorizer with clean water once every two years or whenever you feel its performance has diminished.
- Dry the deodorizer under the sun for 24 hours and then replace it in the reverse order of its removal.
CLEANING THE REFRIGERATOR
WARNING
Do not use benzene, thinner, Clorox, or car detergent to clean the refrigerator.
They can damage the surface of the appliance and may cause a fire.
Do not spray the refrigerator with water while it is plugged in.
This can cause an electric shock.
To clean the refrigerator, follow these steps:
To Clean the Refrigerator
- Unplug the power cord of the refrigerator.
- Slightly dampen a soft, lint-free-free cloth or paper towel with water.
NOTE: Do not use any kind of detergent to clean the refrigerator
Detergent can discolor or damage the refrigerator.
- Wipe the inside and outside of the refrigerator until it is clean and dry.
- Plug the power cord of the refrigerator back in.
CHANGING THE INTERIOR LIGHTS
Freezer / Fridge LED Lamp
- If the LED Lamp Cover is stained with foreign substances, the LED lamp may not look bright. Wipe the surface cover with a clean, dry cloth to return the light to full brightness.
CAUTION
Do not disassemble or replace the LED type lighting yourself.
To replace the LED lights, contact a Samsung service center or your authorized Samsung dealer.
NOTE: If you attempt to replace the LED lamps yourself, you risk subjecting yourself to an electric shock or serious personal injury.
TO IMPROVE THE COOLING PERFORMANCE
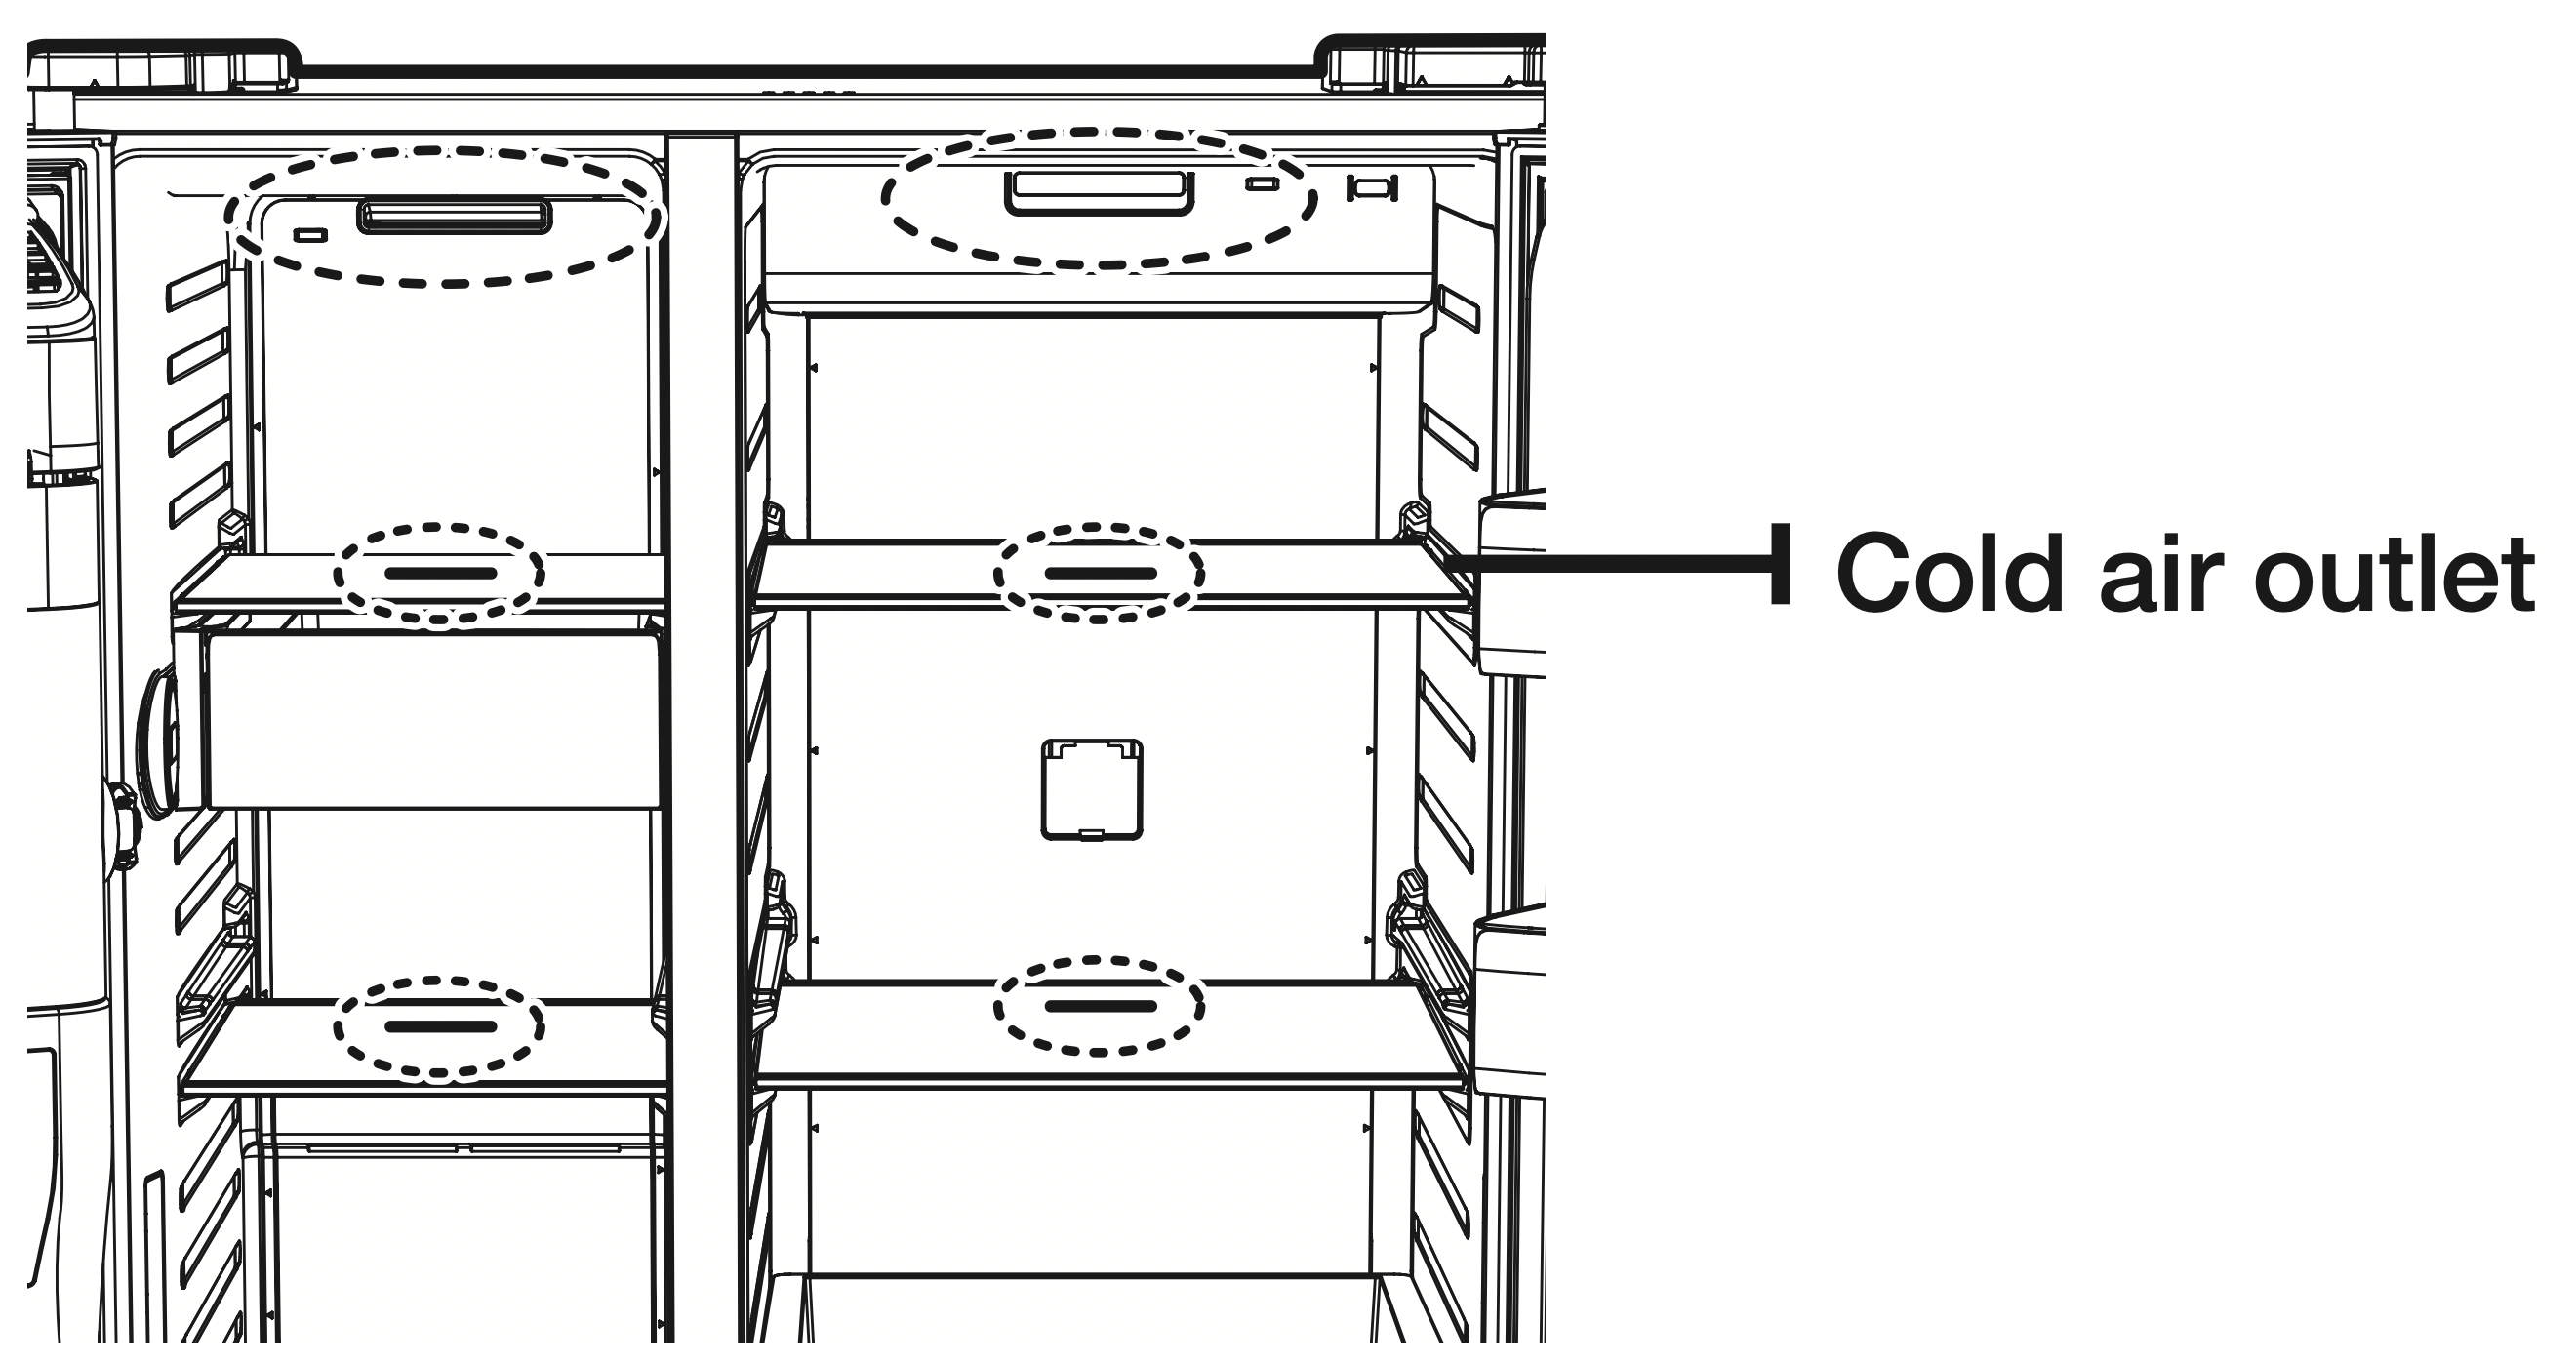
NOTE: Do not block the cold air outlets with food. If the cold air outlets are blocked, cold air cannot penetrate the entire compartment and will be unable to freeze the food efficiently, resulting in a degraded cooling performance.
CHANGING THE WATER FILTER
WARNING
To reduce risk of water damage to your property DO NOT use generic brands of water filers in your SAMSUNG Refrigerator.
USE ONLY SAMSUNG BRAND WATER FILTERS. SAMSUNG is not legally responsible for any damage, including, but not limited to property damage caused by water leakage from the use of a generic water filter.
SAMSUNG Refrigerators are designed to work ONLY WITH SAMSUNG Water Filters.
How to Change the Water Filter
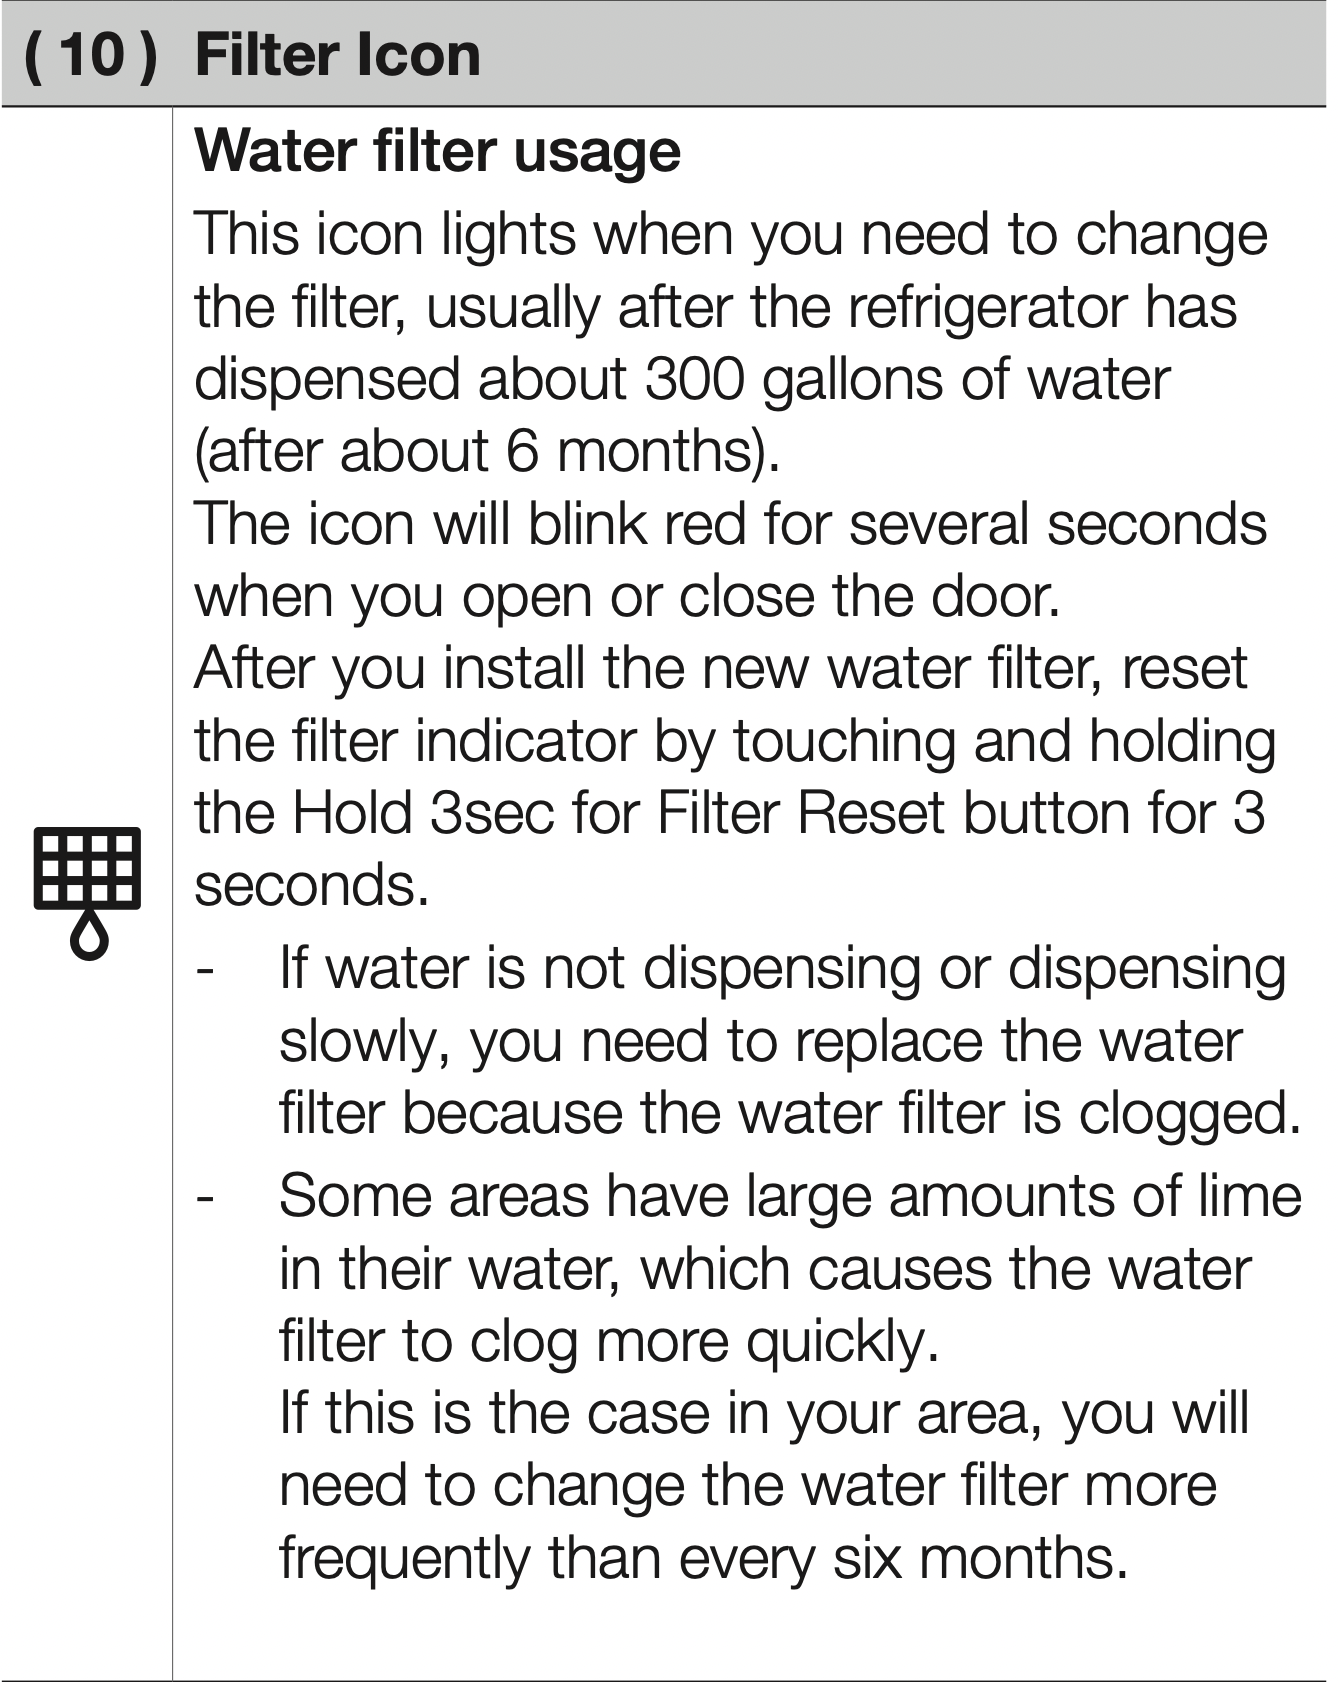
The “Filter Indicator” light lets you know when it is time to change your water filter cartridge.
To give you preparation time to get a new filter, the red light will come on just before the capacity of the current filter runs out.
Changing the filter on time provides you with the freshest, cleanest water from your fridge.
To change the water filter, follow these steps:
- Turn the water filter 90˚ counterclockwise.
- Pull the water filter from the filter housing.
- Insert the new water filter inside the filter housing.
- Turn the new water filter 90˚ clockwise.
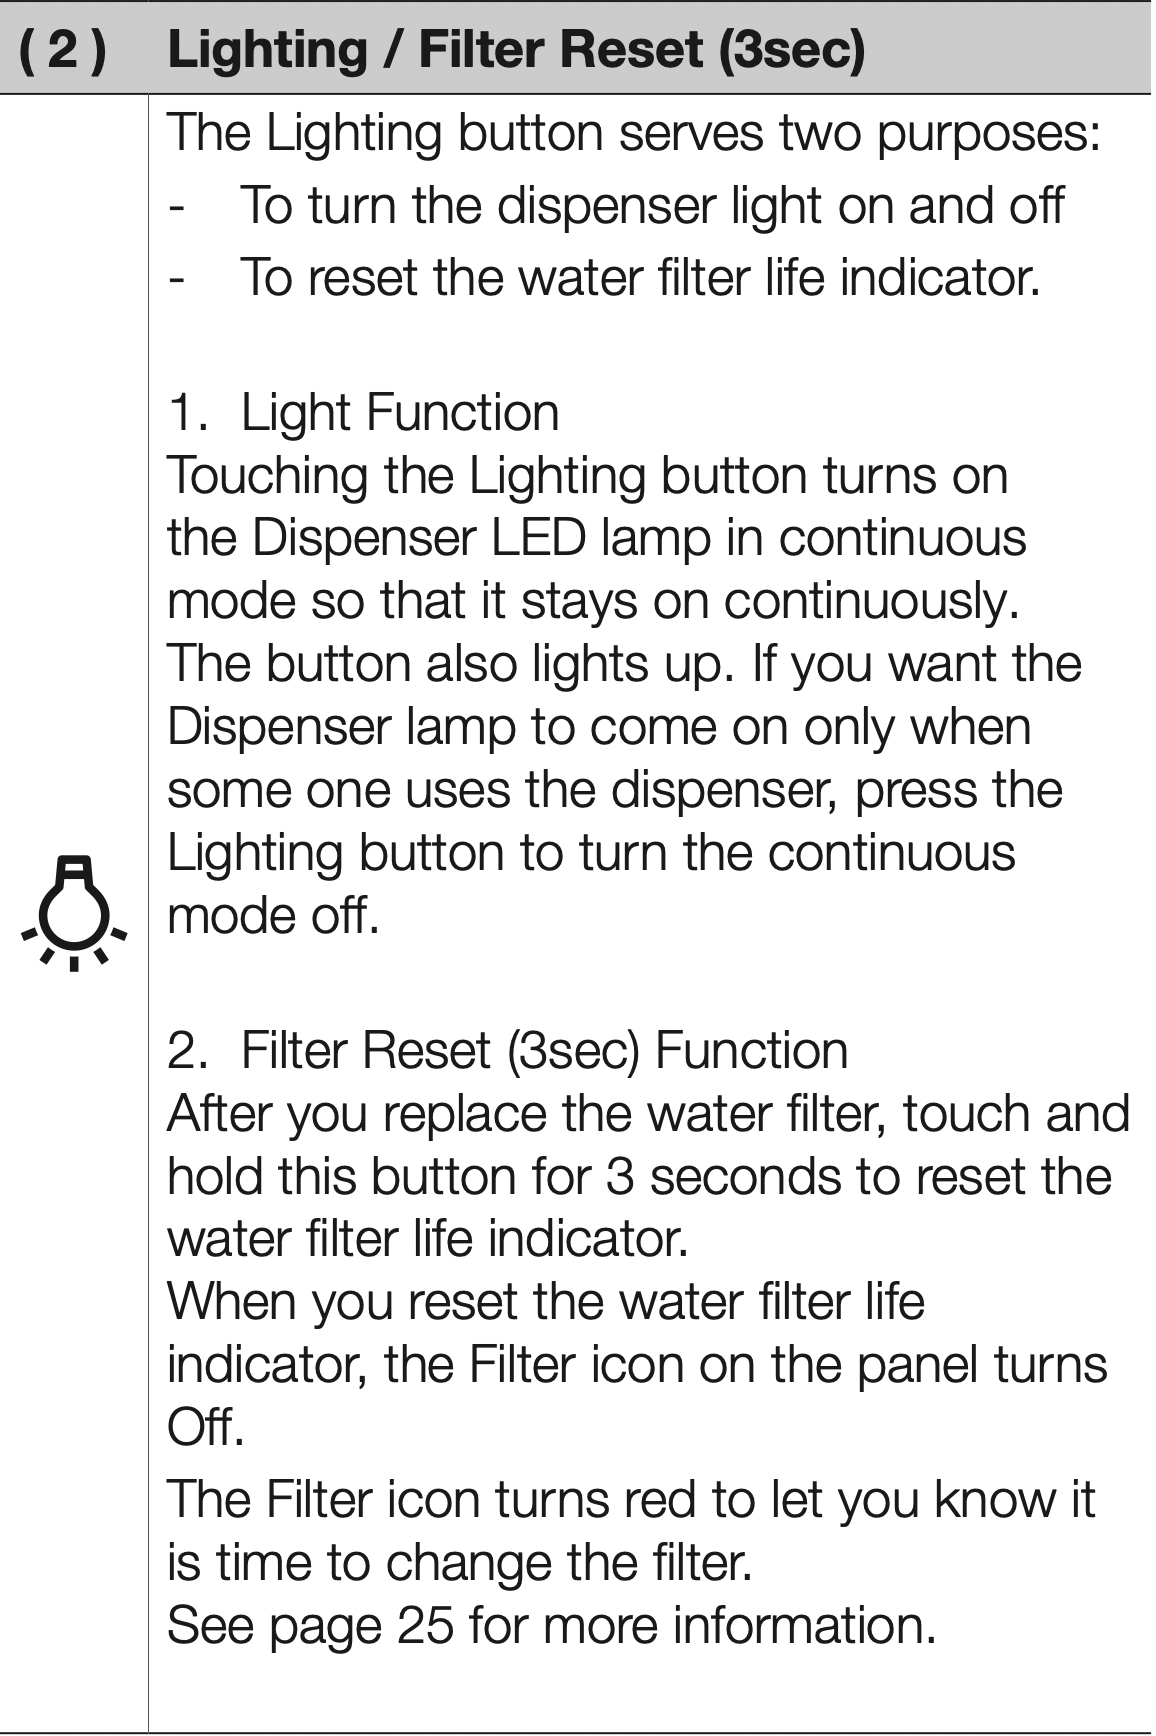
- Press the “Lighting/hold 3 sec” button (
 ) for about 3 seconds to reset the water filter.
The color of indicator changes from red to light off.
NOTE: A newly installed water filter cartridge may cause water to briefly spurt from the water dispenser.
This is due to air getting into the line.
It should pose no problem to operation.
CAUTION
When you replace the water filter, water can drip from the bottom front of the refrigerator.
Make sure to clean up any drips or spills after you have changed the filter.
Removing residual matter inside the water supply line after installing a new filter
- Press the Water button, and then push the Dispenser Lever with a cup or glass.
- Flush 1 gallon of water through the filter, one cup or glass at a time. (Flush approximately 6 minutes.)
This will clean the water supply system and remove air from the lines.
Additional flushing may be required in some households.
- Open the refrigerator door and make sure there are no water leaks coming from the water filter.
Reverse Osmosis Water Supply IMPORTANT :
The pressure of the water supply coming out of a reverse osmosis system going to the water inlet valve of the refrigerator needs to be between 35 and 120 psi (241 and 827 kPa).
If a reverse osmosis water filtration system is connected to your cold water supply, the water pressure to the reverse osmosis system needs to be a minimum of 40 to 60 psi (276 to 414 kPa.)
If the water pressure to the reverse osmosis system is less than 40 to 60 psi (276 to 414 kPa):
- Check to see whether the sediment filter in the reverse osmosis system is blocked.
Replace the filter if necessary.
- Allow the storage tank on the reverse osmosis system to refill after heavy usage.
- If your refrigerator has a water filter, it may further reduce the water pressure when used in conjunction with a reverse osmosis system. Remove the water filter.
If you have questions about your water pressure, call a licensed, qualified plumber.
Ordering replacement filters
To order more water filter cartridges, contact your authorized Samsung dealer.
Troubleshooting
|
PROBLEM
|
SOLUTION |
|
The refrigerator does not work at all or it does not chill sufficiently.
|
- Check that the power plug is properly connected.
- Is the temperature control on the display panel set to the correct temperature?
Try setting it to a lower temperature.
- Is the refrigerator in direct sunlight or located too near a heat source?
If so, it may not be able to cool sufficiently. Install it in a location that is out of direct sunlight and not near a heat source.
- Is the back of the refrigerator too close to the wall, preventing proper ventilation?
If so, it may not be able to cool sufficiently. Keep it an appropriate distance from the wall.
- Is there too much food inside so that the food is blocking the outlet vent?
To keep the refrigerator at a suitable temperature, do not fill the refrigerator with too much food.
|
|
The food in the fridge is frozen.
|
- Is the temperature control on the display panel set to the correct temperature?
Try setting it to a warmer temperature.
- Is the temperature in the room very low?
- Did you store the food with a high water content in the coldest part of the fridge?
Try moving those items into the body of the fridge instead of keeping them in the Cool Select Zone™ drawer.
|
|
You hear unusual noises or sounds.
|
- Check that the refrigerator is level and stable.
- Is the back of the refrigerator too close to the wall and therefore keeping air from circulating?
- Was anything dropped behind or under the refrigerator?
- A “ticking” sound is heard from inside the refrigerator. This is normal and occurs because various accessories are contracting or expanding inrelation to the temperature of the refrigerator interior.
|
|
The front corners of the appliance are hot and condensation is occurring.
|
- Some heat is normal as anti-condensators are installed in the front corners of the refrigerator to prevent condensation.
- Is the refrigerator door ajar?
Condensation can occur when you leave the door open for a long time.
- Water condensation in the drawer may occur when storing vegetables and it will be removed naturally as time passes.
|
|
Ice is not dispensing.
|
- Did you wait for 12 hours after installation of the water supply line before making ice?
It may take longer to make ice if it is not sufficiently cool, such as when first installed.
- Is the water line connected and the shut-off valve open?
- Did you manually stop the ice making function?
Make sure Ice is set to Cubed or Crushed.
- Is there any ice blocked within the ice maker bucket?
- Is the freezer temperature too warm? Try setting the freezer temperature lower.
|
|
You can hear water bubbling in the refrigerator.
|
- This is normal. The bubbling comes from the refrigerant coolant liquid circulating through the refrigerator.
|
|
There is a bad smell in the refrigerator.
|
- Has a food item spoiled?
- Make sure that strong smelling food (for example, fish) is wrapped so that it is airtight.
- Clean out your freezer periodically and throw away any spoiled food.
When cleaning the inside of the fridge, store food elsewhere and unplug the appliance. Wipe with a dry dishcloth after 2-3 hours and then circulate air inside the refrigerator.
|
|
Frost forms on the walls of the freezer.
|
- Is the air vent blocked? Remove any obstructions so air can circulate freely.
- Allow sufficient space between the foods stored for efficient air circulation.
- Is the freezer drawer closed properly?
If the freezer drawer is not completely closed or is blocked, humidity from outside may enter and cause severe frost to form.
|
|
Water dispenser is not functioning.
|
- Is the water line connected and the shut-off valve open?
- Has the water supply line tubing been crushed or kinked?
Make sure the tubing is free and clear of any obstruction.
- Is the water tank frozen because the refrigerator temperature is too low?
Try selecting a warmer setting on the main display panel.
- Check if the filter is properly installed. If it is not properly installed, the water dispenser may not work.
|
|
What Do I Need to Use the E-Smart and Smart Grid functions?
|
- To use the Smart Grid (Demand Response) and E-Smart function on your Refrigerator, you need the following devices and apps:
- Devices: 1) Wireless Router, 2) Samsung E-Smart Refrigerator, 3) Smartphone (Recommended: Galaxy S4, Galaxy Note3 or later models and Android OSJelly Bean or later version)
- Applications: 1) “Samsung E-Smart App” from the Google Play Store or Samsung Apps.
- You also need to:
- Connect the Refrigerator and the Smartphone to the same Wi-Fi network in your home.
- Install and run Samsung E-Smart App on your Smartphone.
- In addition, to use the Smart Grid (Demand Response) function, you must Register for the service with your electric company. The company must have anEMS (Energy Management System) that supports SEP (Smart Energy profile).
|
|
Why isn’t the E-Smart function working normally?
|
- Confirm that the router in your home and the Internet are working properly.
- Connect a Smartphone to the router (AP, Access Point), and then confirm that you can browse the Internet on the phone.
- Confirm that refrigerator is connected to the AP.
- Check the E-Smart icon on the PANEL of the refrigerator.
If the refrigerator is connected, the icon will be on.
- Confirm that the refrigerator and Smart Phone are connected to the same router.
|
|
Why isn’t the Delay Defrost Capability working normally?
|
- Confirm that the router in your home and the Internet are working properly.
- Connect a Smartphone to the router (AP, Access Point), and then confirm that you can browse the Internet on the phone.
- Confirm that the area where you live is properly entered into the Smart phone App.
- Confirm that the Smart Grid function works correctly.
(Check the PANEL. L3 and L4 should not be displayed on the PANEL.)
|
|
What can be done when freezer door is not closed well.
|
- Push lever dispenser and check water supply.
- Push lever dispenser (Ice mode) and check operation of auger motor.
- Remove objects on shelves that might obstruct drive auger.
Precautions : If you have not dispensed the water or ice for an extended time, the ice bucket may accumulate ice chunk that interferes with the drive auger,causing the inability to dispense.
- Remove the remaining ice of bucket and object that might obstruct drive Auger. Please operate dispenser (water & ice) and it will improve auto-closing of freezer door.
|