Loading ...
Loading ...
Loading ...
16
VENT SYSTEM CARE
Surface of Downdraft Vent
To avoid damaging the finish, clean downdraft vent with soap
and water. Do not use scouring powder or abrasive solutions.
Exterior Surfaces:
To avoid damage to the exterior surface, do not use steel wool or
soap-filled scouring pads.
Always wipe dry to avoid water marks.
Cleaning Method:
■ Liquid detergent soap and water, or all-purpose cleanser
■ Wipe with damp soft cloth or nonabrasive sponge, and then
rinse with clean water and wipe dry.
Glass
To Remove:
1. The vent hood must be in the raised position. See the
“Downdraft Vent System Use” section.
2. Grasp the glass on both sides and pull up to disengage the
glass panel hooks from the glass retention pins and bottom
channel.
3. Wash both sides of the glass with warm, soapy water or glass
cleaner.
4. Wipe the glass with a soft damp cloth or nonabrasive sponge,
then rinse with clean water and wipe dry.
To Install:
1. The vent hood must be in the raised position. See the
“Downdraft Vent System Use” section.
2. The filters should be installed before replacing the glass.
See the “Filters” section.
3. Align the bottom edge of the glass with the bottom channel
and attach the hooks over the pins on the vent hood.
4. Slide the glass down to clip the hooks onto the pins and
capture the bottom of the glass in the channel.
Filters
Frequently remove and clean the filter(s) in the retractable section
of the downdraft vent. This will improve the operating efficiency
of the downdraft vent system.
NOTE: The glass panel must be removed prior to removing
the filters. See “To Remove” in the “Glass” section.
To Replace or Clean:
1. Remove each filter by pulling the knob and lifting up.
2. Wash metal filters as needed in dishwasher or hot detergent
solution and dry the clean filters.
3. Reinstall the filter by making sure the knobs are toward the
front. Insert metal grease filter into the bottom filter track.
4. Push up on metal filter and it will magnetically latch into
place.
5. Repeat steps 1-4 for the other filter.
6. Replace the glass panel. See “To Install” in the “Glass”
section.
Changing the Remote Batteries
To Remove Battery:
1. Use a small Phillips screwdriver to remove the screw from
the small back cover.
2. Pull up on the bottom of the remote and remove. It has a
slot on the end and is magnetically held in place.
3. Remove the battery by pushing it toward the center to clear
the edge of the battery from the 2 battery retention tabs,
and pull it out to remove the battery.
4. Repeat Step 3 for other battery.
To Replace Battery:
1. Place the battery into the battery mounting hole with the
positive (+) side up. Push the battery to the left against the
spring and push down to lock it under the 2 battery retention
tabs.
2. Repeat Step 1 for other battery.
3. Replace the small back cover. Fit the end tab under the large
back cover and snap it into place.
4. Use a small Phillips screwdriver to replace and secure the
screw.
NOTE: The remote uses 2 - CR2032 3v lithium batteries.
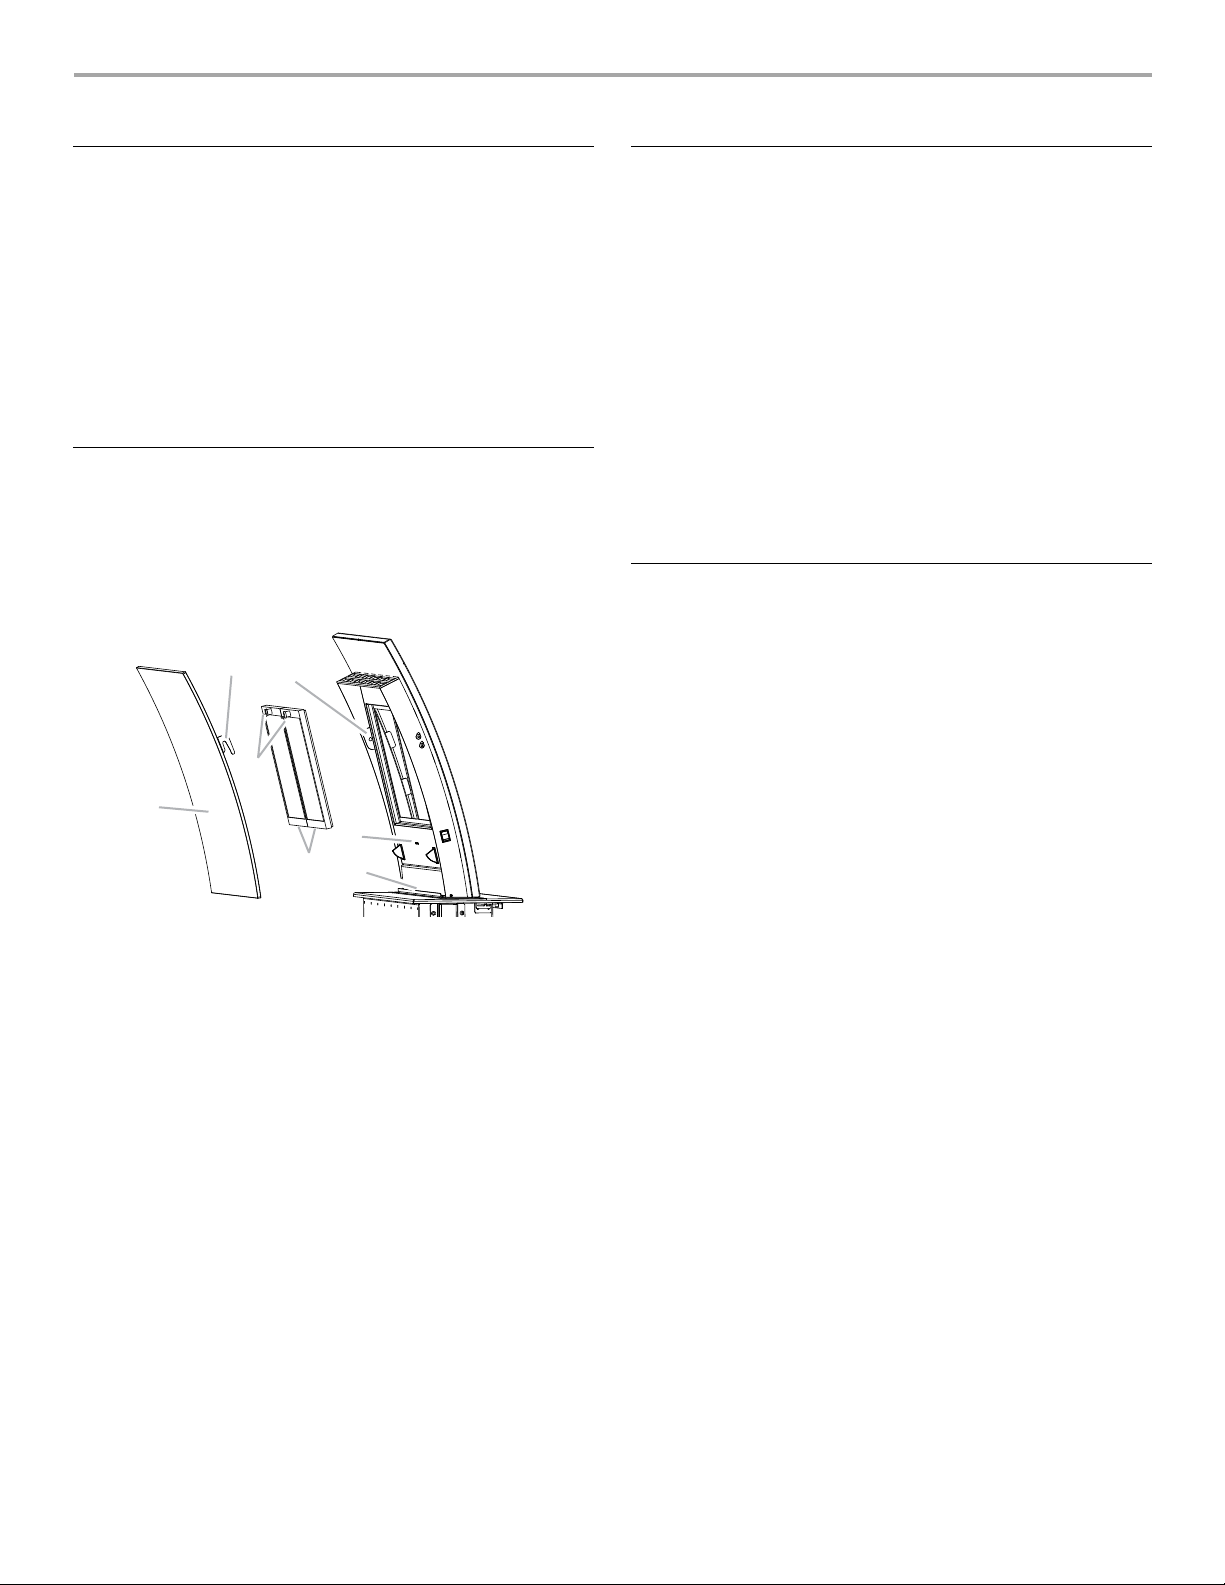
A. Glass panel
B. Hooks - glass panel (2)
C. Filter knobs
D. Glass retention pins (2)
E. Indicator lights
F. Bottom channel
G. Filters (2)
D
B
A
G
F
C
E
Loading ...
Loading ...
Loading ...