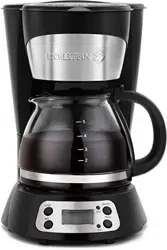
5CUP DIGITAL COFFEE
MAKER
MAQUINA DE CAFE DIGITAL
DE 5 TAZAS
THIS MANUAL IS FOR USE WITH ALL
ITEMS WITH THE MODEL NUMBER:
HH-09101009B
ESTE MANUAL DE USUARIO APLICA
PARA TODOS LOS PRODUCTOS CON
EL NÚMERO DE MODELO:
HH-09101009B
READ THIS MANUAL BEFORE USING THE PRODUCT AND SAVE FOR FUTURE REFERENCE
LEA ESTE MANUAL ANTES DE USAR EL ARTEFACTO Y GUÁRDELO PARA REFERENCIA

2
www.holsteinhousewares.com
IMPORTANT SAFEGUARDS
WHEN USING ELECTRICAL APPLIANCES,
BASIC SAFETY PRECAUTIONS SHOULD
ALWAYS BE FOLLOWED TO PREVENT THE
RISK OF FIRE, ELECTRIC SHOCK, BURNS, OR
OTHER INJURIES OR DAMAGES.
1 . Read all instructions before using this appliance.
2 . Always unplug the appliance from the electrical outlet before relocating,
servicing, or cleaning it.
3 . Keep hands and utensils out of the appliance when using. Do not touch
hot surfaces. CAUTION: Surface becomes hot during use.
4 . Do NOT plug/unplug the appliance into/from the electrical outlet with
your hands wet.
5 . Do NOT operate the appliance if the power cord is cut, damaged, or if
the wires are exposed.
6 . Keep the power cord and appliance AWAY from heated surfaces,
including stovetops, burners or heated ovens.
7 . Do NOT immerse in or expose the base, power cord, or plug to water or
any other liquids. NEVER use this appliance near water or wet surfaces.

3
www.holsteinhousewares.com
8 . To disconnect the appliance from an electrical outlet, pull directly on
the plug; DO NOT pull on the power cord.
9 . Do NOT put any stress on the power cord where it connects to the
appliance, as the power cord could fray and break.
10. Do NOT operate the appliance if it malfunctions, or if it is dropped or
damaged.
11. This appliance has NO user-serviceable parts. Do NOT attempt to
examine or repair this appliance yourself. ONLY qualied and approved
service personnel should perform servicing.
12. This appliance is intended for HOUSEHOLD and INTERIOR USE ONLY
and cannot be used for any other purpose. This item is NOT a toy.
13. Keep the appliance out of the reach of children and pets. This appliance
is NOT intended to be used by children and strict supervision is
necessary when used near children.
14. Do NOT leave the appliance unattended while it is in use.
15. Do NOT use any attachments or accessories that are not recommended
or sold and approved by the manufacturer for this appliance.
16. Always operate the appliance on a dry, at, stable, heat-resistant
surface to avoid accidents.
17. Do NOT move the appliance while it is in use. Always let it cool before
moving.
18. Do NOT let cord hang over the edge of a table or counter.
19. Use an oven mitt when opening and closing the lid for safety.

4
www.holsteinhousewares.com
WARNING: During the rst few minutes of initial use, you may notice
a little smoke and/or a slight odor. This is normal and should quickly
disappear. It will not recur after appliance has been used a few times.
SAVE THESE INSTRUCTIONS!
ADDITIONAL SAFEGUARDS
DO NOT OPERATE APPLIANCE IF THE
POWER CORD SHOWS ANY DAMAGE OR IF
APPLIANCE WORKS INTERMITTENTLY OR
STOPS WORKING ENTIRELY.
• EXTENSION CORDS
A short power-supply cord is to be provided to reduce the risk resulting
from becoming entangled in or tripping over a longer cord. Longer
detachable power-supply cords or extension cords are available and may
be used if care is exercised in their use. If a longer detachable power-supply
cord or extension cord is used:
1 . The marked electrical rating of the cord set or extension cord should be
at least as great as the electrical rating of the appliance, and
2 . The longer cord should be arranged so that it will not drape over the
countertop or tabletop where it can be tripped over, snagged, or pulled
on unintentionally by children or the user.

5
www.holsteinhousewares.com
• POLARIZED PLUG
This product has a polarized plug (one blade is wider than the other). To
reduce the risk of electric shock, this plug is intended to t into a polarize
outlet only one way. If plug does not t fully into the outlet, reverse the plug.
If it still does not t contact a qualied electrician. Do not attempt to modify
the plug in any way.
HOW TO OPERATE
BEFORE FIRST USE:
1 . Unpack the appliance and all parts. Remove all packaging materials,
including any stickers or labels.
2 . Read these instructions carefully.
3 . Clean the interior surface of the appliance with a damp cloth. Wipe
dry with a soft cloth immediately. Do not use abrasive materials. Wipe
down the exterior with a soft dry cloth.
4 . NEVER IMMERSE APPLIANCE OR CORD IN WATER OR ANY OTHER
LIQUID.
5 . Position the appliance on a stable, dry, level, heat-resistant surface near
an electrical outlet.
6 . Unroll the electrical cord.
7 . Operate this appliance on a separate outlet and circuit from other
appliances to avoid overloading the circuit.

6
www.holsteinhousewares.com
CAUTION: The surfaces of the appliance get hot. To avoid accidental
burns, scalping or steam being released while cooking, always open
and close the lid by using an oven mitt.
FOR HOUSEHOLD USE ONLY
USING THE APPLIANCE:
NOTE: To clean the coee maker of any residues, ll it to the maximum level
mark with fresh water. Boil and empty the coee maker at least 2 times.
Using the coee maker:
The coee maker is only for brewing coee. HOUSEHOLD USE ONLY
1 . Lift up the lid (2) and remove lter basket (14).
2 . Place the permanent lter (15) into the lter basket (14).
3 . Add the desired amount of the ground coee to the lter basket (14).
(Suggested each cup of coee use 1 to 1.5 level measuring spoon). Do
not overll.
4 . Place the lter basket (14) in its place. (Please make sure it is mounted
well).
5 . Leave the lid (2) open.
6 . Fill carafe (10) with desired amount of water (check the water level
indicator (1) on coee maker). Pour water into the water tank (4).
7 . Place carafe (10) on warming plate (8).
8 . Insert power plug into a standard 120V~ 60Hz. wall outlet. The LCD will
display “AM12:00 ” (see control panel).

7
www.holsteinhousewares.com
9 . Press ON/OFF button, the indicator of RUN will be illuminated. The
appliance will begin working.
10. The brewing process can be interrupted by pressing the ON/OFF button
at any time, and the indicator of RUN will be extinguished. The appliance
will continue brewing once ON/OFF is pressed again.
11. Remove out carafe to serve when nish brewing (about one minute later
after the coee stops dripping out.)
12. Note: the coee you get will less than the water you have added, as
some water is absorbed by coee ground.
13. When the process is nished, if you do not want to serve immediately,
keep the coee maker is energized, the coee can be kept warm in the
keeping warm plate, the appliance will be cut o power automatically
after two hours if it has not been manually disconnected at the
completion of brewing. For an optimum coee taste, serve it just after
brewing.
14. Always turn the coee maker o and disconnect the power supply when
not in use.
15. Note: pay attention to pour the coee out, otherwise you may be hurt as
the temperature of coee just nished is high.
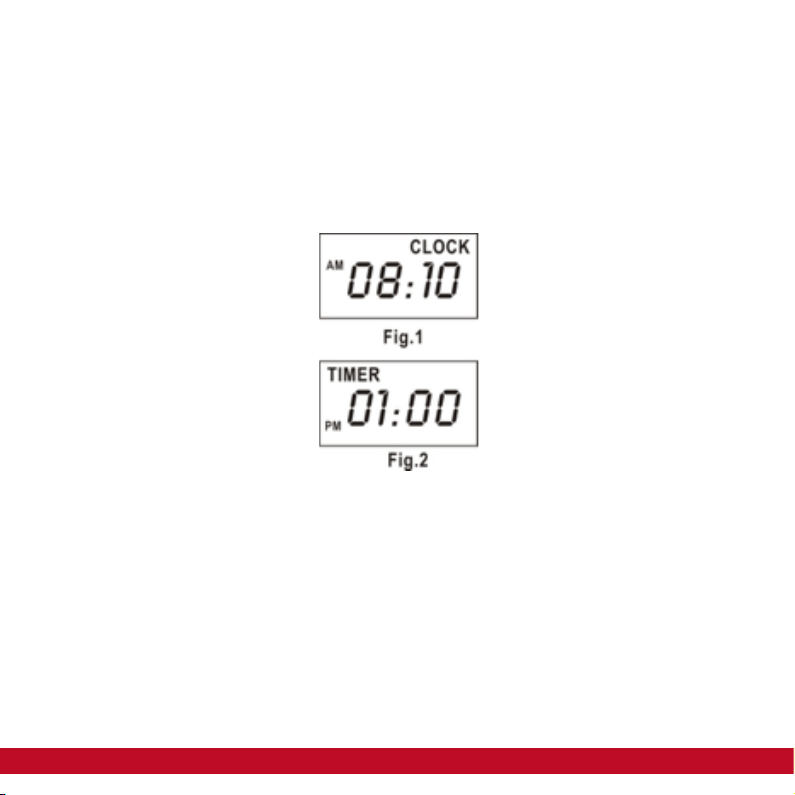
If you do not want the coee maker to start operation immediately, for
example now it is 8:10 am, you hope that the coee maker will automatically
start at 1:00 pm, rst follow steps 1 to 7 of above section, and then you can
8
www.holsteinhousewares.com
set the automatic start function as follows:
1. Press PROG button one time, the word CLOCK is showed at the up-right
corner on display.
2. Press the HOUR and MIN button continuously to set the present time (real
clock), that is 8:10(See g. 1).
Note: the time cycle is 12 hours.
3) Press PROG button once again and the word TIMER shows on up-left
corner of display.
4) Set the delayed starting time by pressing HOUR and MIN button repeti-
tively, that is 01:00 pm (see Fig. 2).
5) Press the ON/OFF twice, the indicator of AUTO is illuminated. After about
10 seconds, the LCD will display the current clock. You may see the auto-
matic start time by pressing PROG.
Note: You may cancel the automatic start function by pressing ON/OFF. If
you want to change the automatic start time, only following the above 1-4
steps again.
When the brewing cycle is complete the indicator of AUTO will turn
o,

9
www.holsteinhousewares.com
NOTE:
• Never leave the empty carafe (10) on the warming plate (8) when the
coee maker is on. Other wise the carafe (10) is liable to crack.
• When you are nished with the coee turn the switch o and unplug
the unit. (The light in the switch will go o then the unit is turned o).
NOTE: To interrupt brewing, press ON/OFF button, and the light turns o.
CAUTION:
• Do not touch the warming plate! Risk of burn injury.
• To reduce the risk of scalding. Do not open lid when coee is brewing.
• Hot steam on the lid, do not touch the lid during brewing.
• After the brew cycle is complete, wait a minimum of 10 minutes before
taking out the lter basket (14). Steam builds up under the shower head
(3), there is a risk of injury from the hot steam.
Extra features
• The drip stop valve (13) function allows you to remove the carafe (10) dur-
ing the brewing to serve a cup of coee (replace carafe (10) immediately in
less than 30 seconds).
while the indicator of RUN turn on and the unit starts brewing. The
appliance will turn o power automatically after two hours if it has
not been manually disconnected at the completion of brewing.

10
www.holsteinhousewares.com
CLEANING
Proper maintenance will ensure years of service of your appliance. Clean the
appliance after every use following these steps. This appliance contains no
user serviceable parts and requires little maintenance.
WARNING: The surfaces of the item will get very hot during use, unplug the
appliance and allow cooling before cleaning.
CAUTION:
• Do not immerse the coee maker, the power cord with plug into water or
any liquids.
• Clean the housing and warming plate (8) with a clean, damp cloth.
• Remove carafe (10), permanent lter (15) and the lter basket (14) from the
coee maker.
• Only the carafe (10) is dishwasher-safe. Wash the carafe (10), carafe lid (12)
and lter basket (14) in hot, soapy water. Rinse and dry.
• Use baking soda or mild cleaning agent to remove stains on the carafe (10).
• Ensure all parts are completely dry after washing and before use.
NOTE:
• Do not dry inside of water tank (4) with a cloth, as lint may remain.
• After cleaning, reassemble coee maker.

11
www.holsteinhousewares.com
CAUTION:
DO NOT IMMERSE THE APPLIANCE, THE POWER CORD OR
THE PLUG INTO WATER OR ANY LIQUIDS.
STORAGE
1 . After following the steps of cleaning and maintenance, collect the
power cord.
2 . Store the appliance in a dry and clean place.
SPECIFICATIONS
Before using the appliance, verify that the domestic supply voltage matches
the specications indicated on the appliance.
120V~
60Hz
600W
12
www.holsteinhousewares.com
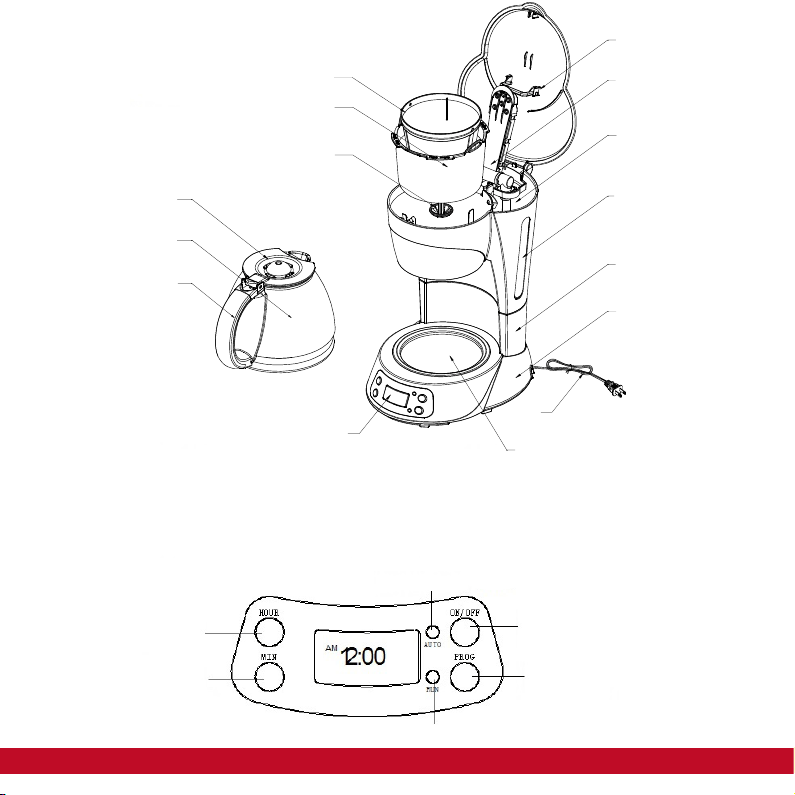
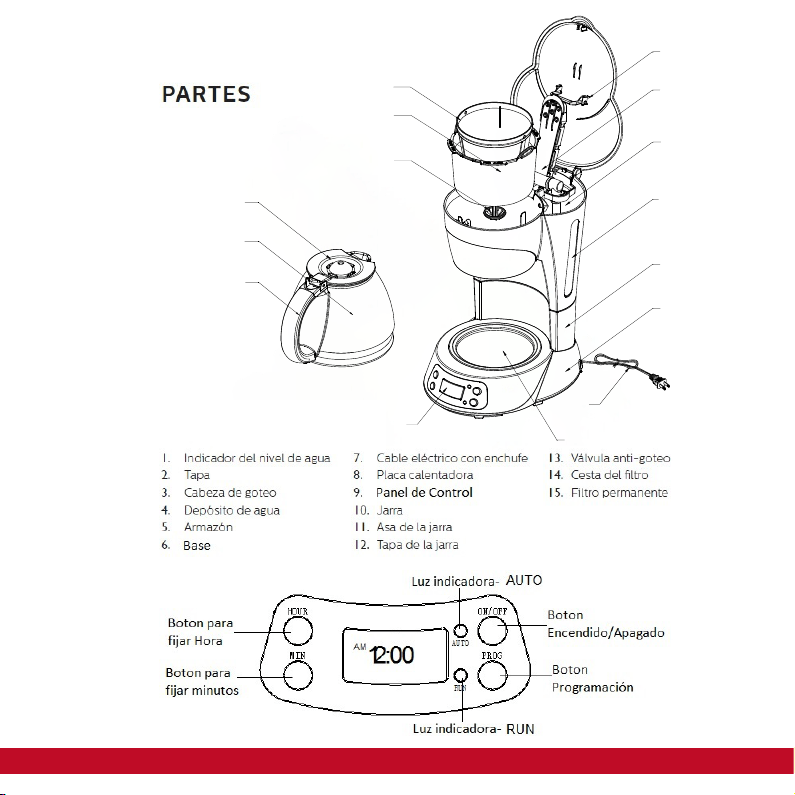
PARTS
1 . Water-level indicator
2 . Lid
3 . Shower head
4 . Water tank
5 . Housing
6 . Base
7 . Power cord with plug
8 . Warming plate
9 . Display Panel
10. Carafe
11. Grip handle
12. Carafe lid
13. Drip stop valve
14. Filter basket
15. Permanent lter
ON/OFF BUTTON
PROGRAMMING BUTTON
HOUR BUTTON
MINUTE BUTTON
INDICATOR LIGHT - AUTO
INDICATOR LIGHT-RUN
7
14
15
9
8
12
10
11
13
6
5
1
4
3
2
13
www.holsteinhousewares.com
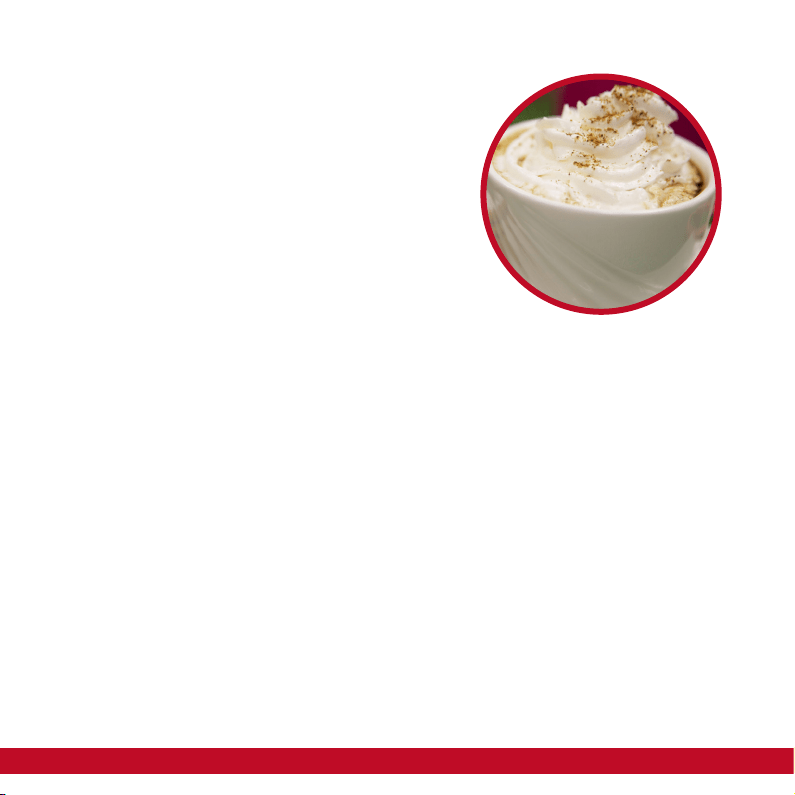
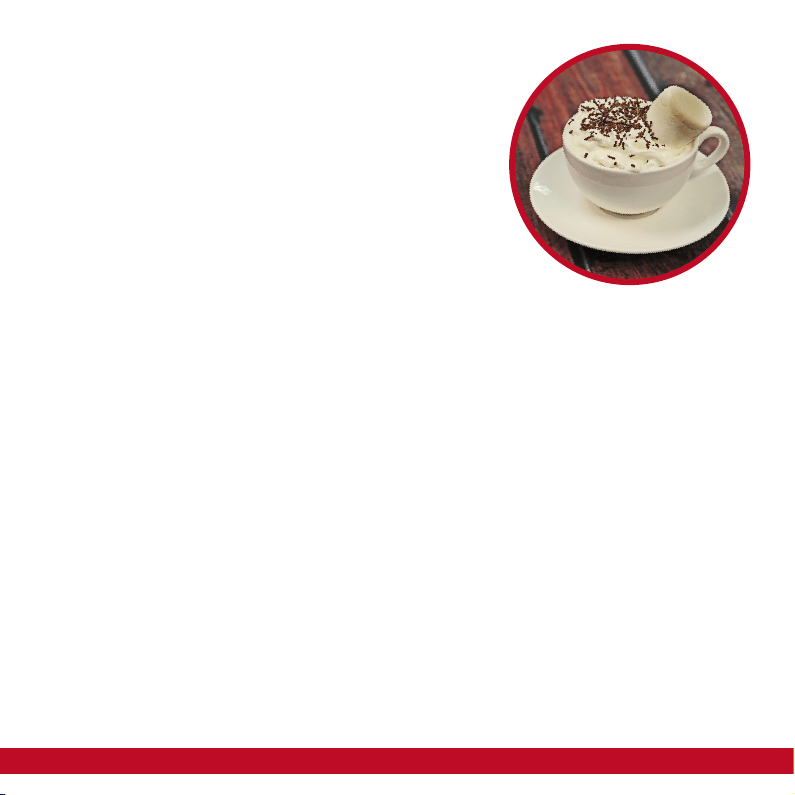
Ingredients:
4 cups brewed coee
1 tbs brown sugar
1/8 tsp ground cinnamon
1/4 cup whipped cream
1 tbs Nutella
Steps:
Combine freshly brewed coee, sugar, and cinnamon together.
Pour the coee into your mugs
In a small bowl mix the whipped cream and Nutella together
Top your coee with a spoonful.
(serves up to four)
Hazelnut
Cof fee
14
www.holsteinhousewares.com
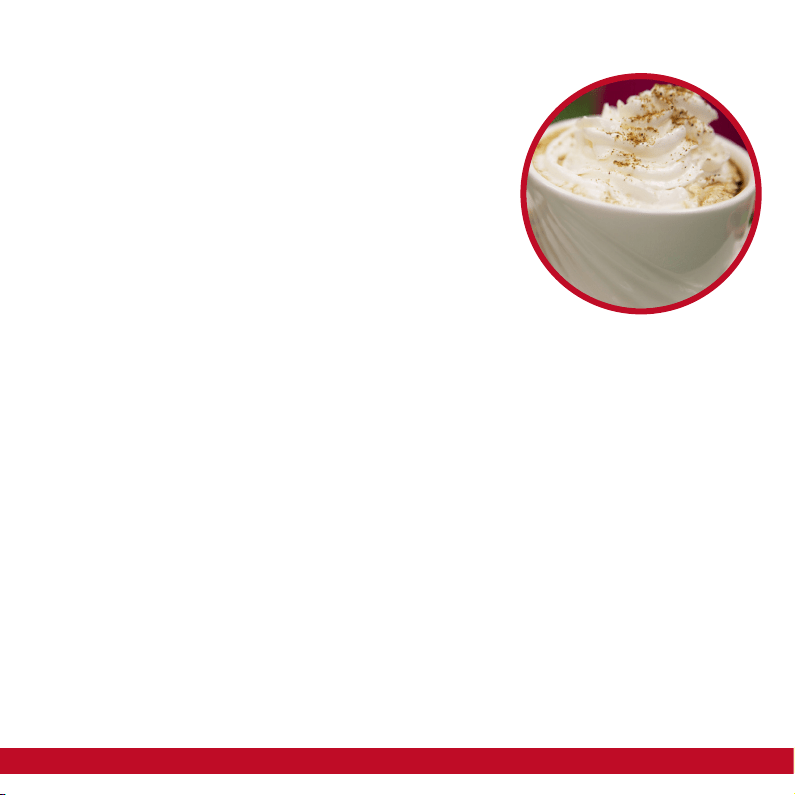
Ingredients:
• 1/2 cup Coconut avored coee
• 1 1/2 tbs caramel sauce
• 2 tbs vanilla syrup
• 1 cup milk
Steps:
• Add 2 tbs of vanilla syrup and 1/2 tbs of caramel sauce to the bottom of
the mug.
• Pour over your coee
• Add in the desired amount of milk
• Top o with 1 tbs of caramel sauce
• Stir well and enjoy
• (serves up to 2 cups)
Caramel
Cof fee
15
www.holsteinhousewares.com
Ingredients:
• 1 cup coee
• 2 tbs sugar
• 1/2 cup milk
• 2 tbs dark chocolate syrup
• 8 crumbled oreo cookes
• Whipped cream
Steps:
• Place the coee, milk, sugar and cookies in the blender.
• Mix them well.
• Pour into glasses and top with whipped cream and chocolate syrup
Chocolate Cookie
Cof fee

16
www.holsteinhousewares.com
IMPORTANTES INSTRUCCIONES
DE SEGURIDAD
AL USAR ARTEFACTOS ELÉCTRICOS, SIEMPRE
DEBEN TOMARSE PRECAUCIONES BÁSICAS
DE SEGURIDAD PARA EVITAR EL RIESGO DE
INCENDIO, CHOQUE ELÉCTRICO, QUEMADURAS
U OTRAS LESIONES O DAÑOS.
1 . Lea todas las instrucciones antes de usar este artefacto.
2 . Siempre desenchufe el artefacto del tomacorriente antes de mover o
limpiar.
3 . Mantenga las manos y utensilios fuera del artefacto cuando se utilice.
No toque las supercies calientes. Utilice un guante de cocina y las
asas para abrir y cerrar el artefacto. ATENCIÓN: La supercie se calienta
durante su uso.
4 . NO conectar / desconectar el artefacto del tomacorriente con las
manos mojadas.
5 . NO utilice el artefacto si el cordón eléctrico esta roto, dañado, o si los
cables están expuestos.
6 . Mantenga el cordón eléctrico y el artefacto alejado de supercies
calientes, incluyendo estufas y hornos.
7 . NO sumerja el artefacto, cordón eléctrico o el enchufe en agua u otros
líquidos. NUNCA use este artefacto cerca del agua o supercies mojadas.

17
www.holsteinhousewares.com
8 . Para desconectar el artefacto del tomacorriente, tire directamente del
enchufe, NO tire del cordón eléctrico.
9 . NO ponga presión sobre el cordón eléctrico donde se conecta al
artefacto, ya que el cordón eléctrico podría romperse.
10. NO utilice el artefacto si funciona mal, o si se ha caído o dañado.
11. Este artefacto no tiene piezas que el usuario pueda reparar. No trate de
examinar o reparar este artefacto usted mismo. Sólo personal calicado
y aprobado debe realizar cualquier tipo de servicio.
12. Este artefacto está diseñado sólo para uso doméstico y uso en
interiores y no puede ser utilizado para ningún otro propósito. Este
artefacto no es un juguete.
13. Mantenga el artefacto fuera del alcance de niños y mascotas. Este
artefacto no está destinado a ser utilizado por niños y una estricta
supervisión es necesaria cuando se utiliza cerca de niños.
14. NO deje el artefacto desatendido mientras está en uso.
15. NO utilice ningún accesorio que no está recomendado o vendido y
aprobado por el fabricante de este artefacto.
16. Siempre opere el artefacto en un lugar seco, plano, estable, y resistente
al calor para evitar accidentes.
17. NO se debe mover el artefacto mientras está en uso. Siempre deje que
se enfríe antes de moverlo.
18. NO permita que el cordón eléctrico cuelgue del borde de una mesa o
mostrador.
19. Utilice un guante de cocina al abrir y cerrar la tapa cuando está en uso
para su seguridad y evitar quemaduras.

18
www.holsteinhousewares.com
PRECAUCIÓN: Durante los primeros minutos de uso inicial, usted
puede notar un poco de humo y/o un olor del artefacto. Esto es
normal y desaparecerá. No va a reaparecer después de que el
artefacto se haya utilizado un par de veces.
¡CONSERVE ESTAS INSTRUCCIONES!
INSTRUCCIONES DE SEGURIDAD
ADICIONALES
NO USE EL ARTEFACTO SI EL CORDÓN
ELÉCTRICO MUESTRA CUALQUIER TIPO
DE DAÑO O SI EL ARTEFACTO FUNCIONA
INTERMITENTEMENTE O DEJA DE
FUNCIONAR POR COMPLETO.
• CABLES DE EXTENSIÓN
Se provee un cordón eléctrico corto para reducir el riesgo de enredarse o
tropezar con un cable/cordón largo. Pueden usarse cables de extensión
más largos si se toman las precauciones necesarias en su uso. Si se usa
cable de extensión:
1 . Las características eléctricas del cable de extensión deben ser iguales o
superiores a las del artefacto.

19
www.holsteinhousewares.com
2 . El cable debe colocarse de forma que no cuelgue para evitar que se pueda
tropezar, enredarse o tirar de el accidentalmente (especialmente por niños).
• ENCHUFE POLARIZADO
Este electrodoméstico tiene un enchufe polarizado (una pata del enchufe
es más ancha que la otra). Para reducir el riesgo de descarga eléctrica, este
enchufe está diseñado para entrar de un sólo modo en la toma eléctrica. Si
el enchufe no entra totalmente en la toma de corriente, invierta su posición.
Si aún así no entrase, póngase en contacto con un electricista cualicado.
No intente modicar el enchufe de ninguna manera.
FUNCIONAMIENTO
ANTES DEL PRIMER USO:
1 . Desempaque cuidadosamente el artefacto y todas las partes. Retire todo
los materiales de embalaje, incluyendo las pegatinas (las etiquetas).
2 . Lea las instrucciones de uso cuidadosamente.
3 . Limpie las supercies interiores y exteriores del artefacto con un paño
húmedo. Seque con un paño suave de inmediato. No use materiales
abrasivos.
4 . NUNCA SUMERJA EL ARTEFACTO O EL CABLE EN AGUA U OTROS
LÍQUIDOS.
5 . Coloque el artefacto en un lugar estable, seco, y resistente al calor.
6 . Desenrolle el cordón eléctrico.
7 . Utilice este artefacto en una toma de corriente y circuito separado de
otros aparatos para evitar la sobrecarga del circuito.
PRECAUCIÓN: Las supercies del artefacto se calientan. Siempre abra
y cierre la tapa utilizando un guante de cocina para evitar quemaduras
mientras cocina.

20
www.holsteinhousewares.com
SOLO PARA USO DOMESTICO
INSTRUCCIONES DE USO:
NOTA: Para limpiar el artefacto de cualquier residuo, llénela hasta la marca
de nivel máximo con agua fresca. Lleve a ebullición y vacíe el artefacto por lo
menos 2 veces.
Utilice este artefacto solamente para hacer café. SOLO PARA USO DOMÉSTICO.
1 . Abra la tapa (2) y remueva la cesta del ltro (14).
2 . Coloque el ltro permanente (15) en la cesta del ltro (14).
3 . Añada la cantidad de café molido deseada a la cesta del ltro (14). (Se sugiere usar
entre 1 y 1.5 niveles de café de la cucharilla de medición para cada taza de café
dependiendo de su gusto). No sobrellene.
4 . Coloque la cesta del ltro (14) en su lugar. (por favor, asegúrese de que esta
correctamente colocada)
5 . Deje la tapa (2) abierta.
6 . Llene la jarra (10) con la cantidad de agua deseada (fíjese en el indicador de nivel de
agua (1) en la artefacto). Vierta agua en el depósito de agua (4).
7 . Vuelva a colocar la jarra (10) sobre la placa calentadora (8)
8 . Inserte el enchufe en una toma de corriente alterna según las características del
artefacto. La pantalla mostrará AM12:00
9 . Presione el botón ON/OFF (ENCENDIDO/APAGADO), el indicador de RUN se
iluminará. El artefacto comenzará a funcionar.
10. El proceso de preparación puede ser interrumpido pulsando el botón ON/OFF
(ENCENDIDO/APAGADO) en cualquier momento, y el indicador de RUN se

21
www.holsteinhousewares.com
apagará. El artefacto continuará funcionando una vez que se vuelve a encender /
apagar.
11. Retire la jarra para servir cuando nalice la preparación
(aproximadamente un minuto después de que el café deje de gotear).
Nota: el café que obtenga será menor que el agua que ha agregado, ya que un poco
de agua es absorbida por el café molido.
12. Cuando el proceso haya terminado, si no quiere servir inmediatamente, mantenga el
artefacto en funcionamiento, el café se mantendrá caliente en la placa calentadora,
el artefacto se cortará automáticamente después de dos horas si se ha No se ha
desconectado manualmente al nalizar la preparación. Para un sabor óptimo del café,
servirlo justo después de la elaboración de la cerveza.
13. Apague siempre el artefacto y desconecte la fuente de alimentación cuando no esté
en uso.
Nota: preste atención para verter el café, de lo contrario se puede quemar, ya
que la temperatura del café una vez terminado es alta.
FUNCIÓN DE ENCENDIDO AUTOMÁTICO
Si no desea que el artefacto empiece a funcionar de inmediato, por ejemplo
ahora son las 8:10 am, espere que el artefacto comience automáticamente a
la 1:00 pm, primero siga los pasos 1 a 5 de la sección anterior, entonces usted
Puede congurar la función de arranque automático de la siguiente manera:
1. Presione el botón PROG una vez, la palabra CLOCK aparecerá en la esquina
superior derecha de la pantalla.
2. Presione continuamente los botones HOUR y MIN para ajustar la hora actual
(reloj real), es decir, 8:10 (Vea la gura 1).

22
www.holsteinhousewares.com
Nota: el ciclo de tiempo es de 12 horas,
3. Presione el botón PROG una vez más y la palabra TIMER aparecerá en la
esquina superior izquierda de la pantalla.
4. Ajuste el tiempo de inicio diferido pulsando repetidamente las teclas HOUR y
MIN, es decir, a las 01:00 PM horas (ver Fig. 2).
5. Pulse dos veces ON/OFF (ENCENDIDO/APAGADO), el indicador de AUTO
está iluminado. Después de unos 10 segundos, la pantalla LCD mostrará el reloj
actual. Puede ver la hora de inicio automático pulsando PROG.
Nota: Puede cancelar la función de inicio automático pulsando ON/OFF (EN-
CENDIDO/APAGADO). Si desea cambiar la hora de inicio automático, siga los
pasos 1-4 anteriores.
Cuando llegue la hora, el indicador de AUTO se apagará, mientras que el
indicador de RUN se encenderá y la unidad comenzará a funcionar. El aparato
se apagará automáticamente después de dos horas si no se ha desconectado
manualmente al nalizar la preparación.
NOTA: Nunca deje la jarra (10) vacía en la placa calentadora (8) cuando el arte-
facto este encendido porque se puede quebrar la jarra.
Para interrumpir la infusión, pulse el interruptor (9) de nuevo y la luz se
apagara.
No toque la placa calentadora. Riesgo de quemadura

23
www.holsteinhousewares.com
PRECAUCION: Para reducir el riesgo de escaldarse, no abra la tapa durante el
proceso de infusión. Hay vapor caliente debajo de la tapa, no toque la tapa du-
rante el proceso de infusión. Una vez el ciclo de infusión se haya completado,
espere por lo menos 10 minutos antes de extraer la cesta del ltro (14). Se forma
vapor debajo de la cabeza de goteo (3). Lo que conlleva un riesgo de lesiones a
causa del vapor caliente.
FUNCIONES ADICIONALES:
• La función de válvula anti-goteo (13) le permite retirar la jarra (10) durante la
infusión para servir una taza de café (vuelva a colocar la jarra (10) inmediata-
men
te en menos de 30 segundos).
LIMPIEZA Y MANTENIMIENTO
El mantenimiento adecuado asegurará muchos años con su artefacto. Limpie el
artefacto después de cada uso. Este artefacto no contiene piezas reparables por el
usuario y requiere poco mantenimiento.
ADVERTENCIA:
• Desenchufe el artefacto y deje enfriar completamente antes de limpiarlo.
PRECAUCION:
• No sumerja la cafetera o el cable de corriente con el enchufe en agua o en
otros líquidos
• Limpie el armazon y la placa calentadora (8) con un trapo limpio y húm-
edo.
• No use estropajos abrasivos o alcohol. Retire la jarra (10), el ltro perman-
ente(15) y la cesta para el ltro (14) de la cafetera.
24
www.holsteinhousewares.com
• Solo la jarra (10) se puede limpiar en el lavavajillas. Limpie la jarra (10),
la tapa de la jarra (12) y la cesta del ltro (14) en agua caliente y jabonosa.
Enjuague y seque.
• Use bicarbonato o un agente limpiador suave para eliminar las manchas
de la jarra (10).
NOTA:
• No seque el interior de depósito de agua (4) con un paño ya que puede
dejar pelusa.
• Despues de limpiar, vuelva a montar la cafetera con todas sus partes.
PRECAUCIÓN:
NO SUMERJA EL ARTEFACTO, EL CABLE O
EL ENCHUFE EN AGUA U OTROS LÍQUIDOS.
ALMACENAJE
1 .
Luego de seguir los pasos de limpieza y mantenimiento, recoja el cordón
eléctrico.
2 .
Guarde el artefacto en un lugar seco y limpio.
ESPECIFICACIONES
Antes de utilizar el artefacto, verique que el voltaje de la red doméstica
corresponda con la indicada en el artefacto.
120V~
60Hz
600W
25
www.holsteinhousewares.com
7
14
15
9
8
12
10
11
13
6
5
1
4
3
2
26
www.holsteinhousewares.com
Cafe con
Caramelo
Ingredientes:
• 1/2 taza de café con sabor a coco
• 1 1/2 cucharada de salsa de caramelo
• 2 cucharadas de jarabe de vainilla
• 1 taza de leche
Pasos:
• Añadir 2 cucharadas de jarabe de vainilla y 1/2cucharada de salsa de
caramelo en el fondo de la taza.
• Vierta el café.
• Añadir en la cantidad deseada de leche
• Complete con 1 cucharada de salsa de caramelo
• Revuelva bien y disfrutar
• (sirve hasta 2 tazas)

27
www.holsteinhousewares.com
Ingredientes:
• 1 taza de café
• 2 cucharadas de azúcar
• 1/2 taza de leche
• 2 cucharadas de jarabe de chocolate oscuro
• 8 cookes oreo desmenuzadas
• crema batida
Pasos:
• Coloque el café, leche, azúcar y galletas en la licuadora.
• Mezclar bien.
• Vierta la mezcla en copas y cubra con crema batida y sirope de choco-
late
Cafe con
Gal letas de
Chocolate
28
www.holsteinhousewares.com
Ingredientes:
• 4 tazas de café
• 1 cucharada de azúcar morena
• 1/8 cucharadita de canela en polvo
• 1/2de taza de crema batida
• 1 cucharada de Nutella
Pasos:
• Combine café recién hecho, el azúcar y la canela.
• Vierta el café en sus tazas
• En un tazón pequeño mezcle la crema batida y Nutella juntos
• Inicie su café con una cucharada de la mezcla.
• (sirve hasta 4 tazas)
Cafe con
Avel lanas

29
www.holsteinhousewares.com

30
www.holsteinhousewares.com
LIMITED WARRANTY
HOLSTEIN HOUSEWARES hereby warrants, subject to the terms and conditions
herein stated, that should this product become defective by reason of mechanical or
workmanship manufacturing defects during the specied warranty period, HOL-
STEIN HOUSEWARES will, at its option, either repair or replace this product found
to be defective. HOLSTEIN HOUSEWARES warrants that from the date of purchase,
this product will be free from mechanical manufacturing defects for a period of 180
days.
Transportation charges on parts, or products in whole, submitted for repair or re-
placement, under this warranty, must be borne by the purchaser.
CONDITIONS
THERE IS NO OTHER EXPRESS WARRANTIES, IMPLIED WARRANTIES, INCLUDING
THOSE OF MERCHANTABILITY AND FITNESS FOR A PARTICULAR PURPOSE, AND
ANY WARRANTIES ARE LIMITED TO THE TIME PERIOD SPECIFIED HEREIN, OR TO
THE EXTENT PERMITTED BY LAW. ANY AND ALL IMPLIED WARRANTIES ARE EX-
CLUDED. LIABILITIES FOR CONSEQUENTIAL DAMAGES UNDER ANY AND ALL WAR-
RANTIES ARE EXCLUDED TO THE EXTENT SUCH EXCLUSION IS PERMITTED BY LAW.
This warranty is valid for the original retail purchaser from the date of initial retail
purchase and is not transferable. Purchaser must present the original sales receipt.
Proof of purchase is required to obtain warranty service or replacement. Dealers,
service centers, or retail stores do not have the right to alter, modify or in any way,
change the terms and conditions of this warranty.
SAVE YOUR ORIGINAL PROOF OF PURCHASE RECEIPT. IF YOU DO NOT PROVIDE
ORIGINAL PROOF OF THE INITIAL PURCHASE DATE, WARRANTY SERVICE WILL NOT
BE PROVIDED.
ABOUT YOUR PRODUCT WARRANTY
The warranty service would NOT apply if the product damage occurred because of
misuse, lack of routine maintenance, shipping, handling, warehousing, or improper
installation. Similarly, the warranty is void if the manufacturing date or the serial

31
www.holsteinhousewares.com
number on the product has been removed or the equipment has been altered or
modied. During the Retailer Return Policy, the Retailer may exchange or refund any
product, in accordance with their established Return Policy.
NORMAL WEAR
This warranty does not cover normal wear of parts or damage resulting from any of
the following: negligent use or misuse of the product; improper voltage or current;
use contrary to the operating instructions and manual; deviation from instructions
regarding storage and transportation; repair or alteration by anyone other than
HOLSTEIN HOUSEWARES or an authorized service center. Further, the warranty
does not cover Acts of God, such as re, ood, hurricanes, and tornadoes.
HOLSTEIN HOUSEWARES shall not be liable for any incidental or consequential
damages caused by the breach of any express or implied warranty. Except to the
extent prohibited by applicable law, any implied warranty of merchantability or
tness for a particular purpose is limited in duration to the duration of the above
warranty. Some states, provinces or jurisdictions do not allow the exclusion or limi-
tation of incidental or consequential damages or limitations on how long an implied
warranty lasts, so the above limitations or exclusion may not apply to you. This
warranty gives you specic legal rights, and you may also have other rights that vary
from state to state or province to province.
HOW TO OBTAIN WARRANTY SERVICE:
GENERAL INQUIRIES: Please contact Holstein Housewares Customer Service at
info@holsteinhousewares.com
WARRANTY VALID IN UNITED STATES AND PUERTO RICO

32
www.holsteinhousewares.com
GARANTIA LIMITADA.
HOLSTEIN HOUSEWARES por este medio garantiza, sujeto a los términos y condicio-
nes aquí establecidos, que si este producto es defectuoso en concepto de defectos
mecánicos o mano de obra de fabricación durante el período de garantía especica-
do, HOLSTEIN HOUSEWARES, a su elección, reparará o reemplazará este producto
encontrado defectuoso. HOLSTEIN HOUSEWARES garantiza que a partir de la fecha
de compra, este producto estará libre de defectos de fabricación mecánica, por un
período de 180 días. Gastos de transporte de piezas o productos en conjunto, presen-
tados para su reparación o reemplazo, según esta garantía, deben ser pagados por el
comprador.
CONDICIONES
NO HAY NINGUNA OTRA GARANTÍA EXPRESA O GARANTÍAS IMPLÍCITAS, INCLUY-
ENDO LA DE COMERCIALIZACIÓN Y APTITUD PARA UN PROPÓSITO PARTICULAR,
Y CUALQUIER GARANTÍA SE LIMITA AL PERIODO DE TIEMPO ESPECIFICADO EN LA
PRESENTE, O LA EXTENSIÓN PERMITIDA POR LA LEY. TODAS LAS GARANTÍAS IM-
PLÍCITAS QUEDAN EXCLUIDAS. RESPONSABILIDADES POR DAÑOS CONSECUENTES
BAJO Y PARA TODAS LAS GARANTÍAS SE EXCLUYEN EN LA MEDIDA EN QUE DICHA
EXCLUSIÓN SEA PERMITIDA POR LA LEY.
Esta garantía es válida para el comprador minorista original a partir de la fecha de
compra inicial y no es transferible. El comprador debe presentar el recibo de compra
original. Se requiere comprobante de compra para obtener el servicio de garantía o
reemplazo. Los distribuidores, centros de servicio o las tiendas minoristas no tienen el
derecho de alterar, modicar o cambiar de ninguna manera, los términos y condicio-
nes de esta garantía.
GUARDE SU COMPROBANTE ORIGINAL DE RECIBO DE COMPRA. SI NO APORTA LA
PRUEBA ORIGINAL DE LA FECHA DE COMPRA INICIAL, la garantía no será proporcio-
nada.

33
www.holsteinhousewares.com
ACERCA DE LA GARANTÍA DEL PRODUCTO
El servicio de garantía no será válido si el daño del producto ocurrió debido a abuso,
falta de mantenimiento, el transporte, la manipulación, el almacenamiento o la insta-
lación incorrecta. Del mismo modo, la garantía se anula si la fecha de fabricación o el
número de serie del aparato haya sido removido o el equipo ha sido alterado o mod-
icado. Durante la póliza de devolución del vendedor, el vendedor puede cambiar o
devolver cualquier producto, de acuerdo con su política de devolución establecida.
DESGASTE NORMAL
Esta garantía no cubre el desgaste normal de las piezas o daños resultantes de cual-
quiera de los siguientes: uso negligente o mal uso del producto; voltaje incorrecto o
corriente; uso no conforme a las instrucciones de servicio y manual; desviación de las
instrucciones con respecto al almacenamiento y transporte; reparación o alteración
por cualquiera que no sea HOLSTEIN HOUSEWARES o un centro de servicio autoriza-
do. Además, la garantía no cubre Actos de Dios, tales como incendios, inundaciones,
huracanes y tornados.
HOLSTEIN HOUSEWARES no será responsable por ningún daño incidental o con-
secuente causado por el incumplimiento de cualquier garantía expresa o implícita.
Salvo en la medida prohibida por la ley aplicable, cualquier garantía implícita de
comerciabilidad o aptitud para un propósito particular está limitada en duración a
la duración de la garantía antes mencionada. Algunos estados, provincias o jurisdic-
ciones no permiten la exclusión o limitación de daños o limitaciones incidentales o
indirectas sobre la duración de una garantía implícita, por lo que las limitaciones o
exclusiones anteriores pueden no aplicarse a usted. Esta garantía le otorga derechos
legales especícos, y usted también puede tener otros derechos que varían de un
estado a otro o de una provincia a otra.
COMO OBTENER EL SERVICIO DE GARANTÍA
PREGUNTAS GENERALES : Por favor, póngase en contacto con Holstein Housewares
Servicio al Cliente a info@holsteinhousewares.com
GARANTIA VALIDA SOLO EN ESTADOS UNIDOS Y PUERTO RICO
WARNING
TO REDUCE THE RISK OF ELECTRIC SHOCK, NEVER IMMERSE THE BASE, CORD OR PLUG
IN WATER OR OTHER LIQUID.
THIS APPLIANCE IS EQUIPPED WITH A POLARIZED PLUG (ONE BLADE OF THE PLUG
IS WIDER THAN THE OTHER) TO REDUCE THE RISK OF ELECTRIC SHOCK. THIS IS
A SECURITY FEATURE. THE PLUG WILL FIT IN A POLARIZED OUTLET ONE WAY. IF
UNABLE TO INSERT THE PLUG INTO THE ELECTRICAL OUTLET, TRY REVERSING THE
PLUG. YET IF THE PLUG DOES NOT FIT, CONTACT A QUALIFIED ELECTRICIAN. DO NOT
USE THE PLUG OF AN EXTENSION CORD UNLESS THE PLUG CAN BE FULLY INSERTED
IN THE EXTENSION CORD. NEVER MODIFY THE PLUG. DO NOT ATTEMPT TO ALTER
THIS MEASURE OF SAFETY IN ANY WAY.
ADVERTENCIA
PARA REDUCIR EL RIESGO DE CHOQUE ELÉCTRICO, NUNCA SUMERJA LA BASE, EL
CORDÓN ELÉCTRICO O EL ENCHUFE EN AGUA O EN NINGÚN OTRO LÍQUIDO.
ESTE ARTEFACTO ESTÁ EQUIPADO CON UN ENCHUFE POLARIZADO (UNA PATA
DEL ENCHUFE ES MÁS ANCHA QUE LA OTRA) PARA REDUCIR EL RIESGO DE UNA
DESCARGA ELÉCTRICA. ESTA ES UNA CARACTERÍSTICA DE SEGURIDAD. EL ENCHUFE
ENCAJARÁ EN UN TOMACORRIENTE POLARIZADO EN UNA SOLA DIRECCIÓN.
SI NO PUEDE INSERTAR EL ENCHUFE EN LA TOMA DE ELECTRICIDAD, TRATE DE
INVERTIR EL ENCHUFE. SI EL ENCHUFE TODAVÍA NO ENCAJA, CONTACTE A UN
ELECTRICISTA CALIFICADO. NO USE EL ENCHUFE DE UN CABLE DE EXTENSIÓN A
MENOS QUE SE PUEDA INSERTAR COMPLETAMENTE EL ENCHUFE EN EL CABLE DE
EXTENSIÓN. NUNCA MODIFIQUE EL ENCHUFE. NO INTENTE ALTERAR ESTA MEDIDA
DE SEGURIDAD DE NINGUNA MANERA.
ADVERTENCIA
CHOQUE ELÉCTRICO
WARNING
ELECTRIC SHOCK